How to Install Canless Recessed Lighting (No Attic Access Needed)
Canless recessed lighting installs directly into a ceiling cutout with a built-in junction box — no metal can, no attic access, and as little as 2 inches of clearance required versus 5 to 7 inches for traditional can lights. Using the wrong wire gauge or skipping the IC-rating check can trip breakers or void the fixture warranty. This guide covers wiring the junction box, meeting NEC circuit-load limits, and spacing fixtures for even light.
Quick Answer
Turn off the circuit, cut a hole with the fixture’s included template, run cable to a junction box mounted in the opening, connect black-to-black/white-to-white/ground-to-ground, then push the wafer fixture’s spring clips through the hole until it seats flush. Choose an IC-rated model if the ceiling has insulation above it — most canless kits are IC-rated by default.
Benefits Of Canless Recessed Lighting
Canless recessed lighting is easier to install than can-based fixtures because there’s no separate housing to mount — just a small ceiling cutout and a tethered junction box. That makes canless models the practical choice for low ceilings, finished ceilings with no attic access, and tight joist bays where a traditional can won’t fit.
Most canless fixtures are LED-only, drawing 9 to 15 watts versus 65+ watts for an old incandescent can light, so they cut lighting electricity use substantially and rarely need a bulb change — the LED module itself is rated for roughly 50,000 hours, or over 20 years of typical evening use.
Modern design is a real advantage too. The slim 1–2 inch profile sits nearly flush with the ceiling, so there’s no visible can lip or trim ring. With no metal housing to accumulate heat, well-ventilated canless fixtures also carry less fire risk than older non-IC can lights buried in insulation.
What Makes a Light Fixture “Canless”?
Canless recessed lighting (also called wafer, disc, or pancake lights) is a one-piece LED fixture that mounts straight to the ceiling drywall with spring clips instead of dropping into a separate metal can. The driver and LED board are built into the thin fixture body, and a tethered junction box handles the wire connections. This matters when there’s no attic above — between floors, in a basement ceiling, or under a low-slope roof — because a canless fixture needs only 2 inches of clearance where a can light needs 5 to 7.
| Factor | Canless (Wafer) | Traditional Can |
|---|---|---|
| Ceiling clearance needed | ~2 in. | 5–7 in. |
| Attic/above-ceiling access required | No | Usually yes |
| Typical install time | 30–60 min/fixture | 60–90+ min/fixture |
| Typical fixture wattage | 9–15W LED | 65W+ incandescent or 12–18W LED retrofit |
| Best for | Retrofits, low ceilings, no attic access | New construction with open joist bays |
Tools And Materials Needed
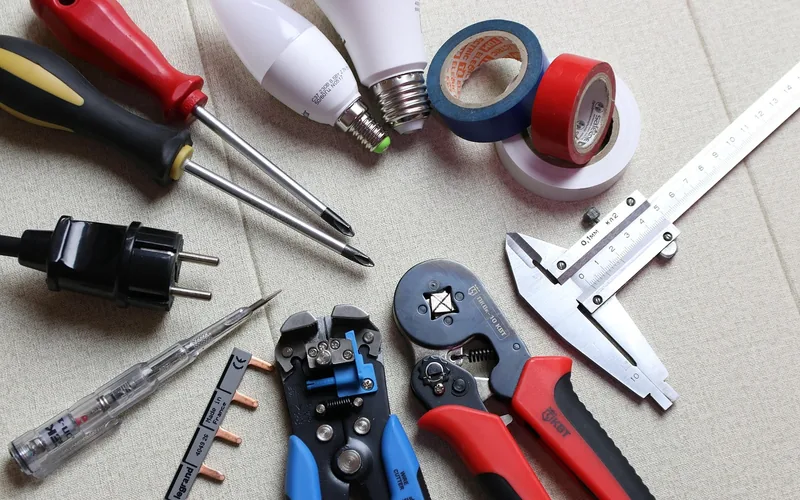
A few tools make the job easy. You’ll need a drill or the fixture’s included cutting template, a measuring tape, wire cutters/strippers, and safety goggles for drilling. A pencil marks the cutout locations, a screwdriver secures the junction box, and a ladder gets you to the ceiling. Add wire connectors and a voltage tester for safe, verified connections. The canless recessed light kit itself — fixture, driver, and tethered junction box — is the main item; buy IC-rated kits if the ceiling has insulation above it.
Best Canless Recessed Light Kit Pick
HALO HLB Canless LED Recessed Light 4-Pack – $83.35
A 4-pack from HALO (Eaton), the brand behind most pro-installed can lights, in a slim canless body with selectable color temperature — matches the IC-rated, no-attic-access approach this guide covers.
- Best for: Retrofits in ceilings with no attic access
- Why we picked it: IC-rated, 5-CCT selectable, reputable brand with wide parts availability
- Main drawback: 4-pack costs more per fixture than bulk 12-packs
Compare more canless recessed light options
 Option 1 NuWatt IC-Rated Canless Wafer Light 12-Pack – $139.99
|
 Option 2 Daminy Canless Wafer Downlight 12-Pack – $52.98
|
 Option 3 HALO LT Canless Recessed Light (Single) – $19.47
|
As an Amazon Associate we earn from qualifying purchases.
Choosing The Right Location
First, check your ceiling structure — know whether you’re working with wood joists or metal furring, and find the joists with a stud finder so the cutout falls in open space between them, not through structural framing. Canless fixtures still need clear space to seat the tethered junction box, even without a can to fit.
Next, plan for coverage, not just placement. More fixtures at lower wattage mean even brightness without hot spots. Space canless lights 4 to 6 feet apart for most living spaces — closer for task lighting over a counter or desk, wider for ambient light in rooms with higher ceilings. For 6-inch fixtures specifically, see this site’s detailed recessed light spacing guide for spacing broken down by ceiling height.
Preparing The Ceiling
Always turn off the power before starting. Find the circuit breaker, switch it off, and confirm with a voltage tester — don’t rely on the wall switch alone.
Mark the cutout with the template that comes in the fixture box, keeping it clear of joists and at least a few inches from walls. Use a drywall jab saw to cut along the marked line — canless cutouts are usually 4 to 6 inches depending on the model, so check the fixture’s spec sheet, not a generic can-light hole saw size. For an exact bit match, see this site’s hole saw sizing guide. Clear any debris from the cut before moving on.
Wiring The Lights
With power off, open the fixture’s tethered junction box and locate the incoming cable’s black (hot), white (neutral), and bare or green (ground) wires. Match them to the corresponding leads on the junction box using wire connectors sized for the gauge you’re using — typically 14-2 NM-B on a 15-amp circuit. Twist the wires together, thread on the connector, and turn until snug. Give each connection a gentle tug to confirm it’s secure before closing the box.
📊 Non-IC-rated recessed fixtures must keep thermal insulation at least 3 inches away from the enclosure and wiring compartment — IC-rated canless fixtures remove that restriction entirely, which is why IC rating matters for retrofits in insulated ceilings. — Source: Building America Solution Center, U.S. Department of Energy
Installing The Light Fixture
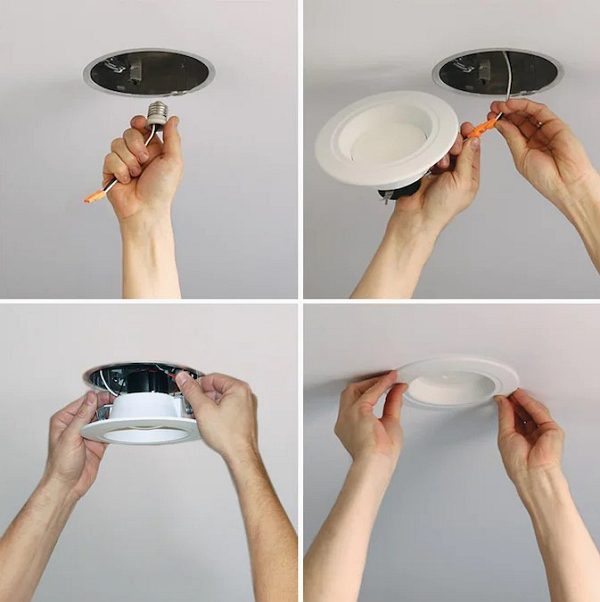
Installing canless recessed lighting comes down to five steps once the wiring is connected: seat the junction box, engage the spring clips, check alignment, confirm it sits flush, and test the circuit.
- Tuck the junction box into the cutout: Fold the connected wires neatly and push the junction box up into the ceiling opening first, keeping wires away from the cutout edge.
- Align the fixture with the hole: Center the fixture body over the cutout so the trim will sit evenly once seated.
- Engage the spring clips: Press the fixture up and in — the spring clips compress as they pass through the drywall, then snap outward to pull the fixture tight against the ceiling from behind.
- Check the fit: Run a hand around the trim edge to confirm there’s no visible gap and the fixture sits flush with the ceiling surface.
- Adjust if needed: If the fixture sits crooked or gapped on one side, gently pull it back out, reseat, and re-engage the clips until it’s centered and flush.
Testing The Installation
Once every fixture is seated, restore power and flip the switch. Check for flickering or uneven brightness across fixtures on the same circuit, and confirm every light comes on at the same dimmer level if the circuit is on a dimmer.
Restoring Power
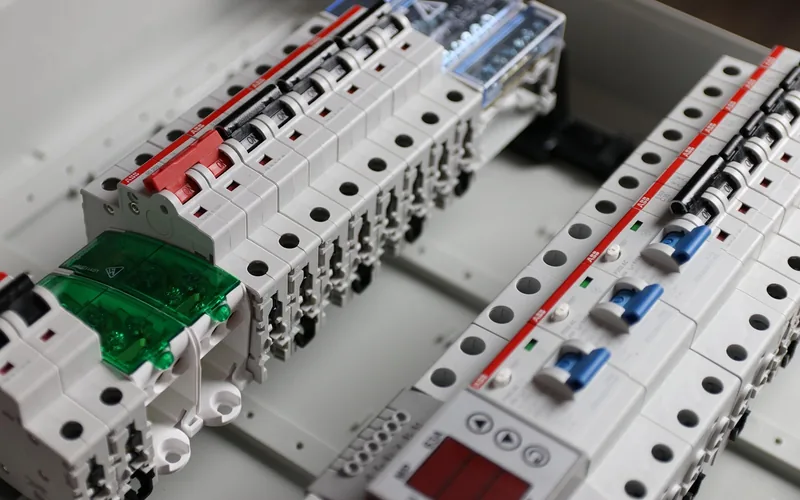
First, confirm the wall switch is in the off position, then go to the breaker panel and flip the circuit back on. Keep hands clear of the panel’s live bus bar and avoid touching anything metal inside the panel door.
Checking Light Functionality
Turn on the switch and watch each fixture. If a light doesn’t come on, check that the driver connector inside the fixture is fully seated first — that’s the most common cause on a fresh canless install, more often than a bad wire connection. If it still doesn’t light, recheck the wiring at the junction box with the circuit off.
Troubleshooting Common Issues
- Light won’t turn on: Check the breaker first, then confirm the driver connector inside the fixture is fully seated — a loose driver plug is the most common no-light cause on canless kits.
- Flickering: Usually a loose wire connector or a dimmer that isn’t LED-compatible. Swap in a trailing-edge LED dimmer if the fixture is dimmable.
- Dim output: Confirm the fixture’s lumen or color-temperature dial (many canless models have a selectable switch) isn’t set to its lowest setting.
- Fixture runs hot: Uncommon on IC-rated canless models since they’re designed for insulation contact, but confirm insulation isn’t directly blocking the driver’s ventilation slots.
Maintenance Tips
Wipe the trim with a soft, dry cloth periodically — dust buildup on the lens can noticeably dim output over time. Skip water or glass cleaner directly on the fixture. Check the trim ring for gaps every year or two; a gap lets dust and insects into the housing. Because the LED driver is sealed into the fixture body, canless lights have no bulb to replace — when one eventually fails, the whole fixture gets swapped.
Frequently Asked Questions
What are the disadvantages of canless recessed lighting?
The whole fixture has to be replaced if the LED driver fails, since there’s no separate bulb to swap. Canless models also generally throw slightly less total light spread than a larger can-based fixture, and cheaper models may not be dimmer-compatible, so check the spec sheet before buying if dimming matters.
How many canless lights can I put on one circuit?
On a dedicated 15-amp circuit, the NEC’s continuous-duty rule caps the load at 12 amps (80% of the breaker rating), or about 1,440 watts. At 9 to 15 watts per canless LED fixture, that’s wattage headroom for dozens of fixtures, but most electricians still cap a single 15-amp lighting circuit around 10 to 15 fixtures so it has spare capacity for future additions. Always confirm with a licensed electrician before finalizing a layout.
Are canless recessed lights code compliant?
Yes, when the fixture is properly rated for the ceiling it’s installed in. Use an IC-rated (insulation contact) model if there’s insulation above the ceiling, and a non-IC model only where there’s at least 3 inches of clearance from insulation. Choose ETL or UL-listed products and follow the NEC’s junction box and wiring requirements.
How far apart should canless lights be spaced?
Space canless lights 4 to 6 feet apart for most living spaces, tightening to 3 to 4 feet for task lighting over counters or desks. Rooms with higher ceilings can go wider without creating dark spots. For 6-inch fixtures specifically, this site’s recessed light spacing guide breaks down spacing by ceiling height in more detail.
Do canless recessed lights need a junction box?
Yes. Every canless fixture ships with a tethered junction box built into the assembly — it’s not optional or separate. The box houses the wire connections between the incoming cable and the fixture’s driver, and it must stay accessible (not buried behind drywall) in case the connections ever need servicing.
Can you use canless recessed lights in an insulated ceiling?
Yes, but only IC-rated (insulation contact) models. An IC rating means the fixture is listed for direct contact with insulation without becoming a fire hazard. Most canless kits sold today are IC-rated by default, but always check the box or spec sheet — a non-IC fixture needs a 3-inch insulation clearance the fixture can’t guarantee once it’s buried.
“All recessed luminaires should be IC-rated and labeled as having an air leakage rate not more than 2.0 cfm when tested in accordance with ASTM E 283 at a 1.57 psf pressure differential.”
Conclusion
Canless recessed lighting solves the exact problem can lights can’t: tight ceilings, no attic access, and a faster install. Match the fixture’s IC rating to the ceiling, keep the junction box accessible, and stay within the circuit’s continuous-duty limit, and the rest of the install — cut, wire, clip in — takes well under an hour per fixture.
Sponsored / affiliate links. As an Amazon Associate I earn from qualifying purchases. I may earn additional commission from eligible campaigns.