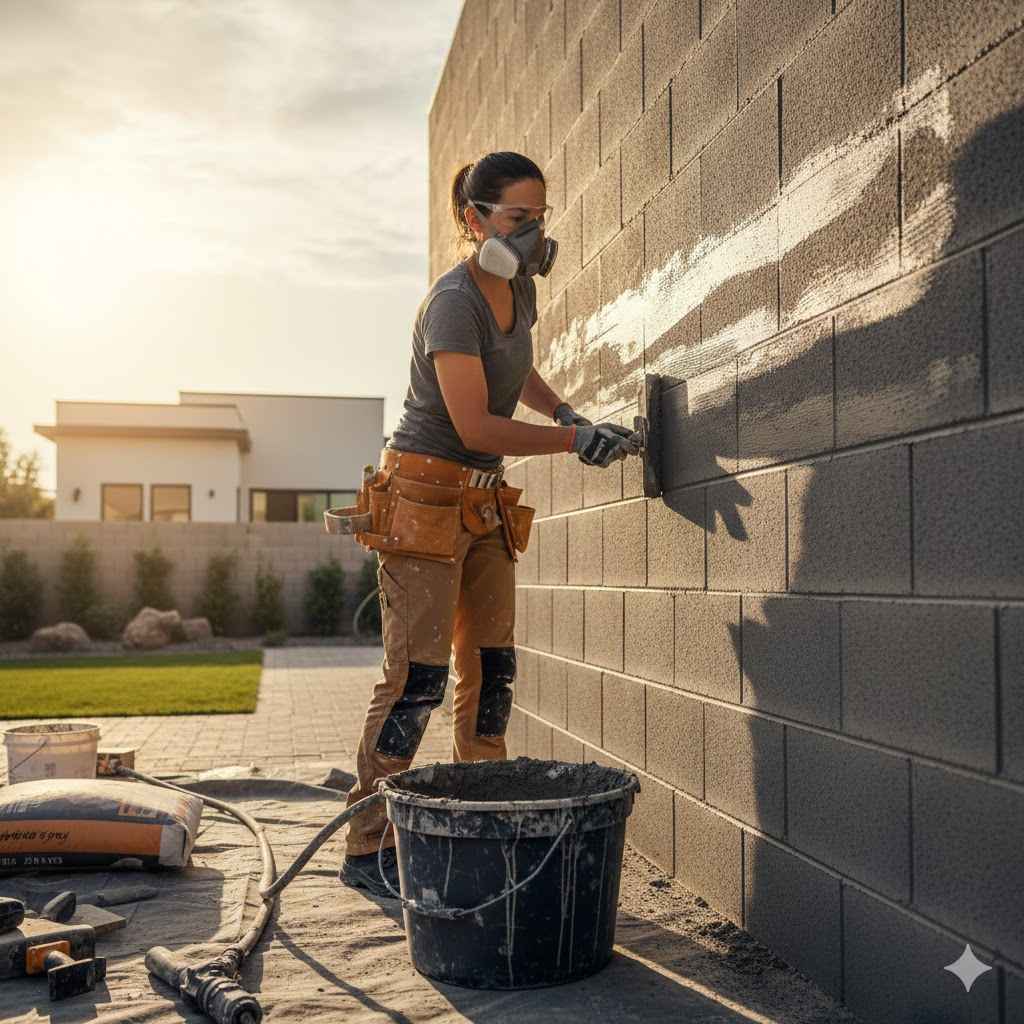
How to Stucco a Painted Block Wall Properly
Got a painted block wall that looks a bit tired or you just want to give it a fresh new look? You might be wondering about stuccoing over it. It can seem a little tricky at first, especially if you haven’t done it before.
But don’t worry! This guide will walk you through it step-by-step. We’ll make learning How to Stucco a Painted Block Wall Properly easy.
You’ll be ready to tackle your project in no time.
Preparing Your Painted Block Wall for Stucco
Getting your painted block wall ready is a really important first step. It ensures your stucco sticks well and looks great for a long time. Skipping this part can lead to problems down the road, like stucco peeling off.
We’ll cover everything you need to do to get your wall set up for success. This includes cleaning, repairing any damage, and making sure the paint is in good shape for the stucco to adhere to.
Cleaning the Block Wall
First things first, you need a clean surface. Any dirt, dust, grease, or loose paint will stop the stucco from sticking properly. You’ll want to wash the wall thoroughly.
A good scrub brush and some water can do wonders. For tougher grime, a mild detergent or a pressure washer on a low setting can be used.
- Scrubbing the WallUse a stiff-bristled brush to loosen dirt and grime. Work in sections, scrubbing firmly to remove any surface build-up. This physical action helps break down stubborn particles that might be clinging to the porous block.
- Rinsing ThoroughlyAfter scrubbing, rinse the wall completely with clean water. Make sure all soap residue is gone. Leftover soap can interfere with the stucco’s adhesion, acting like a barrier.
A garden hose is usually sufficient for this rinsing step.
- Allowing it to DryIt’s crucial that the wall is completely dry before you apply any stucco. Moisture trapped behind the stucco can cause mold or other issues. This might take a day or two, depending on the weather.
You can speed this up by using fans if needed.
Inspecting and Repairing Damage
Look closely at your block wall for any cracks, chips, or crumbling areas. These need to be fixed before you stucco. Small cracks can be filled with a masonry repair caulk.
Bigger holes or damaged blocks might need to be patched with mortar. A solid base is key to a lasting stucco finish.
- Filling Small CracksUse a good quality masonry caulk or a patching compound designed for concrete and masonry. Apply it with a caulk gun, pressing it into the crack to ensure full coverage. Smooth the excess with a putty knife or your finger for a flush finish.
- Repairing Larger HolesFor larger voids, you’ll want to use a masonry repair mix. This is a dry product you mix with water to a workable consistency. Pack the mix firmly into the hole, building it up in layers if necessary.
Smooth the surface to match the surrounding block as closely as possible.
- Checking for Loose MortarInspect the mortar joints between the blocks. If any look loose, crumbly, or are missing entirely, they need to be repointed. This involves carefully removing the old, loose mortar and then filling the joint with new mortar.
This strengthens the wall and provides a more uniform surface.
Evaluating the Existing Paint
The type of paint on your block wall matters. Most standard exterior paints are okay, but glossy or very smooth paints might need extra attention. If the paint is peeling or flaking, it must be scraped off.
A good test is to tape a piece of duct tape firmly to the wall and then rip it off quickly. If paint comes off with the tape, it’s not adhering well and needs to be removed.
- Testing Paint AdhesionPerform a few adhesion tests in different spots. Press a strip of strong tape (like duct tape or packing tape) onto the painted surface. Rub it down firmly.
Then, pull the tape off quickly. If a significant amount of paint lifts, you know you have an adhesion problem.
- Removing Loose PaintUse a stiff wire brush or a paint scraper to remove any paint that is loose, chipping, or flaking. Focus on areas where the paint is compromised. This ensures that the stucco will bond directly to the solid block or well-adhered paint.
- Sanding Glossy SurfacesIf your wall has a very glossy or slick paint finish, it’s a good idea to lightly sand it. This creates a slightly rougher texture, called a “key,” for the stucco to grip. Use medium-grit sandpaper.
You don’t need to remove all the paint, just dull the shine.

Choosing the Right Stucco Product and Tools
Selecting the correct stucco mix and having the right tools makes a big difference in your project’s success. You’ll want a product that’s suitable for exterior block walls. Also, gathering your tools beforehand means you won’t be scrambling mid-project.
This section covers what you need to pick up from the store and the essential equipment for the job.
Types of Stucco for Block Walls
For exterior block walls, you’ll typically be looking at a cement-based stucco. These are durable and designed for masonry applications. Some are single-coat, while others are multi-coat systems.
For DIY projects, a pre-mixed, single-coat stucco can be a good choice as it’s simpler to apply. Always check the product’s suitability for painted surfaces if your prep wasn’t perfect.
- Cement-Based StuccoThis is the most common and robust type of stucco for exterior use. It’s made from Portland cement, sand, and lime. It forms a very hard and durable finish that can withstand various weather conditions.
It’s ideal for masonry substrates like concrete blocks.
- Acrylic StuccoAcrylic stucco is a synthetic product that offers flexibility and crack resistance. It can be applied over various surfaces, including properly prepared painted surfaces. It often comes pre-mixed, making application simpler for beginners.
However, it can be more expensive than traditional cement stucco.
- Single-Coat StuccoThis type of stucco is designed to be applied in one thick coat, combining the scratch, brown, and finish layers into a single application. It significantly speeds up the process. It’s a great option for beginners who want to stucco a painted block wall properly without the complexity of multiple layers.
Essential Tools for Stucco Application
You’ll need a few key tools to apply stucco. A hawk is a flat board with a handle used to hold stucco while you work. A trowel is used to spread and smooth the stucco.
You’ll also need a measuring bucket and a mixing paddle if you’re mixing your own stucco. Safety gear like gloves and eye protection is also a must.
- Stucco HawkThis is a flat, square board with a central handle underneath. It acts as a portable work surface, holding a portion of stucco that you’ve scooped from your mixing tub or wheelbarrow. You then use your trowel to scoop stucco from the hawk to apply it to the wall.
- Stucco TrowelsYou’ll need a few different trowels. A steel trowel is used for applying and smoothing the stucco. A margin trowel is smaller and useful for filling in tight spots or corners.
A finishing trowel is used for achieving a smooth final surface.
- Mixing ToolsIf you’re mixing stucco from powder, you’ll need a large mixing tub or wheelbarrow. A sturdy mixing paddle attached to a drill is essential for achieving a consistent, lump-free mix. Measure your water and dry mix accurately according to the product instructions.
- Measuring and Mixing BucketsAccurate measurement of water and dry stucco mix is vital for proper consistency. Use sturdy buckets for mixing smaller batches if needed. A large graduated bucket is helpful for measuring water precisely.
- Safety GearAlways wear heavy-duty gloves to protect your hands from the abrasive stucco mix. Safety glasses are crucial to prevent eye irritation. If working in a dusty environment or with fine powders, a dust mask is also recommended.
The Stucco Application Process Step-by-Step
Now for the main event: applying the stucco! This process involves mixing your stucco, applying the first coat, letting it cure, and then applying subsequent coats if needed, followed by the final finish. Following these steps carefully will help you achieve a professional-looking result.
Mixing the Stucco
Follow the manufacturer’s instructions precisely for mixing. Too much or too little water can weaken the stucco or make it hard to work with. You want a consistency similar to thick peanut butter – stiff enough to hold its shape but still spreadable.
Mix in small batches so it doesn’t dry out before you use it.
- Measure IngredientsCarefully measure the amount of dry stucco mix and water according to the bag’s instructions. Using a measuring bucket for water is key. Consistency in your mix is important for uniform application.
- Combine and MixAdd the measured water to your mixing tub or wheelbarrow first. Then, gradually add the dry stucco mix. Use your drill with the mixing paddle to combine them thoroughly.
Scrape the sides and bottom of the container to ensure no dry pockets remain.
- Achieve Proper ConsistencyThe ideal consistency is like thick oatmeal or stiff peanut butter. It should hold its shape when you form a ball and not drip water. If it’s too wet, it will sag and be difficult to apply.
If it’s too dry, it will be crumbly and hard to spread.
Applying the First Coat Scratch Coat
The first coat is called the scratch coat. You’ll throw or trowel it onto the wall, making sure it’s about 1/4 to 3/8 inch thick. Then, using a notched trowel or a stiff brush, you’ll scratch horizontal lines into the surface.
These scratches create a good grip for the next coat.
- Applying to the WallLoad your trowel with stucco from your hawk. Apply it to the wall with a firm, sweeping motion, pressing it into the surface. Cover the entire block wall, ensuring an even thickness across all areas.
Don’t worry too much about making it perfectly smooth at this stage.
- Creating the Scratch TextureOnce the first coat is applied and has set slightly (it shouldn’t be wet or sticky, but firm), take a scratcher tool or the edge of a trowel. Drag it across the surface in parallel horizontal lines. These lines should be about 1/8 inch deep.
- Curing the Scratch CoatThis first coat needs to cure properly, which usually takes 24-48 hours. During this time, it’s beneficial to keep it slightly damp, especially in hot or dry weather. Lightly misting it with water a couple of times a day helps prevent it from drying out too quickly.
This process is called “damp curing” and is essential for strength.
Applying the Second Coat Brown Coat
The second coat, the brown coat, is applied over the cured scratch coat. It should also be about 1/4 to 3/8 inch thick. This coat is smoothed out more than the scratch coat, aiming for a flat and level surface.
After smoothing, you might lightly mist it again to prepare for the final coat.
- Coverage and ThicknessApply the brown coat evenly over the scratch coat. The goal here is to fill in the scratched lines and build up a level surface. Aim for a uniform thickness of about 1/4 to 3/8 inch.
Ensure there are no low spots or voids.
- Smoothing the SurfaceUse your trowel to smooth the brown coat. Work in smooth, overlapping strokes. The surface should be relatively flat and free from major imperfections.
A float tool can also be used to further level and smooth the brown coat before it cures.
- Curing the Brown CoatSimilar to the scratch coat, the brown coat needs to cure. This also typically takes 24-48 hours. Keeping it damp during this period is important for its strength and durability.
Proper curing prevents cracking and ensures a solid base for the final finish.
Applying the Finish Coat
The finish coat is the decorative layer. It can be smooth, textured, or patterned, depending on your preference. You’ll apply this coat thinly, usually around 1/8 inch thick.
The trowel technique here determines the final look. Some common finishes include a smooth trowel finish, a sprayed-on texture, or a stucco netting technique for a rustic look.
- Achieving Desired TextureThe finish coat is where you get creative. For a smooth finish, use a steel trowel with steady pressure. For a textured look, you can use a sponge, a brush, or specialized stucco tools.
You can also achieve a “dash” finish by throwing a wetter mix of stucco onto the wall.
- Working in SectionsStucco needs to be worked on in manageable sections. This is especially true for the finish coat, as you want to avoid noticeable lines where one section ends and another begins. Work from a corner and proceed along the wall, blending the edges as you go.
- Final Curing and ProtectionOnce the finish coat is applied, it needs to cure. This process can take several days to a couple of weeks, depending on the product and weather. During this time, protect the stucco from rain, direct sun, and extreme temperatures.
Gentle misting can still be beneficial for optimal curing.
Tips for a Flawless Stucco Finish
Achieving a truly beautiful stucco finish involves a few extra considerations. These tips will help you avoid common pitfalls and ensure your painted block wall looks professionally done. From working with the weather to handling details, these pointers are designed to give you that perfect stucco look.
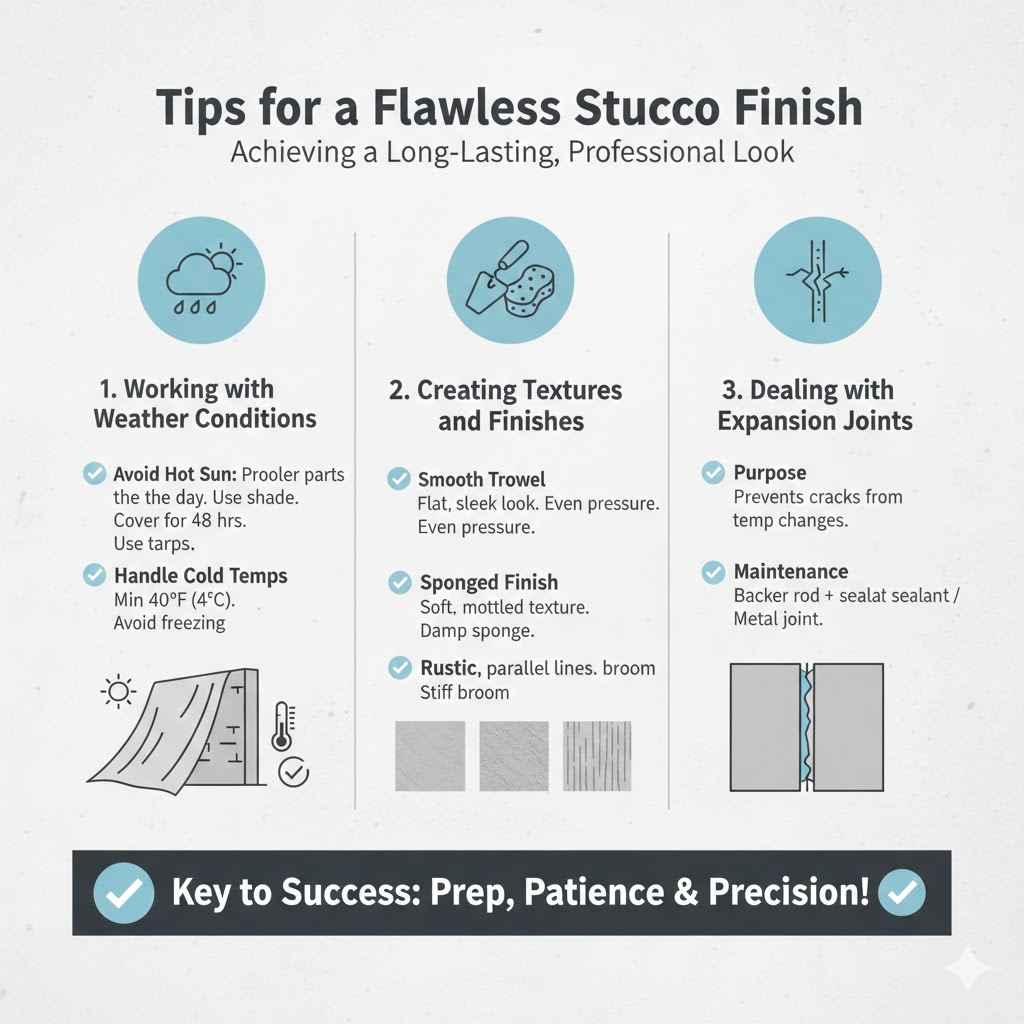
Working with Weather Conditions
The weather plays a big role in stucco application. Avoid stuccoing in direct, hot sun, as it can cause the stucco to dry out too quickly and crack. Don’t apply stucco if rain is expected within 24-48 hours, as the water can wash away the fresh stucco or weaken it.
Freezing temperatures are also a no-go; stucco needs to cure above 40°F (4°C).
- Avoiding Hot SunApply stucco during cooler parts of the day, like early morning or late afternoon, to prevent rapid drying. If you must work in the sun, focus on applying and finishing sections quickly. Protecting the fresh stucco with shade screens or tarps can also help.
- Protecting from RainEnsure no rain is forecast for at least 48 hours after application. If rain is a possibility, cover the wall with tarps or plastic sheeting. Make sure the sheeting is secured well enough to prevent wind from lifting it.
- Handling Cold TemperaturesStucco should not be applied when the temperature is expected to drop below 40°F (4°C) within 48 hours. If you’re working in cooler weather, consider using accelerators or heated enclosures for small areas, but for a whole wall, it’s best to wait for warmer conditions.
Creating Textures and Finishes
The finish coat is your chance to add personality. A simple trowel finish is classic. For more texture, you can use a sponge, a stiff brush, or even a roller designed for stucco.
You can also achieve a “skip trowel” look by lightly dragging a trowel over the surface after it has begun to set, leaving gaps.
- Smooth Trowel FinishThis is achieved by using a steel trowel to move across the surface in smooth, overlapping strokes. Apply gentle, even pressure. The goal is to flatten the brown coat and create a uniform, sleek appearance.
It requires a steady hand and consistent technique.
- Sponged FinishAfter the finish coat is applied and has begun to firm up, gently dab the surface with a damp sponge. This softens the texture and creates a subtly mottled look. Vary the pressure and direction of your sponging for a more natural appearance.
- Broom FinishFor a more rustic or durable texture, a broom finish can be achieved. Lightly drag a stiff-bristled broom across the surface of the stucco when it’s partially set. This creates a series of parallel lines that add grip and visual interest.
Dealing with Expansion Joints
Expansion joints are important for large stucco surfaces. They allow the stucco to expand and contract with temperature changes without cracking. If your block wall is very long, you’ll need to plan for these joints.
They are essentially planned breaks in the stucco, often filled with flexible sealant.
- Purpose of Expansion JointsStucco, like concrete, is prone to cracking due to expansion and contraction caused by temperature and moisture fluctuations. Expansion joints create controlled points of weakness where these movements can occur without causing random, unsightly cracks in the stucco itself.
- Installation TechniqueExpansion joints are typically created by installing a backer rod (a foam rope) and then applying a flexible sealant over it. Alternatively, a metal or plastic control joint can be embedded into the stucco during the finishing stage. The placement of these joints depends on the wall’s length and local building codes.
- Maintenance of JointsOver time, the sealant in expansion joints may need to be replaced. Inspect them periodically for signs of wear, cracking, or separation. If you notice any issues, remove the old sealant and backer rod, clean the joint, and apply fresh sealant for continued protection against cracking.
Common Mistakes and How to Avoid Them
Even with careful planning, mistakes can happen. The most common include improper surface preparation, inconsistent mixing, stuccoing in bad weather, and rushing the curing process. Always read product labels and follow manufacturer guidelines.
If in doubt, it’s better to wait or seek advice.
- Insufficient Surface PrepFailing to clean the wall thoroughly or repair cracks can lead to stucco adhesion problems. Always spend ample time on the prep work. It’s the foundation of a good stucco job.
- Incorrect Mixing RatiosToo much or too little water will result in stucco that is too weak or too difficult to apply. Measure precisely and mix thoroughly. If you’re unsure, start with a small test batch.
- Ignoring Curing TimesStucco needs time to cure properly. Rushing this process by applying coats too soon or not keeping it damp can result in weak, cracked stucco. Patience is key to a durable finish.
FAQ
Question: Can I stucco directly over old, peeling paint?
Answer: No, you cannot stucco directly over peeling paint. The loose paint will not provide a stable surface for the stucco to adhere to, leading to peeling and failure of the stucco layer. You must scrape away all loose and flaking paint and ensure the remaining paint is well-adhered.
Question: How long does it take for stucco to cure?
Answer: Stucco curing is a multi-stage process. The initial set takes a few hours, but each coat typically needs 24-48 hours to cure before the next is applied. The final finish coat can take several days to two weeks to fully harden and reach its maximum strength.
Question: What is the best type of stucco for a beginner?
Answer: For beginners, a pre-mixed, single-coat stucco is often the easiest to work with. It simplifies the application process by combining multiple layers into one, reducing the chances of error. Always choose a product specifically designed for exterior masonry applications.
Question: Do I need to use a bonding agent on painted block walls?
Answer: If the paint on your block wall is sound and well-adhered, you may not need a bonding agent. However, if you’re concerned about adhesion or if the paint is slightly glossy, a masonry bonding primer can significantly improve the stucco’s grip and prevent future problems.
Question: How thick should each stucco coat be?
Answer: The scratch coat should be about 1/4 to 3/8 inch thick. The brown coat should also be around 1/4 to 3/8 inch thick, applied to level the surface. The finish coat is typically thinner, about 1/8 inch, and is where the final texture is created.
Summary
Learning how to stucco a painted block wall properly involves careful preparation, choosing the right materials, and following a step-by-step application process. Clean and repair your wall thoroughly. Select a quality cement-based stucco and gather your tools.
Apply the scratch, brown, and finish coats, allowing each to cure. Pay attention to weather and texture for a beautiful, lasting result.