How to Wax Hardwood Floors: Expert Tips for a Gleaming Finish
Waxing hardwood floors can bring out their natural beauty. It also adds a protective layer.
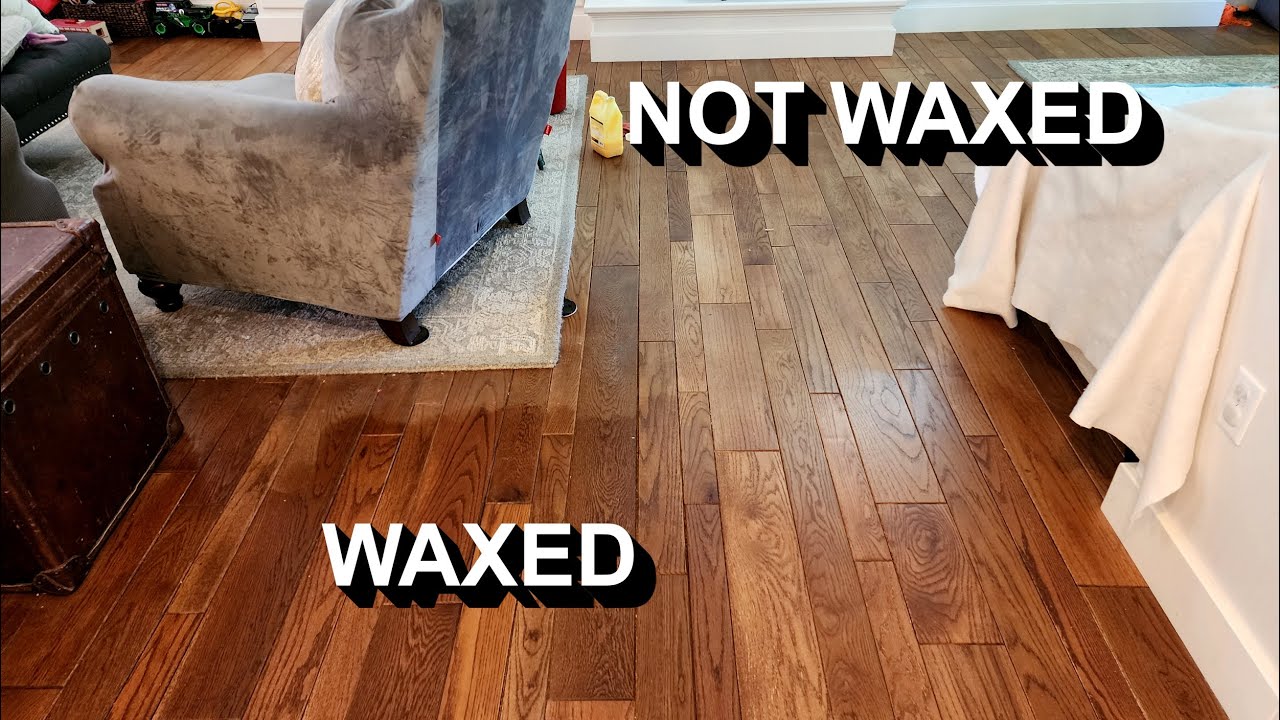
Learning how to wax hardwood floors isn’t hard. It just takes the right steps and care. Hardwood floors are a timeless choice for any home. Over time, though, they can lose their shine and become dull. Waxing is a great way to restore their luster.
This process involves applying a layer of wax to the floor’s surface. The wax protects the wood and gives it a beautiful glow. Regular waxing can also extend the life of your floors. In this guide, we will walk you through the steps to wax your hardwood floors. You’ll learn how to prepare, apply, and maintain the wax for lasting results.
Credit: www.youtube.com
Preparation Steps
First, get all your supplies ready. You need a broom, vacuum, mop, and microfiber cloths. Also, have a wax applicator and wax. Ensure you have a bucket of water. Don’t forget to wear gloves. It’s important to protect your hands. Having everything ready saves time.
Start by sweeping the floor with a broom. Remove all dirt and dust. Then, use a vacuum to get smaller particles. Next, mop the floor with water. Make sure the mop is damp, not wet. Let the floor dry completely. Use a microfiber cloth to wipe any leftover dirt. Clean floors allow wax to stick better.
Choosing The Right Wax
Different waxes suit various hardwood floors. Liquid wax is easy to apply. Paste wax lasts longer and offers more protection. Solid wax is less common but very durable. Choose the best type based on your needs.
Check if your floor has a polyurethane finish. Some waxes are not compatible. Always test a small area first. Look at the finish and type of wood. High-traffic areas need stronger protection. Consider ease of application. Liquid wax is faster. Paste wax takes more time but offers better protection.
Application Techniques
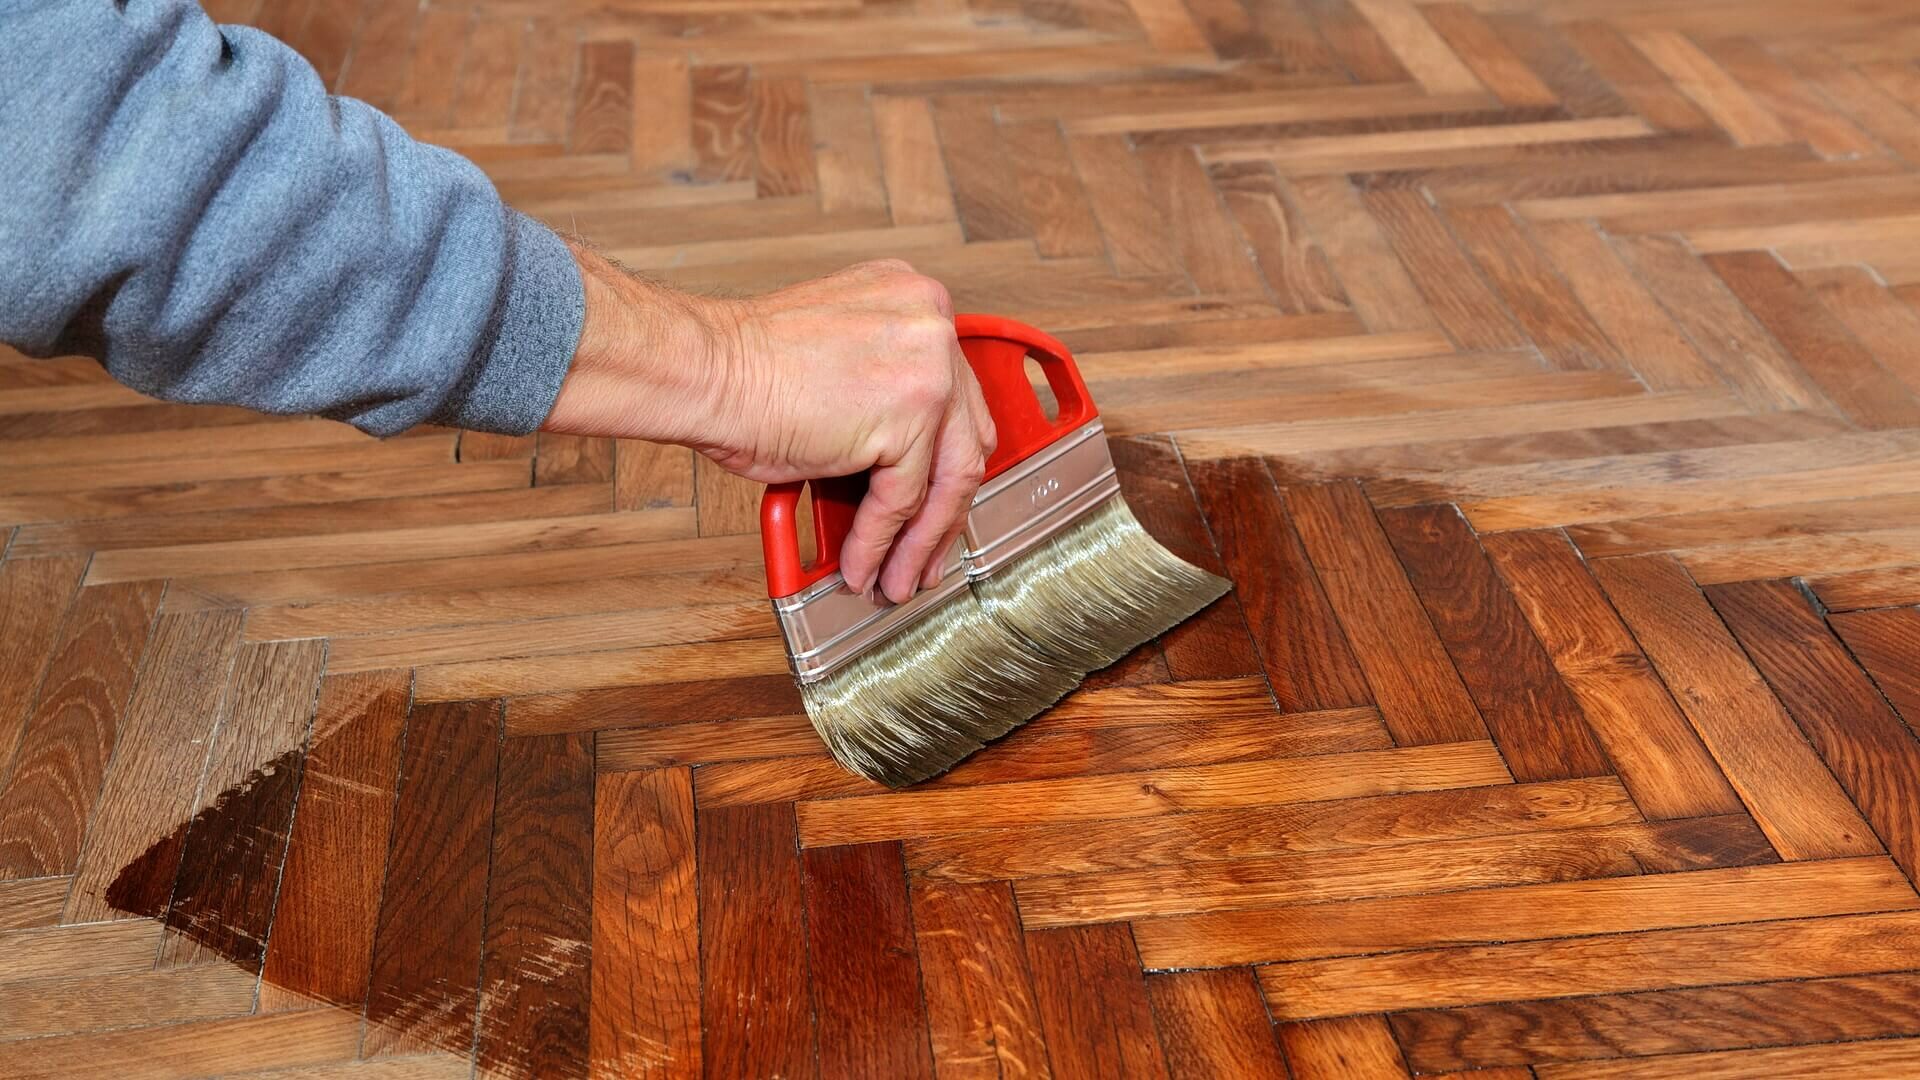
Shake the liquid wax bottle well. Pour a small amount onto the floor. Use a clean cloth to spread the wax evenly. Work in small sections. Make sure the wax covers the floor evenly. Let it dry for about 20 minutes. Buff the floor with a soft cloth. This gives the floor a shiny look. Repeat the process if needed.
Scoop a bit of paste wax with a clean cloth. Rub the wax into the floor in a circular motion. Work in small areas at a time. Make sure to apply a thin, even layer. Let the wax dry for 10-15 minutes. Buff the area with a soft cloth. This will make the floor shine. Apply a second coat if desired.

Credit: newyorkcitywoodfloors.com
Buffing The Floor
Waxing hardwood floors enhances their shine and protection. Start by cleaning the floor thoroughly. Next, apply wax evenly with a soft cloth, following the wood grain.
Manual Buffing
Manual buffing is a simple way to shine your floor. First, clean the floor with a mop. Dirt and dust can scratch the wood. Use a soft cloth for buffing. Rub the cloth in small circles. This helps the wax to spread evenly. Move slowly to avoid missing spots. Buffing by hand takes time. But it gives a great shine.
Using A Buffer Machine
A buffer machine makes the job faster. First, read the machine’s manual. Follow all safety steps. Clean the floor before starting. Attach a buffing pad to the machine. Start in a corner of the room. Move the machine in a straight line. Work from one end to the other. Keep the machine moving. This avoids damage to the floor. A buffer machine gives a smooth, shiny finish.
Maintaining The Shine
Keep hardwood floors shiny by waxing them regularly. Apply a thin layer of wax, then buff to a beautiful sheen. Regular care ensures long-lasting luster and durability.
Routine Cleaning
Dust and dirt can dull the shine. Sweep your floors daily. Use a soft broom to avoid scratches. A vacuum with a hardwood floor setting also works well. Clean spills right away with a damp cloth. Too much water can damage wood. Use a gentle cleaner once a week. Choose a cleaner made for hardwood floors.
Re-waxing Schedule
Re-wax your floors to keep them shiny. Most floors need re-waxing every six months. High-traffic areas might need it more often. Check the label on your wax product. Follow the instructions for the best results. Test a small area first. Make sure the wax works with your floor type. Apply wax in thin, even layers. Let each layer dry completely.
Credit: mrsander.co.uk
Common Mistakes
Over-waxing can cause floors to become sticky and dull. Waxing too often builds up layers. This traps dirt and grime. Less is more with floor wax. Waxing once every six months is usually enough. Always follow the product instructions. This helps avoid over-waxing.
Using the wrong products can harm your hardwood floors. Never use all-purpose cleaners. They can strip the wax. Always use products made for hardwood floors. Check labels before buying. Use wax that matches your floor type. This will protect your floors and keep them shiny.
Safety Tips
Good ventilation is key. Open windows and doors. Fresh air helps remove fumes. Wax products can be strong. Avoid breathing them in. Use fans if needed. This keeps the air clean. Safety first, always.
Wear gloves to protect your hands. Eye protection is also needed. Wax can splash. Protect your eyes. A mask is useful too. It filters out dust. Your safety gear is important. It keeps you safe while working.
Faqs
Learn how to wax hardwood floors with easy steps. Follow these tips to keep floors shiny and protected. Enjoy beautiful floors with regular maintenance.
Waxing Frequency
Wax hardwood floors every 6 to 12 months. This keeps them shiny and protected. High-traffic areas may need waxing more often. Less-used rooms can go longer between waxes. It depends on wear and tear. Always clean the floor before waxing. Dust and dirt can scratch the wood.
Handling Scratches
Small scratches can be fixed with a wax stick. Rub the stick over the scratch. Buff it with a soft cloth. For deep scratches, sand the area lightly. Apply matching wax and buff. Regular waxing helps hide minor scratches. It also protects the wood from damage.
Frequently Asked Questions
How Often Should I Wax Hardwood Floors?
Wax hardwood floors every 6 to 12 months. High-traffic areas may need more frequent waxing. Follow the manufacturer’s recommendations.
Can I Wax Pre-finished Hardwood Floors?
Yes, you can wax pre-finished hardwood floors. Ensure the wax is compatible with your floor’s finish for best results.
What Type Of Wax Is Best For Hardwood Floors?
Use a high-quality paste wax or liquid wax. Choose one specifically designed for hardwood floors to ensure optimal protection and shine.
How Do I Prepare Hardwood Floors For Waxing?
Clean the floors thoroughly. Remove all dust and debris. Ensure the floor is dry before applying wax for a smooth finish.
Conclusion
Waxing hardwood floors can enhance their beauty and extend their life. This simple task requires basic tools and a bit of time. Clean the floor thoroughly before starting. Apply the wax evenly and let it dry. Buff the floor to a shine for a perfect finish.
Regular waxing can protect the wood and keep it looking its best. Enjoy your gleaming, well-maintained floors!