Make Your Own DIY Rolling Pin: Simple Steps To Follow
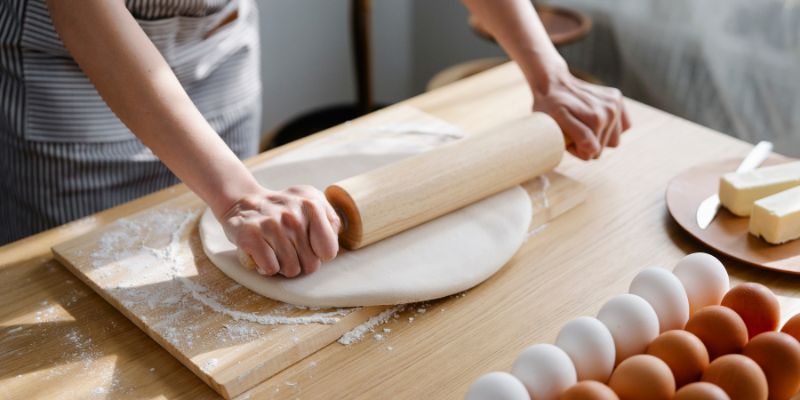
In the realm of culinary tools, the DIY rolling pin stands out as a quintessential object, pivotal to the process of dough manipulation. Constructed from various materials such as wood, marble, or even silicone, a rolling pin’s design plays a critical role in achieving optimal dough thickness and texture. Crafting your own rolling pin not only allows for personalized customization but also enhances your kitchen repertoire with a unique touch.
As we delve deeper into the intricacies of creating a DIY rolling pin, you’ll uncover the nuances of materials, techniques, and tips that will elevate your baking experience. Prepare to roll into the world of DIY kitchen craftsmanship!
Crafting Your Own DIY Rolling Pin: A Step-By-Step Guide
This summary provides a concise overview of the DIY rolling pin project, highlighting its simplicity and personalizable nature. Whether you’re a seasoned baker or a novice, crafting your own rolling pin allows for creativity and customization, ensuring that your baking experience is as unique as your style. From selecting the right materials to step-by-step assembly, this guide emphasizes the satisfaction of creating a functional tool that enhances your culinary endeavors while adding a personal touch to your kitchen.
Understanding the Importance of a Rolling Pin
Historical significance in baking. Types of rolling pins and their uses. Benefits of a personalized rolling pin.
A rolling pin has deep roots in baking history. It helps transform dough into flat shapes for various treats. Different types serve unique purposes:
- Classic Rolling Pins: Great for general use.
- French Rolling Pins: Offers more control and maneuverability.
- Double Roller Pins: Perfect for even dough thickness.
Getting a personalized rolling pin adds a special touch to baking. It can reflect your style and inspire creativity, making each baking session more enjoyable.
Materials Needed for a DIY Rolling Pin
List of wood types suitable for rolling pins. Additional materials (finishing oils, seals, etc.). Tools required for crafting.
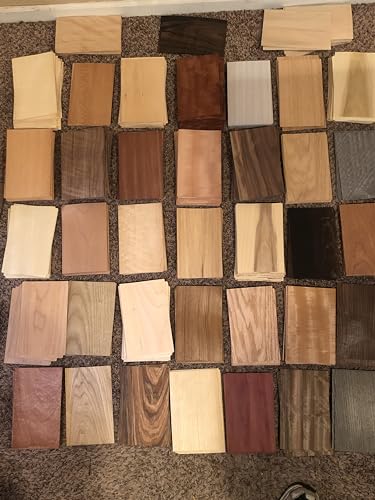
To make a fantastic DIY rolling pin, you need the right materials. First, choose a wood type that is safe and smooth. Some great options are maple, walnut, and birch.
Each adds its own style and strength. You’ll also want some finishing oils, like mineral oil or beeswax, to keep it shiny and safe for your food. Don’t forget your tools! A saw, sandpaper, and drill will help turn your wood into a rolling masterpiece.
| Wood Type | Features |
|---|---|
| Maple | Hard, smooth, and great for baking! |
| Walnut | Beautiful color and very durable. |
| Birch | Lightweight but still strong! |
Step-by-Step Instructions for Crafting Your Own Rolling Pin
Measuring and cutting the wood. Shaping the rolling pin (dimensions and techniques). Sanding and finishing touches.
First, grab some wood. Measure it to about 12-18 inches long, depending on how much dough you want to roll! Cut it straight; nobody wants a wobbly pizza!
Next, shape your rolling pin. Aim for about 2 inches in diameter for a comfy grip. Use a saw or chiseling tools—just don’t miss your target. Finally, sand it down like you’re polishing a trophy.
Smooth edges help prevent dough from sticking, and they look fancy too!
| Step | Details |
|---|---|
| Measure | 12-18 inches long |
| Shape | 2 inches in diameter |
| Sanding | For smooth edges |
Customizing Your DIY Rolling Pin
Ideas for design enhancements (carving, engraving). Painting and staining options. Practical tips for personalization.
Want to make your rolling pin as unique as your cookies? Start by considering some fun design enhancements. You can carve cute shapes or engrave names right into the wood.
For a splash of color, try out various painting and staining options. Consider using food-safe paints to keep things cookie-friendly. Finally, here are some practical tips: use sandpaper to smooth rough surfaces and feel free to add a personal touch with stickers or designs. Your rolling pin will be the talk of the kitchen!
| Enhancement | Description |
|---|---|
| Carving | Add simple shapes like hearts or stars. |
| Engraving | Personalize with names or fun quotes. |
| Painting | Use vibrant, food-safe colors. |
| Staining | Enhance natural wood grain with stains. |
Maintenance and Care for Your Rolling Pin
Cleaning and storage recommendations. Tips for prolonging the life of your rolling pin. Common issues and how to fix them.
To keep your rolling pin in great shape, follow these care tips. Clean it with warm soapy water, but avoid soaking it. Let it dry completely before storage.
For storage, place it in a cool, dry area to prevent warping.
- Apply food-safe mineral oil often to maintain its smooth surface.
- Store it lying flat to avoid bending.
- Check for small cracks and fix them with food-safe wood glue.
Taking good care of your rolling pin will help it last longer and make baking more enjoyable!
Creative Uses for Your DIY Rolling Pin
Beyond baking: other culinary applications. Alternative uses in crafts and home projects. Sharing your rolling pin with friends and family.
Your DIY rolling pin is not just for baking! It can enhance many culinary tasks. Use it to crush cookies for cheesecake crusts, or roll out pasta for a homemade dinner. Think outside the kitchen, too!
Here are some fun alternatives:
- Stamping patterns on clay for crafts
- Creating art with paint rolling
- Flattening fabric for sewing projects
Sharing this tool with friends and family can make cooking and crafting even more enjoyable. Together, you can spark creativity and fun!
Frequently Asked Questions about DIY Rolling Pins
Common misconceptions. Troubleshooting tips for DIY enthusiasts. Engaging with the baking community: sharing your creations.
Many think a diy rolling pin must be fancy or expensive. In reality, you can use a smooth wooden dowel or even a large soda can! If your dough sticks, try dusting it with flour.
For those who love sharing their kitchen masterpieces, join online baking groups. Post pictures and swap tips! Below is a quick table to clear up common myths:
| Myth | Truth |
|---|---|
| Only store-bought pins work. | Diy versions work just as well! |
| They’re hard to make. | It’s easier than pie—literally! |
Conclusion
In conclusion, a DIY rolling pin is not only a practical addition to your kitchen but also a unique project that showcases your creativity. Whether you choose to customize it with different materials or designs, this simple tool can significantly enhance your baking experience. Embrace the art of crafting your own rolling pin, and enjoy the satisfaction of handmade kitchenware!
FAQs
Sure! Here Are Five Related Questions About DIY Rolling Pins:
1. What materials are best for making a DIY rolling pin? 2. How can I personalize my DIY rolling pin? 3. What is the ideal length and diameter for a rolling pin? 4. Are there any tips for achieving a smooth finish on my rolling pin? 5. How can I properly maintain and clean my homemade rolling pin?
Of course! Please provide the question you’d like me to answer, and I’ll respond accordingly.
What Materials Are Best For Making A DIY Rolling Pin?
The best materials for making a DIY rolling pin are hardwoods like maple or beech due to their durability and smooth surfaces. PVC pipe is also a popular option for its lightweight and easy-to-clean properties. Alternatively, you can use a sturdy dowel rod for a simple and effective design. Whichever material you choose, ensure it is food-safe and has no rough edges to prevent sticking or damage to dough.
How Can You Customize A Rolling Pin With Unique Designs Or Patterns?
You can customize a rolling pin by using laser engraving or carving tools to create unique designs or patterns on the surface of the pin. Alternatively, you can apply food-safe molds or stamps to imprint specific shapes and textures while rolling dough. Another option is to use washi tape or painter’s tape to create geometric designs before applying a coat of food-safe varnish. Finally, consider decorating with paint or resin for more vibrant, colorful patterns, ensuring all materials used are food-safe.
What Are The Steps Involved In Constructing A Simple Wooden Rolling Pin From Scratch?
To construct a simple wooden rolling pin from scratch, first select a suitable piece of hardwood and cut it to the desired length, typically around 18 inches. Next, use a lathe or hand tools to shape the wood into a smooth cylinder, tapering the ends slightly for easier handling. After shaping, sand the surface to remove any rough spots and ensure a smooth finish. Finally, apply food-safe mineral oil or another finish to protect the wood and enhance its appearance.
Are There Specific Care Instructions For Maintaining A DIY Rolling Pin After It’S Made?
Yes, there are specific care instructions for maintaining a DIY rolling pin. It’s important to regularly clean it with mild soap and warm water, avoiding harsh chemicals or soaking it, as this can cause damage. After cleaning, dry it immediately with a soft cloth to prevent moisture buildup. Additionally, periodically applying mineral oil or food-safe wood conditioner will help keep the wood hydrated and in good condition.
Can You Repurpose Materials From Around The House To Create A Functional Rolling Pin? If So, What Are Some Examples?
Yes, you can repurpose materials from around the house to create a functional rolling pin. For example, a sturdy empty paper towel roll can be used, or a wine bottle filled with water can serve in its place. A cylindrical glass jar, like those used for pasta or pickles, can also be effective. Just ensure that whatever material you choose is clean and has a smooth surface for even rolling.