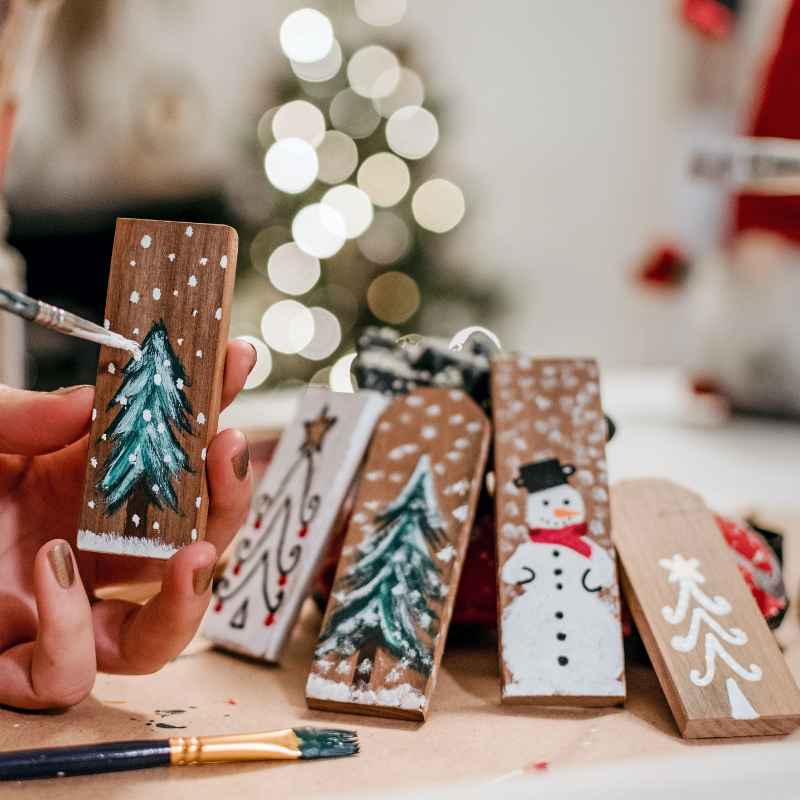
DIY Wooden Christmas Decorations You Can Make at Home
DIY wooden Christmas decorations bring a cozy, rustic charm to your home that plastic and mass-produced ornaments simply cannot match. This guide covers easy woodworking projects, the essential tools, and finishing techniques so you can create heirloom-quality holiday decor on a budget.
Simply put, you can make beautiful wooden Christmas decorations at home with basic tools like a saw, sander, and drill. Start with simple projects like wood slice ornaments or painted signs, and finish them with a quality sealant so they last for years.
Key Takeaways
- DIY wooden Christmas decorations are budget-friendly, customizable, and perfect for personal gifting.
- Basic tools such as a jigsaw, sander, and drill handle nearly all beginner projects.
- Wood slice ornaments and painted plaque signs are the easiest projects to start with.
- Wooden Christmas decorations last for decades when you seal them properly.
- Pine, cedar, and birch are the best woods for lightweight, aromatic holiday decor.
Why Wooden Christmas Decorations Make Perfect DIY Projects
Wood has a natural warmth that fits perfectly with the holiday season. When you craft your own pieces, you control the size, shape, color, and finish. You also skip the mass-produced look that fills big-box store shelves every fall.
Wooden Christmas decorations are defined simply as handmade or crafted items made from wood that adorn your home during the holidays. They range from small ornaments and cutout figures to large centerpieces and yard displays, and they are prized for their durability and rustic character.
Handmade wooden decor also makes thoughtful gifting. A personalized ornament or a custom sign turns into a keepsake that friends and family will display year after year.
Here are a few reasons this hobby is worth picking up:
- Cost-effective: A single board can make multiple decorations for just a few dollars.
- Endlessly customizable: Stain, paint, carve, or burn designs to match any theme.
- Durable: Wood outlasts plastic and glass decorations by decades.
- Family-friendly: Older kids can help with sanding, painting, and gluing.
- Sustainable: Use reclaimed pallet wood or scrap lumber to reduce waste.
- Gift-ready: Handcrafted pieces make memorable presents for neighbors and coworkers.
According to the National Retail Federation, holiday retail sales routinely top $900 billion, making it the biggest shopping season of the year. Making your own decor lets you keep more of that money in your pocket while creating something unique.
Plus, woodworking is a proven stress reliever. The focus required to cut, sand, and assemble keeps your mind engaged and your hands busy, which makes the whole process feel like a holiday tradition in itself.

What You Need to Begin Making Wooden Christmas Decorations
You do not need a full workshop to get started. In fact, most beginner projects require fewer than ten tools. The key is choosing the right wood and the right saw for your skill level.
Start with softwoods like pine, cedar, or birch plywood. They are lightweight, easy to cut, and take paint and stain well. Hardwoods like oak look beautiful but require more effort to shape, making them better for experienced builders.
| Tool | Best For | Skill Level |
|---|---|---|
| Jigsaw | Curved cutouts like snowmen and stars | Beginner |
| Circular saw | Straight cuts and sheet goods | Intermediate |
| Orbital sander | Smoothing edges and surfaces | Beginner |
| Drill | Hanging holes and pilot holes | Beginner |
| Hot glue gun | Assembling small parts | Beginner |
This tool setup covers about 90 percent of the projects in this guide.
Beyond tools, you will want these supplies on hand:
- Pine boards, birch plywood, or pre-cut wood slices
- Wood glue and carpenter’s glue for joints
- 180-grit and 220-grit sandpaper
- Acrylic craft paint in red, green, white, and metallic tones
- Wood stain or clear sealant for a finished look
- Twine, ribbon, or wire for hanging
- Stencils and painter’s tape for clean designs
Warning: Always wear safety glasses and a dust mask when cutting and sanding wood. Sawdust and flying debris are the most common causes of workshop injuries, even for experienced makers.
How to Make Rustic Wood Slice Ornaments
Wood slice ornaments are the gateway project for most beginners. They look professional, take about thirty minutes each, and use minimal supplies. You can buy pre-cut slices online or at craft stores, or cut your own from a fallen branch.
Here is the simple process:
- Sand each slice with 180-grit paper until smooth.
- Drill a small hole near the top edge for the hanger.
- Paint a design on the face using acrylic paint and a fine brush.
- Let the paint dry completely, then add a layer of sealant.
- Thread twine or ribbon through the hole and tie a secure knot.
Design ideas that look great on slices:
- Snowflakes in white or silver
- Reindeer faces with tiny antlers
- “Merry Christmas” lettering in black or red
- Simple trees or stars with glitter accents
- Family names or monograms for a personal touch
If you want a truly rustic look, leave some pieces unfinished and only add a coat of clear matte sealant. The natural grain and bark edges give each ornament a one-of-a-kind texture that pairs well with farmhouse-style trees. For a more polished look, paint the entire surface with a solid color before adding your design.
Tip: Use a stencil or painter’s tape for crisp lettering on small surfaces. Freehand lettering takes practice, and stencils give you a professional look on your first try.
Building a DIY Wooden Christmas Tree Centerpiece
A wooden Christmas tree centerpiece draws the eye without overwhelming the table. This project uses progressively smaller wood discs stacked into a tree shape. You can also build one from a single sawtooth-shaped plank if you prefer a flat, modern silhouette.
For the stacked version, follow these steps:
- Cut or buy wood discs in sizes from 6 inches down to 2 inches.
- Drill a small hole through the center of every disc.
- Stack them on a dowel rod from largest to smallest.
- Glue each layer in place or leave them loose for easy storage.
- Top with a small wooden star and add battery-operated fairy lights.
This project works well with birch or pine slices. Birch has smooth bark that looks great natural, while pine takes paint well if you want a colorful tree.
Styling options to make it your own:
- Stain the slices in different shades of green for a modern look
- Leave them natural and decorate with tiny ornaments
- Add a wooden base for extra stability
- Wrap the dowel in twine for a rustic touch
- Use gold or silver paint on the edges for a glam feel
You can scale this project up or down to fit your space. A small version on a side table uses just five discs, while a large version can anchor a buffet or entryway table. According to the American Christmas Tree Association, around 30 million households put up a real tree each season. A wooden version gives you the same festive silhouette with zero cleanup and no pine needles to vacuum.
Creating Wooden Snowmen and Reindeer Cutouts
Cutout decorations are a favorite among DIYers because they make a big visual impact. You can trace a template onto plywood, cut it out with a jigsaw, and paint it in a single afternoon. These pieces work indoors or outdoors, depending on the finish you choose.
Snowman cutouts are simple to make:
- Draw or print a snowman template and trace it onto plywood.
- Cut along the outline with a jigsaw, keeping a steady pace.
- Sand the edges to remove splinters and round the corners.
- Paint the body white, then add a black top hat and orange nose.
- Add a scarf detail with red or green acrylic paint.
Reindeer cutouts follow the same process. The main difference is the shape and the paint colors. Use brown for the body and face, a red nose if you want a Rudolph nod, and dark brown for the antlers.
To keep the design balanced, keep the legs short and wide so the piece stands without support. If you plan to hang it, drill a hole behind the head area where the hanger will not show.
Choosing the right material for cutouts makes a big difference:
| Material | Pros | Cons |
|---|---|---|
| Plywood | Lightweight, stable, affordable | Edges can splinter |
| MDF | Smooth surface, easy to paint | Heavy, not weather-resistant |
| Solid pine | Durable, natural grain, easy to cut | More expensive, can warp |
For outdoor displays, use exterior-grade plywood and a weatherproof sealant.
Painting and Personalizing Wooden Christmas Signs
Plaque signs are the easiest way to add a custom message to your holiday decor. You can paint a quote, a family name, or a simple greeting on a cut plank and display it on a mantel, door, or shelf.
Start with a pre-cut wooden plaque from the craft store, or cut a 1×6 pine board to your preferred length. Sand the surface smooth, then apply a base coat in a color that matches your room.
Personalization ideas that always win:
- Family last name with a Christmas tree silhouette
- Short phrases like “Joy” or “Noel” in large stenciled letters
- Painted holly sprigs in each corner
- “Merry Christmas” in contrasting black or white
- Monograms surrounded by small dots and painted stars
For a clean finish, use a pencil line to guide your lettering. Center the text by measuring the board and marking the midpoint. Painter’s tape keeps paint lines crisp and prevents bleed.
You can also use a wood-burning tool to personalize signs. Pyrography creates a rich, dark line that looks especially elegant on light woods like birch and maple. If you are new to wood burning, practice on scrap wood first and keep your strokes slow and steady. According to the Association for Creative Industries, the crafting industry generates over $40 billion in annual sales, and personalized wood decor remains one of the fastest-growing categories.
Tip: Distress your sign with 120-grit sandpaper after the paint dries. Sand the edges and corners lightly to create a vintage, farmhouse-style finish that sells well at holiday craft fairs.

How to Seal and Protect Your Handmade Christmas Decorations
Sealing is the step most beginners skip, and it is the one that separates a one-season decoration from a family heirloom. A good sealant locks in paint, prevents moisture damage, and keeps wood from cracking over time.
| Finish | Best Use | Drying Time |
|---|---|---|
| Polyurethane | Indoor pieces needing a tough clear coat | 4-6 hours |
| Polycrylic | Fast-drying projects with low odor | 1-2 hours |
| Danish oil | Natural look that soaks into the grain | 24 hours |
Sponsored / affiliate links. As an Amazon Associate I earn from qualifying purchases. I may earn additional commission from eligible campaigns.