How To Make An Outdoor Wooden Christmas Tree (Diy Guide)
Making an outdoor wooden Christmas tree involves cutting wood pieces into tree shapes and assembling them. It’s a rewarding DIY project that adds unique charm to your yard during the festive season. This guide will walk you through the process step-by-step.
What is an Outdoor Wooden Christmas Tree?
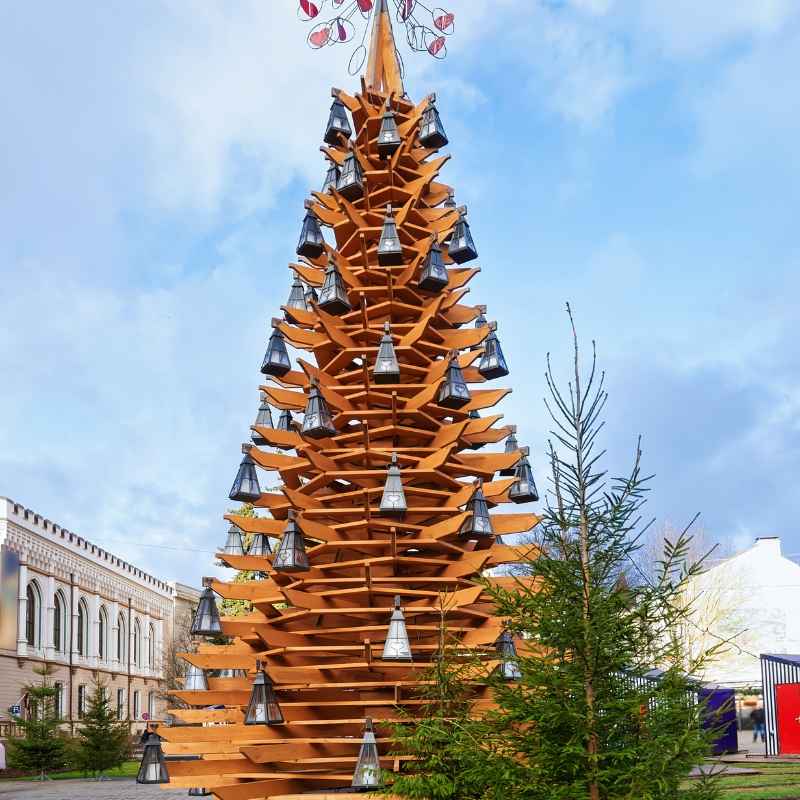
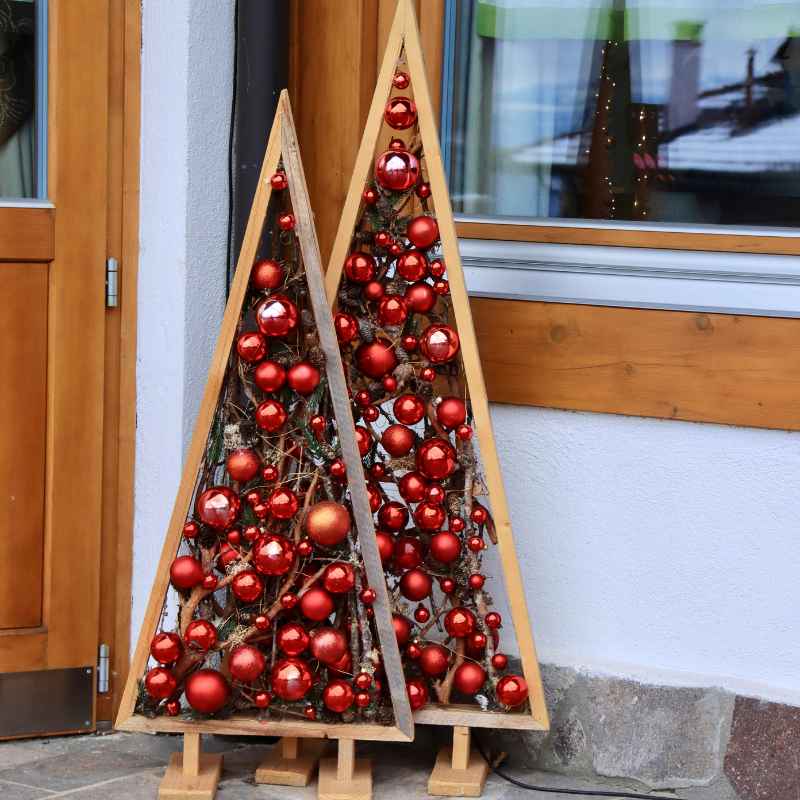
An outdoor wooden Christmas tree is a decorative structure. It is made from wood. People build it for holidays.
It sits outside your home. It can be a simple shape or quite detailed. It often uses planks or small logs.
These are arranged to look like a Christmas tree. It’s a rustic and charming alternative to real or artificial trees.
These trees bring a festive feel to gardens, yards, or porches. They are built to withstand weather. They use durable wood.
They can be painted or left natural. Some people add lights or ornaments. This makes them even more special.
They are a way to express holiday spirit outdoors.
Why Build One? The Charm of DIY Outdoor Decor
Building your own outdoor wooden Christmas tree is special. It’s more than just decoration. It’s about creating something unique.
It shows your personal style. You can make it fit your yard perfectly. It can be as tall as you like.
Or it can be small and cozy. You choose the wood. You choose the style.
It’s a great family activity. Everyone can help. Kids can paint.
Adults can cut and build. It makes holiday memories. It’s also often more budget-friendly.
You use materials you might already have. Or you can buy affordable wood. It’s a sustainable choice too.
You can reuse it for years. It’s a lasting piece of holiday decor.
My First Outdoor Wooden Tree: A Tale of Enthusiasm and a Wobbly Branch
I remember my first attempt clearly. It was a crisp autumn day. The leaves were turning bright colors.
I wanted our yard to feel festive early. I saw a picture online of a tall, stacked wooden tree. It looked amazing.
I grabbed some scrap lumber from the garage. I had a rough plan in my head. It seemed easy enough.
I cut out several triangular shapes. Then I tried stacking them on a central pole. The problem was my cuts weren’t quite straight.
The second piece didn’t sit flat on the first. It tilted oddly. Then the third piece was even worse.
By the time I got to the top, the whole thing looked like it was about to fall over. I felt a wave of frustration. It didn’t look anything like the picture!
I learned then that precision matters. Even for a rustic look. That wobbly branch taught me a lot.
Choosing Your Wood Wisely
Wood Type Matters: For outdoor trees, pick wood that lasts. Cedar, redwood, or treated pine are good choices. They resist rot and bugs.
Untreated pine can work. But you’ll need to seal it well. Avoid particleboard or MDF.
They don’t do well in rain or snow.
Wood Thickness: Thicker wood makes a sturdier tree. For smaller trees, 1-inch thick boards are fine. For larger ones, 2-inch thick lumber is better.
It won’t warp as easily. It can hold paint or lights better too.
Wood Finish: You can paint your tree. Or use a wood stain. A good outdoor sealant is essential.
It protects the wood from moisture. It keeps your tree looking good for longer. Bright colors make it festive.
Natural wood tones are also lovely.
Types of Outdoor Wooden Christmas Trees
There are many ways to make these trees. Some are very simple. Others are more complex.
The style you choose depends on your skill. It also depends on the look you want. Let’s look at a few popular types.
Stacked Plank Trees
This is a common and easy style. You cut wooden planks into different sizes. They are usually triangles or trapezoids.
You stack these pieces. They get smaller as they go up. Often, they are attached to a central wooden post.
This post acts as the trunk. It holds the branches together. You can use scrap wood for this.
It’s a great way to use up leftover lumber.
Pallet Wood Trees
Pallets are readily available. They offer a rustic, weathered look. You can take apart a pallet.
Then use the boards to create your tree. You can cut the boards into triangles. Or arrange them in a layered effect.
This style often looks very charming. It has a natural, aged appearance. It’s a very popular DIY choice.
Ladder Trees
Some people use old wooden ladders. They decorate the ladder itself. They wrap it with lights.
Or hang ornaments from the rungs. It’s a very simple approach. You don’t need to cut much wood.
It already has a tree-like shape. It’s a quick way to get outdoor holiday decor.
3D Wooden Trees
These trees have more depth. They are built with multiple layers. Or they are constructed to be freestanding.
Imagine two large wooden triangles. They are joined at a right angle. Then smaller triangles are added.
This creates a full, three-dimensional look. These can be more involved to build. But they are very striking.
Quick Scan: Popular Wood Types for Outdoor Trees
Cedar: Naturally rot-resistant. Smells nice. Good for durability.
Redwood: Similar to cedar. Very durable. Looks beautiful.
Treated Pine: Affordable. Protected against rot and insects. Needs sealing.
Untreated Pine: Cheapest option. Must be sealed thoroughly. Less durable than others.
Scrap Wood/Pallet Wood: Eco-friendly. Can have unique character. Needs careful inspection and preparation.
Planning Your Project: Design and Materials
Before you grab your tools, plan! This saves time. It also prevents mistakes.
Think about the size. Where will it go in your yard? Will it be against a fence?
Or in the middle of the lawn? Measure the space. This helps decide the height and width.
Sketch out your design. A simple drawing helps. It shows the shape.
It helps estimate how much wood you need. Consider your skill level. Are you a beginner?
Or do you have some woodworking experience? Choose a design that matches. Simple stacked triangles are great for beginners.
A 3D tree might need more skill.
Make a list of materials. You’ll need wood. You’ll also need screws or nails.
Wood glue is helpful. Outdoor paint or sealant is important. You might need a saw.
A drill is useful. Safety gear like gloves and glasses is a must.
Step-by-Step: Building a Simple Stacked Plank Wooden Tree
This guide focuses on a common stacked plank design. It’s manageable for most DIYers. You can adapt it to your liking.
Step 1: Gather Your Materials
For a medium-sized tree (about 5-6 feet tall):
- Several wooden boards. You can use 1×6 or 1×8 lumber. You’ll need enough to cut about 10-15 pieces. These will be your “branches.”
- One sturdy wooden post for the trunk. A 2×2 or 2×4 works well. About 6-8 feet long.
- Exterior wood screws (various lengths, e.g., 1.5-inch and 2.5-inch).
- Exterior wood glue (optional, but adds strength).
- Sandpaper (medium and fine grit).
- Exterior wood sealant, primer, and paint (your choice of color).
- A way to secure the tree in the ground. A metal stake or concrete base works.
Step 2: Cut Your “Branches”
This is where you create the tree shape. You’ll cut several planks. Each plank will be a “branch” layer.
They need to get smaller as they go up. You can cut them into triangles. Or just cut them into shorter lengths.
Option 1: Triangle Shapes
For a classic look, cut each plank into a triangle. If you’re using a 1×8 board that’s 4 feet long, you can cut it into a large triangle. You’ll need a jig or a miter saw for accurate angles.
Measure and mark your triangles carefully. Make sure they are all the same shape for each layer.
Option 2: Simple Plank Layers
This is easier. Cut your boards into decreasing lengths. For example:
- Bottom layer: 3 feet long
- Next layer: 2.5 feet long
- Next layer: 2 feet long
- And so on, until you have a top piece about 1 foot long.
You’ll want maybe 5-7 layers. You can also cut these planks at an angle on the ends. This gives a tapered look.
Aim for consistency in your cuts for each layer.
DIY Tree Dimensions (Example)
This is for a 6-foot tree using 1×6 boards:
- Base Layer: 5 feet long
- Layer 2: 4.5 feet long
- Layer 3: 4 feet long
- Layer 4: 3.5 feet long
- Layer 5: 3 feet long
- Layer 6: 2.5 feet long
- Top Piece: 2 feet long
Adjust these lengths based on your desired width and height. Ensure each layer is wider than the one above it.
Step 3: Sand the Wood
Once all your pieces are cut, sand them. Use medium-grit sandpaper first. This smooths out rough edges.
Then use fine-grit sandpaper. This makes the surface feel nice. Smooth wood takes paint better.
It also prevents splinters when you handle it.
Step 4: Assemble the Tree
You have your trunk post. You also have your branch pieces. Now you attach the branches to the post.
Mark the Trunk: Lay your trunk post flat. Decide where each branch layer will go. Mark them on the post.
Space them out evenly. Ensure the largest branches are at the bottom. The smallest are at the top.
Leave enough space between layers.
Attach the Branches: For each layer, place the branch piece against the trunk post. Make sure it’s centered. Use wood glue for extra strength.
Then, drive screws through the branch piece into the post. Use two screws for each branch piece. Ensure the screws are long enough.
They should go into the post well. Don’t let the screw heads stick out too much.
Placement: You can attach them straight out. Or you can angle them slightly downwards. This can make it look more natural.
Work from the bottom up. Make sure each layer is level before screwing. Check that it’s centered.
It can be tricky to get it perfect.
Attaching Branches: Tips for Stability
Pre-Drill Holes: Drill pilot holes in the branch pieces. This prevents the wood from splitting. Especially important with thinner wood.
Use a Level: Make sure each branch is level before you screw it in. This ensures a balanced look.
Overlap: For a fuller tree, you can slightly overlap the branches. Make sure they still look like a cohesive tree shape.
Consider a Base: If you aren’t anchoring it in the ground, a sturdy base is vital. A wide, heavy base keeps it from tipping.
Step 5: Finishing Touches
Now that your tree is assembled, it’s time to finish it. Apply a coat of exterior primer. Let it dry completely.
Then apply your chosen exterior paint. Two coats are usually best for good coverage. Make sure to paint all sides.
Even the back and edges.
Once the paint is dry, apply an exterior wood sealant. This is crucial for outdoor durability. It protects against rain, sun, and snow.
Follow the product instructions carefully. Allow ample drying time.
Step 6: Securing Your Tree
This is a very important step for safety. You don’t want your tree to blow over. Especially on a windy day.
You can use a metal ground stake. Drive it deep into the ground. Then attach the bottom of your trunk post to the stake.
Make sure it’s very secure.
Another option is to put the trunk post in a large bucket. Then fill the bucket with concrete. Let it cure fully.
This creates a heavy, stable base. Ensure the tree is upright before the concrete sets.
Ornamenting Your Wooden Tree
Lights: Use outdoor-rated LED Christmas lights. Wrap them around the branches. You can string them vertically too.
Solar-powered lights are a great option for less hassle.
Ornaments: Choose ornaments that can withstand the weather. Wooden ornaments, metal stars, or shatterproof balls work well. Avoid delicate glass ornaments.
You can also paint designs directly onto the wood.
Topper: Don’t forget a star or angel for the top! A painted wooden star is a perfect match.
Real-World Context: Where This Tree Shines
These wooden trees are fantastic for many outdoor spaces. Think about your porch. A small, tabletop wooden tree looks lovely there.
It adds a festive welcome. Or place a larger one in your front yard. It’s visible from the street.
It greets visitors.
Backyards are also perfect. Imagine a tall tree near a patio. You can decorate it with lights.
It creates a magical evening scene. Some people even build them in their garden beds. They become a focal point among plants.
Consider the elements. Is your area very windy? Choose a sturdy design.
Anchor it well. Is there a lot of rain? Use good quality sealant.
Protect your wood well.
The key is placement. Where will it be seen most? Where will it be safe from damage?
Think about sunlight. Will it be in direct sun all day? This can fade paint faster.
Or will it be in shade? The wood might stay damp longer.
What This Means for Your Yard
An outdoor wooden Christmas tree means more curb appeal. It shows you embrace the holiday spirit. It’s a unique decoration.
It stands out from typical plastic or inflatable decor. It can become a family tradition. You can decorate it differently each year.
When is it normal? If it looks a bit rustic, that’s normal. Wood has natural variations.
Small knots or grain patterns add character. If it’s slightly tilted, maybe that’s its charm! However, if it looks like it’s about to collapse, that’s not normal.
When should you worry? If the wood is showing signs of rot. Or if it’s very wobbly.
If screws are coming loose. If paint is peeling badly. These mean it needs maintenance.
Or maybe it’s time for a new one. Regular checks are good. Look for damage after storms.
Quick Fixes and Tips for Longevity
Wood needs care, especially outside. If you see a loose screw, fix it. If paint starts to chip, touch it up.
A fresh coat of sealant each year can help. This adds a protective layer. It keeps the wood from drying out or getting waterlogged.
Consider removing it during the off-season. Store it in a shed or garage. This protects it from harsh weather.
It can extend its life considerably. If you live in a very damp climate, extra sealing is wise. You can even paint the cut ends of the wood.
These are often the most vulnerable spots.
Frequently Asked Questions About Outdoor Wooden Christmas Trees
What kind of wood is best for an outdoor Christmas tree?
The best woods are naturally resistant to rot and insects. Cedar, redwood, and cypress are excellent choices. Treated pine is also a good option, as it’s chemically protected.
Untreated pine can work, but it requires thorough sealing and likely won’t last as many seasons.
How do I make my wooden tree more stable in the wind?
Stability is key. Ensure you anchor the tree securely to the ground with a strong stake. For larger trees, consider a concrete base for the trunk.
You can also make the base wider and heavier. Proper anchoring prevents it from tipping over in strong winds.
Can I use a regular saw to cut the wood for my tree?
Yes, a standard handsaw can work for basic cuts. However, a miter saw or circular saw will make cleaner, straighter cuts much faster. This is especially helpful if you’re making angled cuts for a tapered look.
Always use safety gear when operating any saw.
How should I attach the wooden branches to the trunk?
The most common method is using exterior wood screws. Pre-drilling pilot holes helps prevent the wood from splitting. You can also use wood glue for extra strength before screwing.
Ensure the screws are long enough to penetrate the branch and anchor firmly into the trunk post.
What type of paint or finish is best for an outdoor wooden tree?
Always use exterior-grade paint and sealants. These products are designed to withstand UV rays, moisture, and temperature changes. A good quality exterior primer is also recommended before painting.
A final clear sealant over the paint will provide extra protection.
Can I add lights and ornaments to my wooden tree?
Absolutely! Use outdoor-rated LED lights that are safe for the elements. For ornaments, choose weather-resistant options like shatterproof balls, wooden decorations, or metal figures.
Avoid delicate glass ornaments that could break in the cold or wind.
Bringing Festive Cheer Outdoors
Creating your own outdoor wooden Christmas tree is a joyful endeavor. It connects you to nature and the holidays. It’s a project that can be simple or complex.
It’s a chance to be creative. Your finished tree will add unique charm. It will be a focal point in your yard.
Enjoy the process. Enjoy the results for years to come.
Sponsored / affiliate links. As an Amazon Associate I earn from qualifying purchases. I may earn additional commission from eligible campaigns.