Proven Tricks to Stop Chair Mat Sliding
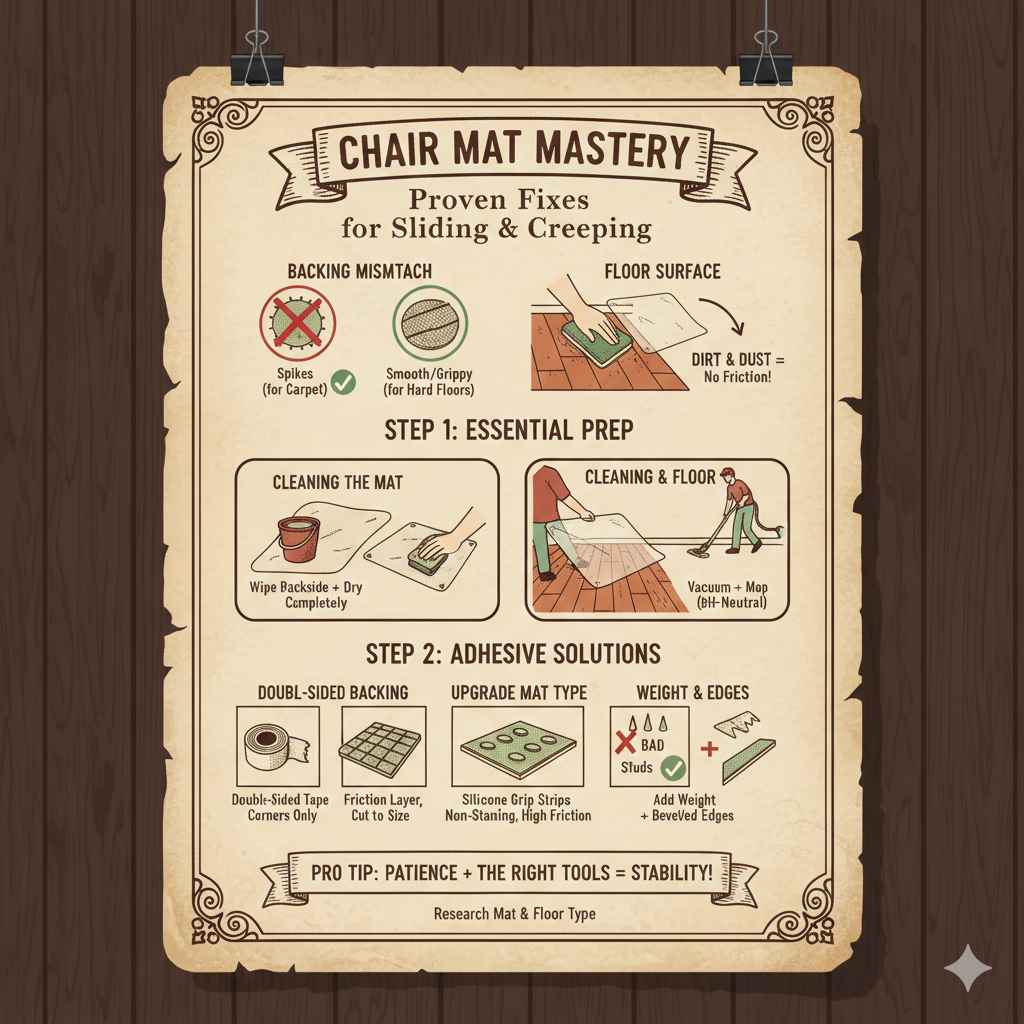
To stop your chair mat from sliding, use double-sided carpet tape, non-slip rug pads cut to size, or specialized silicone grip strips. For hardwood floors, ensure the mat’s backing is clean and switch to a mat designed for hard surfaces if the current one has aggressive spikes. These simple fixes restore stability immediately.
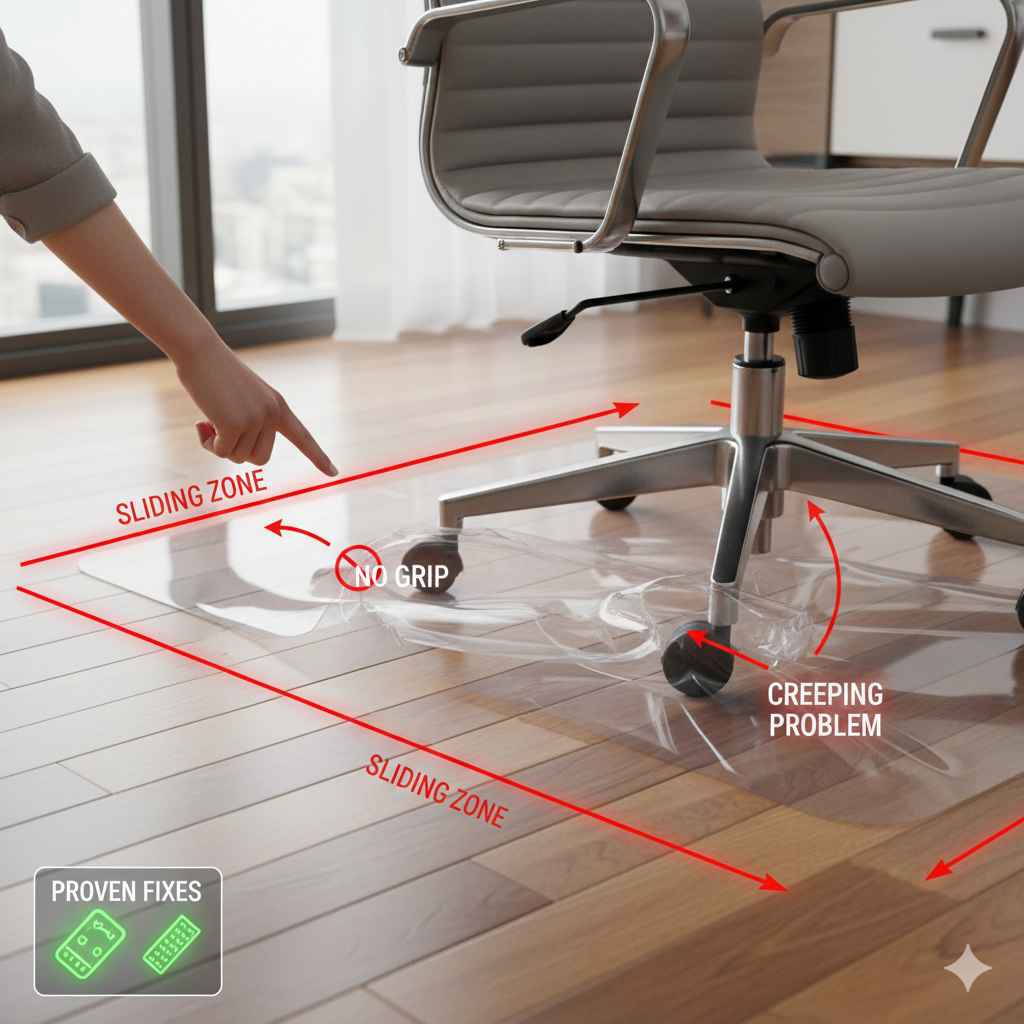
Welcome! If you’re finding that your office chair mat seems to have a mind of its own, constantly creeping across your nice floor, you are not alone. This happens to almost everyone who uses a rolling chair on a hard surface like wood or tile. It is frustrating because you lose focus when you have to constantly kick the mat back into place. Don’t worry; this common home office issue has simple, reliable fixes that anyone can do. We are going to walk through the best, most affordable ways to lock that mat down so you can roll smoothly and safely.
Why Do Chair Mats Slide? The Science Behind the Movement
Understanding why your mat moves is the first step to fixing it permanently. Chair mats typically slide for one of two main reasons: the backing material and the floor surface type.
The Backing Material Mismatch
Most chair mats come with two types of backing:
- Spike Backing (For Carpet): These have small, sharp teeth meant to grip thick carpet fibers. If you use these on a hardwood floor, the spikes can’t dig in. Instead, they act like tiny, smooth runners, making the mat slide easily with every push of your chair.
- Smooth/Grippy Backing (For Hard Floors): These are designed to stay put using friction. However, if your floor is dusty, slightly waxed, or if the mat is thin plastic, even this grip can fail over time.
Floor Surface Issues
Hard floors, like hardwood, laminate, or polished concrete, offer very little natural resistance. Rolling a chair transfers kinetic energy horizontally, and without anything anchoring the mat down, it simply moves in the direction of the force. Dirt, dust, and spills also reduce the friction needed to keep it stable.
Step 1: The Essential Preparation—Cleaning for Maximum Grip
Before trying any special product, you must ensure the mat and the floor are perfectly clean. This might sound basic, but it solves the problem more often than people realize. Dirt acts like ball bearings between the mat and the floor.
Cleaning the Mat Surface
- Remove the Mat: Carefully lift the entire chair mat and move it away from the desk area.
- Wipe Down the Back: Use a mild solution of dish soap and warm water. Do not use harsh ammonia-based cleaners, as these can sometimes degrade plastic over time. A slightly damp, clean microfiber cloth is best.
- Rinse Gently: Wipe the soap residue away with a cloth dampened only with water.
- Dry Completely: This is crucial. Let the mat air dry completely. If you put a wet mat down, the trapped moisture will create a suction/slip cycle that is hard to break.
Cleaning the Floor Area
You need a clean canvas beneath the mat. Dust and oils build up quickly on hardwood floors, even if they look clean to the naked eye.
- Vacuum the area thoroughly to pick up grit and loose dust.
- Mop or wipe the area using a gentle cleaner appropriate for your specific flooring type (e.g., a pH-neutral cleaner for hardwood). Check out resources from the Environmental Protection Agency (EPA) for suggestions on effective, safe cleaning solutions for home surfaces.
- Allow the floor to dry completely before placing the mat back down.
Step 2: Proven Adhesive Solutions to Lock It Down
If cleaning isn’t enough, you need external adhesion. These methods add the grip that your mat is missing. Remember: these solutions work best for mats used on hard floors, not soft carpets.
Trick 1: Double-Sided Carpet Tape (The Heavy Hitter)
This is one of the most popular and reliable methods. Carpet tape is designed to hold fabric items down, but the strong adhesive works wonders on smooth plastic and wood.
When to Use This: If your mat is small, or if you only need to stop movement at the corners.
How to Apply Carpet Tape:
- Purchase a reputable, strong, double-sided mounting tape. Look for varieties labeled “heavy-duty” or “carpet mounting.”
- Cut the tape into small strips—about 3 inches long. You generally only need four strips, one for each corner.
- Peel the backing off one side of the tape and stick it firmly to the underside corners of the chair mat.
- Peel the remaining backing off the exposed side of the tape.
- Carefully position the mat and press down firmly across the whole surface, especially over the taped areas, to ensure good adhesion to the floor.
Trick 2: Anti-Slip Rug Pads (The Gentle Barrier)
If you have ever secured an area rug, you know the power of a rubberized or vinyl rug pad. These work perfectly for chair mats, providing a wide area of friction.
When to Use This: When you want to secure the entire mat surface gently without using strong glue.
The beauty of this method is that rug pads are usually breathable and don’t leave heavy residue. You can often buy them pre-cut or easily trim them with sturdy scissors or a utility knife.
Choosing the Right Rug Pad:
| Pad Type | Best For | Pros | Cons |
|---|---|---|---|
| Open Mesh/Netting | Quick, temporary grip on smooth floors. | Allows air circulation; easy to trim. | Less effective on very slick surfaces. |
| Solid Rubber/Vinyl | Maximum, long-term grip on smooth floors. | Excellent friction and staying power. | May leave slight transfer marks over many years; requires cutting to size. |
| Felt/Rubber Combination | Good cushioning with added grip. | Offers comfort and stability. | Can be thick, raising the mat slightly. |
Trick 3: Non-Staining Silicone Grip Strips
If you are nervous about adhesives sticking directly to your finished wood floor, look for thin, adhesive-backed silicone strips. These are often used for securing small electronics or cabinet linings.
Silicone creates excellent surface tension and friction without being overly sticky like duct tape adhesives. Simply cut small 2-inch squares and place them near the edges and center of the mat’s underside.
Step 3: Addressing the Mat Itself (Material Swapping)
Sometimes, the problem isn’t the floor—it’s the mat you bought. If you bought a cheap mat or one meant for carpet, no amount of tape will make it work perfectly long-term. It may be time to invest in the right tool for the job.
Check the Backing: Spike vs. Stud
If you must use a mat with some form of grip structures on the bottom, ensure they are “studs” rather than “spikes.”
- Spikes: Long, sharp tines meant for deep carpet pile. Avoid these on hardwood floors entirely.
- Studs: These are small, blunt bumps or nodules. While they can scratch floors if too sharp, they offer better surface contact than spikes on hard floors and may provide just enough initial resistance to help a friction-based mat stay put.
Upgrade to a Hard Floor Specific Mat
When shopping for a replacement, look specifically for mats labeled for “Hardwood Floors,” “Tile,” or “Laminate.” These mats usually feature a heavy, textured vinyl or polycarbonate base designed for maximum friction on non-carpeted surfaces. They are often heavier and less likely to shift due to their inherent weight.
Step 4: Using Weight and Surface Modifiers for Stability
Sometimes, a little extra weight or surface modification can make a world of difference in keeping the mat flat and still.
Add Weight to the Edges
If the edges are lifting or the mat slides when you roll toward the boundary, adding weight right on the edge can press it down, increasing friction locally.
Safe Weight Options:
- Heavy books stacked temporarily near the mat edges (if practical for your setup).
- Pieces of heavy-duty rubber trim (the kind used for garage door weather stripping) secured with very low-tack tape along the perimeter on the floor side.
Consider Edge Ramps or Beveled Edges
A major cause of movement is when the mat slightly lifts at the entry point. If your mat is thick and flat-edged, it can act like a small ramp that your chair wheel catches, pushing the whole mat forward. Look for mats with smooth, gently sloped or beveled edges. This allows your chair wheels to transition onto the mat without catching the edge and initiating a slide.
For more information on choosing durable and safe office furniture accessories, checking industry guidelines from sources like the Nolo Legal Resource Center on Workplace Safety can offer helpful context on minimizing tripping and movement hazards in your workspace.
Troubleshooting Sliding: A Quick Comparison Table
When troubleshooting, it helps to quickly compare the primary fix against the potential cause. Use this table to diagnose your situation quickly:
| Observed Problem | Likely Cause | Recommended Solution |
|---|---|---|
| Mat slides immediately when I sit down. | Floor/Mat backing is smooth and too clean (no friction). | Apply double-sided carpet tape at corners. |
| Mat drifts slowly over several days of use. | Dust buildup underneath or mild slippage. | Clean the floor and mat thoroughly (Step 1). |
| Mat constantly bunches up at one corner. | The wrong backing type (spikes on wood). | Switch to a hard-floor specific mat or cover the bottom with a rug pad. |
| The edge of the mat is catching my wheel and pushing the mat. | Thick, blunt mat edge/ramp effect. | Ensure mat has a beveled edge or secure the edges firmly with tape. |
Advanced Material Tips: Alternatives to Traditional Plastic Mats
If you are looking for a long-term, aesthetically pleasing solution that resists sliding naturally, traditional thin PVC mats might not be your best friend. Consider these highly durable alternatives:
Polycarbonate Mats
Polycarbonate is far more rigid and heavier than standard vinyl (PVC). Because it holds its shape better and has more inherent weight, it is naturally less prone to skittering around the floor. If you often roll aggressively, polycarbonate is an excellent, though slightly more expensive, upgrade.
Natural Rubber Base Mats
Some premium chair mats now incorporate a layer of heavy, non-slip natural rubber on the bottom, similar to high-quality kitchen mats. These mats essentially have the “rug pad” built-in. They offer superior stability and often last much longer than traditional plastic mats.
The DIY Felt Underlayment (For the Woodworker)
If you enjoy a little DIY, you can create your own friction layer. Purchase a piece of dense, thin felt material (like padding used under laminate flooring) that matches the size of your mat.
- Lay the felt down on the clean floor area.
- Place the chair mat (spike-side down, if applicable) directly onto the felt.
- The dense fibers of the felt grab the spikes (if present) or the plastic texture (if smooth) and keep the felt itself anchored to the wood floor through friction. This creates a fantastic, stable cushion.
Safety First: Why Stopping the Slide Matters
It’s easy to dismiss a sliding mat as just annoying, but it can pose a real safety hazard, especially if you are working from home or have pets running nearby. As a woodworker, I always preach safety, and this applies to home office setup too!
Trip Hazards
When the mat bunches up, the edges can lift unexpectedly. If you get up quickly, you might catch your foot on the raised edge, leading to a nasty fall, especially near furniture.
Wheel Control and Injury Risk
If you lean heavily to one side to reach something, and the mat slides out from under you, you could lose balance quickly. For users with mobility challenges, this instability is a significant risk. Securing the mat ensures that when you push off, you move with the chair, not against a stationary object.
Frequently Asked Questions (FAQ)
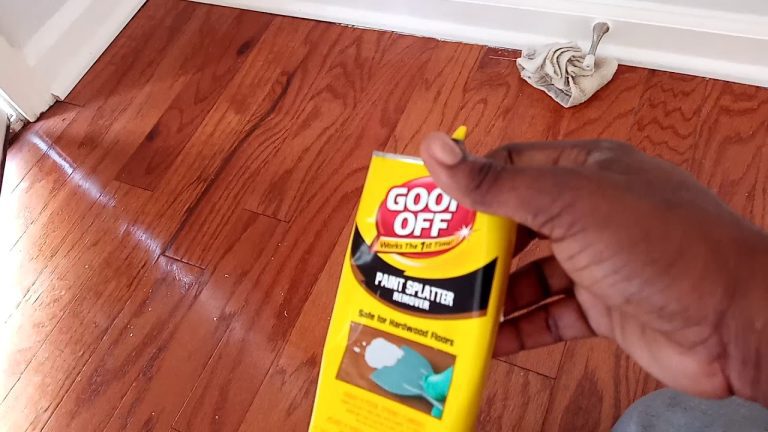
Q1: Can I use Goo Gone or WD-40 to stop my mat from sliding on wood?
A: No, absolutely not. These products are solvents or lubricants. They will make your wood floor slicker and could permanently damage the finish, potentially dissolving the plastic of your chair mat itself. Stick to double-sided tape or rubber pads.
Q2: My mat has spikes on the bottom, but it still slides on my low-pile carpet. What should I do?
A: Even on carpet, sliding can happen if the carpet is very dense or if the mat is very light. First, clean the carpet fibers thoroughly. Second, apply only four small dots of temporary adhesive tape (like painter’s tape—low tack) right where the center of the mat naturally rests when you are sitting. This minor anchoring should stop the creeping without damaging the carpet.
Q3: Will placing the mat on a different type of floor protector (like vinyl sheeting) help?
A: Yes. If you place a sheet of vinyl flooring roll protector (often available at hardware stores) over your hardwood floor first, and then place your chair mat on top of that, the vinyl sheeting acts as a grip layer between the wood and the mat. This works well because vinyl sheeting is typically heavier and has better grip on wood than a light plastic chair mat.
Q4: How often do I need to reapply the anti-slide tape?
A: If you use high-quality, permanent mounting tape, it should last for several years. If you use removable carpet tape, you may need to check it every 6 to 12 months, especially if you move the mat frequently or clean underneath it.
Q5: Is it safe for my hardwood floor finish if I use strong double-sided tape?
A: If you use strong mounting tape, there is a risk of removing the finish when you pull the mat up. To mitigate this, always use heat (like a hairdryer on low) to gently warm the adhesive before peeling the mat up slowly. This softens the glue, making removal much safer for the floor underneath.
Q6: Are there mats designed specifically for rolling chairs on radiant heated floors?
A: Yes. Radiant heated floors can sometimes cause standard PVC mats to warp or off-gas. Look for chair mats explicitly labeled as “Heat Resistant” or made from thicker, high-quality polycarbonate. These materials handle temperature fluctuations better and usually have built-in non-slip features designed for these conditions.
Conclusion: Enjoy a Stable and Productive Workspace
Dealing with a sliding chair mat is one of those small frustrations that chips away at your daily productivity and comfort. But as we’ve covered, the fix is almost always straightforward and surprisingly affordable. Remember, the core of the solution lies in maximizing friction: either by thoroughly cleaning the surfaces, adding a gripping intermediary layer like a rug pad, or securing the corners with reliable, temporary adhesives like carpet tape.
Take an afternoon to try the cleaning steps first. If that doesn’t completely solve it, move on to applying four pieces of strong double-sided tape to the underside. By taking these proactive steps, you are transforming your workspace from a source of annoyance into a stable, secure base where you can focus on what truly matters. You’ve got this! A stationary mat means a smoother workday ahead.