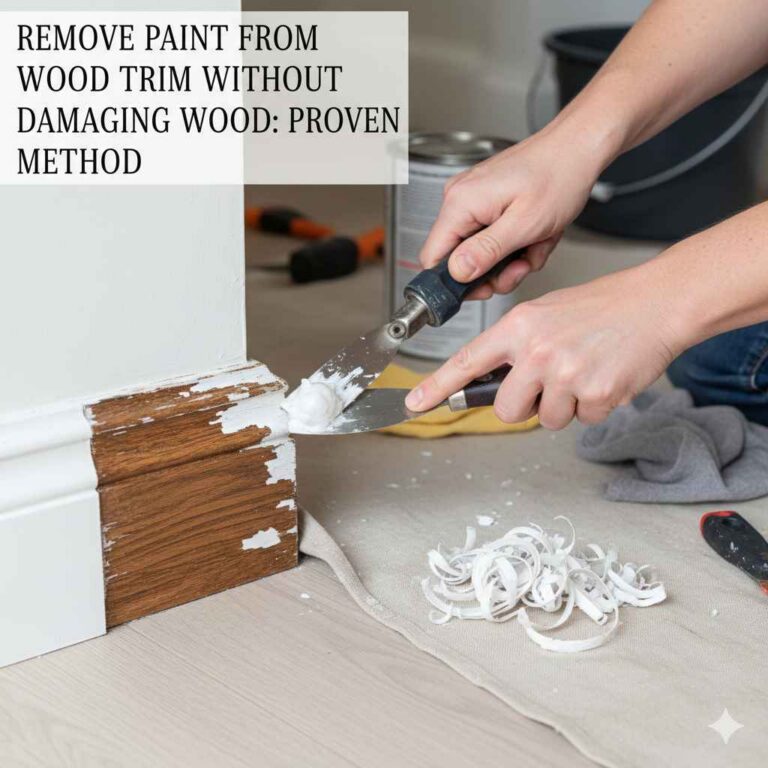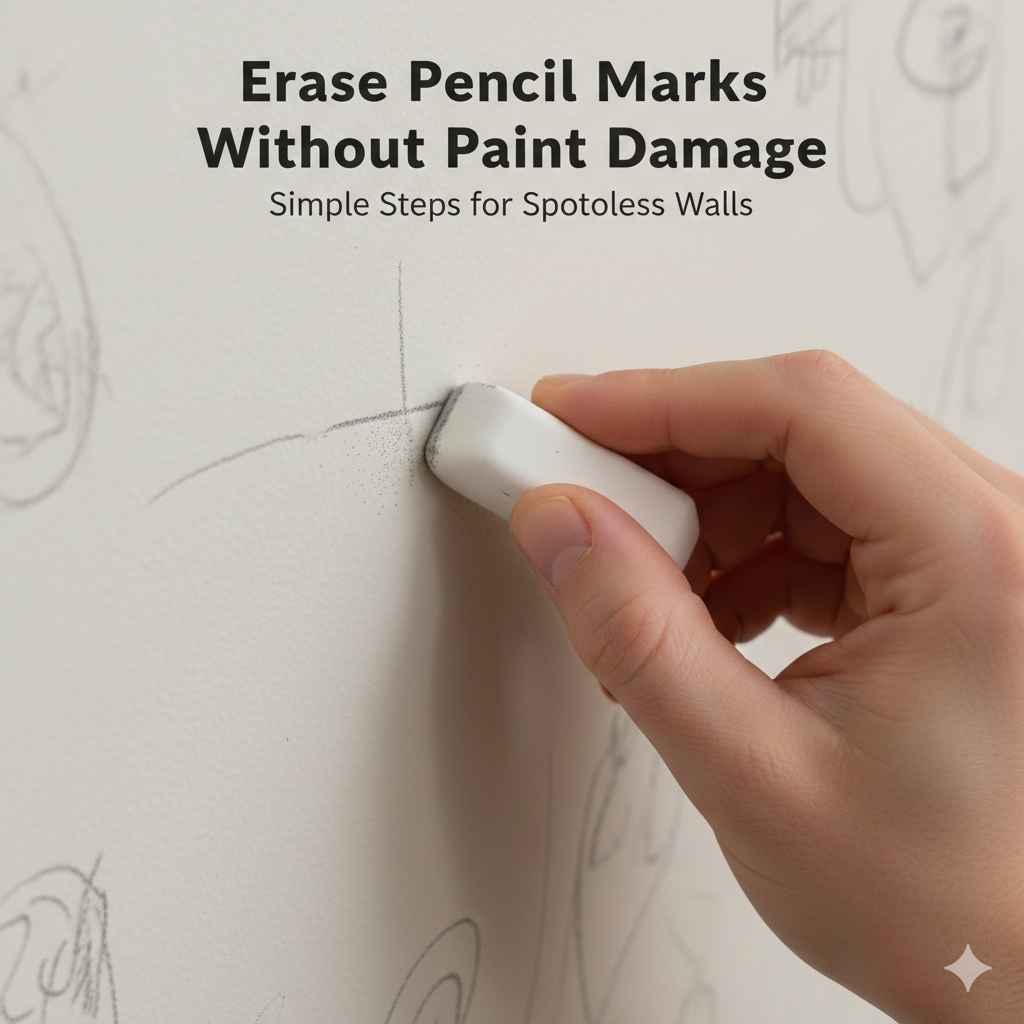
Remove Pencil Marks From Walls Without Paint Damage: Simple Steps
It’s super common to find little ones’ artwork, or maybe even your own, on the walls. Trying to Remove Pencil Marks From Walls Without Paint Damage can seem tricky at first. Paint can be delicate, and you want to clean up those marks without ruining the finish. But don’t worry! This guide breaks down the process into easy steps so you can get your walls looking clean again. We’ll look at the best methods and materials to erase those pencil lines. Let’s get started!
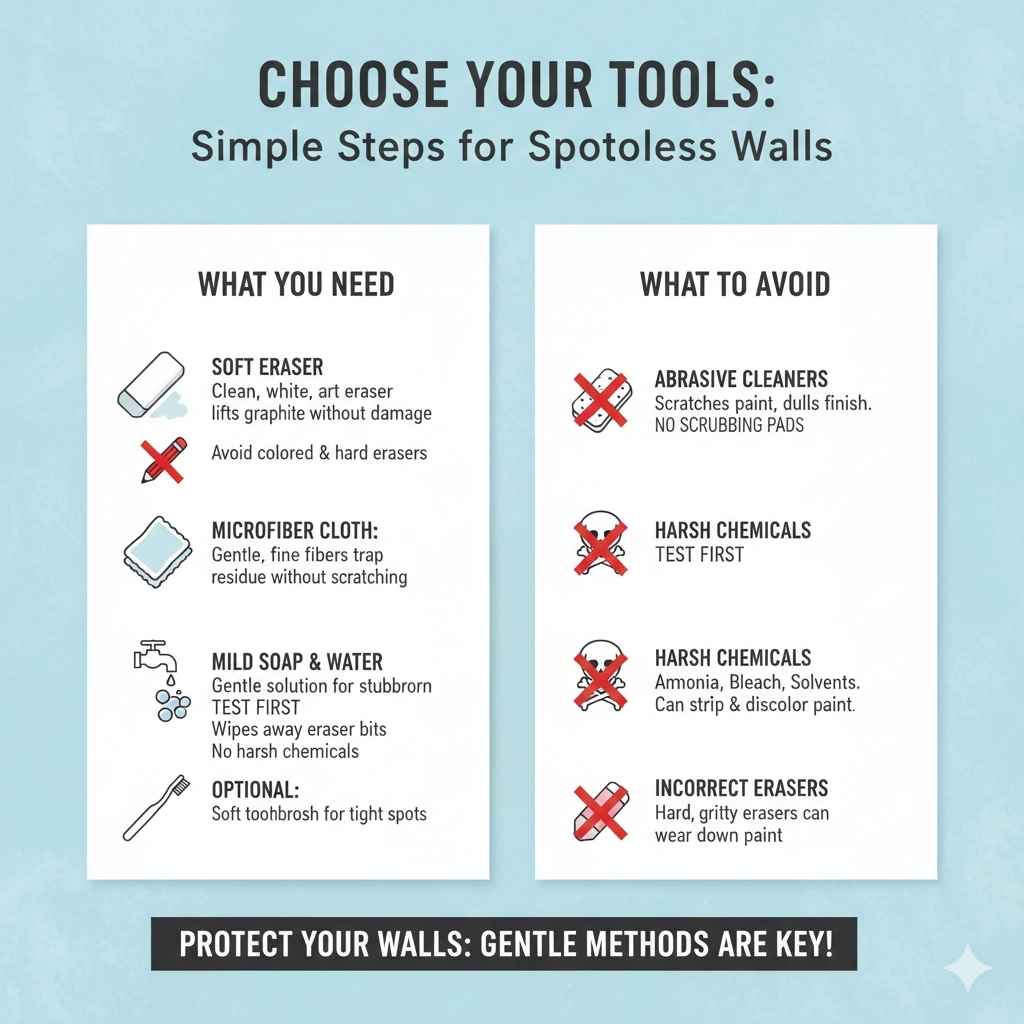
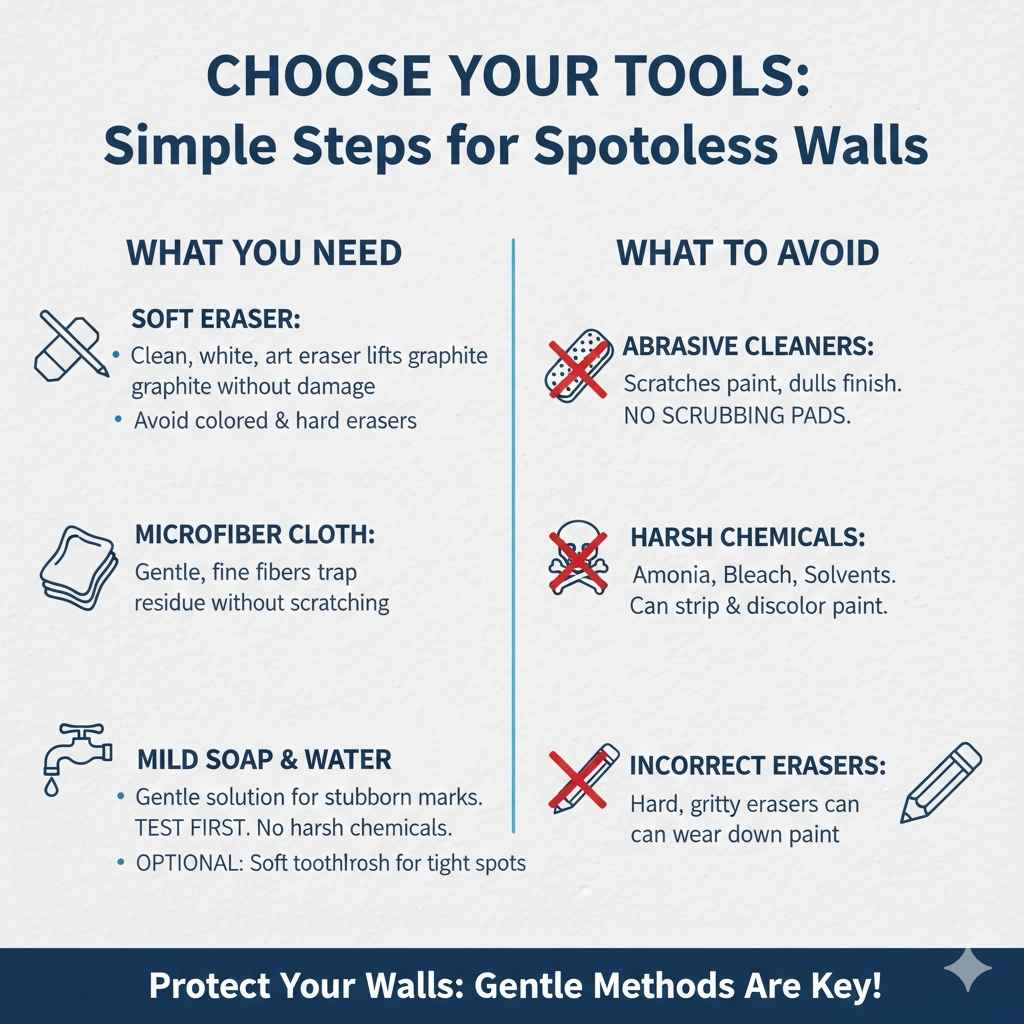
Choosing the Right Cleaning Tools
Before you begin, gather your supplies. The right tools make a big difference when you want to remove pencil marks from walls. Using the wrong things can cause more harm than good, like scratching the paint or making the marks spread. You’ll want to avoid anything too harsh or abrasive. Instead, choose items that are gentle yet effective. This section focuses on what you’ll need and why these choices work best for your walls. It also covers what you should absolutely avoid.
What You Need to Get Started
Soft Eraser: A clean, white, art eraser is your best friend. These erasers are designed to lift marks without damaging paper. On walls, they work the same way. Avoid colored erasers, as they can sometimes leave a mark. The goal is to lift the graphite without leaving any traces behind. Choose a new one or make sure your current one is clean and free of debris.
Choosing a soft eraser is crucial because of its gentle nature. Hard erasers, often found on the end of pencils, are made of coarser materials designed for tougher erasing tasks. When used on painted walls, these harder erasers can cause scratches or remove the paint itself. A soft eraser, however, is much more pliable and designed to lift graphite without abrasion. These specialized erasers are typically made from vinyl or rubber and are free of harsh chemicals that could damage the paint.
Microfiber Cloth: A microfiber cloth is another must-have. These cloths are made of tiny fibers that grab onto dirt and dust without scratching surfaces. They’re great for wiping away eraser residue and cleaning the wall gently. The cloth will help keep the area clean and prevent any smudging as you work. The fine weave of a microfiber cloth is gentle on painted surfaces.
Microfiber cloths are extremely effective because of their construction. The fine fibers have a large surface area compared to traditional cloths. This construction allows them to pick up and trap dirt, dust, and eraser residue with ease. Unlike coarse cloths, microfiber cloths are made of synthetic materials like polyester and nylon, making them incredibly soft. They’re designed to lift particles without scratching or damaging the paint. These cloths work really well with any cleaning solution, maximizing their cleaning power.
Mild Soap and Water: Sometimes, pencil marks leave a slight stain. For those, a little bit of mild soap and water can work wonders. Use a gentle soap, like dish soap, and mix it with warm water. Test the solution in an inconspicuous area of your wall first. This will ensure it doesn’t affect the paint. Make sure your cleaning solution does not include harsh chemicals.
Mild soap and water is an essential part of the cleaning kit because it can address any stubborn marks or residue that remain after erasing. Mild soaps are generally pH-neutral, which means they won’t strip away the protective oils or pigments in the paint. By using a gentle soap, you minimize the risk of damaging the wall’s finish. Test the solution in a small, unseen spot first to guarantee it won’t discolor or otherwise damage the paint.
Optional Items: Consider a soft toothbrush (for tight spots) and a gentle cleaning solution. Always test the solution in a hidden spot first to make sure it doesn’t harm the wall. Also, consider the type of paint on your wall.
Other useful items include a soft toothbrush, perfect for getting into corners or around molding, and a mild, gentle cleaning solution for more stubborn marks. Always test any cleaning solution in a hidden part of the wall first to ensure it won’t affect the paint. This is especially important as paint types vary greatly. Some paints are more sensitive than others. Always use gentle products and test them first. Avoid using anything abrasive or strong chemicals. The right tools will help you achieve the best results.
What to Avoid
Abrasive Cleaners: Avoid anything that could scratch the paint. This includes abrasive cleaners, like those containing bleach, or scrubbing pads. These cleaners can damage the surface of your walls. Even something that feels soft to you can cause scratches that are visible in the right light. When you’re trying to remove pencil marks from walls without paint damage, the goal is to be gentle.
Abrasive cleaners contain small particles that are designed to remove dirt and grime through friction. While this can be effective on tougher surfaces, these particles can be very damaging to painted walls. The surface of the paint can be worn away, causing scratches, dulling the finish, and even removing the color. Using abrasive cleaners is likely to cause noticeable damage, and will make your walls look worse. Avoid anything with a grit, such as scouring pads or abrasive cleaning solutions.
Harsh Chemicals: Strong chemicals like ammonia, bleach, or solvents should be avoided. These chemicals can strip the paint, causing discoloration or even dissolving it. Using these harsh chemicals can also pose health risks, so it’s best to avoid them when you can. They’re simply too risky to use on walls.
Harsh chemicals are designed to break down dirt and grime, but they can be aggressive and harm the paint on your walls. Ammonia and bleach, for example, can dissolve or discolor paint, causing permanent damage. Solvents can also strip away the paint, leaving your walls looking patchy and uneven. Moreover, the fumes from these chemicals can be dangerous to your health, potentially causing respiratory issues. Choosing gentle cleaning methods is always best for both your walls and your well-being.
Incorrect Erasers: Avoid using erasers with harsh chemicals or hard erasers. The pink erasers commonly found on pencils are designed for rougher materials and can damage your walls. You don’t want to use anything that will wear down your paint.
Erasers that contain harsh chemicals, or erasers that are harder in texture, can damage your wall. Harder erasers have a gritty texture that can scratch the surface of your paint. Erasers made for the end of pencils might be too harsh for a painted wall. Using the wrong eraser can make the problem worse, adding scratches that are very difficult to fix. Always choose a soft, clean, art eraser that will gently lift the pencil marks without damaging the paint.
Step-by-Step Guide to Removing Pencil Marks
Now, let’s look at how to actually remove those pencil marks. This guide is easy to follow and uses safe methods to protect your paint. It breaks down the process into simple steps that even beginners can follow. This will help you get the best results while keeping your walls looking great. The goal is to get those walls clean without harming them. Here’s how.
Initial Assessment and Preparation
Assess the Marks: Before doing anything, take a good look at the pencil marks. Note how dark they are, and how widespread they are. This will help you choose the best cleaning method. For example, light marks will usually come off easily. Deeper marks might need a bit more attention.
Taking a look at the pencil marks before you start is an important step. Assess the situation to decide on the best approach. Are the marks light and barely visible, or are they dark and heavy? The age of the marks can also play a role. Fresh marks are usually easier to remove. Understanding the nature of the marks will help you choose the right method. This will increase the chances of getting your walls clean without damaging the paint.
Gather Your Supplies: Have all your supplies ready. This includes your soft eraser, microfiber cloth, and a small bowl with the mild soap and water solution (if needed). Having everything within reach will keep things organized and make the cleaning process go much faster. Make sure you also have some clean water to rinse your cloth.
Having all the necessary supplies within easy reach is critical for a smooth cleaning process. This ensures that you can work quickly and efficiently without interruptions. This includes your soft eraser, a clean microfiber cloth, and a small bowl of mild soap and water (if you think you’ll need it). This setup will allow you to address the marks without having to search for the right tools. When you have everything ready, you can start the cleaning. It’s a simple thing, but it makes a big difference.
Test in an Inconspicuous Area: Before you start cleaning, test the eraser and cleaning solution in a hidden spot on your wall. Look at a place behind furniture or in a closet to make sure it doesn’t damage the paint. Wait a few minutes to see if any color comes off or if the finish changes. This will prevent any damage to your visible walls.
Testing your cleaning method in an inconspicuous area is a very important step. Different paints react differently to cleaners. Before applying any cleaner to a visible area, test it out on a small, hidden spot. If you’re using an eraser, rub it gently on a small part of the wall to see how the paint reacts. If you’re planning to use a solution, apply a small amount with a microfiber cloth. Wait to see if there is any change. This simple step can prevent any accidental damage.
Erasing the Marks
Gently Erase the Marks: Using a clean, soft eraser, gently rub over the pencil marks. Start with light pressure and increase it gradually if needed. Don’t press too hard, as this can damage the paint. The goal is to lift the graphite without harming the wall. The gentle approach will keep your paint safe.
Gently erasing the marks is the most important step. Hold the eraser at a slight angle and apply gentle pressure. It’s better to make several light passes than to press hard. Rub in a consistent direction and try not to rub the same spot too much. This helps prevent damage to the wall. Keep an eye on the eraser and brush away any graphite that accumulates. Working slowly and gently will ensure that you remove the pencil marks without damaging the paint.
Remove Eraser Residue: As you erase, the eraser will leave residue. Use your microfiber cloth to wipe away the eraser shavings. This will keep the area clean and let you see how well you’re removing the marks. Also, it prevents the residue from spreading and smudging the marks. Using the microfiber cloth is a key part of the process.
As you erase, the eraser will lift the graphite and create a residue that can make your walls look dirty. By using a microfiber cloth, you can easily remove this residue and see how well you’re doing. Wipe away the shavings frequently to keep the area clean. This is an important step. Doing this will keep your walls looking clean, and help you get the best results. The microfiber cloth will pick up the eraser residue without scratching the paint.
Repeat as Needed: If some marks remain, repeat the erasing process. Use a clean area of the eraser and wipe away the residue after each pass. Sometimes, it takes a few tries to completely remove the pencil marks. Go slow and be patient to protect your walls.
Sometimes, it takes more than one try to remove pencil marks from walls without paint damage. If some marks remain after the first round, repeat the erasing process. Use a clean section of the eraser each time you go over the marks, and wipe away the residue after each pass. Be patient and persistent. Some marks might need a little extra attention, but with patience and gentle cleaning, your walls will look their best.
Using Soap and Water (If Needed)
Prepare the Solution: Mix a small amount of mild dish soap with warm water in a bowl. You only need a few drops of soap. Stir until the soap is dissolved. Make sure the solution isn’t too soapy. If it’s too strong, it could remove the paint. The key is to create a solution that is gentle yet effective.
If you need to use soap and water, the preparation of the cleaning solution is critical. Use a mild dish soap that is gentle on surfaces. Mix a few drops of soap into a bowl of warm water and stir until the soap dissolves. Don’t use too much soap. A too-strong solution could damage the paint or leave a sticky residue. The correct ratio will help you clean your walls. It’s also important to have some clean water to rinse your cloth.
Dampen the Cloth: Dip your microfiber cloth into the soap solution and wring it out very well. The cloth should be damp, not wet. This will prevent water from seeping into the wall and damaging the paint. Wringing out the cloth well is important for a safe and effective clean.
The goal is to gently remove any remaining marks, not to damage the paint. Soak your microfiber cloth in the soap solution and squeeze out any excess water until the cloth is just damp. This helps to prevent water from dripping down the wall. If the cloth is too wet, it can damage the wall. Make sure the cloth is damp. This helps to clean the walls without leaving any marks or damaging the paint.
Gently Wipe the Area: Use the damp cloth to gently wipe the area where the pencil marks were. Don’t rub hard. Wipe in a circular motion, or in a single direction. This will help lift any remaining marks. This also reduces the risk of smearing or spreading the marks. This approach will protect your walls.
Gently wipe the area with the damp cloth. Use light pressure and wipe in a circular or linear motion to lift any remaining pencil marks and residue. The microfiber cloth should gently lift away any remaining marks. Avoid rubbing too hard, which could damage the paint. Make sure to wipe the area carefully. After cleaning, the wall should look cleaner, and you should not see any pencil marks.
Rinse and Dry: After wiping with the soap and water, use a clean, damp cloth to rinse the area. Remove any soap residue. Then, use a dry, clean microfiber cloth to dry the wall completely. This will prevent water spots and keep your walls looking great. Complete drying prevents streaks.
After wiping with the soap and water, the final step is to rinse and dry. Use a clean, damp cloth to remove any soap residue. Then, dry the wall with a clean, dry microfiber cloth. This will remove any soap or water spots. Make sure the wall is completely dry. This will help your walls look fresh, clean, and ready. This helps to make sure that the walls don’t have streaks.
Dealing With Stubborn Pencil Marks
Sometimes, pencil marks can be tougher to remove. This part gives you some additional tips for these tougher situations. These extra methods can help you with more stubborn marks that don’t come off easily. You’ll learn how to address tough stains without hurting your walls. It’s important to test anything new in an inconspicuous area before trying it on a visible part of the wall.
Extra Eraser Techniques
Try Different Eraser Types: Experiment with different types of erasers, like art gum erasers, which are more gentle. If one eraser isn’t working, try another. Keep in mind that the softer the eraser, the better it is for the wall. Sometimes, you need to experiment a little to find the right tool for the job.
There are many kinds of erasers, and some are better for specific types of marks. If a regular eraser isn’t working, try a different type. Art gum erasers are known for being gentler. They can be very effective at removing marks without damaging the paint. Experimenting with different types of erasers can help you find one that works without harming the walls. Always test a new eraser in an out-of-the-way spot first, just in case.
Use an Eraser Shield: If the marks are in a detailed area, like around a light switch, use an eraser shield. This will let you focus on the marks without affecting the surrounding paint. This is especially helpful if the marks are near any edges or trim. This adds a layer of precision to your work.
An eraser shield is a useful tool when you’re working on a wall with pencil marks. This shield allows you to target the marks precisely without accidentally touching other parts of the wall. This is a very useful technique if the pencil marks are near edges, around light switches, or near trim. The shield will help you focus your erasing efforts. This approach keeps the rest of the wall clean.
Combine Techniques: Try combining erasing with mild soap and water. Erase first to lift the bulk of the mark, and then use the soap solution to remove any remaining shadows. Always make sure to dry the wall afterward to prevent water damage or streaking.
For more stubborn marks, you might need to use a combination of techniques. Start by erasing the marks to remove as much of the graphite as possible. Then, use a mild soap and water solution to clean the area and lift any lingering shadows. It’s really important to dry the wall completely afterward, to stop water damage or streaking. This approach combines the advantages of different methods. It often helps to remove tough marks without damaging your walls.
When Soap and Water Isn’t Enough
Try a Magic Eraser (Carefully): Magic Erasers are great for tough stains, but use them gently. Test in a hidden area first. Magic Erasers are very effective. They can also be a bit abrasive, so you have to be careful when using them. They can sometimes remove paint if you press too hard.
Magic Erasers can be very helpful for removing tough pencil marks. However, these erasers are slightly abrasive, which means they can damage your paint if you aren’t careful. Always test the Magic Eraser in a hidden spot first to make sure it won’t affect your wall’s finish. Use it gently, with light pressure. The Magic Eraser is an effective tool if you treat it with care. Using this approach will help you clean your walls effectively.
Consider a Specialized Cleaner: If the marks are still there, look for a cleaner specifically made for removing crayon or marker. Always read the label and test the cleaner in an inconspicuous area. Some cleaners are designed for the paint on your walls. They are a good solution.
If you’ve tried the usual methods and the marks remain, you might need to try a special cleaner. Look for a product designed to remove crayons or markers. These cleaners are often made to remove stubborn stains. Always read the label carefully before using any product, and always test the cleaner in an out-of-the-way area first. Specialized cleaners are a good option. They can help you remove tough marks and keep your walls clean and undamaged.
Consult a Professional: If the marks are really bad, or if you’re concerned about damaging your paint, consider contacting a professional cleaner. They have the experience and products to get the job done without harming your walls. Professionals can help you when things get really difficult.
If the pencil marks are extensive, or if you’re worried about damaging your walls, the best option is to call in a professional. Professionals have special products and experience that help them remove marks safely. This will give you peace of mind. It’s also good to know that sometimes, a simple cleaning job turns into a painting project. Consulting a professional can save you a lot of time and potential problems. Getting expert help ensures the best results.
Preventing Future Pencil Marks
The best way to remove pencil marks from walls without paint damage is to prevent them in the first place. This section offers ideas on preventing pencil marks. It focuses on the importance of preparation and protection. This can reduce the time and effort you need to keep your walls looking fresh.
Protective Measures
Use Protective Barriers: Consider putting up clear panels or plexiglass in areas where artwork is likely. This gives a physical barrier between the walls and the pencils. This will protect your walls, and it’s super easy to clean.
One of the best ways to keep your walls free from pencil marks is to use protective barriers. Consider putting up clear panels or plexiglass in areas where kids or artists often draw. This can work near a desk or a play area. The clear panels create a physical barrier between the walls and the pencils, which makes the walls safe. They’re also easy to clean, and the walls underneath will stay clean. This approach is effective and simple.
Teach Children Proper Etiquette: Teach kids to draw on paper or a designated drawing surface. Have a conversation about where they can and can’t draw. Make it fun, and make it part of their understanding about boundaries. This sets them up for success.
Teaching children about drawing etiquette is crucial for preventing pencil marks on walls. Teach kids to draw only on paper or on a designated drawing surface, such as a whiteboard. Talk to them about where they can and cannot draw. Explain that walls are not drawing surfaces, but paper is. Make it a fun and educational discussion to help them understand boundaries. Teaching them proper behavior from a young age can help them learn good habits.
Choose Washable Paints: When painting, choose paints that are washable. This makes it much easier to clean pencil marks and other messes. Consider using satin or semi-gloss paints, which are more durable and easier to clean than flat paints. The right kind of paint makes a big difference in maintaining your walls.
The type of paint you choose for your walls can impact how easy it is to remove pencil marks. Washable paints, such as those with satin or semi-gloss finishes, are more durable and easier to clean. They provide a surface that’s designed to withstand some scrubbing. Flat paints, on the other hand, are more porous and can absorb marks. By choosing the right paint, you can make the process of removing pencil marks much simpler. This will reduce your cleaning efforts.
Creating a Drawing Space
Designated Art Area: Set up a dedicated art space where your kids can draw and create. Equip it with a drawing board, paper, and art supplies. A designated spot will keep their creativity in one area. This is a very positive way to manage the problem.
Creating a dedicated art space can help keep pencil marks off your walls. Set up a special area where children can draw and create. Include drawing boards, paper, and art supplies. The art space provides a designated area for artistic expression. This makes it easier to manage art activities. This area helps to keep art supplies organized, and encourages creativity. The art space will keep their artwork off your walls.
Supervision and Monitoring: Keep an eye on the drawing activities, especially with young children. This helps you to catch any stray marks before they become permanent. Also, keep the art supplies organized. Supervision is key to success.
Supervising drawing activities is an important step to prevent pencil marks. Keep a watchful eye, especially with young children. This allows you to catch any stray marks before they become permanent. Ensure that art supplies are used properly. This approach helps to encourage creativity while preventing marks on walls. Supervision can help to stop problems before they start.
Regular Cleaning Schedule: Make it a habit to regularly check your walls for pencil marks. Wipe them away as soon as you see them. This will prevent the marks from settling in. Regular cleaning prevents marks from being permanent.
Make it a habit to check your walls on a regular basis. You should check them for pencil marks. When you find marks, wipe them away immediately. Regular cleaning prevents marks from setting in. This easy habit helps to keep your walls looking great. Consistent cleaning makes the task much easier. It helps you keep your walls looking fresh.
Frequently Asked Questions
Question: What’s the best type of eraser to use?
Answer: A clean, soft, white art eraser is usually the best choice. These erasers are designed to lift pencil marks without damaging the paint.
Question: Can I use a regular pencil eraser?
Answer: It’s generally better to avoid regular pencil erasers, especially the pink ones. These erasers can be too abrasive and might scratch your walls.
Question: Will soap and water damage my paint?
Answer: Mild soap and water is usually safe. Test it first in a hidden spot to ensure it doesn’t discolor or affect your paint’s finish.
Question: What if the pencil marks are still there after erasing?
Answer: Try a combination of methods, like gently erasing, then wiping with a damp cloth and mild soap. You might need to repeat the process.
Question: Can I use a Magic Eraser?
Answer: Magic Erasers can work, but use them gently. They are slightly abrasive, so test them first and be careful not to scrub too hard.
Final Thoughts
Now you have a clear approach to Remove Pencil Marks From Walls Without Paint Damage. Knowing how to choose the right tools and materials, along with a step-by-step cleaning process, puts you in charge. Remember that gentle methods and being patient are key to getting the best results. Start by gathering your supplies and assessing the marks on your walls. Then, go with gentle erasing using a soft eraser, and wipe up the residue.
For tougher spots, a mild soap and water solution can work wonders. And don’t forget preventative steps, like a designated art space. So, the next time you spot pencil marks on your walls, you’ll know exactly what to do. You can easily clean up those marks, and keep your walls looking fresh. Good luck, and enjoy your clean walls!