Remove Super Glue From Plastic Lenses Safely: A Simple Guide
It’s frustrating when you accidentally get super glue on your plastic lenses. It seems like a sticky, messy problem, but don’t worry! Trying to Remove Super Glue From Plastic Lenses Safely can feel difficult because you might fear damaging your glasses or other items. This guide makes it easy. We’ll show you how to get rid of that glue without causing harm. We’ll explore some common solutions and provide a step-by-step method to help you get those lenses clean again.
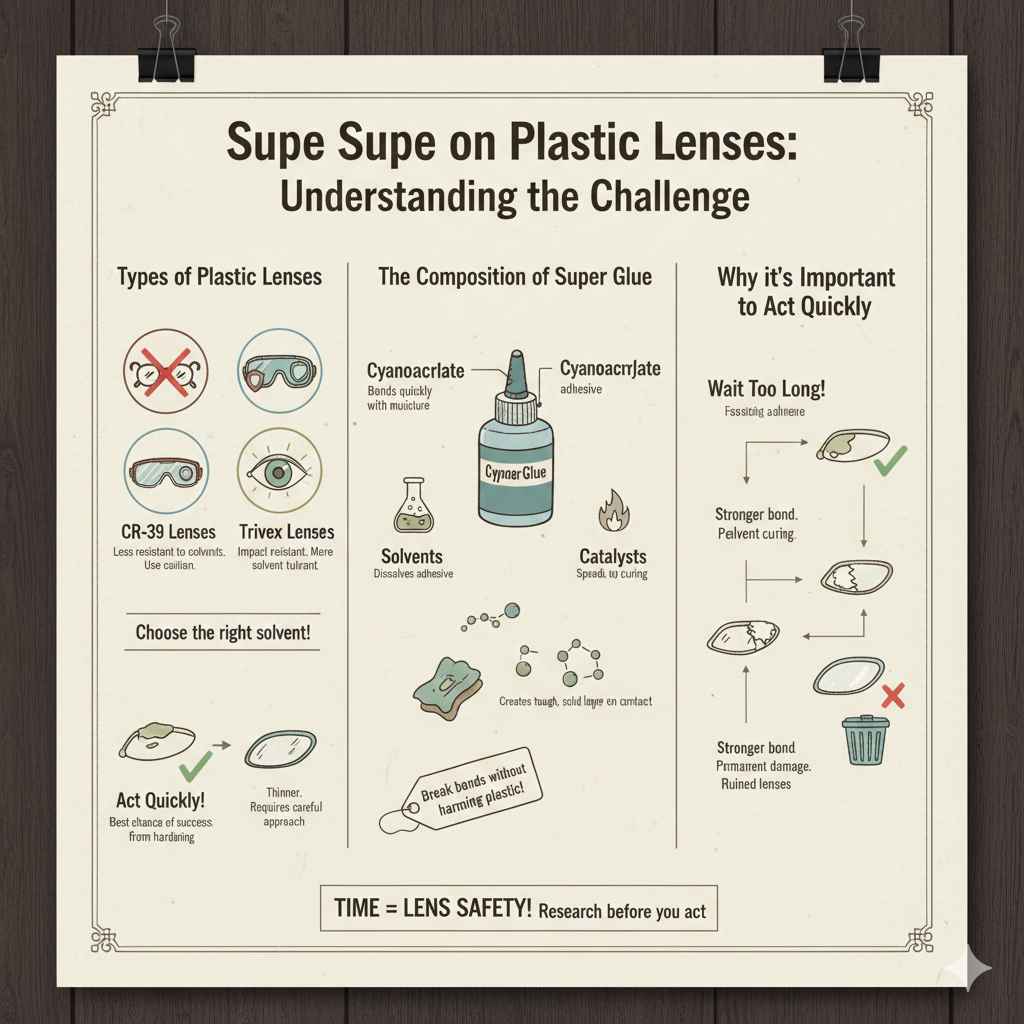
Understanding the Challenge: Plastic Lenses and Super Glue
Plastic lenses are everywhere, from eyeglasses to safety goggles. They’re strong, lightweight, and offer good vision correction. However, their material makes them sensitive to certain chemicals. Super glue, also known as cyanoacrylate adhesive, bonds very quickly and can be tough to remove without the correct approach. Trying to scrape or forcefully remove the glue can scratch or damage the lens, making things worse. The challenge lies in dissolving the glue without hurting the plastic. Knowing what to do can save your lenses, money, and time.
Types of Plastic Lenses
Different types of plastic lenses exist, and the method to Remove Super Glue From Plastic Lenses Safely might change slightly depending on the material. Common types include CR-39, polycarbonate, and Trivex. CR-39 is a basic plastic, while polycarbonate is known for its impact resistance. Trivex offers a balance of impact resistance and optical clarity. Before starting, it is useful to know the lens type to choose the best solvent and avoid damage.
- CR-39 Lenses: These are less resistant to solvents and can be easily damaged. Proceed with caution.
- Polycarbonate Lenses: Known for impact resistance, these can generally withstand more solvents.
- Trivex Lenses: Offers both impact resistance and optical clarity, usually resistant to common solvents.
- High-Index Lenses: Made to be thinner, these lenses require a more careful approach when removing super glue.
The variety in lens materials stresses the importance of understanding the best method for removing glue without damaging the lens. Different plastics respond differently to solvents and cleaning agents. Using the wrong products can cause permanent clouding or surface damage, making the lenses unusable. Always research the type of lens you have and use a testing method before starting the main procedure.
The Composition of Super Glue
Super glue is mainly composed of cyanoacrylate, a fast-acting adhesive that creates a strong bond upon contact with moisture. It sets rapidly, making it great for many tasks. However, its fast-drying nature also means it can be difficult to remove quickly, especially from plastic lenses. Cyanoacrylate molecules bond with the surface they touch, creating a tough, solid layer. When looking to Remove Super Glue From Plastic Lenses Safely, we must find a way to break these bonds without harming the lens material.
- Cyanoacrylate: The key ingredient forming the glue.
- Solvents: Often used to dissolve the adhesive bond, allowing removal.
- Catalysts: Sometimes added to speed up the curing process.
The speed at which super glue dries often leads to accidental spills or contact. Knowing its chemical composition lets you understand how to approach the removal process. Solvents, which are vital, must be used carefully, as they can also impact plastic materials. Choosing the right solvent is as important as the technique used. The wrong choice could easily ruin your lenses. A good understanding of the glue’s components will always help in finding the right solution.
Why it’s Important to Act Quickly
When super glue touches a plastic lens, prompt action is often helpful. The longer the glue stays, the stronger the bond becomes. Acting quickly gives you the best chance of successful removal without any damage. A quick response can prevent the glue from hardening completely, making the process less challenging. Early action improves the chance of getting rid of the glue effectively. It prevents the glue from setting too firmly, reducing the risk of lens damage.
Waiting too long can let the glue spread or bond more securely to the lens surface. Prompt action is useful, but the correct approach is essential. Starting the removal process too soon, without knowing the right methods, might also worsen the situation. It’s always better to take a few moments to choose the right approach for your lens type. The goal is to remove the glue efficiently while protecting your lenses.
Step-by-Step Guide to Safely Removing Super Glue
Removing super glue from plastic lenses requires patience and the right tools. Here is a simple, effective method to help you Remove Super Glue From Plastic Lenses Safely. This guide will provide detailed steps to make the process as easy as possible. This process is designed to minimize risk to the lenses while effectively dissolving the glue.
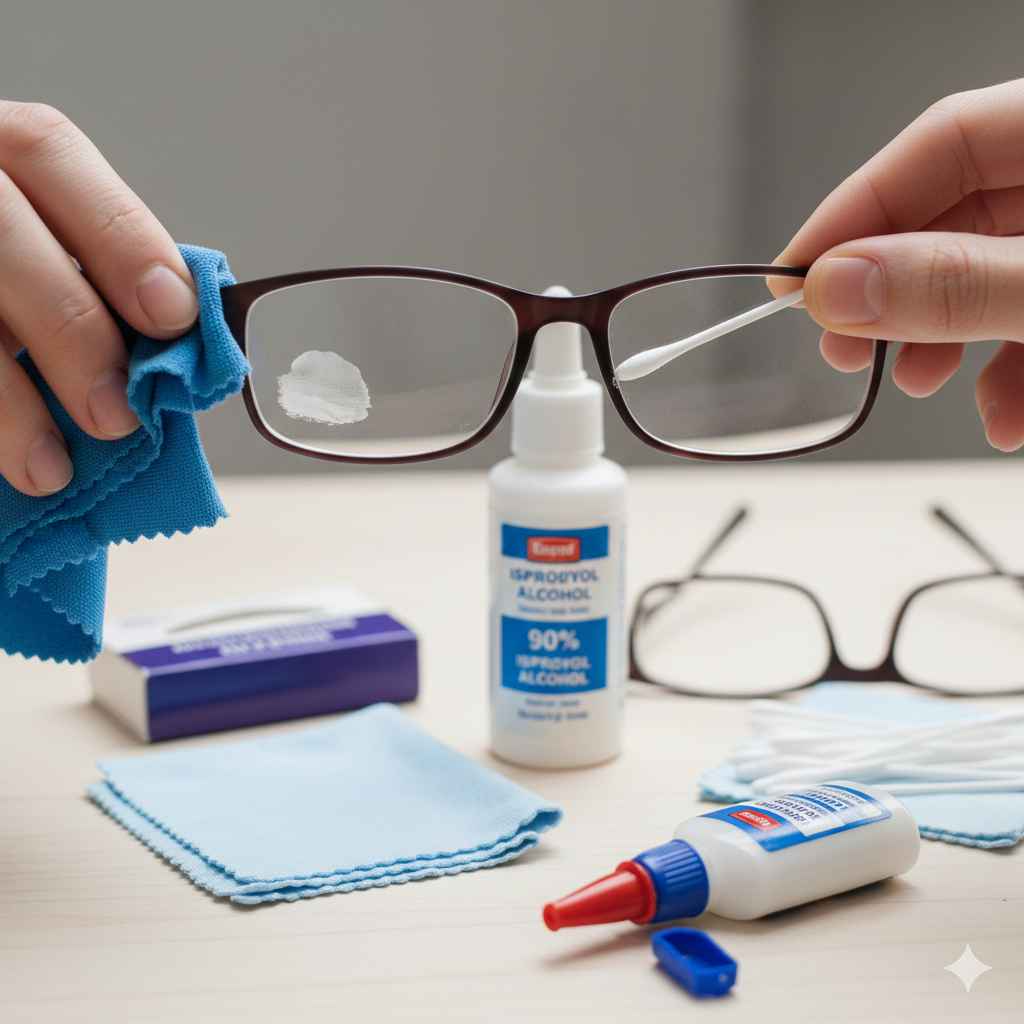
Gathering Your Materials
Before you start, collect the necessary supplies. Having everything ready saves time and ensures a smooth process. The items you’ll need are available and inexpensive. This preparation stage lets you work without stopping and ensures your focus remains on the glue removal process. Preparing your workspace reduces the chances of spilling or misusing chemicals, ensuring safety and efficiency.
- Warm Water: For softening the glue.
- Mild Soap: Dish soap works well to help loosen the glue.
- Soft Cloth: A microfiber cloth to wipe the lens.
- Cotton Swabs: For controlled solvent application.
- Acetone-based Nail Polish Remover: Test this on a small, hidden area of the lens first.
- Plastic Scraper (optional): Use this carefully, if needed, after softening the glue.
Make sure to have plenty of ventilation and eye protection during the process. Having the right tools at hand enables you to deal with the super glue effectively. Choosing the right tools can make the process simpler and reduce the risk of lens damage. When you have everything ready, you can start the process.
Preparation and Testing
Before using any solvent, always test it on a small, hidden area of your lens. This test will help you avoid accidental damage. Apply a small amount of the acetone-based nail polish remover (or other solvent) to a tiny area of the lens. Leave it for a few seconds, then wipe it off with a soft cloth. Check the area for any changes, such as cloudiness or melting. If no changes occur, you can proceed with confidence. This testing step is key to preserving your lenses.
Testing your lens on a small area first makes sure that the solvent doesn’t react poorly with the lens material. Not all plastic lenses respond the same to solvents, and testing can prevent irreversible damage. This testing phase lets you proceed with confidence. You can move forward if there are no negative reactions, knowing the process is safe for your lenses. This small step helps prevent possible lens damage. This step avoids serious damage to your lenses by ensuring the cleaning agent is safe.
Soften the Glue
Start by cleaning the lens gently with warm, soapy water. This removes any debris or dirt that might interfere with the removal process. Apply warm water and mild soap to the lens and clean the area around the glue spot. The goal is to soften the glue slightly before introducing the solvent. Gently wipe the lens with a soft cloth to make sure it’s clean and ready.
- Warm Water: Slightly softens the glue and prepares the surface.
- Gentle Soap: Works as a cleaning agent to eliminate dirt and debris.
- Microfiber Cloth: Use it to gently remove excess water and soap.
This first step is essential in preparing the lens for the solvent. The soap also creates a protective layer, reducing the chance of the solvent directly touching the lens material. Thorough cleaning also helps the solvent perform better by making sure it touches the glue surface directly. Remember to gently wipe away any excess water to avoid harming the lens surface. This first step can improve your success in removing the super glue.
Applying the Solvent
Carefully apply the acetone-based nail polish remover (or the solvent you’ve chosen) to the glue. Use a cotton swab to apply it directly to the super glue, trying to avoid contact with the rest of the lens. Let the solvent sit on the glue for a few minutes. Avoid soaking the entire lens; you only want the solvent to contact the glue. Monitor the glue to check if it’s softening or dissolving.
- Use a Cotton Swab: To control the application and apply to the glue.
- Avoid the Rest of the Lens: Minimize contact between the solvent and other lens areas.
- Wait for a Few Minutes: The solvent needs time to react with the glue.
Applying the solvent directly to the glue helps to make the process more efficient. The cotton swab allows you to target the glue without risking damage to the rest of the lens. Be patient and allow the solvent to do its job. Remember, the goal is to soften the glue, not to dissolve it quickly. This stage requires patience and careful monitoring to achieve the best results. You will want to check regularly to see if the glue is softening.
Gently Removing the Glue
Once the glue has softened, gently try to remove it. Use a soft cloth to wipe away the softened glue. If it doesn’t come off easily, apply a little more solvent and try again. If the glue is still difficult to remove, you can carefully use a plastic scraper. Be extremely careful not to scratch the lens surface. Avoid any sharp or abrasive tools that could damage the lens material. The key is to work gently, avoiding pressure.
- Soft Cloth Wiping: Use gentle wiping motions to remove softened glue.
- Additional Solvent: If the glue remains, apply more and try again.
- Plastic Scraper: Use with extreme caution and only if necessary.
The aim is to remove the softened glue without harming the lens surface. Remember, if the glue does not come off easily, pause and reapply the solvent. Avoid using force, and take your time. This step requires the most patience and care. It’s better to apply more solvent and wait than risk damaging the lens. Continue to wipe gently until all the softened glue is gone. This careful approach can help protect your lenses.
Final Cleaning and Inspection
Once the glue is gone, clean the lenses again with warm, soapy water. This helps to remove any solvent residue. Rinse the lenses thoroughly and dry them with a clean, soft cloth. Examine the lenses carefully under good lighting to make sure all the glue is gone. Ensure the lenses are clear, without any remaining glue or damage. If you see any remaining glue, repeat the process from the beginning.
- Rinse With Water: Remove any remaining solvent and soap residue.
- Dry With a Soft Cloth: Use a clean microfiber cloth.
- Inspect Closely: Ensure there is no glue or damage.
Cleaning and inspecting the lenses is the final step. It confirms that the glue is completely removed and the lenses are restored to their original state. Be thorough to ensure that no glue residue remains, which could impact vision. If you find any residue, repeat the process. Proper cleaning and inspection will guarantee clear lenses. The final inspection will ensure that your lenses are now clean and safe to use.
Alternative Solutions: Explore Different Methods
If the acetone-based nail polish remover doesn’t work, other solutions might help you to Remove Super Glue From Plastic Lenses Safely. Here are some alternatives that might be helpful. These options may offer a less harsh method for removing the glue. Always test any method on a small, hidden area first to ensure it won’t harm your lenses. If the first method doesn’t work, exploring other options can be very helpful.
Using Rubbing Alcohol
Rubbing alcohol, or isopropyl alcohol, is a common household item that can sometimes dissolve super glue. It is less harsh than acetone, making it a good choice for some plastic lenses. Apply a small amount of rubbing alcohol to the glue with a cotton swab. Let it sit for a few minutes, then try wiping the glue away with a soft cloth. Be patient and don’t rub too hard. It’s useful to avoid scratching the lens surface.
- Apply With a Swab: Place the rubbing alcohol carefully on the glue.
- Let It Sit: Let the alcohol work on the glue for a few minutes.
- Gently Wipe: Remove softened glue with a soft cloth, preventing scratches.
Rubbing alcohol can be a good option because it’s usually less damaging than acetone-based solvents. It may take more time and repeated applications. Always do a test before use. Rubbing alcohol offers an easy alternative when using harsher solvents could damage the lenses. This less-aggressive approach is beneficial for sensitive lens types. It may be the solution you need to remove that annoying super glue.
Utilizing Commercial Glue Removers
You can find commercial glue removers designed to remove super glue. These products are specially made to dissolve adhesives. Read the label carefully to confirm the remover is safe for plastic. Follow the instructions on the product label. Apply the remover to the glue, allow it to sit for the recommended time, and then wipe off. Commercial glue removers usually contain chemicals specially designed to break down the bond of the super glue.
- Read the Label: Ensure the product is plastic-safe.
- Follow Instructions: Adhere to the manufacturer’s directions.
- Apply and Wait: Allow the product to work before wiping.
Commercial products can offer a straightforward solution. These removers often have specific ingredients designed to break down super glue bonds. The instructions should be followed precisely to obtain the best outcomes and avoid damage. Commercial products can also save time and effort. Using such products often simplifies the glue removal process. This offers an efficient way to remove super glue.
The Freezer Method
Freezing the item with the super glue can sometimes help. Place the plastic lens in the freezer for about 30 minutes. The cold temperature can make the glue brittle, possibly making it easier to remove. After freezing, remove the lens and attempt to gently chip or scrape off the glue. Be very careful to avoid scratching the lens surface. This method works by making the glue less adhesive.
- Freeze for 30 Minutes: Place the lens in the freezer.
- Remove Carefully: Handle gently after freezing.
- Gently Scrape: Try to remove the glue with care.
This method is worth trying if other approaches don’t work. The cold temperature may shrink the glue, making it easier to separate from the lens. Ensure the lens is at room temperature before handling. This method is effective for specific types of glue. It’s an approach to think about when other methods have failed. This is a gentle approach.
Using a Razor Blade (with extreme caution)
Using a razor blade is a more advanced technique. This should only be used as a last resort. If other methods have failed, and you have experience, you can try using a new, sharp razor blade. Hold the blade at a shallow angle to the lens and gently scrape the glue off. Be extremely careful not to apply too much pressure or angle the blade. This could scratch the lens. This approach is only recommended if other methods don’t work and with expert supervision. Be very careful, since one wrong move can scratch your lenses.
- Sharp, New Blade: Use a sharp razor blade.
- Shallow Angle: Hold the blade carefully to the lens surface.
- Gentle Scraping: Remove the glue slowly and carefully.
This method has a higher risk of damage, so proceed cautiously. Only consider it if other methods fail. The sharp blade can remove the glue without causing scratches. This method is used when the glue has proven difficult to remove. This is a last-resort approach and requires much experience. This approach presents a greater chance of damage, making extreme caution essential.
Preventing Super Glue Accidents
Preventing super glue accidents is key to protecting your plastic lenses. The best approach is to avoid getting glue on them in the first place. Here are some simple, practical steps to help minimize the risk. Proactive steps can save you from glue removal later. By taking the time to protect your lenses, you can avoid frustrating problems.
Using Protective Measures
When working with super glue, use protective measures to prevent accidental contact. Wear safety glasses or other protective eyewear. This will protect your lenses from glue splashes. Work in an area where your lenses are safe. Keep your lenses away from your work area when you are using super glue. These steps will prevent accidental contact between glue and lenses.
- Wear Protective Eyewear: This will protect your lenses from potential splashes.
- Protect Your Work Area: Keep your lenses away from the gluing surface.
- Use a Tray or Surface: Work over a tray to catch any drips.
By taking these steps, you can significantly reduce the risk of accidents. Safety eyewear will act as the first layer of defense. Keeping the area clean and organized also makes a difference. Taking a few moments to prepare can stop glue from getting on your lenses. This proactive strategy can save your lenses.
Proper Handling Techniques
Use correct handling methods when applying super glue to prevent accidents. Apply glue slowly and carefully. Avoid squeezing the tube too hard, which may cause spills. Make sure the nozzle doesn’t come into contact with anything. Always keep the glue bottle upright when not in use. These practices reduce the chances of glue mishaps.
- Apply Slowly: This avoids spills and unwanted adhesive.
- Control the Tube: Avoid squeezing too hard to control the glue flow.
- Keep Nozzle Clean: Avoid the nozzle coming into contact with any surface.
Correct handling makes a big difference in preventing unwanted accidents. If you take your time, you’re less likely to spill glue. By taking these actions, you can greatly lower the chances of getting glue on your lenses. These methods of handling the glue will keep your lenses safe. Careful application reduces the risk of accidental contact. These steps help protect your lenses.
Storing Super Glue Correctly
Store super glue safely to prevent accidental spills and mishaps. Keep the glue in a cool, dry place, away from sunlight and heat. Store the glue in a stable, upright position. Make sure the cap is tightly closed. If the glue is stored correctly, it helps stop it from leaking. This simple practice prevents accidental contact. By keeping it properly stored, the risk of accidents is reduced.
- Cool, Dry Place: This increases the glue’s lifespan.
- Upright and Stable: This stops spills.
- Secure Cap: This prevents leakage and accidental opening.
Safe storage is an essential way to prevent accidents with super glue. Storing it properly protects the glue itself and reduces the chance of spills. Regular inspection of the bottle and its cap helps too. Correct storage reduces problems. When stored correctly, you can avoid accidents. By following these storage steps, you can avoid accidental exposure.
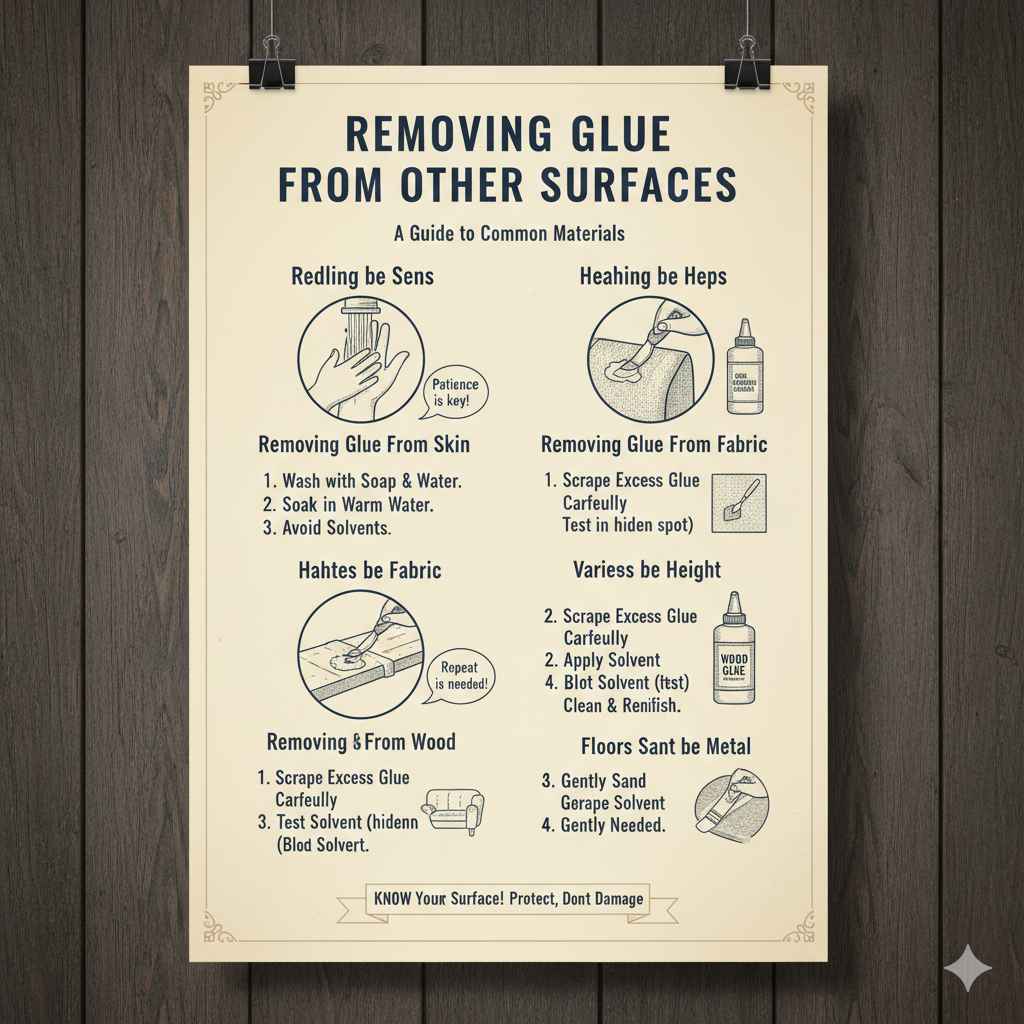
Removing Glue From Other Surfaces
Super glue spills can happen on many surfaces, and each needs a slightly different approach to Remove Super Glue From Plastic Lenses Safely. Here is some information on how to remove glue from common materials. Understanding the surface and the materials will make the removal easier. Having the right method for each surface helps avoid more damage.
Removing Glue From Skin
If super glue gets on your skin, it is important to act gently. Don’t panic or try to pull the skin apart. Wash the area with warm, soapy water. If that isn’t working, try soaking the area in warm, soapy water for a longer time. Avoid using solvents or harsh chemicals on your skin. The skin will naturally slough off the glue. It usually comes off within a few days. Using patience is often the best approach to removing glue from your skin.
- Wash with Soap and Water: Begin with mild soap and warm water.
- Soak in Warm Water: If washing doesn’t work, try a long soak.
- Avoid Solvents: Avoid harsh chemicals on your skin.
The gentle approach prevents unnecessary damage to the skin. The skin will naturally shed the glue as new cells grow. This natural process ensures the best outcome. The goal is to remove the glue. Use mild and gentle processes for your skin. Patience is the best approach for removing super glue from skin.
Removing Glue From Fabric
Removing super glue from fabric can be challenging, but it’s often possible. Start by scraping off any excess glue with a dull knife or spoon. Test any solvent on a hidden part of the fabric first. If it’s safe, apply a solvent like acetone to the glue spot. Use a clean cloth to blot the area gently. Repeat the process until the glue is gone. Make sure to check the fabric label for any special instructions.
- Scrape Excess Glue: Remove extra glue carefully.
- Test the Solvent: Use on a hidden spot.
- Blot with Solvent: Gently apply and blot.
Removing glue from fabric can be a tedious process. Testing a solvent on a hidden area of the fabric prevents damage. Patience and repeated attempts can solve the problem. If the spot is still visible, professional cleaning might be needed. Use care, since removing the glue from fabric is complex. With some care, you can often remove the glue.
Removing Glue From Wood
Removing super glue from wood demands caution to prevent damage. First, carefully scrape off the excess glue. Then, consider using a solvent like acetone or a commercial glue remover. Apply the solvent to the glue, allowing it to soak for a short while. Afterwards, carefully scrape away the softened glue. Always test the solvent on a hidden area first. Finish by cleaning the wood and reapplying the finish if required. Remember that softer woods may be easily scratched.
- Scrape Excess Carefully: Avoid harming the wood surface.
- Apply Solvent: Use the right solvent for the wood type.
- Clean and Refinish: Restore the wood after glue removal.
The goal is to remove the glue while protecting the wood’s finish. Always try a test spot before doing a complete treatment. Avoid abrasive materials that may cause scratches. Be patient and repeat the procedure if needed. This step-by-step method will help. With some care, you can make it happen.
Removing Glue From Metal
Metal surfaces often allow for more aggressive methods for glue removal. Start by scraping off any excess glue with a plastic or metal scraper. Then, soak the glued area with acetone or a commercial adhesive remover. Use a cloth to wipe the softened glue away. If the glue is very persistent, you might use fine-grit sandpaper gently. Always protect yourself with appropriate safety measures. Metal is more sturdy than other materials.
- Scrape the Excess: Use a scraper to remove excess glue.
- Apply Solvent: Choose the right solvent.
- Gently Sand If Needed: Sand if the glue is hard.
Metal’s durability permits a broader array of approaches. Proper safety gear, such as gloves and eyewear, is essential. The type of metal may impact your choice of solvent. A gentle approach will ensure that the finish isn’t damaged. With some care, you can make the metal look good as new. Following the right methods will work.
Frequently Asked Questions
Question: Can I use a hair dryer to loosen the glue?
Answer: It’s best to avoid using a hair dryer. The heat can sometimes damage plastic lenses, making the situation worse. The added heat can alter the shape of the plastic and potentially ruin your lenses. Stick to the methods above for safer results.
Question: What if the glue is already dried and hard?
Answer: If the glue has already dried and hardened, try soaking the lenses in warm, soapy water to soften the bond. Use an acetone-based nail polish remover or commercial remover, and repeat the application until the glue softens enough to wipe away gently. Be patient and repeat the steps as needed.
Question: Are there any solvents I should never use on my lenses?
Answer: Avoid harsh solvents like paint thinner or other strong chemicals. These chemicals can damage plastic lenses. Always use acetone or rubbing alcohol. It is always wise to first test any remover on a small, hidden part of your lenses.
Question: Can I use baking soda to remove super glue?
Answer: Baking soda is generally not effective for removing super glue from plastic lenses. It can sometimes act as a mild abrasive, which may damage the lenses. Stick to the solutions discussed, such as acetone-based removers, for safe and effective removal.
Question: What should I do if the solvent damages my lenses?
Answer: If the solvent causes damage like clouding or melting, stop immediately and seek professional help. A vision care specialist can tell you if the lenses can be saved, or you might need replacement lenses.
Final Thoughts
Having super glue on your plastic lenses can be a stressful situation. We’ve explored methods to Remove Super Glue From Plastic Lenses Safely, focusing on gentle, effective methods. Whether it’s due to a small spill or accidental contact, the steps we’ve reviewed can help to restore your lenses. Remember, patience and care are key. Always test any solvent on a hidden area first. Start gently and try a few applications. Remember to protect your eyes and work area when using super glue. Now you can use this knowledge to tackle the sticky problem and keep your lenses clear and functional. If you take your time and follow the right steps, you should soon be looking through clear lenses.