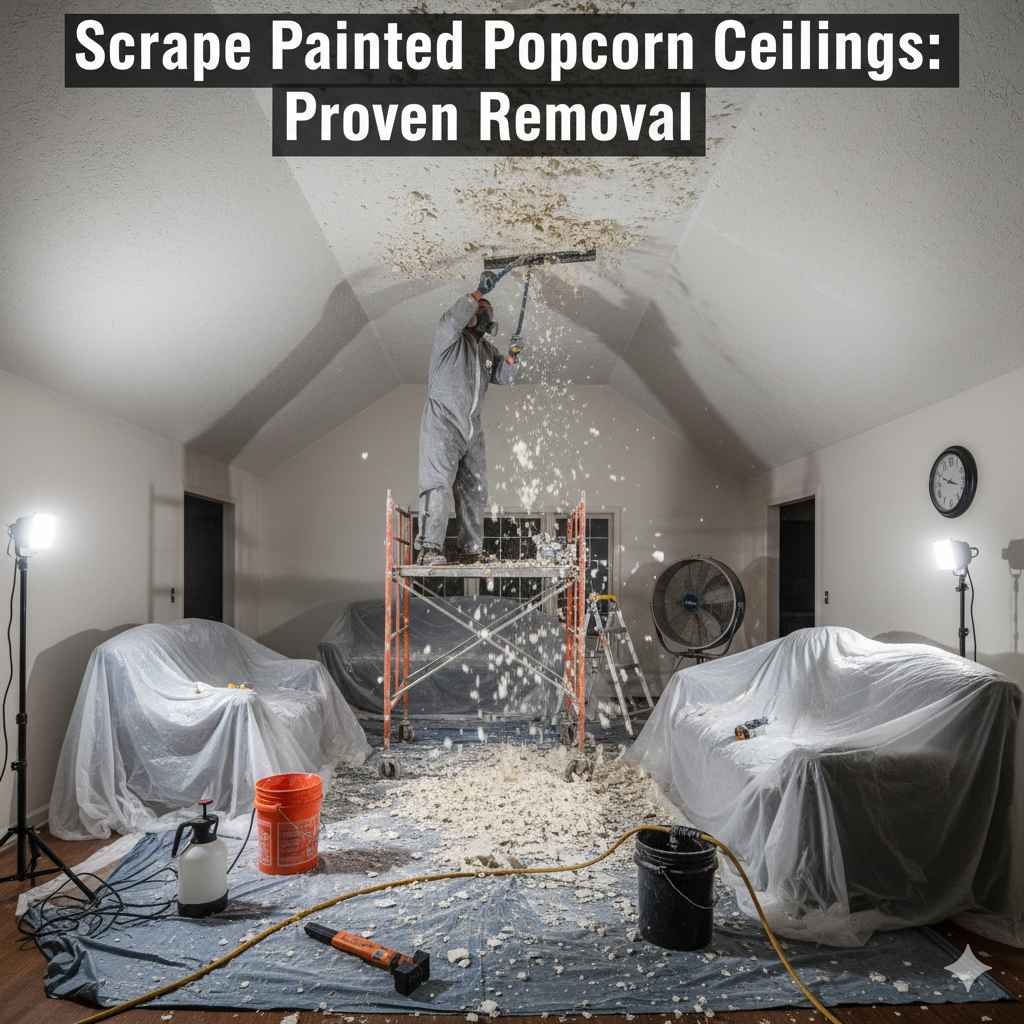
Scrape Painted Popcorn Ceilings: Proven Removal
Scraping painted popcorn ceilings is very achievable by first thoroughly wetting the painted texture with a specialized remover or hot water mixed with dish soap, letting it soak until soft, and then carefully using a wide putty knife to scrape the softened material away in thin layers, minimizing drywall damage.
That bumpy, dated popcorn ceiling texture can really drag down the look of a room. If yours has been painted, the job feels even trickier! Many folks worry that paint seals the texture too tightly, making it impossible to remove without ruining the drywall underneath. Don’t sweat it! With the right approach and plenty of patience, you absolutely can scrape off that painted popcorn safely and effectively. I’m here to walk you through every simple step, showing you how to get that smooth, modern look you want, one easy scrape at a time. Let’s get this tough job broken down so you can start enjoying your refreshed ceiling!
Why Removing Painted Popcorn Ceilings Requires Extra Steps
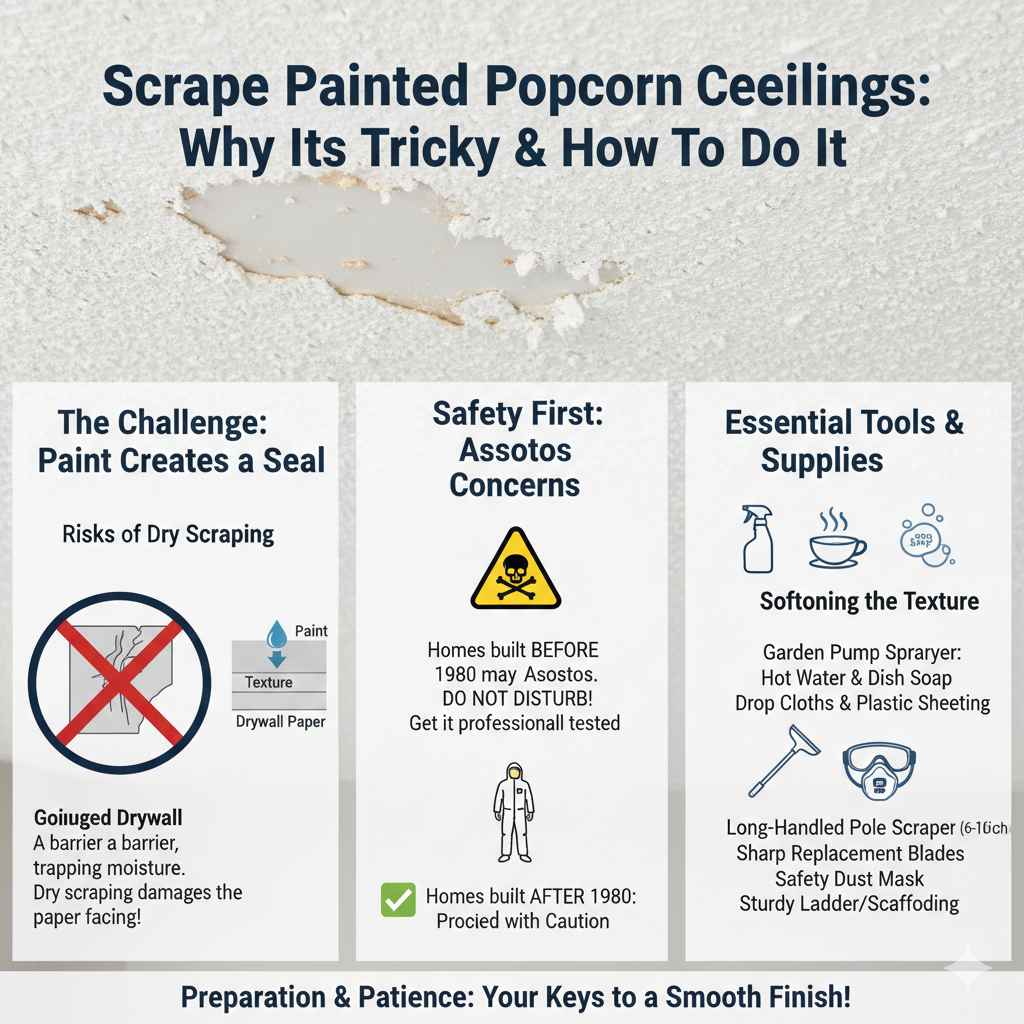
Standard, unpainted popcorn ceilings are generally easy to remove. They are usually just a mix of drywall mud and Styrofoam bits, held on by plain water-soluble glue. A little water softens it right up. However, when someone paints over that texture, it acts like a seal. That layer of paint locks the texture down tightly to the ceiling surface. This means plain water often just runs right off without penetrating the paint layer to reach the adhesive underneath.
Because of this seal, we need to use methods that either dissolve the paint or break through its surface tension so the water can work its magic. If you just try to scrape the painted surface dry, you risk gouging the paper facing of your drywall, which creates a much bigger, more expensive repair job.
The Hidden Danger: Asbestos Concerns
Before touching any ceiling texture that predates the 1980s, safety must come first. While this guide focuses on the removal process, you must confirm what you are dealing with. Textured ceiling materials installed before 1980 occasionally contained asbestos, a known carcinogen. If you suspect your home was built before 1980, stop immediately.
You can hire a certified professional to test a small, discreet sample of the texture. Removing asbestos requires licensed professionals following strict EPA guidelines (like those outlined by the Environmental Protection Agency). If your home was built after 1980, the risk is extremely low, and you can proceed safely with the steps below.
Essential Tools and Supplies for Removal
Gathering your supplies before you start prevents frustrating trips to the store mid-project. Since we are dealing with paint, we need tools that help us apply moisture effectively and scrape without causing harm. Think of this list as your essential toolkit for success.
Tools for Softening the Texture
This is where we break through the paint barrier. We need something aggressive but safe for the underlying drywall.
- Garden Pump Sprayer: This is your best friend for applying liquid evenly over large areas. A standard spray bottle is too slow.
- Very Hot Water: Heat helps penetrate paint films better than cold water.
- Dish Soap or TSP Substitute: A strong surfactant (like quality dish soap) helps the water stick to the painted surface instead of just rolling off. For very tough paint, you might consider a chemical remover (see Pro Tip below), but soap and water are the beginner’s first choice.
- Drop Cloths and Plastic Sheeting: You will make a huge mess! Protect floors and furniture completely.
Tools for Safe Scraping
The goal is to shear the material off, not dig into the drywall.
- Long-Handled Pole Scraper: This is crucial. It allows you to stand comfortably while working and gives you excellent leverage. Look for one with a sharp, wide blade (6-inch or 10-inch).
- Replacement Blades: Bring extras! A dull blade gouges drywall. Keep them razor-sharp.
- Safety Glasses: Debris will fall. Protect your eyes!
- Dust Mask or Respirator (N95 minimum): Even though it’s not asbestos, you don’t want to breathe in old paint particles or drywall dust.
- Step Ladder or Sturdy Scaffolding: Stability is key for safe reaching.
Pro Tip on Chemical Enhancers
If plain hot water and soap fail after testing a small area, you may need a dedicated ceiling texture remover sold at home improvement stores. These products are designed to penetrate old paint layers. Always read the label carefully, ensure it’s safe for painted drywall, and use it strictly according to the manufacturer’s instructions, often requiring enhanced ventilation.
Step-by-Step Guide: How to Scrape Painted Popcorn Ceilings That Have Been Painted
This process requires patience. You are working against the bond created by the paint. Rushing the soaking stage guarantees you will damage the ceiling below.
Phase 1: Preparation and Safety First
Preparation prevents 80% of cleanup headaches later on. Do not skip these steps.
- Clear the Room: Remove all furniture, or move it to the center and cover it completely with plastic sheeting taped securely at the floor level.
- Protect Floors: Lay thick plastic sheeting or canvas drop cloths over all flooring. Tape the edges securely to the baseboards. Remember, this material gets wet and mushy!
- Power Down: Turn off the power to all lights and ceiling fans in the room at the circuit breaker. Remove light fixture covers and, if comfortable, gently disconnect and cap the wires before removing the entire fixture body. This prevents electrocution hazards while spraying.
- Gear Up: Put on your safety glasses, work gloves, and N95 respirator.
Phase 2: The Soaking Solution
Because the paint is sealed, we need a soaking solution that can break down the paint film and penetrate the texture underneath. We are aiming for a hot, soapy, penetrating soak.
- Mix Your Solution: In your pump sprayer, mix very hot (but not boiling) water. Add a generous amount of quality liquid dish soap—about 2 tablespoons per gallon. The soap acts as a surfactant, helping the water spread and soak in rather than bead up on the painted surface.
- Work in Small Sections: Never try to wet the entire ceiling at once. Work in manageable 3×3 or 4×4 foot sections.
- Apply Liberally: Spray the entire section thoroughly with your hot, soapy mixture. Do not soak to the point of dripping everywhere, but make sure the painted surface is fully saturated.
- Wait and Soak (The Most Important Step): This is where patience pays off. Allow the solution to sit and penetrate for at least 15 to 20 minutes. You should start seeing the paint soften or the texture start to wrinkle slightly—this means the water is reaching the glue underneath. If the area dries out before you scrape, mist it again.
Phase 3: The Art of Scraping
Keep your scraper blade sharp and your angle shallow. Shallow angles prevent gouging.
- Test the Scrape: After the waiting period, approach your first section. Hold your scraper at a very shallow angle (almost flat against the ceiling). Apply firm, steady pressure and push forward gently.
- Watch for Success: If the painted popcorn comes off easily in large sheets, you nailed the soaking time! If it resists or flakes off leaving chunks, mist the area again and wait another 10 minutes.
- Maintain the Angle: Keep the blade flat. If you feel resistance, stop pushing hard. Don’t dig! A sharp tool at the wrong angle is more dangerous to your drywall than a dull tool used patiently.
- Rinse and Respray: As you work through a section, debris will fall, and the remaining texture might dry. Keep a spare sprayer filled with fresh hot water nearby. If the next area is stubborn, mist it lightly before scraping.
- Manage Debris: The scraped material will be heavy and wet. It is best to allow it to accumulate slightly on the floor drop cloth so you can fold the plastic around it for easier cleanup later.
Phase 4: Post-Scrape Inspection and Repair
Once the ceiling is bare, you need to check your work before priming and painting.
- Inspect Closely: Once a section is dry, use a bright utility light held close to the ceiling (a technique called “grazing light”). This light reveals every low spot, gouge, or remaining patch of texture you missed.
- Spot Scrape/Sand: If you find any stubborn patches, dampen them lightly and carefully re-scrape. If the damage (gouge marks) is minimal, you can spot-fill these areas with lightweight spackle or joint compound later.
- Wash the Surface: Wipe down the entire exposed drywall surface with clean, slightly damp rags to remove any soap residue or fine dust. Let it dry completely—usually overnight.
Managing Drywall Repairs After Removal
It is very common to have small nicks and scrapes, especially when removing painted texture. Don’t panic about small imperfections; they are easily fixed.
Addressing Gouges and Dings
For the minor surface imperfections created during removal, follow these repair steps:
- Spackle Lightly: Use a lightweight joint compound or patching plaster. Apply it thinly over the gouge using a flexible 4-inch putty knife. For deep gouges, you may need two thin coats, allowing each coat to dry fully.
- Sanding Smooth: Once the compound is totally dry (it will feel hard and cool), use a fine-grit sanding sponge (around 150-220 grit) to sand the repair area flush with the ceiling. Keep your sanding light; you are just leveling the patch, not removing the surrounding drywall paper.
- Prime Everything: Before you apply the final paint, you must use a high-quality primer-sealer, especially over patched areas and any spots where you may have scraped through the paint and into the drywall paper facing. Primer ensures your topcoat paint adheres evenly and doesn’t “flash” (look dull or shiny in spots).
Comparing Scrape-Off vs. Chemical Removal Methods
While our primary method focuses on water saturation, knowing your other options helps you choose the safest route for your specific ceiling.
| Method | Pros | Cons |
|---|---|---|
| Hot Water & Soap Soak (Primary Method) | Least expensive, safest chemicals (if paint isn’t lead), easy cleanup. | Takes the longest waiting/soaking time, less effective on heavy oil paint. |
| Dedicated Texture Remover Spray | More aggressive at penetrating old paint layers, potentially faster removal. | More expensive, requires careful ventilation, potential skin/eye irritants. |
| Skimming/Covering (Alternative) | Zero scraping, no risk of drywall damage, very fast finish. | Adds thickness to the ceiling, requires skill in taping/mudding thin coats, does not eliminate the texture. |
Tips for Dealing with Painted Areas That Won’t Budge
Sometimes, the paint is oil-based or multiple thick layers deep, and the hot water just can’t get through. This is where you need to apply techniques learned from experienced finishers.
Scoring the Surface
If saturation isn’t working, you need to help the water get inside. This is done through scoring.
- Use a Scoring Tool: Purchase a cheap scoring wheel or a stiff nylon bristle brush (not metal).
- Gentle Abrasion: Gently score the painted ceiling surface before spraying. This creates tiny fissures in the paint, allowing the water and soap solution to seep through to the adhesive layer.
- Be Extremely Light: Scoring must be done gently. You are only breaking the surface gloss of the paint, not cutting into the paper beneath. A rotary sanding screen works well for this if used very lightly across the surface.
Temperature Control
Remember, heat is your ally. If you are working in a cooler season, consider using a space heater temporarily to warm up the room air, which can, in turn, keep your water solution hotter for longer during the soaking phase.
Always work in a clockwise direction around the room, returning to areas that appear dry or haven’t yielded results. Think of it like weeding a garden—you loosen the soil around the roots first, then pull. Here, you soften the paint/adhesive, then pull the texture.
Achieving That Professional, Smooth Finish
Once the scraping is done, your focus shifts from removal to preparation for paint. A perfectly smooth ceiling requires careful prepping. For a modern look, skimming is often necessary.
Skimming the Ceiling (Optional but Recommended)
Skimming is applying one or two very thin coats of joint compound over the entire ceiling surface after the texture is removed and repairs are made. This evens out minor roller marks or slight imperfections that appear under bright light.
Here’s how to approach skimming lightly:
- Mix Mud Thin: Mix your setting-type joint compound (like 20-minute or 90-minute setting type) to the consistency of thick pancake batter—much thinner than you would use for filling a hole.
- Use a Large Knife: Use a 10-inch or 12-inch taping knife for skimming. Hold the knife at a shallow angle (about 20 degrees) to the ceiling.
- Pull Thin Coats: Scoop the thin mud onto your knife and pull it across the ceiling in long, smooth strokes, overlapping slightly with the previous pass. The goal is to leave behind only the thinnest layer possible, just enough to fill tiny pores and blend the surface.
- Dry and Light Sand: Let the first coat dry completely. Lightly sand any high ridges left by the knife using 150-grit paper or a sanding pole with fine-grit paper. Apply a second, even thinner coat if needed.
Final Priming and Painting
The final step is crucial for a beautiful result. Never skip priming after scraping or skimming.
- Primer Selection: Use a high-quality PVA (Polyvinyl Acetate) primer or a dedicated drywall primer/sealer. This seals the new paper surface and ensures uniform absorption so the topcoat looks flawless.
- Paint Choice: For ceilings, flatness is key to hiding imperfections. Use a high-quality, flat ceiling paint (often a titanium dioxide-based flat finish).
- Application: Use a thick, high-nap roller cover (3/4-inch nap or more) designed for ceilings. Work systematically from one wall to the next, using a “W” or “M” pattern to spread the paint, and then back-roll in straight lines for an even finish.

FAQ: Beginner Questions About Painted Popcorn Ceiling Removal
Q1: How long does it typically take to scrape the painted popcorn off a standard 10×12 room?
A: For a beginner working on a painted ceiling, budget two full days: Day 1 for prep, soaking, and scraping (you might only finish 50% due to the slow drying/soaking time required for the paint). Day 2 is for inspection, minor repairs, and allowing everything to dry. Professional estimates are usually faster, but plan generously for your first DIY attempt.
Q2: Is it safer to cover the popcorn ceiling instead of scraping it?
A: Covering the ceiling by installing new drywall over it, or applying a skim coat directly over the texture, eliminates scraping mess and debris. However, if the ceiling isn’t perfectly flat, covering it can make low spots more obvious under bright light. Scraping, while messy, results in the cleanest, thinnest, and most authentic final surface.
Q3: If the texture is painted white, does that mean it doesn’t have asbestos?
A: Paint color is not a reliable indicator of asbestos presence. Asbestos was used as a binder in the texture material itself, usually installed before 1980. Always test older ceilings, regardless of the paint color on top.
Q4: What is the best temperature for scraping painted popcorn?
A: Warm temperatures are best. Aim for a room temperature between 70°F and 75°F (21°C to 24°C). Warm air and hot water penetrate the paint and adhesive more effectively than cold conditions.
Q5: My scraper keeps catching and tearing the ceiling paper. What am I doing wrong?
A: You are likely pushing too hard or holding the scraper too steeply (too high an angle). Keep your scraper nearly flat against the ceiling, relying on a very sharp blade and the soaking solution to do the work. If the material is not coming off smoothly, stop, mist the area again, and wait 5 more minutes. Patience prevents paper tears.
Q6: Can I use a garden hose instead of a pump sprayer to wet the ceiling?
A: No. A standard garden hose attachment delivers high pressure, which can instantly damage the drywall paper. You need gentle, widespread saturation provided by a pump sprayer or roller application, allowing gravity and time to penetrate the paint, not force.
Conclusion: Enjoy Your Smooth New View
Removing painted popcorn ceilings might sound like a huge hurdle, but as we’ve covered, the secret lies entirely in proper preparation and patience during the soaking phase. That paint layer acts as a stubborn lock, and very hot, soapy water is the key. By using a wide scraper at a shallow angle and giving the ceiling ample time to absorb the moisture, you will minimize drywall damage and achieve clean removal.
Take your time, protect your space thoroughly, and remember that any minor nicks are easily fixed with a bit of joint compound and sanding. You are essentially mastering a challenging demolition and prep job, which is a huge confidence booster in home improvement. Once the scraping is done and your ceiling is primed, stand back and admire the smooth surface. That clean, modern ceiling is entirely thanks to the effort you put in, step by step. You’ve got this!