What Happens If You Apply Polyurethane Before Stain Is Dry: Essential Guide
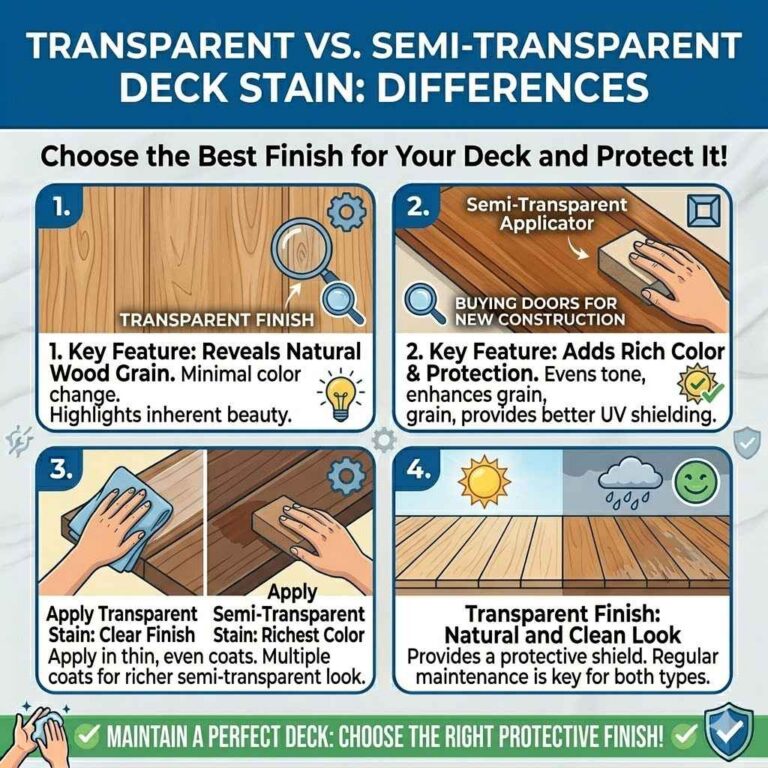
Applying polyurethane before stain is dry can lead to a streaky, blotchy finish, poor adhesion, and potential bubbling. It’s best to wait for the stain to be completely dry to achieve a smooth, durable, and beautiful result.
Hey there, fellow woodworkers! Ever found yourself eager to seal that beautiful wood project, only to wonder, “What happens if I apply polyurethane before the stain is dry?” It’s a common hiccup, especially when you’re excited to see your creation come to life. Rushing this step can lead to frustrating outcomes like uneven color, sticky patches, or even a finish that doesn’t hold up well. But don’t worry! I’m here to guide you through this, breaking down exactly what can go wrong and, more importantly, how to avoid it. We’ll explore the science behind it, the common mistakes, and the simple steps to ensure your next project has a flawless, professional finish. Get ready to learn how to get it right the first time!
Understanding Wood Stains and Polyurethane
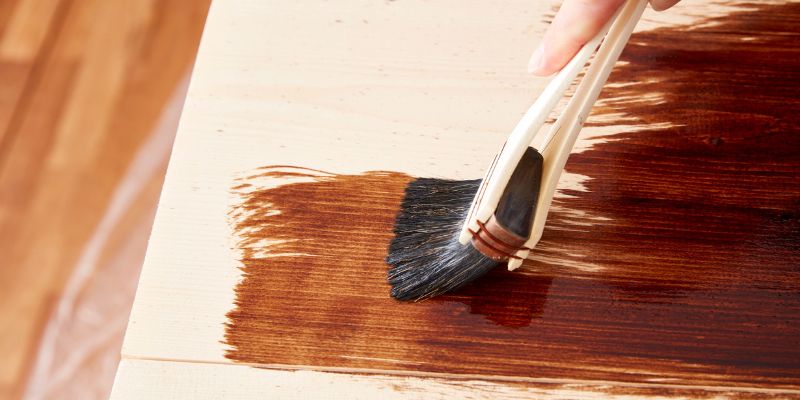
Before we dive into what happens when you mix wet stain and polyurethane, let’s quickly touch on what these two finishes do. Wood stain is designed to penetrate the wood fibers and impart color. It’s essentially a dye or pigment suspended in a liquid carrier. The carrier evaporates over time, leaving the color behind. Polyurethane, on the other hand, is a protective topcoat. It forms a durable, plastic-like film on the surface of the wood, shielding it from moisture, wear, and tear. Think of stain as the color and polyurethane as the armor.
The key here is that these two products have different jobs and need specific conditions to work correctly. Stain needs to dry and cure, meaning the carrier has fully evaporated, allowing the color to set into the wood. Polyurethane needs a dry, clean surface to bond to and form that protective film. When you try to apply polyurethane too soon, you’re essentially trying to put armor on something that’s still wet and changing.
The Unfortunate Consequences: What Happens If You Apply Polyurethane Before Stain Is Dry
So, what’s the damage when you jump the gun? Applying polyurethane over wet stain is a recipe for a less-than-ideal finish. Here’s a breakdown of the common problems you’ll likely encounter:
- Streaking and Blotching: This is probably the most visible issue. The wet stain will mix with the wet polyurethane. As you apply the polyurethane, you’ll drag the wet stain around, creating uneven color distribution. You might see dark streaks where the stain pooled or lighter areas where it was wiped away by the brush. It looks messy and unprofessional.
- Poor Adhesion: Polyurethane relies on a clean, dry surface to create a strong bond. When the stain isn’t dry, the polyurethane can’t properly adhere to the wood itself. Instead, it’s bonding to a layer of wet stain. This weak bond means the polyurethane film can peel, chip, or flake off much more easily over time.
- Bubbling and Fisheyes: This happens because the solvents in the polyurethane can react with the wet stain. As the polyurethane tries to dry, trapped solvents and moisture from the wet stain can create small bubbles or craters, often called “fisheyes.” These are very difficult to fix once the finish has dried.
- Sticky or Tacky Finish: If the stain is still very wet, it can prevent the polyurethane from drying properly. The solvents in the polyurethane might not be able to evaporate as they should, leaving the surface feeling tacky or sticky to the touch, even after it appears dry.
- Inconsistent Sheen: The blotchy nature of the finish will also affect the sheen. Some areas might appear dull, while others might have an unintended gloss due to the uneven distribution of the polyurethane and the underlying wet stain.
- Difficulty in Reapplication: If you notice these problems and try to sand off the failed finish, you might find that the wet stain has permanently discolored the wood in unwanted ways, making it even harder to achieve a good result.
The Science Behind the Setbacks
Let’s get a little technical, but keep it simple! Wood stains typically contain pigments or dyes, a solvent (like mineral spirits or water), and sometimes a binder. For the stain to achieve its intended color, the solvent needs to evaporate, allowing the pigment or dye to settle into the wood grain. This process takes time. For a more in-depth look at wood finishing, resources like the Woodworking Network’s finishing section offer valuable insights.
Polyurethane, on the other hand, is a liquid plastic. When you apply it, the solvent evaporates, and the resin molecules link together, forming a hard, protective film. If the stain underneath is still wet, it means the solvent hasn’t fully evaporated from the stain. When you apply polyurethane, you introduce more solvents. These can:
- Re-dissolve some of the stain, causing it to migrate upwards into the polyurethane.
- Prevent the polyurethane’s solvents from evaporating cleanly, trapping moisture and creating bubbles.
- Create a barrier between the polyurethane and the wood, hindering proper adhesion.
It’s like trying to paint over wet mud – the paint won’t stick well, and you’ll just spread the mud around. Wood finishing requires patience and allowing each layer to do its job correctly before moving on to the next.
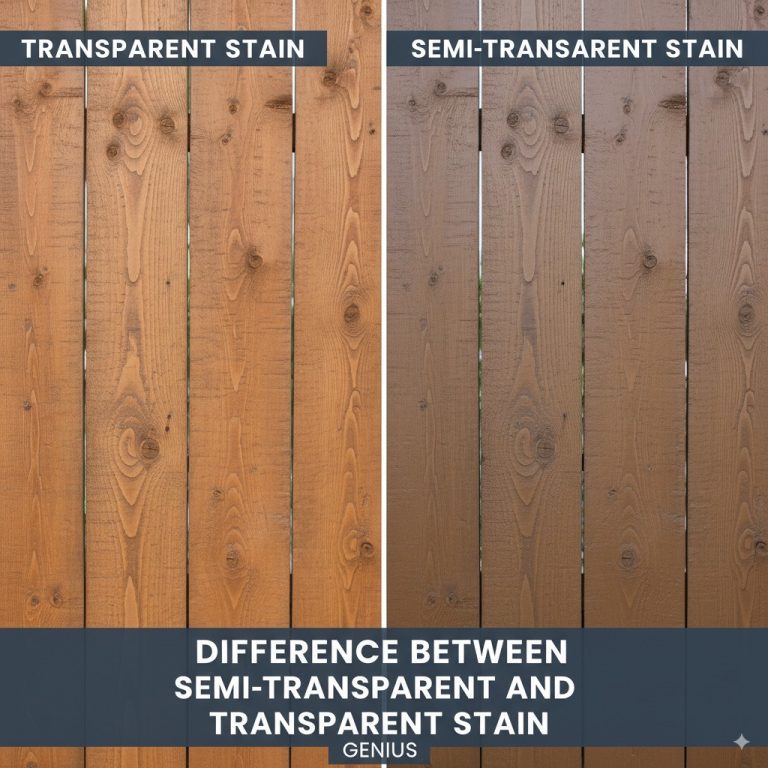
How Long Should Stain Dry Before Applying Polyurethane?
This is the golden question! The drying time for wood stain can vary significantly based on several factors:
- Type of Stain: Oil-based stains generally take longer to dry than water-based stains.
- Environmental Conditions: Temperature, humidity, and airflow all play a crucial role. High humidity and low temperatures will significantly slow down drying.
- Application Thickness: Applying stain too thickly will increase drying time.
- Wood Type: Denser woods might absorb stain differently and affect drying times.
As a general rule of thumb, most manufacturers recommend waiting at least:
| Stain Type | Minimum Drying Time Before Polyurethane | Recommended Drying Time Before Polyurethane |
|---|---|---|
| Water-Based Stain | 4-6 hours | 12-24 hours |
| Oil-Based Stain | 12-24 hours | 24-48 hours |
Important Note: “Dry to the touch” is not the same as “ready for topcoat.” Even if the surface feels dry, the solvents may not have fully evaporated. Always check the stain manufacturer’s specific recommendations on the product can. For example, Minwax, a popular brand, provides detailed instructions for their stains and finishes on their website, which is a great resource for understanding product-specific needs.
How to Tell if Stain is Dry Enough
Beyond just waiting the recommended time, you can perform a simple test to be sure:
- The Clean Cloth Test: Gently wipe a small, inconspicuous area of the stained wood with a clean, white cloth. If any color transfers to the cloth, the stain is not dry enough. Repeat this test periodically until no color transfers.
- The Finger Rub Test: Lightly rub a fingertip over the stained surface. If it feels tacky, sticky, or leaves any residue on your finger, it needs more time. It should feel smooth and dry.
- Visual Inspection: Sometimes, a stained surface that isn’t fully dry can look slightly darker or “wetter” than a properly dried area. This is subtle but can be an indicator.
Patience is your best friend here. It’s far better to wait an extra day than to ruin your finish and have to start over.
Correcting the Mistake: What If You Already Applied Polyurethane Over Wet Stain?
Don’t despair if you’ve already made this mistake! It’s fixable, but it requires a bit of work. Here’s how you can try to salvage your project:
Step-by-Step Correction Process:
- Assess the Damage: Look closely at the finish. Are there streaks, bubbles, or a sticky feel? The severity of the damage will determine how much work is needed.
- Wait for it to Cure (if possible): If the finish is just slightly streaky but not overly sticky or bubbly, sometimes waiting a few days for the polyurethane to fully cure can help. The issues might become less noticeable as it hardens.
- Gentle Removal (for minor issues): If the finish is still somewhat soft or slightly tacky, you might be able to carefully remove the polyurethane layer with a clean cloth lightly dampened with mineral spirits (for oil-based polyurethane) or denatured alcohol (for water-based polyurethane). Work in small sections and wipe away the dissolved finish immediately. Be very careful not to over-wet the cloth, as this can lift the stain.
-
Sanding (for more severe issues): This is the most common solution for significant streaking, bubbling, or a persistently tacky finish.
- Choose the Right Grit: Start with a fine-grit sandpaper, such as 220-grit. You want to remove the polyurethane layer without significantly damaging the stain or the wood underneath.
- Sand Lightly and Evenly: Sand the entire surface gently and evenly. The goal is to remove the polyurethane and any imperfections. Avoid pressing too hard, as this can create sanding marks or remove too much stain.
- Clean Thoroughly: After sanding, use a vacuum with a brush attachment to remove all dust. Then, wipe the surface down with a tack cloth or a cloth slightly dampened with mineral spirits (for oil-based) or water (for water-based) to remove any remaining dust particles.
- Re-stain (if necessary): If sanding has removed too much stain or unevenly, you may need to reapply a thin coat of stain to the affected areas. Ensure this re-applied stain dries completely before proceeding.
- Apply New Topcoat: Once the surface is clean, dry, and the stain is properly cured, you can apply your polyurethane topcoat again. Apply thin, even coats, allowing adequate drying time between each layer.
Important Considerations During Correction:
- Ventilation: Always work in a well-ventilated area, especially when using solvents or sanding.
- Safety Gear: Wear a dust mask when sanding and gloves when working with solvents and finishes.
- Test Area: If you’re unsure about a correction method, test it on a scrap piece of wood that you’ve stained and applied polyurethane to.
Best Practices for a Flawless Finish
Preventing problems is always easier than fixing them! Here are some tips to ensure you get a beautiful, durable finish every time:
Pre-Finishing Steps:
- Proper Wood Preparation: Start with smooth, well-sanded wood. Any imperfections in the wood will be magnified by the finish. Sand from coarse to fine grits (e.g., 80, 120, 180, 220).
- Clean the Surface: After sanding, always remove all dust. A vacuum followed by a tack cloth is the best method. Dust is the enemy of a smooth finish.
- Test Your Stain: Always test your stain on a scrap piece of the same wood you’re using. This helps you confirm the color and check how the wood absorbs the stain.
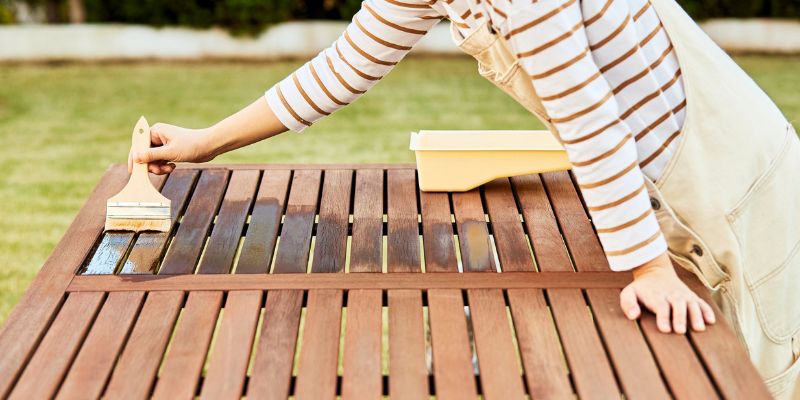
Staining Process:
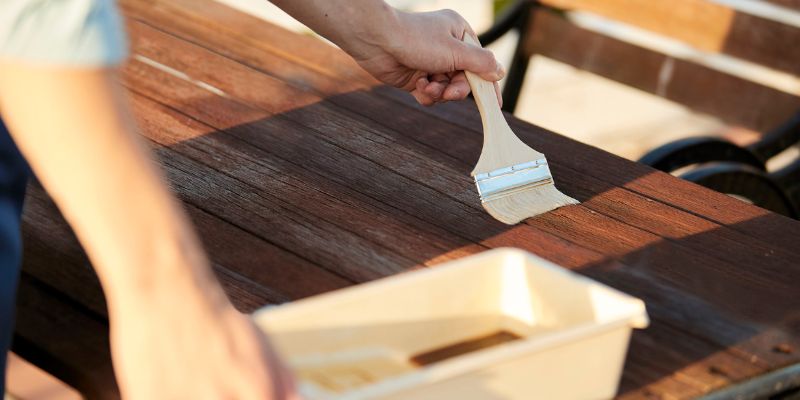
- Apply Stain Evenly: Apply stain with the grain using a brush, rag, or foam applicator. Wipe off excess stain after the recommended time (usually 5-15 minutes, check can).
- Allow Adequate Drying Time: This is crucial! Follow the manufacturer’s instructions and perform the dry tests mentioned earlier.
- Consider a Pre-Stain Wood Conditioner: For blotch-prone woods like pine or maple, applying a pre-stain wood conditioner before staining can help ensure a more even color absorption. This is recommended by many finishing experts.
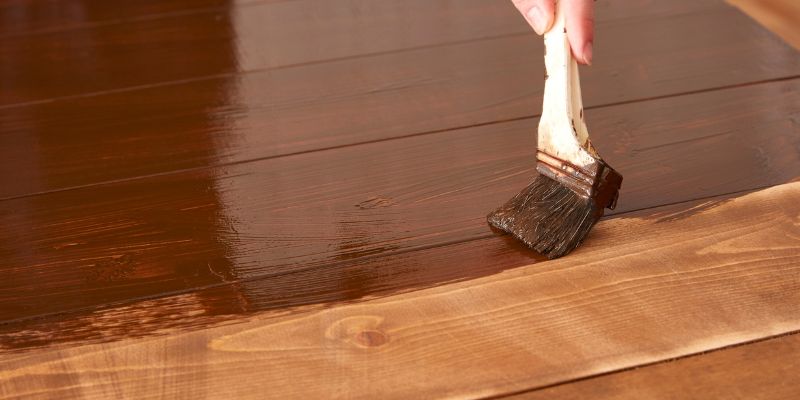
Polyurethane Application:
- Choose the Right Polyurethane: Water-based polyurethanes dry faster and have less odor, but oil-based polyurethanes often offer slightly more durability.
- Stir, Don’t Shake: Always stir polyurethane gently. Shaking introduces air bubbles that can ruin your finish.
- Apply Thin Coats: Multiple thin coats are always better than one thick coat. They dry more evenly and create a more durable film.
- Sand Between Coats: After each coat of polyurethane has dried and cured (check can for time), lightly sand the surface with 220-grit or 320-grit sandpaper. This “de-nibbing” smooths out any dust nibs or imperfections and provides a better surface for the next coat to adhere to.
- Clean Between Coats: Always remove sanding dust with a vacuum and tack cloth before applying the next coat.
Following these best practices will significantly increase your chances of achieving a beautiful, professional-looking finish on your woodworking projects. For more detailed information on finishing techniques, resources like Popular Woodworking’s finishing articles are invaluable.
Frequently Asked Questions (FAQ)
Q1: Will applying polyurethane over wet stain ruin my project permanently?
Not necessarily! While it can cause issues like streaks, poor adhesion, and bubbles, these problems are usually correctable with careful sanding and reapplication. It’s frustrating, but rarely permanent damage.
Q2: Can I use a heat gun to speed up stain drying?
It’s generally not recommended. While a heat gun can speed up surface drying, it might not allow the solvents deep within the wood fibers to evaporate properly. It can also potentially alter the stain color or even scorch the wood. Patience is safer.
Q3: My stain looks dry, but it’s a dark, almost black wood. How can I be sure it’s ready for polyurethane?
Dark woods can be tricky because surface dryness doesn’t always mean complete solvent evaporation. Always perform the clean cloth test and the finger rub test. If you’re still unsure after the recommended time, wait an extra 12-24 hours, especially if humidity is high. It’s better to be safe than sorry.
Q4: I accidentally mixed stain and polyurethane. What’s the best way to remove it?
If it’s still wet, try to wipe it up immediately with a clean rag. If it has started to dry, you’ll likely need to sand it off. Use fine-grit sandpaper (220-grit) and sand gently to avoid damaging the wood. Clean thoroughly afterward.
Q5: How many coats of polyurethane should I apply?
For most furniture and high-wear surfaces, 3-4 coats of polyurethane are recommended. For lighter-use items, 2 coats might suffice. Always allow adequate drying time and light sanding between coats for best results.
Q6: Can I use a different type of topcoat if I mess up with polyurethane?
Yes, you can. If you’ve sanded off a failed polyurethane finish, you can switch to another clear topcoat like lacquer, varnish, or even a wipe-on oil finish, provided the surface is properly prepared and dry.
Q7: Does the type of brush or applicator matter when applying polyurethane over stain?
Absolutely! For polyurethane, synthetic bristle brushes (nylon/polyester) are best for water-based finishes, while natural bristle brushes are better for oil-based finishes. Foam brushes can also work well for thin, even coats, but ensure they are high-quality to avoid shedding. Using the wrong applicator can lead to streaks or bubbles.
Conclusion
Navigating the world of wood finishing can sometimes feel like a delicate balancing act, and the interaction between stain and polyurethane is a prime example. Understanding what happens if you apply polyurethane before stain is dry is key to achieving that beautiful, durable finish you envision for your projects. Remember, the primary culprits for failure are streaking, poor adhesion, and potential bubbling, all stemming from trying to seal a surface that isn’t ready.
The good news is that woodworking is a journey of learning and problem-solving. By respecting the drying times of your stain, performing simple tests to confirm dryness, and applying your topcoat with care, you can avoid these common pitfalls. And if you do make a mistake, know that it’s usually fixable with a bit of patience and some careful sanding. So, embrace the process, be patient with your materials, and take pride in the beautiful, handcrafted pieces you create. Happy building!