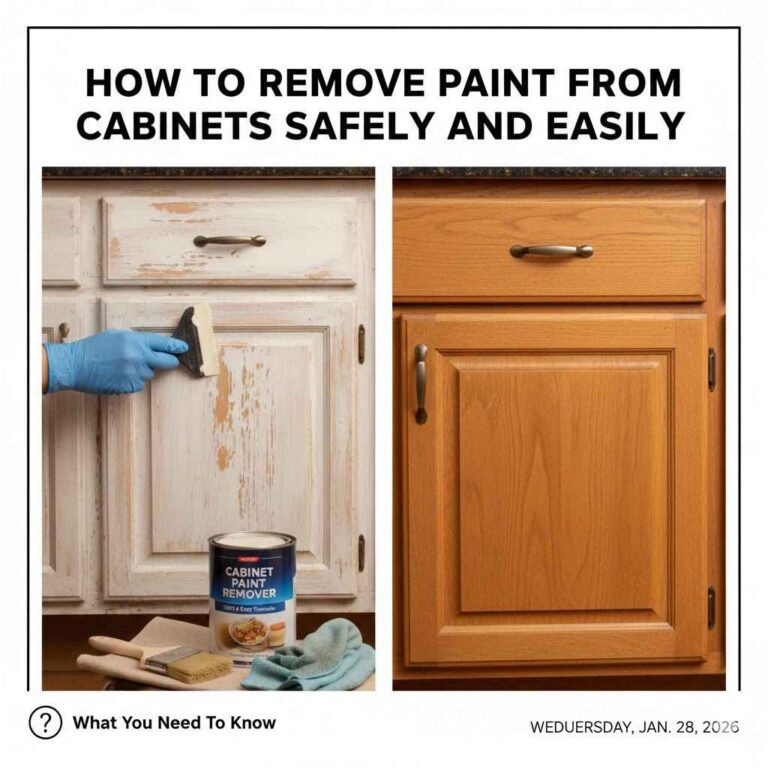
What Is The Easiest Way To Remove Paint From Metal: Proven
The easiest way to remove paint from metal for most DIY projects is by using a chemical paint stripper. This method requires the least physical effort, as the chemical does the hard work of dissolving the paint, which can then be easily scraped away. It is highly effective on intricate shapes and multiple layers.
Have you ever found a beautiful old metal chair or a vintage sign, but it was covered in layers of cracked, peeling paint? It’s a common problem. You know there’s a treasure underneath, but getting that old paint off seems like a huge chore. Many people feel stuck, worried they might damage the metal or spend hours scrubbing for nothing.
Don’t worry, you’re in the right place! Removing paint from metal is easier than you think when you have the right tools and a clear plan. I’m here to guide you through the process, step by step. We’ll look at the simplest and most effective methods that anyone can do at home. By the end of this guide, you’ll know exactly how to restore your metal pieces with confidence. Let’s get started!
Why Remove Old Paint from Metal?
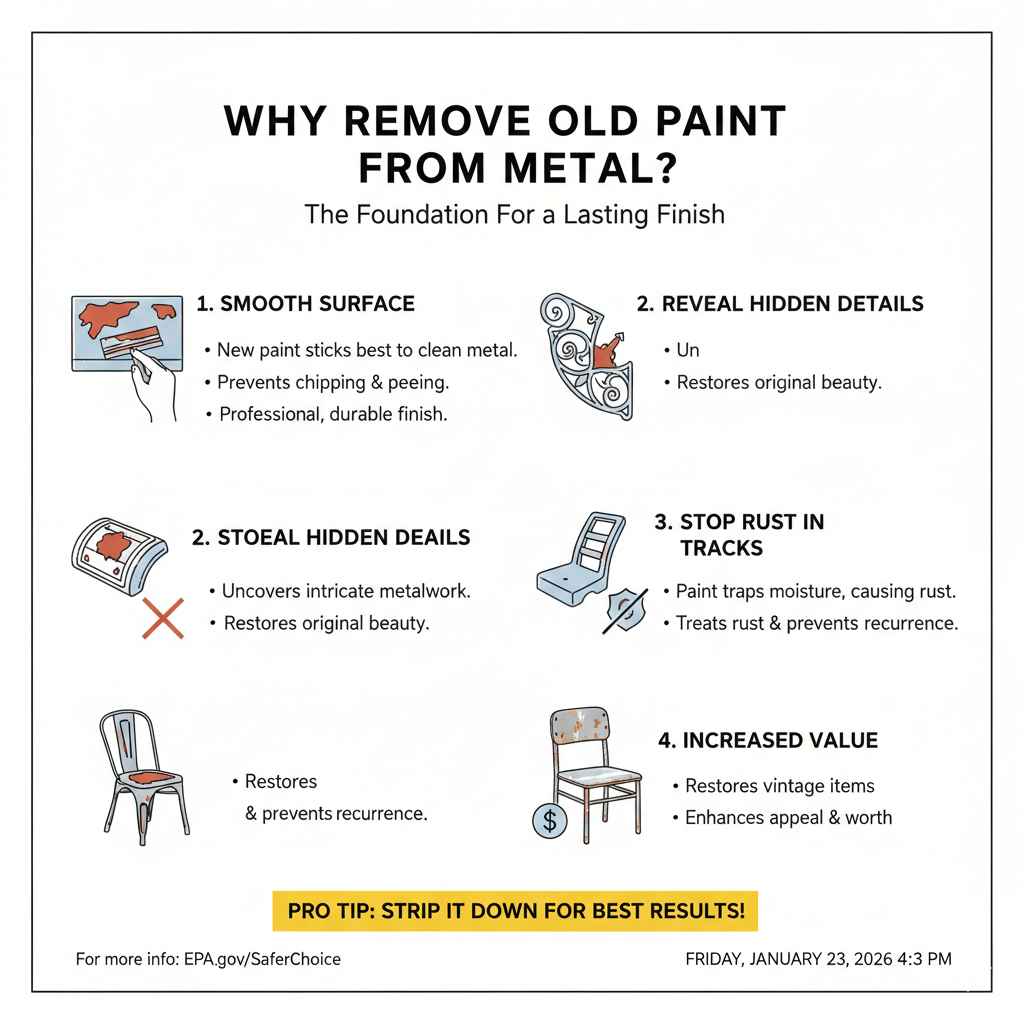
You might be wondering if it’s worth the effort to strip old paint. The answer is a big yes! Taking the time to properly remove old paint sets you up for a successful and long-lasting project. Here’s why it’s so important:
- A Smooth Surface for New Paint: New paint needs a clean, smooth surface to stick to. If you paint over old, flaky paint, your new coat will quickly chip and peel. Removing the old layers ensures your new finish looks professional and lasts for years.
- Revealing Hidden Details: Old metalwork often has beautiful details that are hidden under thick coats of paint. Stripping it down can reveal intricate designs you never knew were there.
- Stopping Rust in Its Tracks: Paint can trap moisture against the metal, leading to rust. By removing the old paint, you can treat any existing rust and apply a protective coating to prevent it from coming back.
- Increased Value: Restoring a vintage metal item, whether it’s furniture or an antique tool, can significantly increase its value and appeal. A clean, well-finished piece is always more desirable.
Safety First: Your Essential Gear for Paint Removal
Before we jump into the fun part, let’s talk about safety. Your health is the most important tool you have. Working with paint strippers, heat, or dust requires proper protection. It’s not complicated, but it’s not a step you should ever skip. Here is your must-have safety checklist:
- Safety Goggles or Glasses: Protect your eyes from chemical splashes, paint chips, and dust. This is non-negotiable for every method.
- Chemical-Resistant Gloves: When using chemical strippers, regular work gloves won’t do. You need gloves made from nitrile or neoprene to protect your skin from burns and irritation.
- Respirator Mask: Paint fumes, chemical vapors, and fine dust particles can be harmful to your lungs. A respirator with the correct cartridges for organic vapors and particulates is essential, especially when working indoors.
- Long-Sleeved Shirt and Pants: Cover your skin to protect it from accidental contact with chemicals or hot paint flakes.
- Well-Ventilated Workspace: Always work outdoors if possible. If you must work inside, open all windows and doors and use a fan to create cross-ventilation. Good airflow helps disperse harmful fumes.
For more detailed information on personal protective equipment (PPE), you can visit the Occupational Safety and Health Administration (OSHA) website. It’s a great resource for understanding how to stay safe during any DIY project.
Choosing Your Paint Removal Method
There are three main ways to remove paint from metal, each with its own strengths. We will focus on the easiest one first, but it’s good to know your options. The best method depends on your project’s size, shape, and the type of paint you’re removing.
- Chemical Paint Strippers: The easiest and most versatile method for beginners.
- Heat Guns: Great for thick, stubborn layers of paint on flat surfaces.
- Mechanical Removal (Sanding & Grinding): Best for light coats of paint or final surface prep.
Let’s break down each one so you can pick the perfect method for your project.
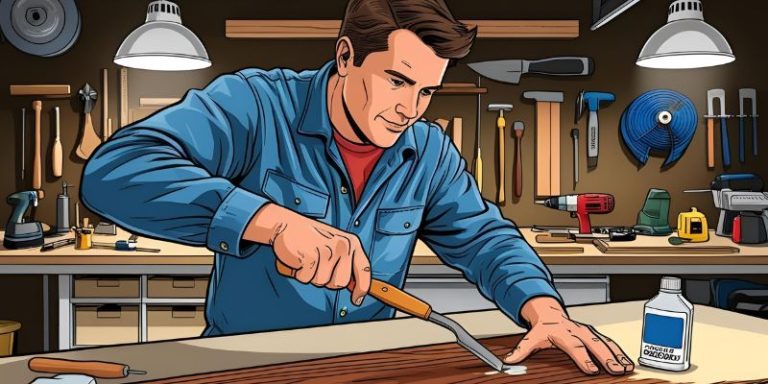
Method 1: Chemical Paint Strippers (The Easiest Way for Most Projects)
For most people, a good chemical paint stripper is the easiest and most effective answer. Why? Because you let the product do the heavy lifting! You simply apply the stripper, wait for it to work its magic, and then scrape the bubbled-up paint away. It’s especially useful for items with detailed patterns, curves, or hard-to-reach corners where sanding would be a nightmare.
Pros and Cons of Chemical Strippers
-
Pros:
- Requires minimal physical effort. The chemical does the work.
- Excellent for intricate shapes and detailed metalwork.
- Removes multiple layers of paint at once.
- Doesn’t damage the underlying metal when used correctly.
-
Cons:
- Requires strong chemicals and fumes. Excellent ventilation is a must.
- Can be messy. The stripped paint turns into a gooey sludge.
- Takes time to work. You’ll need to wait for the stripper to activate.
Tools and Materials You’ll Need:
- Chemical paint stripper (gel or paste form is best as it clings to surfaces)
- A natural bristle brush or a cheap paintbrush you can throw away
- Plastic or metal scraper
- Stiff-bristled brush or steel wool for details
- An old metal or glass container to pour the stripper into
- Clean rags
- Mineral spirits or paint thinner for cleanup
- All the safety gear mentioned earlier (goggles, respirator, chemical-resistant gloves)
Step-by-Step Guide to Using a Chemical Stripper:
- Prepare Your Workspace: Lay down a drop cloth or thick plastic sheeting to protect your work surface. Make sure you are in a well-ventilated area, preferably outdoors.
- Put On Your Safety Gear: This is the most important step! Put on your goggles, respirator, and chemical-resistant gloves.
- Apply the Stripper: Pour a small amount of stripper into your metal or glass container. Using your natural bristle brush, apply a thick, even coat of the stripper onto the painted metal surface. Don’t “paint” it back and forth; lay it on in one direction. Be generous with it!
- Wait Patiently: Check the product instructions for the recommended waiting time. This can range from 15 minutes to several hours. You will see the paint start to bubble and wrinkle. This is a good sign—it means the stripper is working!
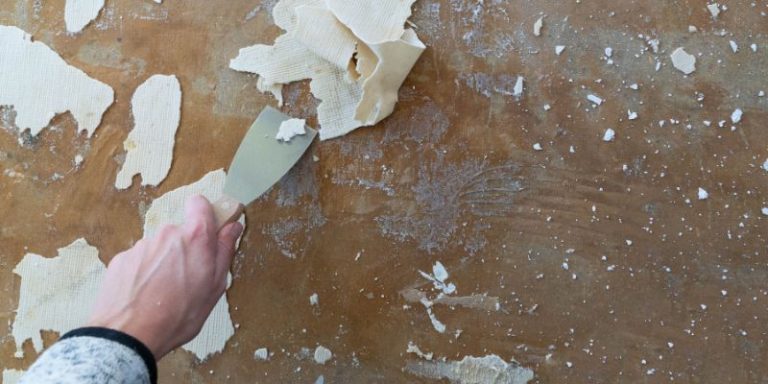
- Scrape Off the Paint: Once the paint is fully bubbled, use your plastic or metal scraper to gently lift it off. Scrape in the direction of the metal’s grain if it has one. The paint should come off in soft sheets or clumps. For detailed areas, use a stiff brush or steel wool.
- Reapply if Needed: For very thick or stubborn paint, you might need to apply a second coat of stripper. Simply repeat steps 3-5.
- Clean the Surface: After all the paint is gone, you need to neutralize the stripper. Wipe the metal down with a rag soaked in mineral spirits or the cleaning agent recommended on the product label. This removes any chemical residue and prepares the surface for the next step.
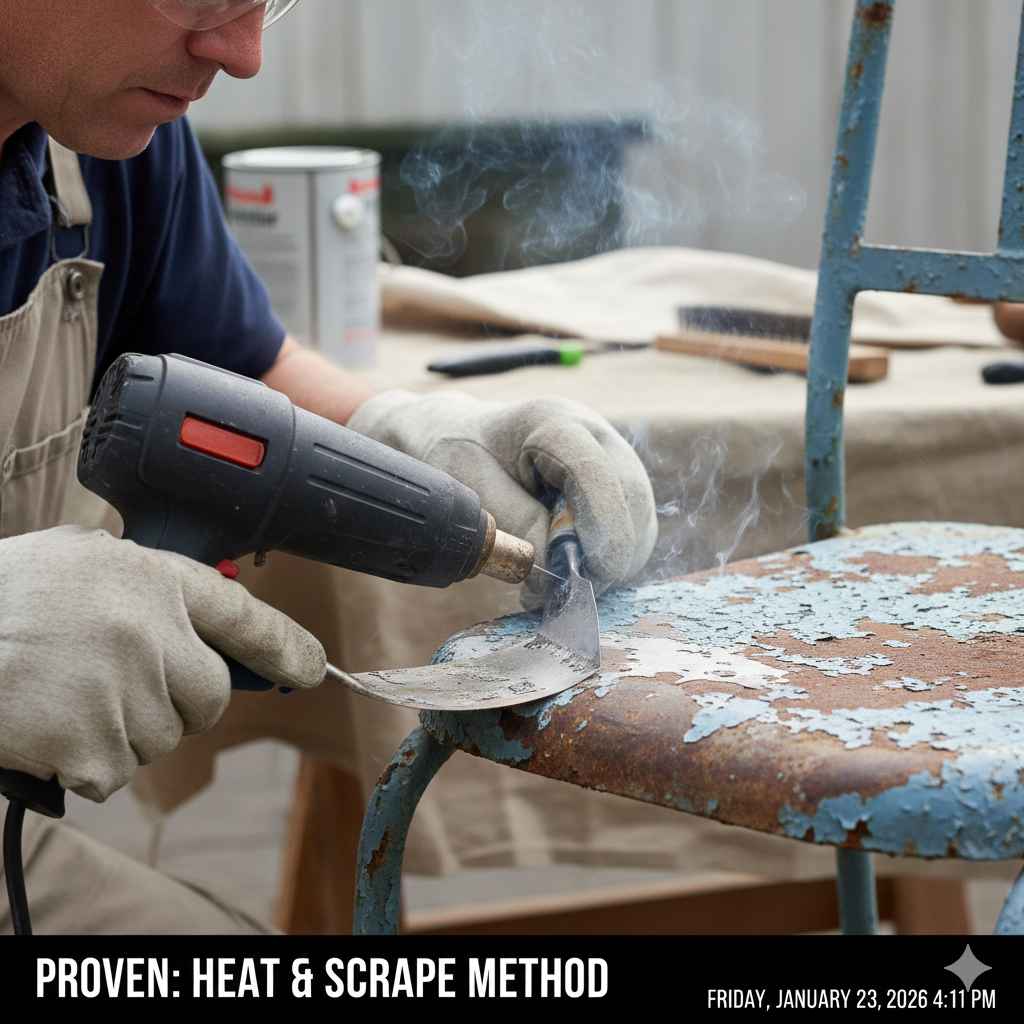
Method 2: Using a Heat Gun (Great for Thick Layers)
A heat gun is another fantastic tool for removing paint, especially when you have many thick layers to get through. It works like a super-powered hair dryer, heating the paint until it softens and blisters, making it easy to scrape off. It’s less messy than chemical strippers but requires a bit more care to avoid scorching the metal or creating hazardous fumes.
Pros and Cons of Using a Heat Gun
Pros:
No harsh chemicals or messy sludge.
Works quickly on thick, heavy layers of paint.
Relatively inexpensive tool to own.
Cons:
Fire hazard. You must be extremely careful with the heat.
Can release toxic fumes, especially from lead-based paint. A respirator is crucial.
Not ideal for intricate details as it’s hard to direct heat into small crevices.
Risk of scorching the metal if you hold it in one spot for too long.
Tools and Materials You’ll Need:
- Heat gun
- Metal scraper (a plastic one might melt)
- Wire brush
- Safety gear (goggles, respirator, leather gloves to protect from heat)
- Fire extinguisher (just in case!)
Step-by-Step Guide to Using a Heat Gun:
- Set Up Your Safe Zone: Work outdoors on a non-flammable surface like concrete. Keep a fire extinguisher nearby and remove any flammable materials from your work area.
- Gear Up: Put on your safety goggles, respirator, and heavy-duty leather gloves.
- Heat the Paint: Turn on the heat gun and hold it about 2-3 inches away from the metal surface. Keep the gun moving continuously in a gentle sweeping motion to heat the area evenly. Do not hold it still!
- Watch for Bubbles: In just a few seconds, the paint will start to wrinkle and bubble. This is your cue that it’s ready to be removed.
- Scrape While It’s Hot: Follow the heat gun with your metal scraper, using your other hand. Scrape the softened paint off while it’s still pliable. It should peel off easily.
- Work in Small Sections: Tackle one small section at a time. Heat, scrape, and then move on to the next area. This keeps the process manageable.
- Clean Up: Once you’ve removed all the paint, let the metal cool down completely. Then, use a wire brush to remove any remaining stubborn bits. Wipe the surface clean with a rag.
Method 3: Mechanical Removal (Sanding and Grinding)
Mechanical removal means using friction to physically grind the paint off the surface. This can be done by hand with sandpaper or with power tools like an orbital sander or an angle grinder with a wire wheel. This method is best for removing thin layers of paint or for cleaning up small, stubborn spots after using a chemical stripper or heat gun. It’s also great for feathering edges and preparing the final surface for priming.
Pros and Cons of Mechanical Removal
Pros:
Gives you excellent control over the final finish.
No chemicals or heat involved.
Effectively removes rust at the same time as paint.
Cons:
Very labor-intensive and time-consuming, especially on large projects.
Creates a lot of dust. A respirator is absolutely essential.
Can easily damage or gouge the metal if you’re not careful.
Ineffective on intricate or detailed surfaces.
Tools and Materials You’ll Need:
- Sandpaper (various grits from coarse to fine)
- Sanding block (for hand sanding)
- Orbital sander or angle grinder with a wire wheel or flap disc
- Safety gear (goggles, respirator, gloves)
- Tack cloth or a clean rag
Step-by-Step Guide to Mechanical Removal:
- Safety First: Put on your goggles, gloves, and a high-quality respirator. Paint dust is not something you want to breathe in.
- Start with a Coarse Grit: If using a power tool, attach a coarse-grit disc (like 40 or 60 grit) or a wire wheel. If sanding by hand, wrap coarse-grit sandpaper around a block.
- Begin Sanding: Apply light, even pressure and keep the sander or grinder moving. Don’t press too hard, as this can create deep scratches in the metal. Let the tool do the work.
- Work Your Way to Finer Grits: Once most of the paint is gone, switch to a medium-grit paper (like 120 grit) to smooth out the scratches from the coarse grit. Finally, use a fine-grit paper (220 grit or higher) to create a perfectly smooth surface for priming.
- Wipe Down the Surface: After sanding, the metal will be covered in fine dust. Use a tack cloth or a rag dampened with mineral spirits to wipe the surface completely clean. You want a perfectly dust-free surface before you even think about painting.
Why Is Planting Good During Wet Season | Proven Benefits for a Thriving Garden
Hello, fellow garden enthusiasts! It’s your friend, Md Saiful Islam. Many of us believe that sunny spring days are the only perfect time for planting. We wait all winter for that warm weather. But what if I told you that another season holds a secret power for gardeners? The wet season, with its steady rains and cloudy skies, is a hidden gem for growing a lush, healthy garden.
It can seem a bit strange to head out with a trowel when the ground is damp. You might worry about mud or overwhelming your new plants. I understand! But I’m here to show you that planting during this time is not only good—it’s one of the smartest things you can do for your garden. We will explore exactly why the rainy months are your garden’s best friend. Let’s dig in!
Comparing the Methods: Which One is Right for You?
Still not sure which method to choose? This simple table breaks down the key differences to help you decide.
| Method | Ease of Use | Speed | Best For | Safety Level |
|---|---|---|---|---|
| Chemical Stripper | Easiest (least physical effort) | Slow (requires waiting time) | Intricate shapes, multiple layers of paint, and beginners. | Medium (requires excellent ventilation and chemical protection) |
| Heat Gun | Moderate (requires technique) | Fast | Thick paint layers on flat or simple curved surfaces. | Medium (fire risk and potential for toxic fumes) |
| Mechanical (Sanding) | Hardest (most physical effort) | Slow to Moderate | Thin paint layers, rust removal, and final surface prep. | High (major dust hazard, requires respiratory protection) |
Cleaning and Preparing the Metal After Paint Removal
You did it! The old paint is gone. But don’t grab your new can of spray paint just yet. This final preparation step is the secret to a professional-looking, durable finish. You need to make sure the metal is perfectly clean and ready to bond with the new primer and paint.
- Final Cleaning: Wipe the entire metal surface with mineral spirits or a degreaser. This removes any leftover chemical residue, oils from your hands, and fine dust. Use a clean, lint-free rag.
- Address Any Rust: If you see any remaining rust spots, now is the time to treat them. You can sand them off or use a rust converter product that turns rust into a stable, paintable surface.
- Scuff the Surface: For very smooth metal, it’s a good idea to lightly scuff the surface with fine-grit sandpaper or a scouring pad. This creates a slightly rough texture, which helps the primer grip the metal much better.
- Final Wipe Down: Give the piece one last wipe with a tack cloth or a clean, dry rag to remove any dust from scuffing. The surface should be completely clean, dry, and dull.
Now your metal piece is officially ready for a fresh start! Priming and painting on a perfectly prepared surface is a joy, and you’ll be amazed at how great the results look.

Frequently Asked Questions (FAQ)
What is the absolute easiest way to remove paint from small metal objects?
For small metal items like hinges or hardware, the easiest method is often to soak them. Place the items in an old slow cooker you don’t use for food, cover them with water and a little dish soap, and let it heat on low for a few hours. The heat and moisture will soften the paint, often causing it to slide right off with minimal scrubbing.
Can I use vinegar or baking soda to remove paint from metal?
While vinegar and baking soda can sometimes work on very thin, fresh latex paint, they are generally not effective for removing old, cured enamel or oil-based paints from metal. For reliable results, a commercial paint stripper is a much better choice.
How do I know if the old paint contains lead?
If the paint is from before 1978, it’s safest to assume it contains lead. You can buy lead paint test kits at most hardware stores. If it tests positive, you should not use a heat gun or dry sand, as this can create dangerous lead dust and fumes. Chemical strippers are a safer option for lead paint. Always check resources like the EPA’s website for guidance on safely handling lead paint.
What’s the best way to remove rust and paint at the same time?
Mechanical removal using an angle grinder with a wire wheel or flap disc is the most effective way to remove both rust and paint simultaneously. This method is aggressive and strips everything down to the bare metal, creating a clean surface ready for priming.
How long does a chemical stripper take to work?
The time varies depending on the product, the type of paint, and the number of layers. It can take anywhere from 15 minutes to several hours. The key is to watch for the paint to bubble and lift. The product’s instructions will give you the best time estimate.
Can I use a chemical stripper on any type of metal?
Most paint strippers are safe for steel, iron, and aluminum. However, some harsher chemicals can damage softer metals or cause discoloration. Always read the product label to ensure it is safe for your specific type of metal, and test it on a small, hidden spot first.
Do I really need to wear a respirator?
Yes, absolutely. A simple dust mask is not enough. Whether you’re dealing with chemical fumes, dust from sanding, or vapors from a heat gun, a respirator with the appropriate cartridges protects your lungs from serious harm. It is one of the most important pieces of safety equipment for this job.
Conclusion: You’re Ready to Tackle Any Project
There you have it—a complete guide to the easiest ways to remove paint from metal. As you can see, the “easiest” method truly depends on your project, but for most DIYers, a chemical stripper offers the best balance of effectiveness and low physical effort. It lets you work smart, not hard, especially on those tricky, detailed pieces.
No matter which method you choose, the key to success is preparation and patience. Take the time to set up your workspace safely, wear the right gear, and follow the steps carefully. By cleaning and prepping the bare metal properly, you’re not just removing old paint—you’re setting the stage for a beautiful, durable finish that will last for years to come.
So go ahead and rescue that old metal table or bring those rusty garden chairs back to life. You now have the knowledge and confidence to do it yourself. Happy stripping!