What Is The P Trap In A Sink: Essential Guide
The P-trap in your sink is a curved pipe that holds water to block sewer gases from entering your home, preventing unpleasant odors and potential health issues. It’s a simple, crucial plumbing component that’s easy to understand and maintain.
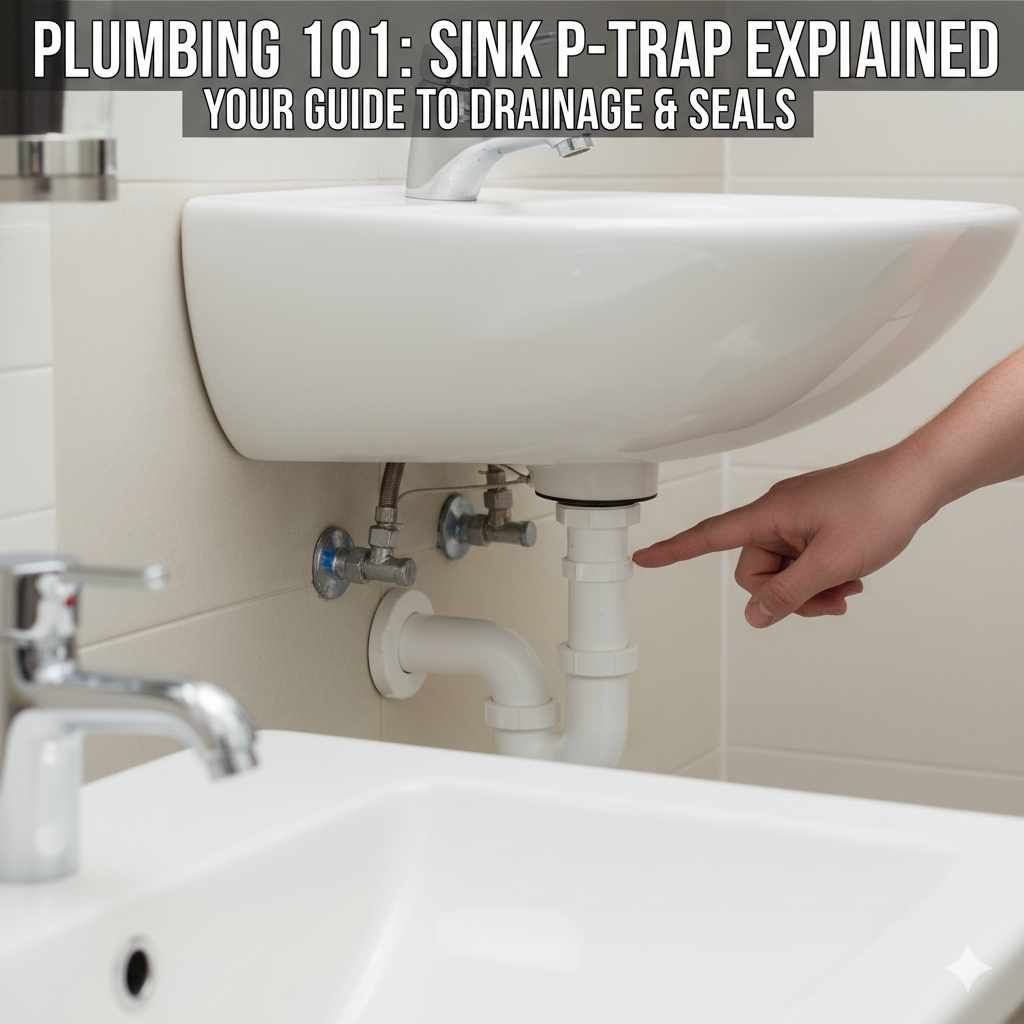
Ever notice a funny smell coming from your kitchen or bathroom sink, even when it’s clean? It’s a common home mystery, and often, the culprit is hiding right underneath the basin. That U-shaped pipe you see is called a P-trap, and it plays a surprisingly big role in keeping your home fresh and healthy. Don’t worry if it sounds a bit technical; understanding what it is and why it’s there is simpler than you might think. We’ll break down this essential plumbing piece, explain its job, and even touch on how to keep it working its best. Let’s dive in and solve that sink smell mystery together!
What is a P-Trap? Your Sink’s Odor Guardian
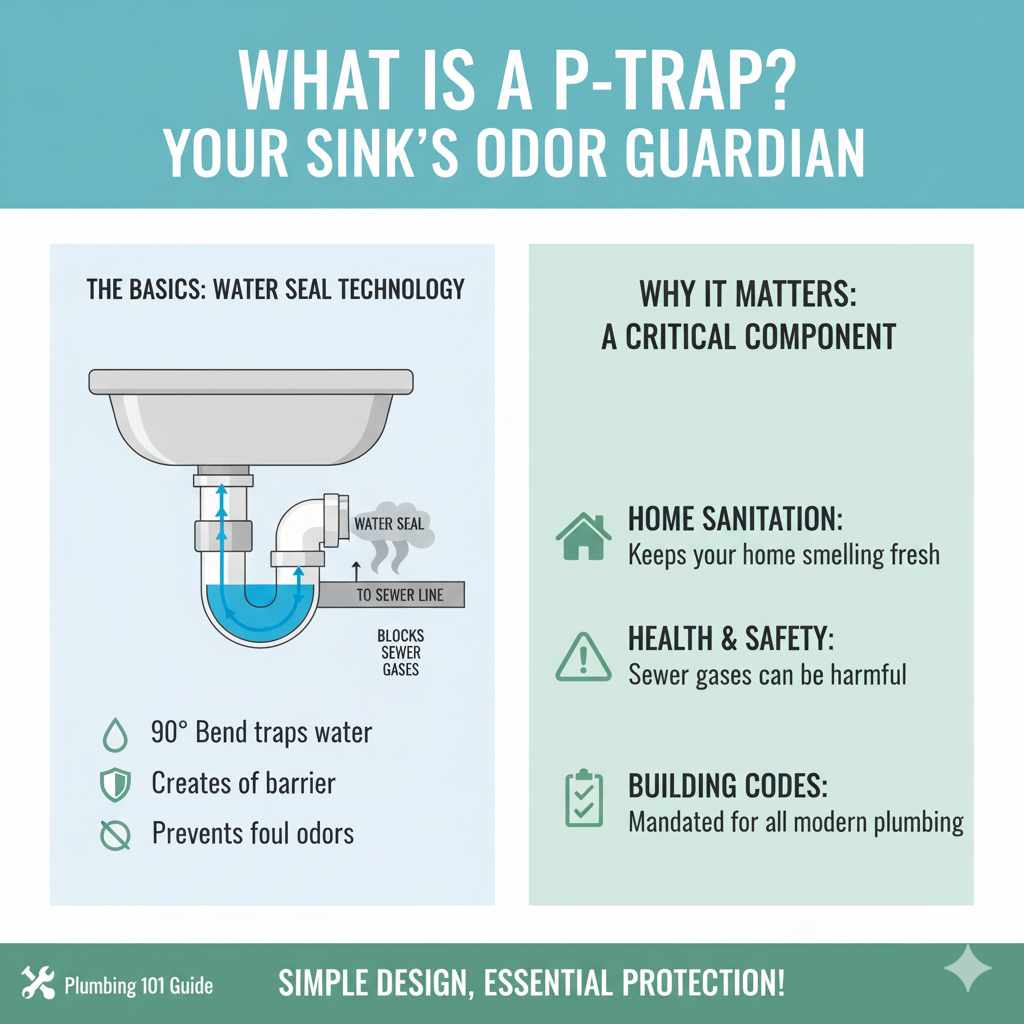
At its core, a P-trap is a simple plumbing fixture designed to do one very important job: prevent foul-smelling sewer gases from entering your home through your sink drain. It’s typically made of PVC (plastic) or metal (like chrome-plated brass) and gets its name from its distinctive shape. When you look at it, it resembles the letter “P” lying on its side, with a curved section that dips down and then curves back up before connecting to the main drainpipe. This specific shape is the key to its function.
Think of it as a water seal. Every time you run water in your sink, the P-trap fills with a small amount of water. This water acts as a barrier, physically blocking any gases from the sewer or septic system from traveling up through the pipes and into your living space. Without this water seal, your home would likely smell like the inside of a sewer, which is not only unpleasant but can also be unhealthy.
This simple, yet ingenious, design is a fundamental part of any modern plumbing system, found under kitchen sinks, bathroom sinks, and even floor drains. Its presence is so vital that building codes mandate its installation in all plumbing fixtures that connect to a sewer or septic system.
Why the “P” Shape? The Magic of the Water Seal
The curved, U-shaped section of the P-trap is the star of the show. Here’s how it works:
- Water Retention: When water flows down the drain, it fills this curved section.
- Gas Barrier: The water held in the curve creates a seal. This seal prevents gases from the sewer line, which can contain methane and hydrogen sulfide, from escaping through the drain opening.
- Continuous Protection: As long as there’s a bit of water in the trap, the seal remains effective. Even after the sink has drained, a small amount of water is intentionally left behind in the bend.
This water seal is crucial. If the trap were just a straight pipe, sewer gases would have a clear path into your home. The P-trap’s design ensures that a small reservoir of water is always present, acting as a constant guardian against unwanted odors and potentially harmful airborne contaminants.
The P-Trap’s Essential Functions
Beyond just preventing smells, the P-trap serves a few other important roles in your home’s plumbing system. Understanding these functions helps appreciate why this seemingly simple pipe is so vital.
1. Preventing Odors
This is the P-trap’s primary and most well-known function. Sewer lines are full of gases produced by decomposing waste. These gases are not only smelly but can also contain harmful bacteria and viruses. The water held in the P-trap acts as a physical barrier, preventing these gases from entering your home through the sink drain. Without it, your kitchen and bathrooms would constantly smell unpleasant, making them uncomfortable spaces to be in.
2. Preventing Pest Entry
While not its main job, the water seal in a P-trap can also help deter small pests like insects or even mice from crawling up through your drains. While a determined critter might find a way, the water acts as a natural deterrent for many common household pests that might otherwise venture into your home via the plumbing system.
3. Trapping Debris (A Double-Edged Sword)
The P-trap’s design also means it can catch larger debris that might otherwise travel further down your plumbing system. Think hair, food scraps, jewelry, or other small items that accidentally go down the drain. This can be a good thing, preventing clogs further down the line. However, it also means the P-trap is a common place for clogs to form, which is why it’s the first place plumbers check when a sink is draining slowly.
This debris-trapping capability is why P-traps often come with a cleanout plug or are designed to be easily disassembled for cleaning. It’s a trade-off: it catches gunk that could cause bigger problems, but it also means it’s the spot that most frequently needs attention.
Types of P-Traps
While the basic function remains the same, P-traps come in a few variations, mainly differing in material and specific design features. For most homeowners, understanding the material is the most practical distinction.
1. Material Differences
- PVC (Polyvinyl Chloride): These are the most common type found in modern homes. They are lightweight, inexpensive, and easy to install. PVC traps are durable and resistant to corrosion. They are typically white or gray.
- ABS (Acrylonitrile Butadiene Styrene): Similar to PVC, ABS is another type of plastic used for drain pipes and traps. It’s often black and can be slightly more flexible than PVC, making it easier to work with in some situations.
- Metal (Chrome-Plated Brass or Stainless Steel): These are often found in older homes or in situations where aesthetics are important, such as in a visible P-trap under a decorative sink. Metal traps are more durable and can be polished to a shine, but they are also more expensive and heavier than plastic options. They are also more susceptible to corrosion over very long periods.
2. Trap Designs
While the “P” shape is standard, you might encounter slight variations:
- Standard P-Trap: The classic U-bend design.
- P-Trap with Cleanout: Many P-traps, especially under sinks, feature a threaded plug at the bottom of the U-bend. This is called a cleanout plug and allows for easier access to clear clogs without having to fully disassemble the trap.
- Drum Trap: Less common now but found in older homes, a drum trap is a larger, cylindrical fixture that serves the same purpose as a P-trap but can hold more water and debris. They are generally less efficient and harder to clean than P-traps.
For most DIYers, the standard PVC P-trap with a cleanout plug is what you’ll encounter and likely work with. They are readily available at any hardware store and are designed for straightforward installation and maintenance.
Common P-Trap Problems and How to Fix Them
Even the best-designed plumbing can run into issues. The P-trap, being a collection point for water and debris, is often the source of common sink problems. Fortunately, most of these are manageable for a DIYer.
1. Leaks
P-trap leaks are usually caused by loose connections or damaged seals (washers). You might see drips under your sink, water stains, or a damp cabinet floor.
Troubleshooting and Fixing Leaks:
- Identify the Leak Source: Place dry paper towels under the trap and run water into the sink for a minute. Check where the paper towels get wet. Look for drips at the slip-nut connections (where the trap pieces join) or cracks in the pipe itself.
- Tighten Connections: Often, a leak is just a loose slip nut. Try tightening it by hand first. If it still leaks, use channel-lock pliers, but be gentle – overtightening can crack plastic fittings. Tighten only about a quarter turn past hand-tight.
- Check the Washer: If tightening doesn’t work, the rubber washer inside the slip nut might be worn, cracked, or misaligned.
- Disassemble and Inspect: Place a bucket under the trap. Loosen the slip nuts (counter-clockwise) and carefully remove the section with the suspected faulty washer. Inspect the washer for damage. If it looks worn or torn, replace it. You can buy replacement washers at any hardware store.
- Reassemble: Ensure the washer is properly seated inside the fitting, then reassemble the trap, tightening the slip nuts securely (hand-tight plus a quarter turn with pliers).
2. Clogs
As mentioned, the P-trap is a prime spot for clogs. Hair, soap scum, grease, and food particles can accumulate over time, slowing down or completely stopping drainage.
Clearing P-Trap Clogs:
- The Bucket Method: Place a bucket directly underneath the P-trap to catch any water and debris.
- Loosen Slip Nuts: Using channel-lock pliers, loosen the slip nuts on either side of the U-bend.
- Remove the Trap: Carefully remove the U-shaped section. Empty its contents into the bucket.
- Clean the Trap: Use a bottle brush, an old toothbrush, or a wire to scrape out any accumulated gunk from inside the trap. Rinse it thoroughly with hot water.
- Check Connecting Pipes: While the trap is off, you can often see into the pipe coming from the sink and the pipe going to the wall. Use a bent coat hanger or a small brush to clear any visible obstructions in these pipes as well.
- Reassemble: Reconnect the P-trap, ensuring washers are in place, and tighten the slip nuts.
- Test: Run water into the sink to check for leaks and ensure the drain is clear.
Tip: If the clog is stubborn or located further down the line, a plumber’s snake (auger) might be necessary. You can often feed the snake through the pipe opening where the trap was connected.
3. Dry Trap (Loss of Water Seal)
This is less common but can happen if a fixture with a P-trap isn’t used for a long time (like a guest bathroom sink or a floor drain in a basement). When the water evaporates from the trap, the sewer gas barrier is gone, leading to odors.
Fixing a Dry Trap:
The solution is simple: just run water down the drain for a minute or two. This will refill the trap and restore the water seal, eliminating the odor. It’s a good practice to periodically run water in seldom-used drains to prevent this.
How to Install or Replace a P-Trap
Replacing a P-trap is a very common DIY project that can save you money on plumber fees. It’s a great starter project for anyone looking to get comfortable with basic plumbing tasks.
Tools and Materials You’ll Need:
- New P-trap kit (ensure it matches the size and type of your old one, usually 1-1/4″ or 1-1/2″ for sinks)
- Bucket
- Channel-lock pliers or pipe wrench
- Rag or old towel
- Plumber’s putty (sometimes needed for the sink strainer, but not usually for the trap itself)
- Safety glasses
Step-by-Step Installation/Replacement Guide:
- Safety First: Put on your safety glasses.
- Prepare the Area: Place a bucket directly underneath the existing P-trap to catch any residual water and debris. Lay down a rag or towel to protect your cabinet floor.
- Loosen Existing Trap: Using your channel-lock pliers, gently loosen the slip nuts connecting the P-trap to the tailpiece (the pipe coming down from the sink drain) and the wall drainpipe. Turn them counter-clockwise.
- Remove Old Trap: Once the nuts are loose, carefully remove the old P-trap assembly. Empty any water and debris into the bucket.
- Clean Pipe Ends: Wipe clean the ends of the tailpiece and the wall drainpipe. Remove any old plumber’s putty or debris.
-
Assemble New Trap: Most new P-trap kits come with all the necessary pieces and rubber washers.
- First, slide a slip nut onto the tailpiece pipe, followed by a washer (cone-shaped end facing the trap).
- Then, attach the U-bend section of the new trap to the tailpiece and hand-tighten the slip nut.
- Next, slide another slip nut onto the wall drainpipe, followed by a washer.
- Connect the other end of the U-bend to the wall drainpipe and hand-tighten the slip nut.
- Align and Tighten: Ensure the P-trap is properly aligned. Once satisfied, use your pliers to tighten each slip nut. Again, tighten about a quarter turn past hand-tight. Do not overtighten, especially with plastic fittings.
- Test for Leaks: Remove the bucket. Run water into the sink for a few minutes, checking all connections for drips or leaks. If you find a leak, try tightening the corresponding slip nut a little more. If it persists, you may need to disassemble that connection, check the washer’s position and condition, and reassemble.
Congratulations! You’ve just successfully installed or replaced a P-trap. It’s a straightforward process that gives you a great sense of accomplishment.
P-Trap Maintenance for a Healthy Home
Keeping your P-trap in good working order is simple and requires minimal effort. Regular maintenance can prevent clogs and ensure that the odor-blocking water seal is always effective.
Regular Cleaning Habits:
- Avoid Pouring Grease Down the Drain: Grease solidifies in pipes and is a primary cause of clogs. Wipe greasy pans with a paper towel before washing, or pour cooled grease into a disposable container and throw it away.
- Use a Drain Strainer: A simple mesh strainer in your sink catch can trap food particles and hair, preventing them from entering the P-trap. Empty the strainer regularly into the trash.
- Flush with Hot Water: Periodically (e.g., once a week), pour a kettle of boiling water down the drain. This helps to melt away any accumulated grease or soap scum. Be cautious with very old or fragile pipes, and avoid this if you have a garbage disposal that might be sensitive.
- Occasional Baking Soda and Vinegar Flush: For a natural deodorizer and cleaner, pour about half a cup of baking soda down the drain, followed by half a cup of white vinegar. Let it fizz for 10-15 minutes, then flush with hot water.
When to Call a Professional:
While most P-trap issues are DIY-friendly, there are times when it’s best to call a plumber:
- Persistent Clogs: If you’ve tried cleaning the trap and snaking the line without success, the clog might be deeper in your plumbing system.
- Multiple Leaks: If you can’t stop leaks after tightening connections and checking washers, there might be a crack in the pipe or a more complex fitting issue.
- Unusual Noises: Gurgling sounds or water backing up in multiple fixtures can indicate a main sewer line problem that requires professional attention.
- Damage to Main Pipes: If you suspect damage to the larger drain pipes connected to the P-trap, it’s best left to the experts.
Taking these simple steps will help ensure your P-trap continues to do its job effectively, keeping your home free from unpleasant odors and potential plumbing headaches.
P-Trap vs. S-Trap vs. Other Drain Traps
While the P-trap is the most common type of trap used today, you might encounter other designs, particularly in older homes or specific plumbing scenarios. Understanding the differences can be helpful.
The P-Trap: The Modern Standard
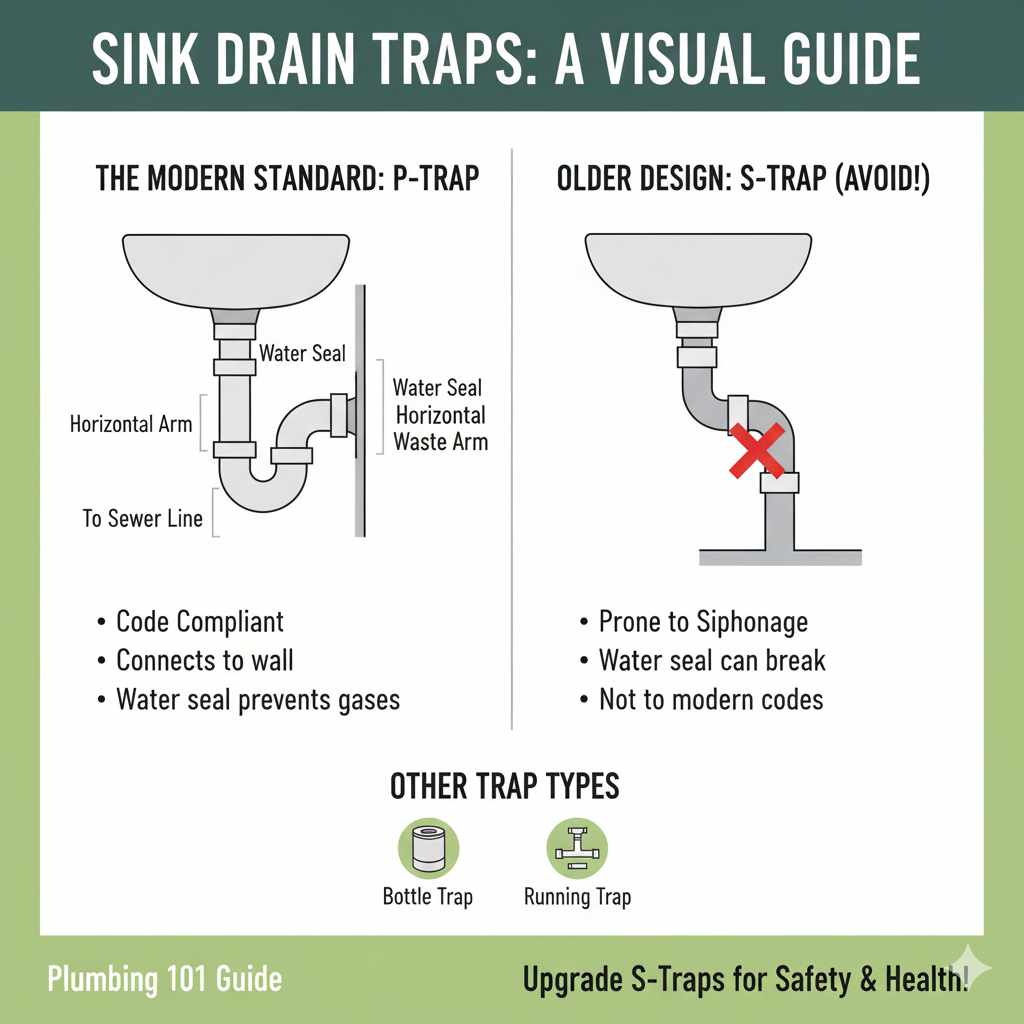
As we’ve discussed, the P-trap connects to a horizontal waste arm coming from the wall. This horizontal connection is key to its effectiveness and compliance with modern plumbing codes.
The S-Trap: An Older, Less Desirable Design
An S-trap looks similar to a P-trap but has a second downward bend, creating an “S” shape when viewed from the side. It typically connects directly to a vertical pipe that goes straight down through the floor.
Why S-Traps are Problematic:
- Siphonage Risk: The primary issue with S-traps is their susceptibility to siphonage. When a large volume of water drains quickly, it can create a vacuum that pulls all the water out of the trap, leaving it dry and unable to block sewer gases.
- Code Violations: Due to the siphonage risk, S-traps are generally not permitted by modern plumbing codes in new installations or significant renovations. If you have an S-trap, it’s often recommended to have it replaced with a P-trap.
Other Trap Types:
- Bottle Trap: These are often used in more decorative or space-constrained installations, like pedestal sinks or vanities where a traditional P-trap might be too bulky. They are typically a more compact, cylindrical design that achieves the same water seal.
- Running Trap: Used in commercial settings or where multiple fixtures drain into a single pipe, a running trap is installed in a horizontal drain line and serves to trap gases from the main line before branching off to individual fixtures.
- Jump Trap: This is a less common term sometimes used to describe a type of trap installed in a vertical pipe that has a horizontal outlet, effectively “jumping” over a section of pipe.
For the average homeowner, the P-trap is the type you’ll most commonly interact with. If you discover an S-trap in your home, it’s worth considering an upgrade for better odor protection and code compliance. The U.S. Environmental Protection Agency (EPA) provides resources on plumbing system best practices, which often touch on the importance of proper trap design for public health and safety.
Frequently Asked Questions About P-Traps
Q1: What is the main purpose of a P-trap?
The main purpose of a P-trap is to hold a small amount of water, creating a seal that prevents sewer gases from entering your home through the sink drain. This keeps your home smelling fresh and healthy.
Q2: Why does my sink smell bad if it’s not clogged?
A bad smell, even without a clog, often means the water seal in your P-trap has evaporated (if the sink isn’t used often) or there’s a crack or leak in the trap allowing gases to escape. Running water will usually fix an evaporated seal.
Q3: How often should I clean my P-trap?
For most busy sinks, regular drain strainers and occasional hot water flushes are sufficient. If you notice slow draining or smells, cleaning the trap itself is a good idea. For sinks used less frequently, run water for a minute every couple of weeks to keep the trap full.
Q4: Can I replace a P-trap myself?
Yes, replacing a P-trap is a very common and achievable DIY project for most homeowners. It requires basic tools and a new P-trap kit, which are inexpensive and readily available.
Q5: What’s the difference between a P-trap and an S-trap?
A P-trap connects to a horizontal drainpipe in the wall and is less prone to losing its water seal. An S-trap connects to a vertical pipe going through the floor and is more susceptible to siphoning, which can remove the water seal and allow sewer gases into your home. Modern codes prefer P-traps.
Q6: What are P-traps made of?
P-traps are most commonly made of PVC (plastic) or ABS (another type of plastic). Older installations or decorative sinks might use metal, such as chrome-plated brass or stainless steel.
Q7: What should I do if my P-trap is leaking?
First, try tightening the slip nuts by hand, then gently with pliers. If that doesn’t work, the rubber washer inside the connection might be worn or misaligned. You may need to disassemble the trap, check, and possibly replace the washer.
Conclusion
So there you have it! The P-trap might seem like a humble, overlooked part of your home’s plumbing, but its role is undeniably crucial. It’s your first line of defense against unpleasant sewer odors and a silent guardian of your home’s air quality. By understanding what it is, how it works, and what common issues can arise, you’re now well-equipped to handle minor leaks or clogs yourself, saving time and money.
Remember, the simple act of keeping water in that U-bend is what makes all the difference. Regular maintenance, like using drain strainers and occasionally flushing with hot water, will keep your P-trap functioning optimally. And for those bigger challenges, you now have the knowledge to tackle a P-trap replacement with confidence. Your home will thank you for it, smelling fresh and functioning smoothly!