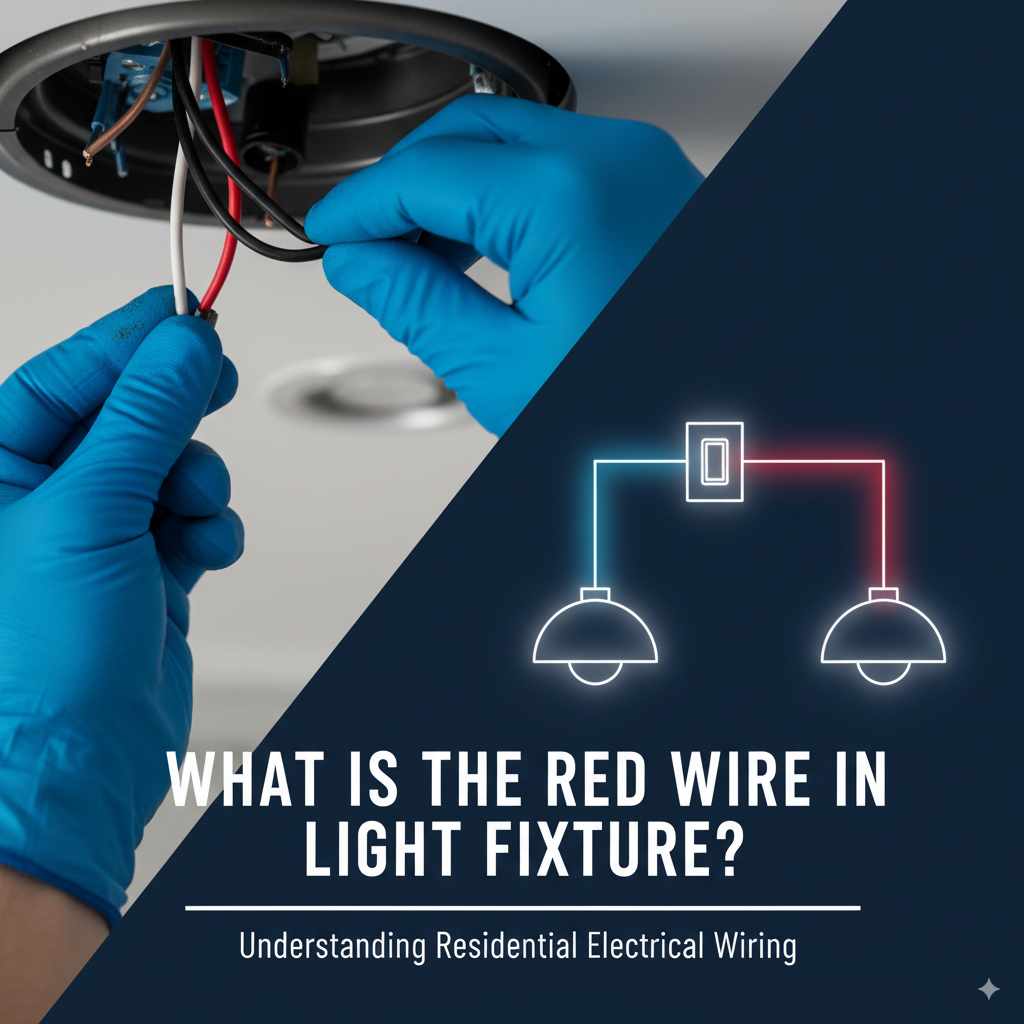
What Is The Red Wire In Light Fixture: Essential Guide
The red wire in a light fixture typically acts as a “switched hot” wire, meaning it carries power from the switch to the light fixture. Understanding its role is crucial for safe and correct electrical installations and troubleshooting.
Ever stared at a tangle of wires inside a light fixture or junction box and wondered, “What in the world is this red one for?” You’re not alone! Electrical wiring can seem like a secret code, but understanding the basic colors, especially the red wire, is a game-changer for DIYers. It’s a common point of confusion, but with a little clarity, you’ll be confidently working on your home’s lighting. This guide will break down exactly what that red wire does, why it’s important, and how to handle it safely. Let’s shed some light on the subject!
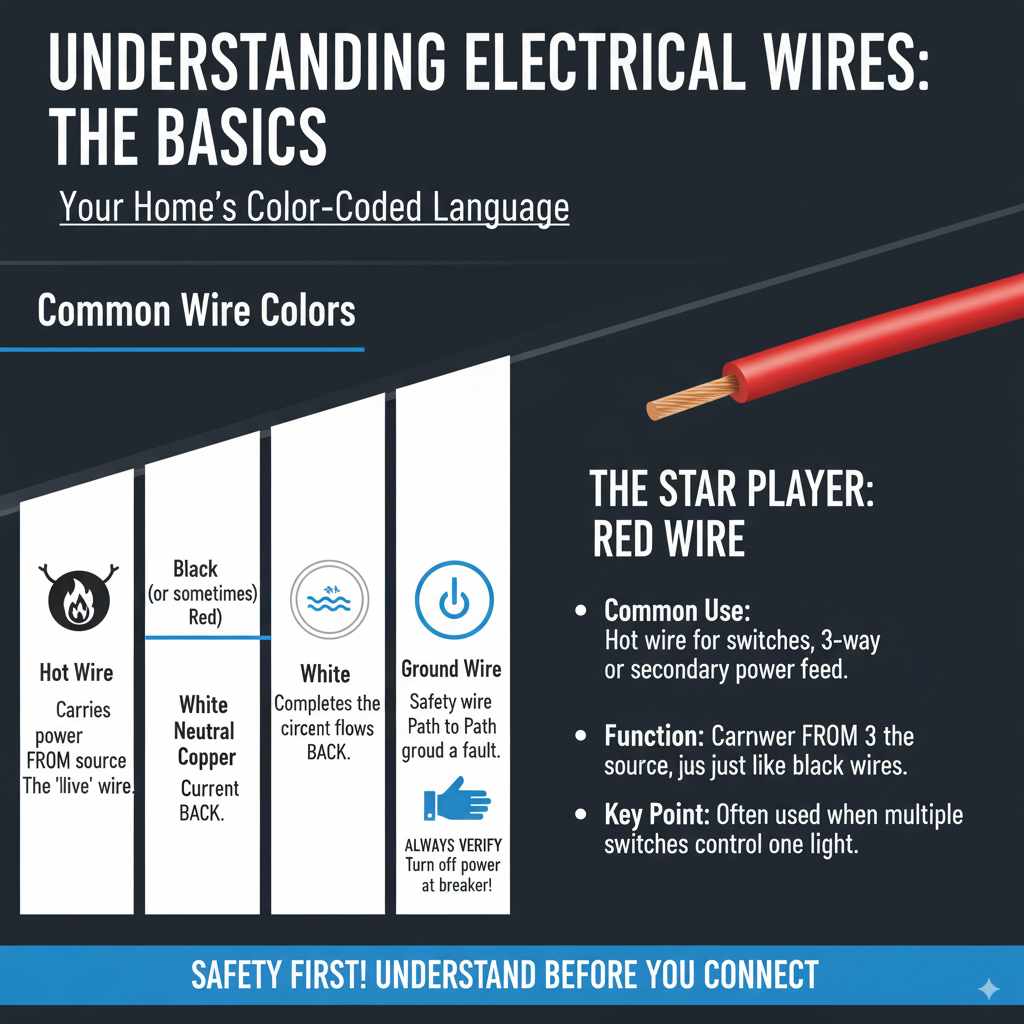
Understanding Electrical Wires: The Basics
Before we dive deep into the red wire, let’s quickly touch on the most common wire colors you’ll encounter in your home’s electrical system. Think of these colors as a color-coded language that electricians use to ensure safety and proper function. While regional codes can sometimes vary slightly, the general color-coding is pretty standard in North America.
Here’s a quick rundown of the usual suspects:
- Black (or sometimes Red): Hot Wire – This wire carries the electrical current from the power source. It’s the “live” wire.
- White: Neutral Wire – This wire completes the circuit, allowing electricity to flow back to the power source. It’s typically cooler to the touch than the hot wire.
- Green or Bare Copper: Ground Wire – This is a safety wire. It provides a path for electricity to flow to the ground in case of a fault, preventing shocks.
Now, let’s focus on our star player: the red wire.
What Is The Red Wire In Light Fixture? Your Essential Guide
When you’re dealing with a light fixture, the red wire almost always serves a specific purpose: it’s the switched hot wire. This means it’s the wire that delivers power to the light after it has been turned on by a switch. In many standard setups, a black wire might be the primary “hot” wire coming from the breaker box, but the red wire becomes crucial when you have a switch involved in controlling the light.
Think of it like this: Power travels from the breaker box, usually through a black wire, to the light switch. When you flip the switch on, it creates a connection. This connection then sends power out through the red wire to your light fixture. When the switch is off, the red wire is de-energized, and your light goes out. It’s a vital part of the circuit that allows you to control your lighting.
Why is there a Red Wire? Common Scenarios
The presence of a red wire often indicates a more complex wiring setup than a simple direct connection from the power source to the light. Here are a few common situations where you’ll find a red wire in play:
- Switch Loops: This is the most frequent scenario. Power comes into the switch box, often via a black wire. The switch then uses a red wire to send power back to the light fixture. This allows the switch to interrupt the flow of electricity to the light.
- Multi-Way Switching (Three-Way or Four-Way Switches): In circuits with multiple switches controlling a single light (like at the top and bottom of stairs), red wires are commonly used as “traveler” wires. These wires carry power between the switches, allowing any switch to control the light.
- Multiple Fixtures on One Switch: Sometimes, a red wire might be used to carry power from one fixture to another in a series, especially if the initial power feed comes into the first fixture.
- Ceiling Fans with Lights: Many ceiling fans have separate controls for the fan motor and the light. A red wire is often used to carry power specifically to the light kit, allowing it to be controlled independently from the fan.
Red Wire vs. Black Wire: What’s the Difference?
This is where it can get a bit confusing, as both red and black wires can function as “hot” wires. The key difference lies in their typical roles within a circuit:
- Black Wire: Usually the primary “hot” wire coming directly from the power source (breaker box) to a junction box or switch. It’s the initial carrier of electrical power.
- Red Wire: Most often used as a “switched hot” wire. It carries power after it has passed through a switch. In some cases, it can also be used as a second hot wire in a multi-wire branch circuit (MWBC), where two circuits share a neutral wire.
It’s important to remember that while these are common uses, the function of a wire is determined by how it’s connected in the circuit, not just its color. However, adhering to these color codes is a crucial safety practice for electricians.
Safety First: Working with Electrical Wires
Before you even think about touching a wire, especially the red one, safety is paramount. Electricity is powerful and dangerous if not handled correctly. Always remember these essential safety tips:
- Turn Off the Power: This is non-negotiable. Locate the circuit breaker that controls the light fixture you’re working on and flip it to the “OFF” position. For extra safety, you can also remove the fuse if your home has a fuse box.
- Verify Power is Off: Don’t just assume the breaker did its job. Use a non-contact voltage tester to confirm that there is no power at the wires you’ll be working with. Touch the tester to each wire; if it lights up or beeps, there’s still power. Go back to the breaker and try again.
- Wear Safety Gear: Always wear safety glasses to protect your eyes from debris or sparks. Insulated gloves can provide an extra layer of protection.
- Use Insulated Tools: Ensure your screwdrivers, wire strippers, and pliers have insulated handles.
- Never Work on Wet Surfaces or with Wet Hands: Water is an excellent conductor of electricity.
- If You’re Unsure, Call a Professional: Electrical work can be complex and dangerous. If you feel uncomfortable or uncertain at any point, it’s always best to hire a qualified electrician. Your safety is worth more than saving a few dollars.
For more in-depth safety guidelines, consult resources like the Consumer Product Safety Commission (CPSC), which offers valuable information on electrical safety in the home.
Identifying the Red Wire in Your Fixture
When you open up your light fixture or the junction box it connects to, you’ll typically see wires coming from the ceiling or wall. Here’s how to identify the red wire and its role in connecting your fixture:
Common Wire Connections in a Light Fixture
In a standard light fixture installation, you’ll usually find three main wire connections:
- Hot Wire (Black or Red): This is the wire that brings power to the fixture.
- Neutral Wire (White): This wire completes the circuit, carrying power away from the fixture.
- Ground Wire (Green or Bare Copper): The safety wire.
When connecting a new fixture, you’ll typically connect the wires from the fixture to the corresponding wires in the junction box using wire nuts:
- Fixture Hot Wire (often black or red) connects to House Hot Wire (usually black, but can be red in switched circuits).
- Fixture Neutral Wire (white) connects to House Neutral Wire (white).
- Fixture Ground Wire (green or bare copper) connects to House Ground Wire (green or bare copper).
Important Note: In a switched circuit, the “House Hot Wire” entering the junction box might be black, and it connects to the switch. The red wire then leaves the switch and goes to the fixture. So, you might connect a black wire from the main power to the switch, and then a red wire from the switch to the fixture’s hot wire (which is also often red or black).
What if my fixture has a red wire and a black wire?
If your new light fixture comes with both a red and a black wire, it’s often designed for more advanced applications, such as ceiling fans with separate light kits or fixtures controlled by multiple switches. Here’s how to approach it:
- Check the Fixture’s Manual: Always refer to the manufacturer’s installation instructions. They will specify which wire is for the primary hot, which is for the light (if separate), and which is neutral.
- Separate Control: If you have a ceiling fan with a light, the black wire might power the fan motor, and the red wire might power the light. This allows you to control them independently with separate switches or a remote.
- Connecting to House Wiring: When connecting to your home’s wiring, you’ll typically connect the fixture’s red wire to the red switched hot wire from your ceiling box (if present and intended for the light) or to the black hot wire if you intend to control both the fan and light together. The fixture’s black wire would then connect to the other hot wire or the same hot wire depending on your setup. The white wires always connect together (fixture neutral to house neutral), and the ground wires connect together.
Troubleshooting Common Red Wire Issues
Encountering problems with your lighting? The red wire can sometimes be the culprit. Here are a few common issues and how to troubleshoot them:
Issue 1: Light Not Turning On
Possible Cause: The red wire is not receiving power from the switch, or the connection to the fixture is loose.
Troubleshooting Steps:
- Ensure the power is OFF at the breaker.
- Check the switch: Is it wired correctly? Is the switch itself faulty?
- Inspect the connections at the switch and at the light fixture. Make sure wire nuts are secure and wires are making good contact.
- Use a voltage tester to confirm power is reaching the red wire at the fixture when the switch is in the “ON” position. If no power is detected, the issue is likely upstream (the switch or wiring to the switch).
Issue 2: Light Stays On (Even When Switch is Off)
Possible Cause: The red wire is improperly connected, or there’s a short circuit. This is less common but can happen with incorrect wiring, especially in multi-way switching.
Troubleshooting Steps:
- Turn off the power at the breaker.
- Carefully examine all connections involving the red wire at the switch and the fixture. Ensure no bare wires are touching each other or metal components.
- If you have a three-way switch setup, double-check the traveler wire connections. An incorrectly wired traveler can sometimes cause lights to stay on.
- If you suspect a short, you may need to disconnect wires one by one (with power off!) to isolate the problem.
Issue 3: Flickering Lights
Possible Cause: Loose connections, a faulty dimmer switch, or an overloaded circuit.
Troubleshooting Steps:
- Check all wire connections for tightness. A loose connection can cause intermittent power flow, leading to flickering.
- If you’re using a dimmer switch, ensure it’s compatible with your light fixture (especially LEDs). Some dimmers can cause flickering with certain types of bulbs.
- Consider if you’ve added other high-draw appliances to the same circuit. An overloaded circuit can cause lights to dim or flicker.
Wiring Diagrams: A Visual Aid
Visual aids are incredibly helpful when dealing with electrical wiring. While a complete electrical diagram for every scenario is beyond this guide, understanding the basic principles can make a huge difference. Here are simplified examples of how red wires are typically used.
Diagram 1: Simple Switched Light
This is the most common setup. Power comes from the breaker box to the switch, then to the light.
| Location | Incoming Wire (from Power/Breaker) | Wire to Switch | Wire from Switch | Wire to Fixture |
|---|---|---|---|---|
| Junction Box 1 (Near Breaker) | Black (Hot), White (Neutral), Ground | Black (Hot) | N/A | N/A |
| Switch Box | Black (Hot from Box 1) | Connects to Switch Terminal | Red (Switched Hot) | Connects to Red (to Fixture) |
| Junction Box 2 (At Fixture) | N/A | N/A | Red (Switched Hot from Switch) | Connects to Fixture’s Hot Wire (often Red or Black) |
| Fixture Connections | N/A | N/A | N/A | Red/Black (Fixture Hot) to Red (House Switched Hot) White (Fixture Neutral) to White (House Neutral) Green/Bare (Fixture Ground) to Green/Bare (House Ground) |
In this diagram, the red wire acts as the “carrier” of power from the switch to the light fixture. The black wire from the power source energizes the switch.
Diagram 2: Ceiling Fan with Light (Simplified)
This shows a common scenario where a ceiling fan has separate controls for the fan and light, often requiring two switched hot wires from the ceiling.
| Location | Wire Function | Connection at Fixture/Fan |
|---|---|---|
| Ceiling Box |
Hot 1 (e.g., Black): To Fan Motor Switch Hot 2 (e.g., Red): To Light Switch Neutral (White): Shared Ground (Green/Bare): Shared |
Connected to appropriate wires from wall switches. |
| Ceiling Fan/Light Fixture |
Fan Motor Hot (Often Black): Connects to Hot 1 from Ceiling Light Hot (Often Red): Connects to Hot 2 from Ceiling Neutral (White): Connects to Neutral from Ceiling Ground (Green/Bare): Connects to Ground from Ceiling |
Follow manufacturer’s instructions for specific wire colors on the fan/light unit. |
This illustrates how different colored wires can be used to control different components of a single fixture independently.
When Red Wire Means Something Else: Advanced Scenarios
While the “switched hot” is the most common role for a red wire in residential lighting, it’s important to be aware of other possibilities, especially in more complex electrical systems. Understanding these can prevent confusion and ensure proper installation.
Multi-Wire Branch Circuits (MWBC)
A Multi-Wire Branch Circuit (MWBC) is a type of electrical circuit that uses two or three ungrounded (hot) conductors, along with a common neutral conductor, to supply power to multiple outlets or fixtures. In an MWBC, you might find a black wire and a red wire both acting as hot conductors, sharing a single white neutral wire. This is done for efficiency and to save on wiring.
Key Characteristics of MWBCs:
- Shared Neutral: The white neutral wire carries the sum of the currents from the two hot wires. If the two hot wires are on opposite phases of the electrical system, the neutral current is reduced.
- Common Shut-off: For safety, the National Electrical Code (NEC) requires that all ungrounded (hot) conductors of an MWBC be provided with a handle tie or be part of a single multi-pole breaker. This ensures that if one hot wire is de-energized, the other is also de-energized, preventing the neutral wire from becoming unexpectedly energized.
- Red and Black Hot Wires: You’ll typically see a black wire and a red wire as the two hot conductors.
Why is this important for you? If you encounter a junction box with a black wire, a red wire, and a white wire, and they are all connected together (with the white wires shared), you might be dealing with an MWBC. Incorrectly disconnecting or working with an MWBC without understanding its structure can be hazardous. For instance, if you turn off only one breaker in an MWBC and then disconnect the shared neutral, the other hot wire could still be energized, posing a shock risk.
The Electrical Contractor Magazine offers detailed insights into MWBCs for those interested in deeper technical understanding.
Three-Way and Four-Way Switching
As briefly mentioned, red wires are indispensable in circuits with multiple switches controlling a single light. In a three-way switch setup (two switches controlling one light), red wires are commonly used as “traveler” wires. These wires carry power between the two switches.
How it works:
- One switch receives the main hot power (usually black).
- This switch connects to the other switch using two traveler wires. These are often red and black, or red and white (with the white wire re-identified as hot using black tape).
- The second switch then connects to the light fixture using a red wire as the switched hot.
In a four-way switch setup (three or more switches controlling one light), additional traveler wires are used between the two three-way switches, often involving red wires.
If you’re installing or troubleshooting a light controlled by multiple switches, pay close attention to how the red wires are routed between the switches and to the fixture. Incorrect traveler wiring is a common reason for these systems to malfunction.
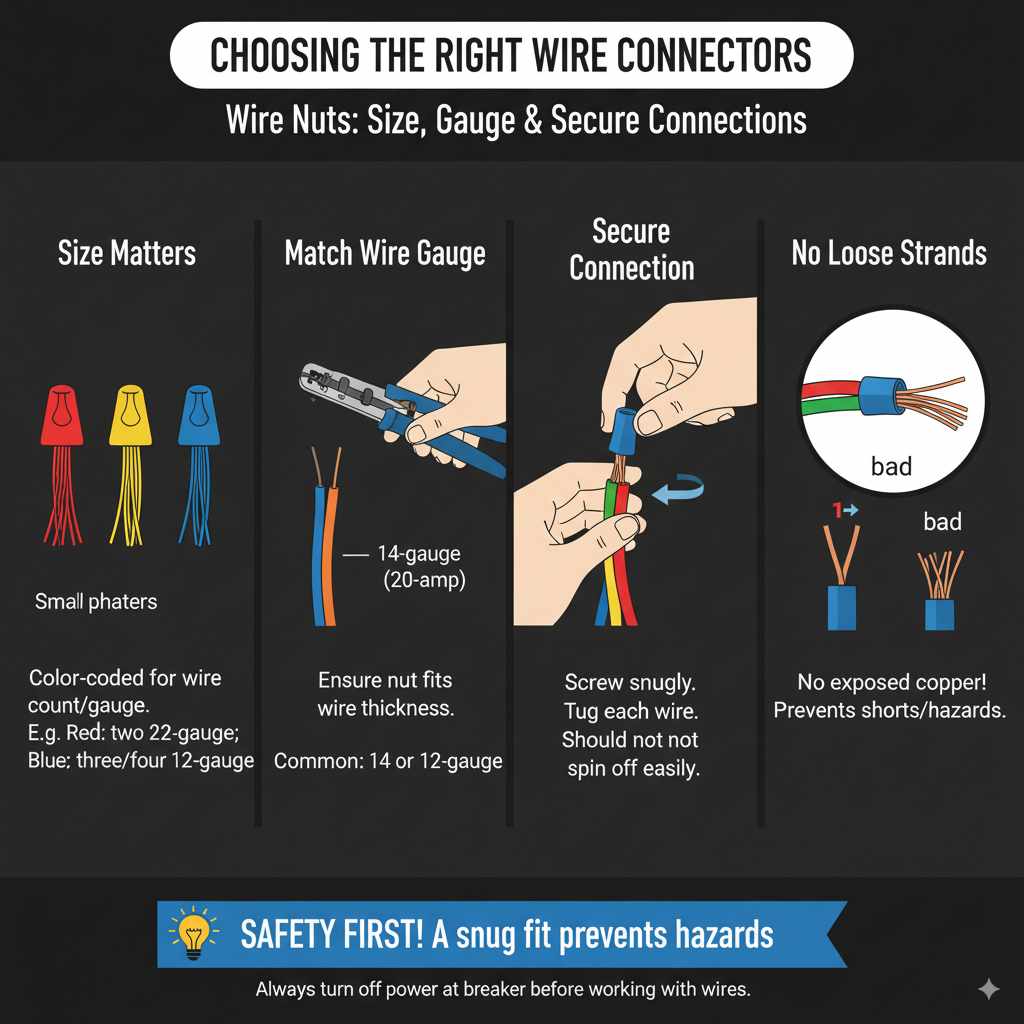
Choosing the Right Wire Connectors
Once you’ve identified your wires and confirmed the power is off, you’ll need to connect them securely. Wire nuts are the standard tool for this job. It’s essential to use the correct size and type of wire nut for the number and gauge of wires you’re connecting.
General Guidelines for Wire Nuts:
- Size Matters: Wire nuts are color-coded based on the number and size of wires they can safely accommodate. A small red wire nut might be for two 22-gauge wires, while a larger blue or yellow one might be for three or four 12-gauge wires.
- Match Wire Gauge: Ensure the wire nut is rated for the gauge (thickness) of your wires. Common household wiring is typically 14-gauge (for 15-amp circuits) or 12-gauge (for 20-amp circuits).
- Secure Connection: Screw the wire nut onto the stripped ends of the wires clockwise until it’s snug. Give each wire a gentle tug to ensure it’s held firmly. A properly installed wire nut should not spin off easily.
- No Loose Strands: Make sure no stray wire strands are exposed outside the wire nut.
Using the wrong size wire nut can lead to loose connections, which can cause flickering lights, intermittent power, or even fire hazards.
Frequently Asked Questions (FAQ)
Q1: Can I use a red wire as a neutral wire?
A: No, you should never use a red wire as a neutral wire. White is the standard color for neutral wires. Using red for neutral would violate electrical codes and create a dangerous situation, as it could be mistaken for a hot wire.
Q2: What if my light fixture has a red wire, but my ceiling wiring only has black, white, and ground?
A: In this common scenario, your ceiling wiring likely indicates a single-pole switch controlling the light. The black wire from the ceiling is the switched hot. You would connect the red wire from your fixture to the black wire from the ceiling. The white fixture wire connects to the white ceiling wire, and the ground connects to the ground. If your fixture has a red wire intended for a separate light control (like on a ceiling fan), and you only have a single hot from the ceiling, you’ll connect both the red and black fixture wires to the single black wire from the ceiling. This will allow them to be controlled together by the single switch.
Q3: Is a red wire always hot?
A: While a red wire is typically used as a “switched hot” or a traveler wire in multi-way switching, it’s crucial to always test wires with a voltage tester before assuming they are hot or dead. In rare cases, or in older wiring, colors might not strictly adhere to modern codes. However, in standard modern installations, assume a red wire is carrying power when the switch is on.
Q4: What is the difference between a red wire and a black wire in a light fixture?
A: Both can be hot wires. The black wire is usually the primary hot wire bringing power from the source. The red wire is most often the “switched hot,” carrying power from the switch to the fixture. If a fixture has both, it’s often designed for independent control of different components (like a fan and light).
Q5: Can I connect a red wire to a black wire directly?
A: Yes, in most cases, you can connect a red wire (switched hot) to a black wire (primary hot) using a wire nut. This is a common practice when wiring a light fixture that is controlled by a switch. Ensure both wires are stripped to the correct length and secured tightly within the wire nut.
Q6: What should I do if I find a red wire connected to a white wire?
A: This usually indicates that the white wire is being used as a hot conductor, which is not standard. The NEC requires that any conductor used as a hot wire other than black (or red in certain applications) must be re-identified with colored tape (usually black) at all termination points. If you find a red wire connected to a white wire without any re-identification, it’s best to consult a qualified electrician to ensure the wiring is safe and compliant.
Q7: How do I know if the red wire is for my light or my fan if I have a ceiling fan/light combo?
A: Always refer to the manufacturer’s installation manual for your specific ceiling fan. It will clearly label which wire on the fan unit is for the motor and which is for the light. You then connect these to the corresponding wires coming from your ceiling box, which are typically controlled by separate switches or a remote system. If your ceiling box only provides one hot wire (usually black), you might connect both the fan’s black and red wires to it, meaning they’ll be controlled by the same switch.
Conclusion
Understanding the role of the red wire in your light fixtures is a significant step towards confidently tackling electrical DIY projects. We’ve explored how it typically functions as a switched hot wire, its common appearances in switch loops and multi-way switching, and crucial safety precautions to always follow. Remember, the key to safe and successful electrical work lies in preparation, understanding, and prioritizing safety above all else.
By now, you should feel much more comfortable identifying and understanding the red wire. You’ve learned about its purpose, how it differs from other wires, common troubleshooting steps, and even some more advanced scenarios like MWBCs. Keep these principles in mind, always turn off the power, use your voltage tester, and don’t hesitate to call a professional if you encounter anything beyond your comfort level.
With this knowledge, you’re well-equipped to handle many common lighting installations and repairs, saving you time and money while gaining valuable skills. Happy, and safe, DIYing!