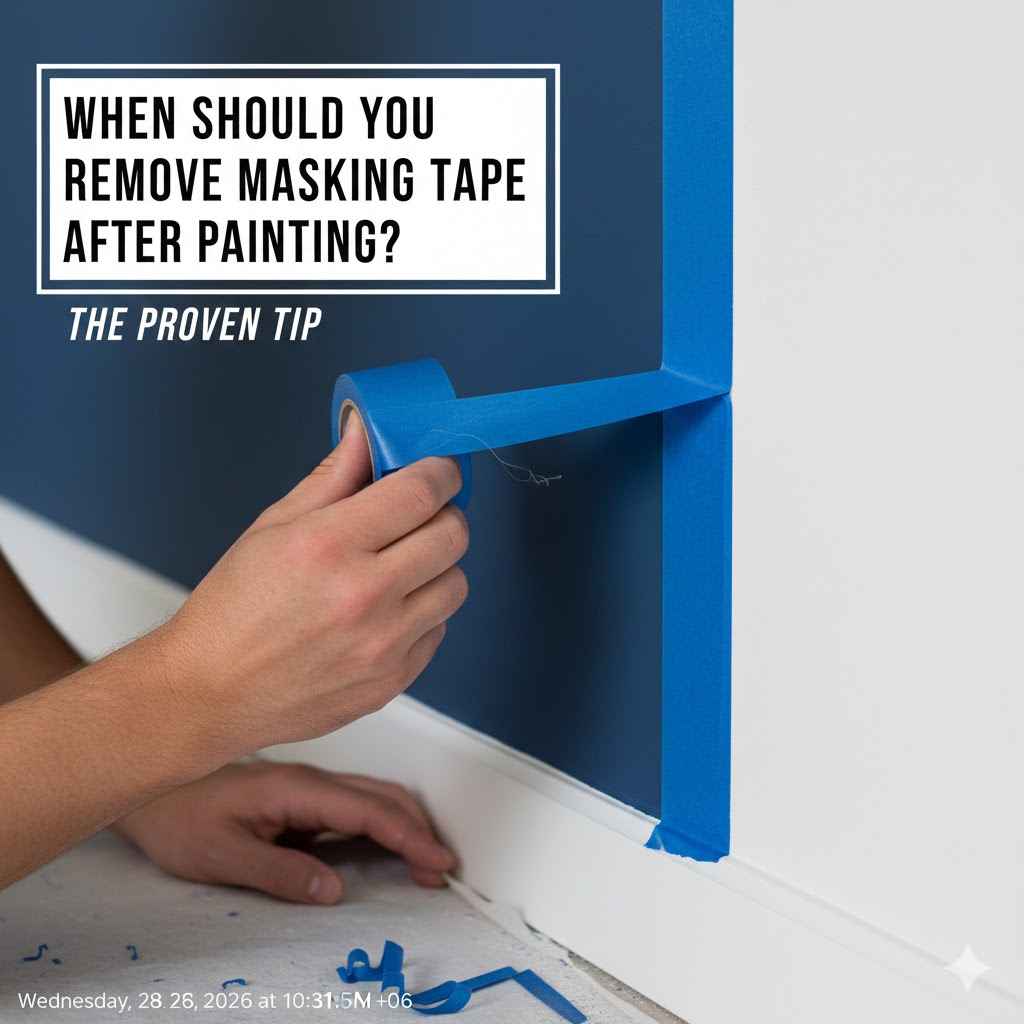
When Should You Remove Masking Tape After Painting? Proven Tip
For the sharpest, cleanest lines, remove masking tape when the paint is still slightly wet or tacky to the touch—typically within 30 to 60 minutes after your final coat. Waiting for the paint to dry completely creates a film that can tear and peel off with the tape, ruining your hard work.
You’ve done the hard work. You spent hours carefully taping every edge and corner. The painting is finally done, and it looks great! But now comes the moment of truth: removing the tape. Pull it too soon, and you get smudges. Pull it too late, and you rip off your beautiful new paint. It’s a common frustration for every DIY painter, and it can turn a great project into a disappointing one in seconds.
Don’t worry, you’re not alone. This is one of the most asked questions I get. The good news is that getting perfect, crisp paint lines is easy when you know the secret. I’m here to show you the simple, proven trick that professionals use to get flawless results every single time. Let’s get this right together and make sure your project looks amazing.
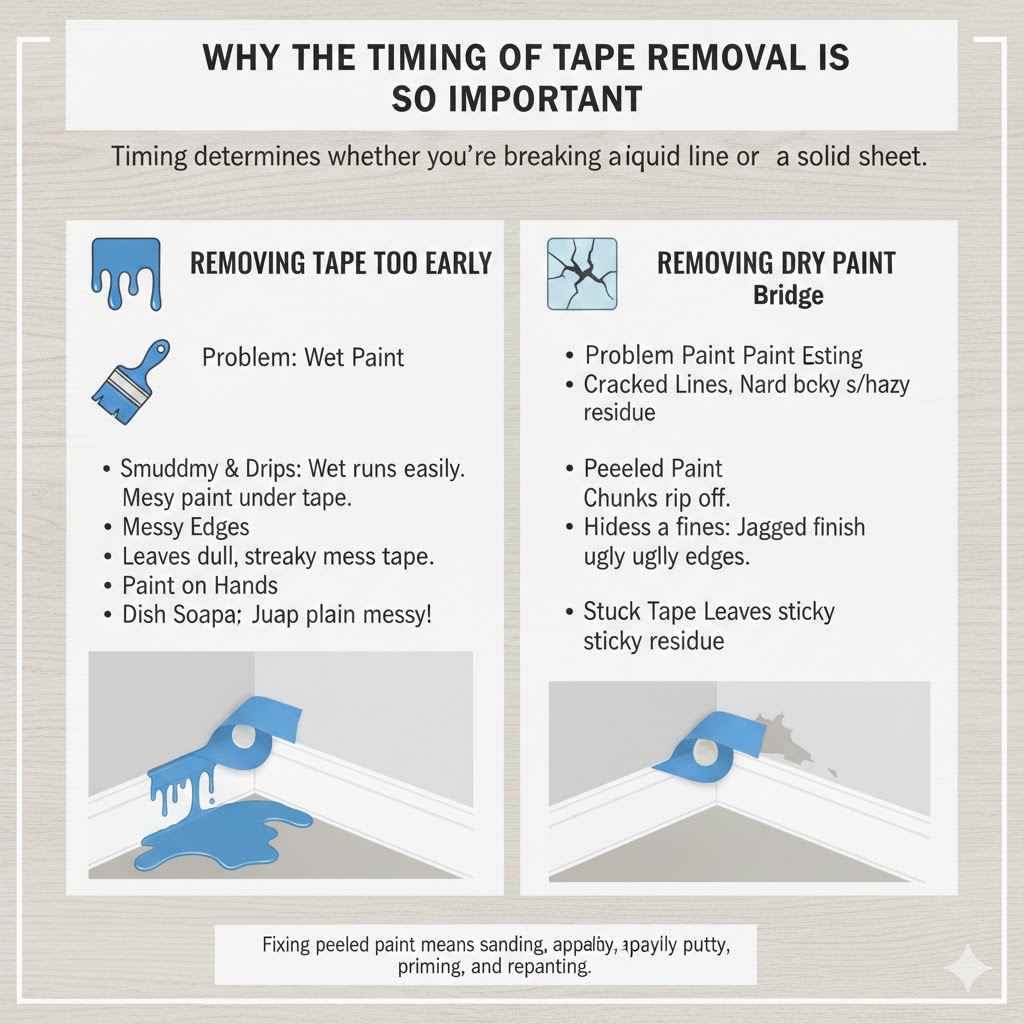
Why the Timing of Tape Removal is So Important
Think of wet paint like a liquid and dry paint like a thin, solid sheet. The timing of when you remove your tape determines whether you’re breaking a liquid line or tearing a solid sheet. This is the key to understanding why timing is everything.
The Problem with Removing Tape Too Early
If you pull the tape off immediately after the brush leaves the wall, the paint is still very wet and fluid. It hasn’t had any time to set up. What happens next?
- Smudging and Drips: The wet paint can easily run or smudge into the area you worked so hard to protect.
- Messy Edges: Instead of a crisp line, you might get a feathered or blurry edge as the paint bleeds under the tape just as you pull it away.
- Paint on Your Hands: It’s just plain messy! You’re more likely to get paint on your hands, clothes, and the surrounding surfaces.
While this is better than waiting too long, it’s not ideal for a professional-looking finish.
The Disaster of Removing Tape Too Late
This is the mistake most beginners make, and it’s the most heartbreaking. When you let the paint dry completely, it forms a continuous film over both the wall and the tape. The paint creates a “bridge” connecting the two. When you pull the tape off, you aren’t just removing tape—you’re tearing that solid film of paint.
Here’s what happens:
- Peeled Paint: The tape takes chunks of your new paint job with it, leaving behind jagged, ugly edges.
- Cracked Lines: Even if it doesn’t peel off completely, the paint along the tape line will crack and look messy.
- Stuck Tape: The adhesive on the tape can cure and bond to the surface, making the tape difficult to remove and leaving behind a sticky residue.
Fixing peeled paint means sanding, reapplying putty, priming, and repainting. It’s a lot of extra work that you can easily avoid.
The “Goldilocks Zone”: The Perfect Time to Remove Painter’s Tape
The perfect time to remove painter’s tape is not when it’s soaking wet, and certainly not when it’s bone dry. The sweet spot, or the “Goldilocks Zone,” is when the paint is tacky but not fully wet.
What does “tacky” mean? It means the paint is dry to the touch but still soft. If you were to gently touch it in an inconspicuous area, it wouldn’t smear all over your finger, but it might feel slightly sticky. For most latex paints, this happens about 30 to 60 minutes after you’ve applied your final coat.
Removing the tape during this window allows the paint film to break cleanly along the edge of the tape. It has set enough not to run, but it’s still flexible enough not to tear. This is the single most important secret to achieving those razor-sharp lines you see in magazines.
How Paint Type Affects Your Timing
Different paints dry at different rates. Understanding your paint is crucial for nailing the timing. Here’s a simple breakdown:
| Paint Type | Typical Dry-to-Touch Time | Optimal Tape Removal Window | Key Tip for Success |
|---|---|---|---|
| Latex (Water-Based) | 30-60 minutes | Within 1 hour of the final coat | This is the most common paint for walls. It dries fast, so be ready to remove your tape shortly after you finish painting a section. |
| Oil-Based (Alkyd) | 6-8 hours | Between 6-10 hours, while still soft | This paint stays workable for longer. You have a much larger window, but don’t forget about it! Remove it the same day. |
| Chalk Paint | 20-30 minutes | Within 30 minutes of the final coat | Chalk paint dries exceptionally fast. You need to be ready to pull the tape almost immediately after you’re done. |
Always check the paint can for the manufacturer’s recommended drying times. Factors like humidity and temperature can also affect how quickly paint dries. High humidity will slow it down, while a warm, dry room will speed it up.
Your Step-by-Step Guide to Perfect Tape Removal
Alright, you understand the “why” and “when.” Now let’s cover the “how.” Follow these simple steps, and you’ll get it right every time.
Tools You’ll Need:
- Your hands!
- A utility knife or a small putty knife (for emergencies)
- A trash bag or can for easy cleanup
The Proven 4-Step Method
-
Step 1: Start as Soon as the Paint is TackyOnce you’ve finished your final coat, set a timer for about 30 minutes. After 30 minutes, find a small, hidden spot (like behind where a door will open) and gently touch the paint. If it feels slightly sticky but doesn’t come off on your finger, it’s time.
-
Step 2: Score the Edge (Only if you waited too long)If you miss the one-hour window and the paint is mostly dry, don’t panic. You can still save it. Take a sharp utility knife or a razor blade and run it very lightly along the edge where the tape meets the fresh paint. This cuts the paint film, creating a clean breaking point. Be careful not to press too hard, or you’ll cut into the wall itself. This step prevents the paint from peeling off with the tape.
-
Step 3: Pull at a 45-Degree Angle
This is crucial. Do not pull the tape straight out (at a 90-degree angle) from the wall. This puts stress on the paint edge and encourages tearing. Instead, pull the tape back on itself at a 45-degree angle. This clean, shearing angle helps the tape release cleanly without lifting the paint.
-
Step 4: Go Slow and SteadyDon’t rush and rip the tape off like a bandage. Pull it with a slow, consistent motion. If you see any paint starting to lift, stop. You may need to change your angle slightly or go back and score the edge with your utility knife. Fold the used tape onto itself as you go to keep your hands and the surrounding area clean.
Choosing the Right Tape Makes a Huge Difference
Not all tapes are created equal. Using cheap masking tape is a recipe for frustration. It can let paint bleed underneath or leave a stubborn, sticky residue. Investing in quality painter’s tape is one of the best things you can do for your project.
Here’s a quick guide to help you choose the right tape for your job:
| Tape Type | Best For | Adhesion Level | Pro Tip |
|---|---|---|---|
| General Blue Painter’s Tape | Most cured surfaces like trim, walls, and glass. | Medium | This is your go-to for most everyday interior painting jobs. Look for brands that promise clean removal for at least 14 days. |
| Delicate Surface Tape (Purple/Yellow) | Freshly painted surfaces (cured for at least 24 hours), wallpaper, cabinets, and vinyl flooring. | Low | Use this when you need to tape over a surface you just painted yesterday. Its gentle adhesive won’t damage the new finish. |
| Green Painter’s Tape (e.g., FrogTape) | Projects where you need ultra-sharp lines. | Medium | This tape often has a special polymer that reacts with latex paint to create a micro-barrier, sealing the edges to prevent bleed. It’s fantastic for stripes and patterns. |
| Exterior Painter’s Tape | Rough or uneven outdoor surfaces like brick, concrete, stucco, and wood. | High | This tape has a much stronger adhesive to stick to challenging textures and withstand UV rays and weather. |
A Quick Tip for Applying Tape
After applying your tape, run a flexible putty knife or a credit card along the edge to seal it firmly. This simple step presses the tape flush against the surface and is your best defense against paint bleeding underneath.
What to Do If You’ve Waited Too Long and the Tape is Stuck
It happens. You get busy, life gets in the way, and suddenly it’s two days later and the tape is still on the wall. Don’t just yank it! You’ll almost certainly peel your paint. Here’s the emergency plan:
-
Soften the Adhesive First: Use a hairdryer on a low to medium heat setting. Hold it about 3-4 inches from the tape and move it back and forth along a section. The heat will soften the adhesive, making the tape easier to remove. Don’t overheat the area, as it can damage the paint.
-
Score the Edge Carefully: Just as mentioned before, use a sharp utility knife to gently score the line where the tape meets the paint. This is your most important step to prevent tearing the dried paint film.
-
Pull Slowly at a Sharp Angle: Begin pulling the tape off at a sharp angle (as close to 180 degrees back on itself as possible) while continuing to apply gentle heat with the hairdryer. Go very slowly.
-
Clean Up Any Residue: If any sticky residue is left behind, you can usually remove it with a cloth dampened with warm, soapy water or a citrus-based cleaner. Test any cleaner on a hidden spot first to make sure it doesn’t harm your new paint finish.
For more information on safe practices during home renovations, including painting, the U.S. Environmental Protection Agency provides valuable guidelines that can help keep your home safe.
Frequently Asked Questions (FAQ)
1. What happens if I leave painter’s tape on for a week?
Leaving painter’s tape on for a week is risky. The paint will be fully cured, creating a strong bond over the tape. This makes it very likely that the paint will peel when you remove the tape. The adhesive may also bake onto the surface, leaving behind a sticky residue that is hard to clean.
2. Can I use a hairdryer to speed up the paint drying before removing the tape?
It’s not recommended. Using a hairdryer can cause the paint to dry too quickly and unevenly, which can lead to cracking or a poor finish. It can also start to cure the adhesive on the tape, making it harder to remove. It’s best to let the paint dry naturally and remove the tape when it’s just tacky.
3. What’s the difference between blue tape and green tape?
While both are excellent painter’s tapes, green tape (like FrogTape®) often contains a special chemical technology (PaintBlock®) that reacts with water in latex paint to create a gel-like barrier. This barrier stops paint bleed, resulting in exceptionally sharp lines. Blue tape is a fantastic all-around choice, but green tape is often preferred for detail work like stripes or geometric designs.
4. How do I remove tape from a textured wall without peeling the paint?
Textured walls are tricky. First, make sure you pressed the tape firmly into the crevices when applying it. When removing, pull the tape at a 45-degree angle very slowly. If you see any paint lifting, use a utility knife to score the edge before continuing to pull. The key is to go slowly and watch the paint edge closely.
5. What’s the best way to remove tape from corners?
For inside corners, start pulling the tape from one end and work your way into the corner. Once you reach the corner, gently tear the tape or use a utility knife to cut it. Then start pulling the tape from the adjacent wall toward the corner. This prevents you from pulling against a sharp, anchored point, which can cause tearing.
6. Can I reuse painter’s tape?
No, painter’s tape is designed for single use. Once you remove it, the adhesive loses its effectiveness and will have paint on it. Reusing it will result in messy lines and paint bleed. Always use a fresh strip of tape for each new section.
7. What if some adhesive residue is left behind?
If you have some sticky spots, don’t scrub them with an abrasive sponge, as this will damage your new paint. Instead, use a soft cloth with warm, soapy water. If that doesn’t work, a small amount of rubbing alcohol or a citrus-based adhesive remover on the cloth should do the trick. Always test it on an inconspicuous area first.
Conclusion: Your Path to Perfect Paint Lines
And there you have it—the simple, proven secret to flawless paint lines. It all comes down to timing. By removing your masking tape when the paint is tacky to the touch (usually 30-60 minutes after your final coat), you allow the paint to break cleanly, giving you that crisp, professional edge you’ve been looking for.
Remember to pull the tape slowly, at a 45-degree angle, and always use a quality painter’s tape suited for your specific surface. Don’t let the final step of a painting project cause you stress. With this knowledge, you can approach the tape removal with confidence, knowing you have the technique to finish your project beautifully.
So next time you pick up a paintbrush, you’ll know exactly what to do. Happy painting, and enjoy the satisfaction of a job well done!