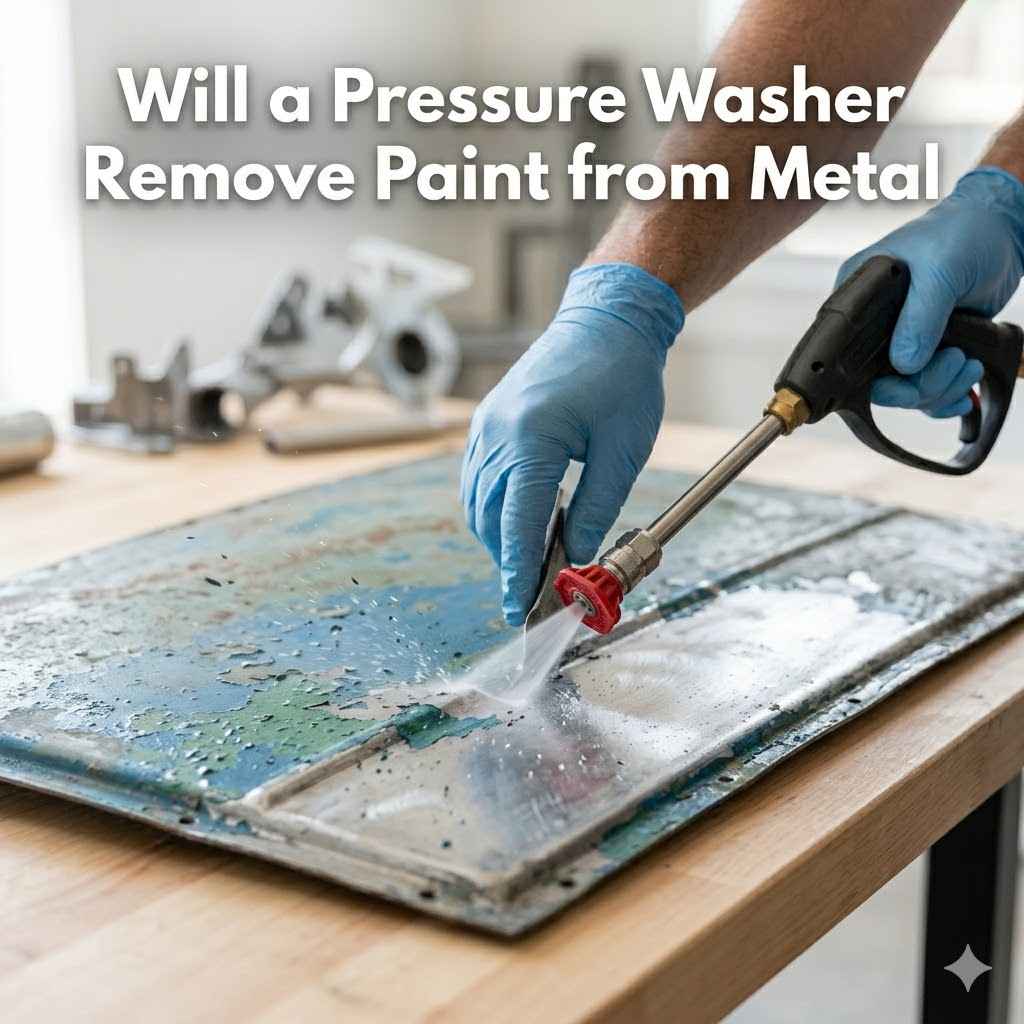
Will a Pressure Washer Remove Paint from Metal
Many people wonder Will a Pressure Washer Remove Paint from Metal? It’s a question that pops up when tackling DIY projects. Figuring out if your pressure washer is tough enough for old paint can be tricky. You don’t want to damage the metal underneath.
This guide makes it simple. We will walk you through exactly what you need to know, step by step, so you can get the job done right. Let’s find out how your pressure washer can help.
Will a Pressure Washer Remove Paint from Metal Safely
This section explores the core question of whether a pressure washer can safely remove paint from metal surfaces. It will cover the factors that influence success, such as the type of paint, the condition of the metal, and the power of the pressure washer itself. We will also discuss the potential risks involved and how to mitigate them to avoid damaging the underlying metal or creating a hazardous situation.
Understanding Paint Adhesion on Metal
Paint sticks to metal in different ways depending on how it was applied and the type of metal. Different paints have varying adhesion qualities. Some are designed to stick very firmly, while others are meant to be removed more easily.
The surface preparation before painting also plays a big role in how well the paint adheres. If the metal was not cleaned or primed properly, the paint might not stick as well.
Many paints are made with binders, pigments, and solvents. The binder is what holds everything together and helps it stick to the surface. When paint starts to peel or chip, it means the bond between the paint and the metal has weakened.
This weakening can happen due to rust, moisture, or physical damage.
Understanding these aspects helps predict how a pressure washer might affect the paint. A strong bond will resist high pressure more than a weak, compromised bond. This knowledge is key to deciding if a pressure washer is the right tool for paint removal.
Types of Metal and Paint Compatibility
The kind of metal you are dealing with is very important. Different metals react differently to pressure and cleaning agents. For example, softer metals like aluminum might be more easily damaged by high-pressure water than harder metals like steel.
Rusting metals, like old iron or steel, often have paint that is already starting to flake off because of the rust underneath.
The paint itself matters a lot too. Old lead-based paints, for instance, might be brittle and easier to blast off. Modern paints, especially specialized industrial coatings, might be much tougher.
The layers of paint also matter; multiple coats can create a thicker barrier that might be harder to remove in one go.
When you consider a pressure washer, you need to think about the specific combination of metal and paint. A thin layer of latex paint on aluminum will behave very differently from several thick coats of enamel on steel. Knowing these details helps you choose the right pressure settings and nozzles.
The Role of Pressure Washer Settings
Pressure washer settings are critical for effective paint removal. The amount of pressure, measured in pounds per square inch (PSI), and the flow rate, measured in gallons per minute (GPM), determine how much force the water exerts. Higher PSI means more cleaning power, but also a greater risk of damage.
The nozzle you use also changes the spray pattern and intensity. A narrow, focused stream (like from a zero-degree or 15-degree nozzle) delivers concentrated force, which is good for stubborn paint but can easily goude softer metals. Wider fan spray nozzles (like 25-degree or 40-degree) spread the pressure over a larger area, making them gentler and safer for overall cleaning or removing looser paint.
It’s often best to start with lower pressure settings and a wider nozzle. You can gradually increase the pressure or switch to a more focused nozzle if needed. Always test the pressure washer in an inconspicuous area first to see how it affects the paint and the metal surface.
Safety Precautions for Pressure Washing Paint
Safety is the top priority when pressure washing, especially when removing paint. Always wear protective gear. This includes safety glasses or goggles to protect your eyes from flying paint chips and debris.
Sturdy, closed-toe shoes are a must to prevent slips and protect your feet.
When dealing with old paint, there’s a risk of lead or other hazardous materials. If you suspect the paint might be lead-based, take extra precautions. This might involve using a dust shroud or wet blasting methods to contain the dust.
Check local regulations regarding lead paint removal. Always work in a well-ventilated area.
Be aware of your surroundings. Ensure no children or pets are nearby. Keep the high-pressure hose away from electrical outlets and cords.
Never point the spray nozzle at yourself or others. Understand that the water spray can create slippery surfaces, so watch your footing.
How a Pressure Washer Works on Paint Removal
This section details the mechanics of how a pressure washer actually removes paint from metal. It will explain the physical forces involved and the conditions under which pressure washing is most effective for stripping paint. We will also touch upon the different approaches and techniques that can be employed to maximize efficiency while minimizing damage.
The Power of Water Jetting
Pressure washing works by blasting water at very high speeds. This creates a powerful jet that can physically break the bonds holding paint to a surface. Imagine tiny hammers hitting the paint layer repeatedly.
The force of the water can chip away at loose or deteriorated paint.
The effectiveness depends on the paint’s condition. If the paint is already flaking, peeling, or has rust underneath, the water jet can easily get under these loose sections and lift them off. For paint that is still well-adhered, it requires more power or a more focused stream to start breaking it down.
The water also carries away loosened paint particles. This means the surface is being cleaned as it is stripped. This process can be quite efficient for large areas where paint has started to fail.
Factors Influencing Paint Stripping Success
Several factors make pressure washing paint removal a success or a failure. The age and type of paint are primary. Older, brittle paints tend to come off more easily than newer, flexible ones.
The condition of the metal surface is also key. Rust, moisture, or previous damage weaken the paint’s grip.
The environment plays a part too. Hot, dry weather can help the paint dry out and become more brittle, potentially making it easier to remove. However, extreme heat might also make some paints more pliable.
Cold weather can make paint brittle, which might help it break off but could also make it harder for certain stripping chemicals to work if you choose to use them.
The preparation of the surface before pressure washing can also influence results. If you can pre-treat the paint with a chemical stripper, it can significantly soften the paint, making the pressure washer’s job much easier and faster.
Choosing the Right Nozzle and Pressure
Selecting the correct nozzle and pressure is crucial for effective paint stripping without damaging the metal. For paint removal, you typically want a more concentrated spray to get under the paint edges and lift them. A 15-degree or 25-degree nozzle is often a good starting point.
A 15-degree nozzle (often colored red) produces a narrow, powerful fan that can cut through paint effectively. However, it demands careful handling and can easily etch softer metals if held too close or too long. A 25-degree nozzle (often colored green) provides a wider fan, offering a bit more coverage and a slightly gentler impact, which can be safer for less experienced users or more delicate metal surfaces.
Start with a lower PSI setting on your pressure washer, perhaps around 1500-2000 PSI for general paint removal. If that isn’t effective, you can gradually increase the PSI, but always monitor the metal for signs of damage, such as etching, pitting, or bending. Many pressure washers have adjustable pressure settings, or you can achieve lower pressure by using a wider nozzle or standing further back from the surface.
Techniques for Effective Paint Removal
When pressure washing paint, a systematic approach is best. Begin by inspecting the paint to identify areas that are already peeling or damaged. These are your starting points.
Hold the nozzle at an angle to the surface, not directly perpendicular. This helps to get under the edge of the paint chip. Move the spray in a sweeping motion, overlapping each pass slightly.
This ensures you don’t miss spots and prevents creating uneven lines.
For stubborn areas, you might need to increase the pressure slightly or use a more focused nozzle. However, always proceed with caution. If the paint is very thick, it might be more efficient to strip it in stages.
You could try using a paint stripper chemical first to soften the paint, then follow up with the pressure washer.
After stripping, rinse the surface thoroughly to remove any remaining paint residue or chemicals. Allow the metal to dry completely before proceeding with any other work, such as sanding or priming.
When Pressure Washing Paint is Not Recommended
This section will discuss situations and metal types where using a pressure washer to remove paint is ill-advised. It will detail the risks involved, such as damage to delicate materials, ineffective removal on certain paint types, and potential environmental concerns. Understanding these limitations is crucial for making informed decisions about your project.
Delicate Metal Surfaces
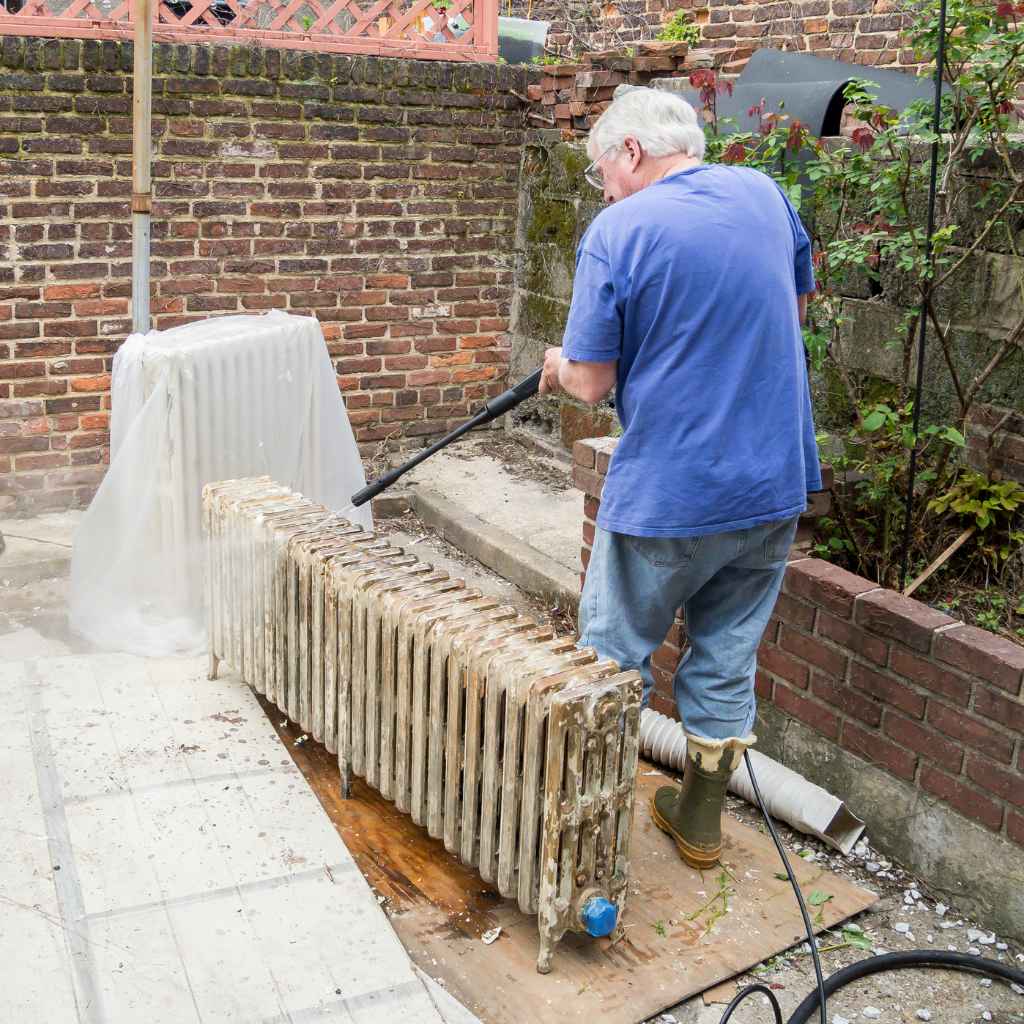
Some metal surfaces are simply too delicate for the forceful spray of a pressure washer, even at lower settings. Thin sheet metal, such as that found on older car bodies, antique furniture, or some decorative items, can easily bend, dent, or even tear under high-pressure water. The force can deform the metal, creating ripples or collapse weaker sections.
Aluminum, especially if it’s cast or has intricate designs, can also be susceptible to damage. While aluminum is strong, its surface can be etched or scarred by aggressive pressure washing. This can ruin the aesthetic appeal of the metal piece.
Very old, corroded, or brittle metals are also poor candidates for pressure washing paint removal, as the water pressure could cause them to crumble or break apart.
If the metal has a polished or anodized finish, high pressure can strip away this protective layer, leaving a dull or uneven appearance. For these types of metals, gentler methods like scraping, sanding, or using chemical strippers with careful manual removal are usually much safer and more effective.
Certain Types of Paint and Coatings
Not all paints respond well to pressure washing. High-performance industrial coatings, such as epoxy resins, powder coatings, or specialized marine paints, are designed for extreme durability. They are formulated to resist solvents, abrasion, and harsh conditions, making them very difficult to remove with just water pressure.
Trying to strip these with a pressure washer might require such high settings that you risk significantly damaging the underlying metal.
Additionally, very thin layers of paint, or paint that is still in excellent condition with no signs of degradation, will also be challenging to remove. The pressure washer’s effectiveness relies on finding weaknesses in the paint’s adhesion or integrity. If the paint is perfectly bonded and intact, the water jet will simply bead up and roll off without making much headway.
Paint that has been applied with specialized techniques, like electrostatic coatings or baked-on enamels, can also be incredibly resistant. These types of finishes are bonded at a molecular level, often requiring heat or specific chemical treatments for removal, rather than brute force from water.
Environmental and Health Concerns with Paint Chips
When you pressure wash paint, especially older paints, you create airborne particles and water runoff that can contain hazardous substances. If the paint contains lead, mercury, or other heavy metals, these particles can become a significant environmental and health hazard. Inhaling lead dust can cause serious long-term health problems.
The water runoff can carry these hazardous paint chips and contaminants into storm drains, local waterways, or soil. This can pollute the environment and harm aquatic life. Regulations often exist for the disposal of such waste, particularly in areas where lead paint is suspected.
For these reasons, pressure washing painted surfaces is often not recommended in residential areas or where environmental protection is a major concern. If you must proceed, it is vital to take measures to contain the debris and contaminated water. This might involve using containment tarps or specialized filtration systems, which can add significant cost and complexity to the project.
When Chemical Strippers Are Better
In many cases, chemical paint strippers offer a superior and safer alternative to pressure washing, especially for challenging jobs. Chemical strippers work by breaking down the chemical bonds within the paint, softening it to a point where it can be easily scraped or wiped away with minimal effort. This method is far less aggressive on the underlying metal.
For delicate metals like aluminum, brass, or thin gauge steel, chemical stripping is usually the preferred method. It avoids the risk of physical damage from high-pressure water. Similarly, for antique or valuable items where preserving the original material is paramount, chemical strippers are a much better choice.
They are also highly effective on tough, durable coatings like epoxies and industrial paints that resist pressure washing. While they might require more time for the chemical to work and careful handling due to their own chemical nature, the end result is often a cleaner surface with no risk of metal deformation. Always choose a stripper appropriate for the type of paint and metal, and follow safety instructions carefully.
Alternative Paint Removal Methods
This section provides a detailed look at other effective methods for removing paint from metal surfaces. It will cover scraping, sanding, abrasive blasting, and heat guns, explaining how each works, their pros and cons, and when they might be a better choice than pressure washing. Technical terms related to these methods will be explained.
Manual Scraping and Wire Brushing
Manual scraping and using wire brushes are some of the oldest and most straightforward paint removal methods. Scraping involves using a sharp tool, like a putty knife, paint scraper, or chisel, to physically lift and peel away loose or brittle paint. For tougher paint, a stiffer scraper or a specialized paint stripping knife might be needed.
Wire brushes, whether used by hand or attached to a drill or grinder, are effective for removing smaller flakes and for getting into textured areas. The stiff bristles can dislodge paint that might be too stubborn for a flat scraper. However, prolonged or aggressive use of wire brushes can scratch or abrade softer metals, so caution is advised.
These methods are best suited for areas where the paint is already significantly degraded or for small touch-up jobs. They require considerable physical effort, especially on large surfaces. They also don’t typically remove all paint down to bare metal, often leaving behind a thin residue that may require further sanding.
Pros:
- Low cost and readily available tools.
- Good control for detailed work and avoiding damage to the base material.
- No electricity or hazardous chemicals needed for basic tools.
Cons:
- Very labor-intensive and time-consuming for large areas.
- May not remove all paint, especially from porous surfaces or deep scratches.
- Can cause minor scratches or gouges on the metal if not done carefully.
Sanding and Grinding Techniques
Sanding uses abrasive materials to wear away the paint layer by layer. This can be done by hand with sandpaper or with power tools like orbital sanders, belt sanders, or die grinders. The grit of the sandpaper determines how aggressive the removal is.
Coarser grits (lower numbers) remove material faster but leave a rougher finish, while finer grits (higher numbers) smooth the surface.
Grinding is a more aggressive form of abrasion, typically done with power tools equipped with abrasive discs. It removes material much faster than sanding and is effective for thick paint layers or for smoothing rough metal surfaces after paint removal. However, it generates significant heat and dust and can easily remove too much metal if not used carefully.
Both methods create dust, which can be a health hazard if it contains lead or other toxins. Proper respiratory protection, like a dust mask or respirator, is essential. For large areas, power sanding and grinding are much more efficient than manual methods but require skill to avoid damaging the metal surface.
Key considerations for sanding/grinding:
- Abrasive Material: Sandpaper grit, grinding disc type, and their coarseness directly impact removal speed and surface finish.
- Tool Selection: Orbital sanders are good for general areas, while detail sanders or die grinders are better for tight spots or heavy material removal.
- Dust Control: Using tools with dust collection systems or wet sanding can significantly reduce airborne dust.
- Heat Generation: Grinding generates significant heat, which can warp thin metal or affect its temper if not managed.
Abrasive Blasting (Sandblasting)
Abrasive blasting, commonly known as sandblasting (though sand is not always the abrasive used), is a highly effective method for removing paint and other coatings from metal. It involves propelling abrasive media at high velocity against the surface using compressed air. The abrasive media can include sand, glass beads, walnut shells, or even dry ice.
The type of abrasive media and the pressure used can be adjusted to suit the material and the paint. For example, softer media like walnut shells might be used for delicate surfaces, while harder media like aluminum oxide or steel grit are used for tougher jobs on robust metals. This process removes paint quickly and thoroughly, often leaving a clean, uniformly roughened surface that is ideal for preparing for new coatings.
However, abrasive blasting requires specialized equipment, including a compressor, blasting pot, and protective gear (a blasting helmet, suit, and gloves). It is also a messy process, generating a large amount of dust and debris. Due to the high velocity and potential for media rebound, proper safety precautions are paramount.
It is often best left to professionals or used with extreme caution.
Abrasive Blasting Media Examples:
- Silicon Carbide: Very hard, sharp, and aggressive, used for rapid stripping and surface profiling.
- Aluminum Oxide: Durable and effective, suitable for various metals and paint types.
- Glass Beads: Gentler, used for cleaning and surface finishing without significant material removal.
- Steel Grit/Shot: Very hard and angular, used for aggressive cleaning and surface preparation on steel.
Heat Guns and Flame Torches
Heat guns and flame torches work by applying concentrated heat to the paint. The heat causes the paint to soften, bubble, and lose its adhesion to the metal. Once the paint is softened, it can usually be scraped away relatively easily.
Heat guns use hot air, while flame torches use an open flame.
Heat guns are generally safer and more controllable than open flame torches. They are suitable for most types of paint and metal, though caution is still needed to avoid overheating and damaging the metal. Flame torches, like propane torches, are more aggressive and can quickly remove paint but carry a higher risk of scorching, discoloring, or even melting certain metals, especially thinner ones or those with lower melting points.
When using heat, good ventilation is essential due to the fumes released by the melting paint. Always have a fire extinguisher nearby, especially when using a flame torch. After heating and scraping, the surface will likely need further cleaning and sanding to remove any remaining residue and prepare it for refinishing.
Tips for Using Heat Tools:
- Work in Small Sections: Heat an area until the paint softens, then scrape immediately.
- Maintain Distance: Hold the heat gun or torch at a consistent distance to avoid scorching.
- Ventilation is Key: Ensure good airflow to dissipate fumes.
- Scrape Gently: Use a sharp scraper to lift the softened paint without gouging the metal.
- Test First: Always test on an inconspicuous area to understand how the heat affects the paint and metal.
Will a Pressure Washer Remove Paint from Metal A Practical Guide
This section provides a step-by-step guide for users who decide to proceed with using a pressure washer for paint removal. It will cover preparation steps, the actual washing process, and post-washing treatment. The aim is to offer practical, actionable advice to help readers achieve the best possible results safely and effectively.
Preparation Steps Before Washing
Before you even turn on the pressure washer, some key preparation steps are crucial for success and safety. First, inspect the metal surface thoroughly. Identify any existing damage, rust spots, or areas where the paint is already lifting.
This helps you understand where the paint is weakest and where to start.
Clean the surface of loose dirt, debris, and grease. A simple wash with soap and water, followed by a good rinse, can remove surface contaminants that might otherwise be blown around by the pressure washer. Make sure the metal is completely dry before you begin the stripping process.
Gather all your safety equipment: heavy-duty gloves, eye protection (goggles or a face shield), and sturdy, waterproof footwear. If you suspect lead paint, wear a respirator suitable for lead dust. Protect surrounding areas that you don’t want to strip of paint, like windows, plants, or other surfaces, using plastic sheeting and painter’s tape.
Ensure your pressure washer is in good working order. Check the hoses for leaks and make sure the connections are secure. Having a good supply of water is essential.
You don’t want to run out mid-job.
Starting the Paint Stripping Process
Once you’re prepared and have your safety gear on, it’s time to start. Begin by selecting the least aggressive setting on your pressure washer. Use a wider-angle nozzle, such as a 40-degree (white) or 25-degree (green) nozzle.
Test the spray on an inconspicuous area first.
Hold the spray wand at a slight angle to the surface, not directly perpendicular. Start from the edge of a peeling paint area. Move the wand in a steady, sweeping motion.
Overlap each pass by about 30-50% to ensure consistent coverage and avoid creating stripes.
Watch closely for how the paint is responding. If it’s coming off easily, you’re on the right track. If it’s not budging, you can try moving slightly closer to the surface or gradually increasing the pressure.
However, always prioritize the integrity of the metal. If you see any signs of etching, pitting, or bending, reduce the pressure or widen the spray pattern immediately.
Work in manageable sections. It’s better to take your time and do it right than to rush and cause damage. For areas with thick, stubborn paint, you might need to make multiple passes or consider a more aggressive approach in combination with this.
Dealing with Stubborn Paint Patches
Sometimes, even with the right settings, certain patches of paint will refuse to budge. For these stubborn areas, you have a few options. First, try a slightly more concentrated nozzle, like a 15-degree (red) nozzle, but use it with extreme caution.
Hold it further away from the surface and move it very quickly. Never linger in one spot with a narrow-angle nozzle on delicate metal.
Another effective method is to pre-treat stubborn areas with a chemical paint stripper. Apply the stripper according to the manufacturer’s instructions, let it dwell for the recommended time, and then scrape away the softened paint. After this, the pressure washer can often easily remove any remaining residue.
You might also consider a slightly hotter water setting if your pressure washer has a heated option. Hot water can sometimes help to break down paint more effectively than cold water. If all else fails and the metal is robust enough, you might need to resort to gentle sanding or a specialized stripping tool for those specific troublesome spots.
Post-Washing Treatment and Surface Prep
Once you’ve removed as much paint as possible with the pressure washer, the work isn’t quite finished. Thoroughly rinse the entire metal surface with clean water. This removes any loosened paint particles, residue from any chemical strippers used, and dirt.
Ensure all traces of paint and stripper are gone.
Allow the metal to dry completely. This might take several hours or even a full day, depending on the weather. You can speed up drying with clean rags or by using a leaf blower, but natural air drying is often best to avoid scratches.
After drying, carefully inspect the metal. You will likely find areas that need further attention. Light sanding is often necessary to remove any remaining paint film, smooth out any minor etching from the pressure washer, and create a uniform surface for priming.
Use an appropriate grit sandpaper for the job.
Once the surface is clean, dry, and smooth, it’s ready for priming and painting. Proper surface preparation is the key to a durable and attractive finish. Don’t skip these final steps.
Frequently Asked Questions
Question: Can a pressure washer remove rust from metal
Answer: Yes, a pressure washer can remove loose, flaky rust from metal surfaces. However, for deeply ingrained rust or pitted metal, you might need more aggressive methods like wire brushing or grinding after pressure washing.
Question: Is it safe to pressure wash painted cars
Answer: It is generally not recommended to pressure wash painted car surfaces, especially at high pressures. The force can easily damage the paint, clear coat, and even the metal itself. Hand washing or using a car-specific pressure washer attachment with low pressure is safer.
Question: What is the best nozzle for pressure washing paint
Answer: For paint removal, a 15-degree (red) or 25-degree (green) nozzle is typically recommended. Always start with the wider angle and lower pressure, and gradually increase if needed, testing in an inconspicuous area first.
Question: How to protect metal after pressure washing paint
Answer: After pressure washing and removing paint, it’s crucial to protect the bare metal. This usually involves cleaning the surface, light sanding, and then applying a rust-inhibiting primer followed by your desired topcoat of paint to prevent future corrosion.
Question: Will a pressure washer damage aluminum
Answer: Yes, a pressure washer can damage aluminum, especially at high pressures. It can cause etching, pitting, or even deformation. It’s best to use low pressure and a wide-angle nozzle, or consider gentler paint removal methods for aluminum surfaces.
Summary
So, Will a Pressure Washer Remove Paint from Metal? Yes, it often can, especially if the paint is old and peeling. You need the right pressure, nozzle, and technique to avoid damaging the metal. Always start gentle, test first, and wear safety gear.
For tough paint or delicate metal, other methods might be better. Proper prep and post-wash care ensure a great finish.