Wood Filler vs. Putty: Essential Differences
Wood filler and wood putty are both essential for repairing wood, but they serve different purposes. Wood filler is ideal for larger cracks, gouges, and holes, offering durability and strength, while wood putty is best for minor surface imperfections like nail holes and small dents, providing a smooth finish that’s easy to sand. Understanding their distinct properties ensures you choose the right product for a flawless wood repair every time.
Hey there, fellow woodworkers! Ever stared at a can of wood filler and a tub of wood putty, wondering which one to grab for your project? It’s a common puzzle, especially when you’re just starting out. Both are fantastic for making your wooden creations look their absolute best, but they have their own superpowers. Using the wrong one can lead to less-than-perfect repairs, and nobody wants that! Don’t worry, though. We’re going to break down exactly what makes them different, when to use each, and how to get the most out of them. By the end of this, you’ll be a pro at choosing the right filler for the job, making your woodworking projects shine with professional-quality finishes.
Wood Filler vs. Wood Putty: The Core Differences
When you’re working with wood, whether it’s building a new piece of furniture or restoring an old gem, you’re bound to encounter imperfections. Dents, cracks, nail holes – they’re part of the charm and character of wood, but sometimes, you need a smooth, flawless surface. This is where wood filler and wood putty come in. While they might look similar and often get used interchangeably by beginners, they are designed for different tasks and have distinct properties. Understanding these differences is key to achieving professional-looking results and ensuring your repairs last.
Think of it like this: wood filler is your heavy-duty repair hero, while wood putty is your detail-oriented touch-up artist. Let’s dive into what makes them unique.
What Exactly is Wood Filler?
Wood filler is a versatile material used to fill larger holes, cracks, gouges, and other significant damage in wood. It’s typically made from a combination of wood fibers or particles, binders, and solvents. This composition gives it a robust and durable quality, allowing it to withstand sanding, painting, staining, and even structural stress to some extent.
Wood fillers come in various forms:
- Water-based wood fillers: These are the most common and beginner-friendly. They are easy to clean up with water, can be sanded and painted once dry, and are generally less prone to shrinking. They are great for most interior repairs.
- Solvent-based wood fillers: These are typically stronger and more durable, making them suitable for exterior projects or areas that might experience more wear and tear. They often have a longer working time but require solvents for cleanup.
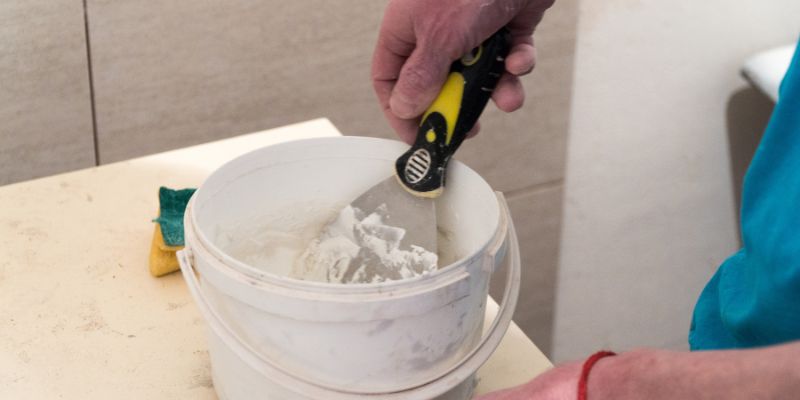
- Epoxy wood fillers: These are two-part fillers that, when mixed, create a very strong, durable, and waterproof repair. They are excellent for structural repairs, filling rot, or areas that need to be exceptionally sturdy. They often require careful mixing and have a limited working time.
The primary advantage of wood filler is its ability to fill gaps and holes that are too large for putty. It’s designed to bond well with wood and hold its shape, preventing the repair from cracking or crumbling over time. When dry, it can be sanded smooth and often accepts stains and finishes quite well, although some fillers might take stain differently than the surrounding wood, so testing is always a good idea.
What Exactly is Wood Putty?
Wood putty, on the other hand, is designed for much smaller cosmetic repairs. It’s a pliable, dough-like substance primarily used to fill tiny imperfections such as nail holes, small dents, minor scratches, and surface imperfections. Its consistency is generally softer and more pliable than wood filler.
Wood putties are often oil-based or latex-based. Some formulations are designed to be self-leveling and smooth, making them perfect for achieving a seamless finish on surfaces that will be painted.
- Oil-based wood putties: These are very workable and can remain pliable for a longer time, allowing for easy application and smoothing. They are often used for exterior applications and can be quite durable.
- Latex-based wood putties: Similar to water-based fillers, these are easy to use and clean up with water. They dry faster but might shrink slightly, so they are best for very small surface repairs where significant shrinkage is not a concern.
- Spackle/Spackling paste: While not always labeled “wood putty,” spackling paste is a common alternative for very minor surface repairs on wood, especially if it will be painted. It’s lightweight and easy to sand.
The main strength of wood putty lies in its fine texture and ease of use for minor touch-ups. It’s excellent for achieving a smooth, paintable surface without the bulkiness of wood filler. However, it’s generally not strong enough for structural repairs or filling large voids, as it can shrink, crack, or crumble if overused.
Key Differences at a Glance
To help you quickly understand the distinctions, here’s a table summarizing the main differences between wood filler and wood putty:
| Feature | Wood Filler | Wood Putty |
|---|---|---|
| Primary Use | Filling larger holes, cracks, gouges, structural repairs | Filling small nail holes, dents, scratches, surface imperfections |
| Consistency | Thicker, paste-like, can be firm | Softer, pliable, dough-like, smooth |
| Strength & Durability | High; designed to be strong and resist cracking | Lower; best for cosmetic, non-structural repairs |
| Shrinkage | Minimal to none, especially in multiple applications | Can shrink slightly, especially latex-based types |
| Sanding | Sands well, can be feathered | Sands very smoothly, ideal for fine finishes |
| Staining | Can accept stain, but results vary; test first | Generally not designed for staining; best for painted surfaces |
| Paintability | Excellent; takes paint well | Excellent; provides a smooth surface for paint |
| Cleanup | Water-based: water; Solvent-based: solvents | Water-based: water; Oil-based: mineral spirits/solvents |
| Application Depth | Can be applied in thicker layers, often in multiple coats | Best for thin applications; multiple thin coats recommended for deeper minor imperfections |
When to Use Wood Filler
You’ll reach for wood filler when you need to repair more substantial damage to your wood. Its strength and ability to fill larger voids make it indispensable for many woodworking tasks. Here are some common scenarios where wood filler is the go-to choice:
- Repairing cracks and splits: If you have a long crack in a table leg or a split in a piece of trim, wood filler is perfect for filling and stabilizing it.
- Filling deep gouges or chips: When a piece of wood has been dinged, leaving a noticeable indentation or a chunk missing, wood filler can restore the surface.
- Restoring damaged edges: If the edge of a shelf or countertop is chipped, wood filler can rebuild the damaged area.
- Fixing rotten wood (with specific types): For areas with minor wood rot, an epoxy-based wood filler can be used to consolidate and rebuild the damaged wood, providing a durable and stable repair. Always ensure you remove as much of the rot as possible before applying filler.
- Repairing significant surface damage before painting or refinishing: For larger imperfections on furniture or cabinetry that will be painted, wood filler provides a solid base.
- Rebuilding missing wood sections: In some cases, you might need to rebuild a small section of wood that has broken off. Wood filler, especially the more robust types, can help reconstruct these areas.
When using wood filler, remember that it’s often best applied in thin layers, especially for deeper repairs, to prevent cracking as it dries. Allow each layer to dry thoroughly before applying the next and before sanding.
When to Use Wood Putty
Wood putty is your best friend for those small, cosmetic touch-ups that make a big difference in the overall appearance of your project. Its fine texture and ease of use for subtle repairs make it ideal for finishing touches. Consider using wood putty for:
- Filling nail holes: This is perhaps the most common use for wood putty. It fills the small indentation left by finishing nails, creating a smooth surface that’s ready for paint or stain (though it’s best for painted finishes).
- Concealing small dents and dings: If you accidentally put a small dent in a piece of furniture while working on it, wood putty can make it disappear.
- Minor surface scratches: Very fine scratches on the surface of wood can often be filled with wood putty to make them less noticeable.
- Filling small imperfections in trim or molding: For decorative trim, where a smooth, flawless finish is desired, wood putty is excellent for filling any tiny gaps or imperfections at joints.
- Touching up pre-finished wood: For minor nicks on pre-finished furniture, a colored wood putty that closely matches the wood’s finish can be used for discreet repairs.
Because wood putty is generally softer and can shrink, it’s best used in thin applications. If you have a slightly deeper imperfection, you might need to apply it in a couple of thin layers, allowing each to dry, to achieve the best result. It’s crucial to remember that most wood putties are not designed to be stained to match the surrounding wood; they are primarily for painted surfaces.
How to Apply Wood Filler and Wood Putty: A Step-by-Step Guide
Knowing the differences is one thing, but applying them correctly is where the magic happens. Here’s a simple guide to help you get those repairs looking seamless.
Preparation is Key!
No matter which product you choose, proper preparation is crucial for a lasting and beautiful repair. This step is vital for ensuring the filler or putty adheres properly and blends well with the surrounding wood.
- Clean the Area: Ensure the area you’re repairing is clean, dry, and free of dust, grease, or any loose debris. A clean surface allows for better adhesion. You can use a tack cloth or a slightly damp rag for this.
- Remove Loose Wood: For cracks or gouges, gently scrape away any loose or splintered wood with a chisel or a utility knife. This creates a more stable surface for the filler to adhere to.
- Sand (Optional but Recommended): Lightly scuff the surface around the repair area with fine-grit sandpaper (around 120-grit). This helps create a better bond for both filler and putty.
Applying Wood Filler
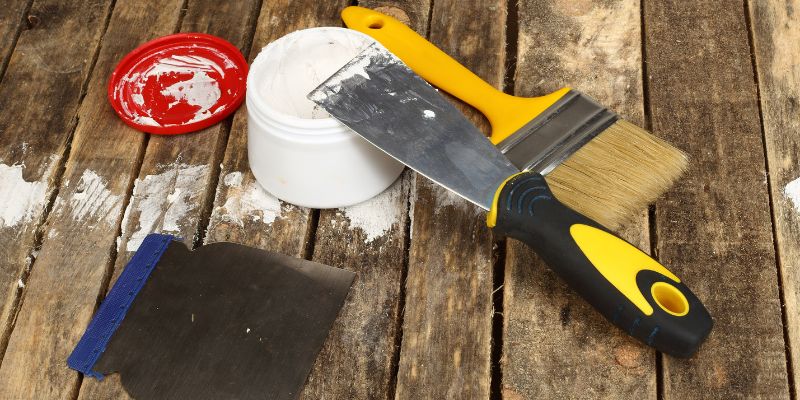
Wood filler is typically applied with a putty knife or a small trowel. For larger repairs, you might use a larger tool.
- Choose Your Filler: Select a wood filler that matches the type of repair and your desired finish (water-based for general use, epoxy for strength).
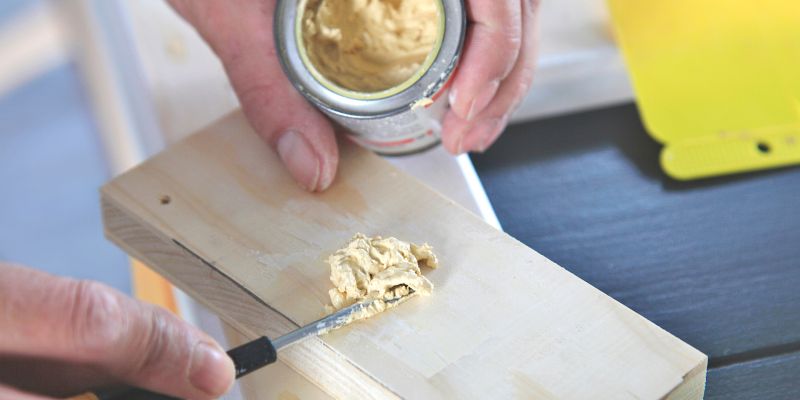
- Load Your Tool: Scoop a generous amount of wood filler onto your putty knife.
- Press into the Void: Firmly press the filler into the crack, gouge, or hole. Work it in from all sides to ensure it fills the void completely and makes good contact with the wood. Overfill slightly, as most fillers will shrink a little.
- Smooth the Surface: Use the putty knife to scrape away any excess filler, leaving the surface as flush as possible with the surrounding wood. For deep holes, apply filler in thin layers, allowing each layer to dry before applying the next. This prevents cracking and ensures a solid fill.
- Allow to Dry: Let the wood filler dry completely according to the manufacturer’s instructions. Drying times can vary depending on the product and the depth of the application. Water-based fillers typically dry faster than solvent-based ones.
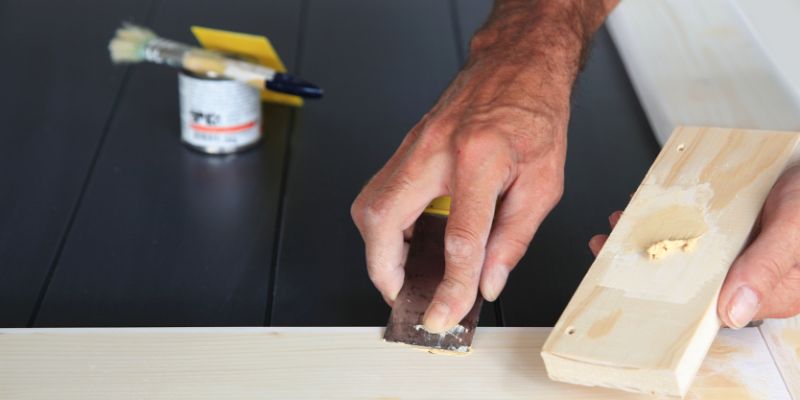
- Sand Smooth: Once dry, sand the filled area smooth using fine-grit sandpaper (150-220 grit). You can use a sanding block for a flatter surface. Feather the edges of the filler into the surrounding wood for a seamless transition.
- Clean and Finish: Wipe away the dust with a tack cloth. Now, the area is ready for priming, painting, staining, or applying a topcoat, depending on your project. Remember to test stain on a hidden area if you plan to stain over filler.
Applying Wood Putty
Wood putty is applied similarly to wood filler but with a lighter touch, focusing on smooth surface application.
- Choose Your Putty: Select a putty that’s appropriate for the size of the imperfection and your intended finish (e.g., latex-based for quick drying and painting, oil-based for more workability).
- Apply with a Putty Knife: Use a small, flexible putty knife or even your finger (if wearing gloves) to apply a small amount of wood putty to the nail hole or dent.
- Press and Smooth: Gently press the putty into the imperfection. For nail holes, ensure the putty fills the hole completely. Use the putty knife to smooth the surface, making it flush with the surrounding wood. Avoid overworking it, as this can create more dust.
- Remove Excess: Carefully scrape away any excess putty from the surface.
- Allow to Dry: Let the putty dry thoroughly. Latex-based putties dry quickly, often within an hour or two. Oil-based putties may take longer.
- Sand Lightly (if needed): If the putty is slightly raised after drying, very gently sand it smooth with fine-grit sandpaper (220-grit or higher). Because putty is so fine, heavy sanding can remove it quickly, so be gentle.
- Finish: The area is now ready for paint. As mentioned, most putties aren’t designed for staining.
Tips for Best Results
To ensure your repairs look like they were never there, here are a few extra tips:
- Test Stains: If you plan to stain your project, always test the stain on a scrap piece of wood that has been filled with your chosen filler. Some fillers can absorb stain differently, leading to a mismatch in color.
- Work in Layers: For deeper holes or cracks, it’s always better to apply wood filler in multiple thin layers rather than one thick one. This reduces the risk of cracking and ensures a more solid repair.
- Feather the Edges: When sanding, aim to feather the edges of the filler or putty into the surrounding wood. This creates a smooth, seamless transition that is less noticeable.
- Consider Color Matching: While many fillers and putties are paintable, some are available in pre-colored options that can be a good match for common wood types if you’re not planning to paint.
- Read the Label: Always read and follow the manufacturer’s instructions for the specific product you are using. Drying times, application techniques, and cleanup methods can vary.
- Safety First: Wear safety glasses when sanding and working with wood fillers and putties. Ensure good ventilation, especially when using solvent-based products.
Common Mistakes to Avoid
Even with the best intentions, beginners can sometimes make a few common mistakes when using wood filler and putty. Being aware of these can save you a lot of frustration:
- Using the Wrong Product: The most frequent mistake is using wood putty for large cracks or gouges, or using wood filler for tiny nail holes where it might be overkill.
- Not Preparing the Surface Properly: Skipping the cleaning and removal of loose wood can lead to poor adhesion and a repair that fails over time.
- Overfilling and Not Scraping Excess: Leaving too much filler or putty proud of the surface makes sanding much more difficult and can lead to an uneven finish.
- Sanding Too Aggressively: Especially with wood putty or on soft woods, aggressive sanding can easily remove the material or create a noticeable depression.
- Not Allowing Adequate Drying Time: Rushing the process and trying to sand or paint over wet filler or putty will likely result in a messy, uneven finish and potential cracking.
- Applying Thick Layers of Putty: Wood putty is designed for thin applications. Applying it thickly can cause it to shrink excessively and crack.
- Forgetting to Test Stains: If you intend to stain, skipping the stain test on a scrap piece is a gamble that often doesn’t pay off, leading to a color mismatch.
When to Choose a Different Solution
While wood filler and putty are excellent for many repairs, there are situations where they might not be the best solution, or you might need to consider alternatives:
- Structural Repairs: For significant structural damage, like a completely rotted beam or a large section of wood that has broken off and needs to bear weight, you’ll need more robust solutions like wood epoxies designed for structural bonding or even physically replacing the damaged section of wood. The American Wood Council offers great resources on wood construction and repair principles.
- Large Void Filling Where Strength is Paramount: If you’re filling a very large void where the filler will be under significant stress, a two-part epoxy wood filler or even a wood-to-wood glue and clamping might be more appropriate than a standard filler.
- Matching Complex Grain Patterns for Staining: While some fillers can be stained, achieving a perfect match to intricate grain patterns can be challenging. In such cases, using a wood veneer patch or carefully selecting and fitting a new piece of wood might yield better aesthetic results.
- Areas Requiring Extreme Durability and Water Resistance: For exterior applications that are constantly exposed to the elements, specific exterior-grade wood fillers or epoxies formulated for outdoor use are essential. A standard interior wood filler or putty will likely degrade quickly.
- Filling Gaps in Flooring or Decking: While some fillers can be used, specialized floor or deck fillers are often formulated for better flexibility and durability under foot traffic and environmental changes.
Frequently Asked Questions (FAQs)
Q1: Can I use wood filler on painted wood?
Yes, you can use wood filler on painted wood, especially for filling cracks or holes that have appeared in the paint or the wood underneath. Once the filler dries, you’ll likely need to sand it smooth and then repaint the area to match the surrounding surface. For very small imperfections on painted surfaces, a fine-grit wood putty might also work.
Q2: Can wood putty be used for exterior projects?
Some wood putties are formulated for exterior use and are designed to withstand moisture and temperature changes. However, many common latex-based putties are best suited for interior projects. Always check the product label to ensure it’s rated for exterior applications. For exterior repairs, especially on larger areas, a good quality exterior wood filler or epoxy is generally more durable.
Q3: Will wood filler shrink when it dries?
Most modern wood fillers are formulated to shrink minimally, if at all, especially when applied in thin layers. However, some formulations, particularly older or cheaper ones, might shrink slightly. If you’re filling a deep void, applying the filler in multiple thin layers and allowing each to dry is the best way to prevent shrinkage-related cracking.
Q4: Can I stain over wood filler?
You can stain over many wood fillers, but the results can be unpredictable. Fillers are made of wood dust and binders, which can absorb stain differently than natural wood. It’s crucial to test the stain on a small, inconspicuous area of the filled wood first. If the color doesn’t match, you might need to use a wood stain conditioner or opt for painting the repaired area.
Q5: What is the difference between wood filler and spackle?
Spackle (or spackling paste) is primarily designed for drywall and plaster repairs. While it can be used for very minor cosmetic touch-ups on wood, like tiny nail holes, it’s generally not as durable or strong as wood filler or wood putty. Spackle tends to be lighter and can shrink more, making it less ideal for anything beyond the most superficial surface imperfections on wood. Wood filler and putty are specifically formulated to bond with and repair wood.
Q6: How many coats of wood filler should I apply?
For shallow repairs, one coat of wood filler might be enough. However, for deeper holes, cracks, or gouges, it’s best to apply wood filler in multiple thin coats, allowing each layer to dry completely before applying the next. This prevents cracking, ensures the filler cures properly, and allows you to build up the repair gradually to the desired level.
Conclusion
So there you have it! Wood filler and wood putty are both invaluable tools in your woodworking arsenal, but they each have their unique strengths. Remember, wood filler is your go-to for filling larger cracks, gouges, and damaged areas where durability and strength are key. Wood putty, with its fine texture and smooth finish, is perfect for those small, cosmetic touch-ups like nail holes and minor dents, especially when you plan to paint. By understanding these essential differences and following proper application techniques, you can confidently tackle any repair, big or small, and achieve those beautiful, professional-looking finishes you’re aiming for in your projects. Happy building, and may your repairs be invisible!