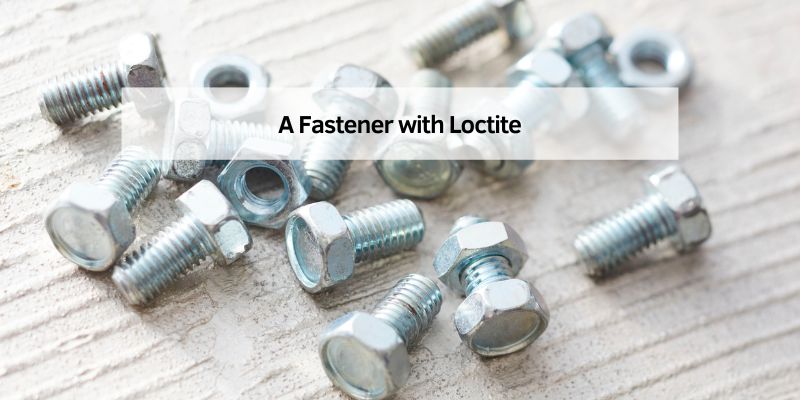
A Fastener with Loctite
Hey there! If you’re someone who loves working on cars, trucks, or even motorcycles, you’ve probably heard of Loctite. I sure have, and let me tell you, using a fastener with Loctite has saved me from countless headaches in my garage. I’ve spent years tinkering with vehicles, from fixing squeaky suspension bolts to securing engine components, and Loctite has become my go-to for making sure things stay tight.
Whether you’re a weekend wrench-turner or a professional mechanic, this guide is all about why and how to use Loctite with fasteners. I’m sharing everything I’ve learned from my own projects, so you can avoid loose bolts and get the job done right. Let’s roll up our sleeves and dive in!
What Is Loctite and Why Use It with Fasteners?
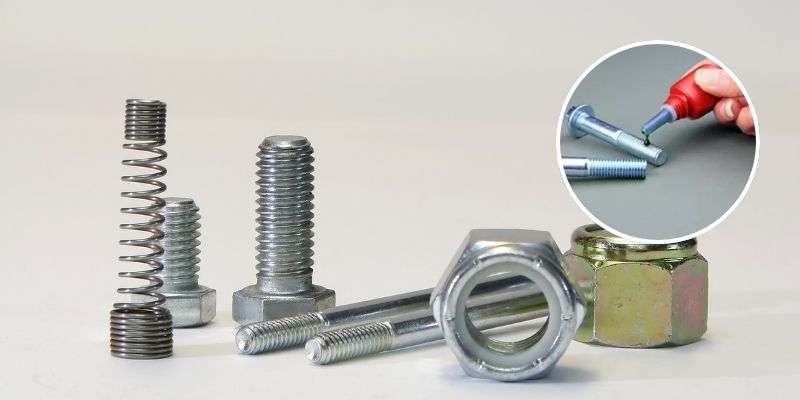
When I first started working on cars, I didn’t know much about Loctite. I’d tighten bolts and assume they’d stay put. Then, I’d hear that annoying rattle or find a bolt loose after a drive. That’s when I discovered Loctite, a thread-locking adhesive that keeps fasteners secure. It’s a liquid or gel you apply to the threads of bolts, screws, or studs before tightening them. Once it cures, it forms a strong bond that resists vibration, heat, and corrosion. I’ve used it on everything from brake caliper bolts to exhaust manifold studs, and it’s a game-changer. Using a fastener with Loctite means peace of mind, knowing your parts won’t wiggle loose on the road.
Types of Loctite for Fasteners
Not all Loctite is the same, and I learned this through trial and error. Different formulas are designed for specific jobs. Here’s a table of the types I’ve used and what they’re best for:
| Loctite Type | Color | Strength | Best For |
|---|---|---|---|
| Loctite 242 | Blue | Medium | General-purpose, removable bolts like suspension parts |
| Loctite 243 | Blue | Medium | Oil-resistant, great for engine bolts |
| Loctite 262 | Red | High | Permanent applications like transmission bolts |
| Loctite 271 | Red | High | Heavy-duty, like axle or frame bolts |
| Loctite 290 | Green | Low | Wicking into pre-assembled fasteners |
I mostly keep Loctite 242 and 271 in my toolbox. Blue is perfect for bolts I might need to remove later, while red is for stuff I want locked down tight. Green is handy for tightening bolts I forgot to Loctite before assembling. Knowing which type to use has made my projects smoother and more reliable.
Why Fasteners Come Loose Without Loctite
Before I started using Loctite, I’d wonder why my bolts kept loosening. It’s not just about tightening them enough—vibration is the real culprit. Cars and trucks shake a lot, especially on rough roads or with high-performance engines. I’ve seen this with my old pickup’s exhaust bolts, which would loosen after a few drives. Heat from engines or exhausts can also expand and contract metal, loosening fasteners. Corrosion is another issue, especially in salty winter climates. I’ve dealt with rusted bolts that were a pain to remove. Loctite fills the gaps in threads, creating a seal that fights vibration, heat, and rust. It’s like insurance for your fasteners.
How to Apply Loctite to a Fastener
Applying Loctite is easy, but I’ve learned a few tricks to get it right. First, I clean the fastener and the hole it’s going into. Dirt or oil can weaken the bond, so I use brake cleaner or rubbing alcohol and a rag. I let everything dry completely. Then, I shake the Loctite bottle to mix it up. For blue or red Loctite, I apply a few drops to the fastener’s threads, covering about half the length. I don’t slather it on—too much can squeeze out and make a mess. For green Loctite, I apply it after the fastener is in place, letting it wick into the threads. I tighten the fastener right away before the Loctite starts to cure. It’s a simple process, but cleaning and using the right amount are key.
Tools You’ll Need
You don’t need a ton of tools to use Loctite, which I love. Here’s what I keep handy:
- Wrench or socket set: To tighten the fastener.
- Screwdriver: For screws or small bolts.
- Cleaning supplies: Brake cleaner, rubbing alcohol, and a rag.
- Wire brush: To clean rusty or dirty threads.
- Gloves: Loctite can be sticky and hard to clean off skin.
- Loctite product: The right type for your job.
I also work in a well-ventilated area because Loctite has a strong smell. A clean workspace helps me stay organized and avoid mistakes.
Step-by-Step Guide to Using a Fastener with Loctite
I’ve used Loctite on countless projects, and this is the process I follow every time. It’s straightforward but takes a bit of care.
Step 1: Choose the Right Loctite
I start by picking the Loctite type for the job. If I’m working on something like a valve cover bolt that I’ll remove later, I go with blue Loctite 242. For permanent jobs, like differential bolts, I use red Loctite 271. I check the fastener size, too—smaller bolts need less Loctite than big ones. Reading the bottle’s instructions helps me avoid mix-ups.
Step 2: Prepare the Fastener and Surface
I clean the fastener’s threads with a wire brush to remove rust or grime. Then, I spray brake cleaner on the fastener and the hole, wiping them down with a rag. If the hole is deep, I use a Q-tip to clean inside. I make sure everything’s dry before moving on. This step makes a big difference in how well the Loctite holds.
Step 3: Apply Loctite
I apply a few drops of Loctite to the fastener’s threads. For a 1/4-inch bolt, two or three drops are enough. For bigger bolts, I use a bit more. I spread it evenly by rotating the fastener. If I’m using green Loctite, I skip this step and apply it after the fastener is installed. I work quickly because some Loctite starts curing fast.
Step 4: Install the Fastener
I thread the fastener into the hole and tighten it to the right torque. I use a torque wrench for critical parts like wheel hub bolts to avoid over- or under-tightening. I tighten right after applying Loctite to ensure a strong bond. If I’m installing multiple fasteners, I apply Loctite to one at a time to keep things manageable.
Step 5: Let It Cure
Loctite needs time to set. I usually wait 24 hours for a full cure, but it’s strong enough for light use after an hour or two. I avoid driving the vehicle or stressing the fastener during this time. For red Loctite, I’m extra careful because it’s meant to stay put permanently.
Step 6: Check Your Work
After curing, I give the fastener a quick tug with a wrench to make sure it’s tight. I also look for any Loctite that squeezed out and clean it up with a rag. This final check gives me confidence that the fastener won’t budge.
Removing Fasteners with Loctite
Sometimes, I need to remove a Loctite-secured fastener. Blue Loctite is easy—I just use a wrench or screwdriver, and it breaks free with a bit of force. Red Loctite is tougher. I’ve had to apply heat with a propane torch to soften it, especially on big bolts like those in my truck’s suspension. I heat the fastener for about 30 seconds, then try turning it. If it’s still stuck, I heat it again. For really stubborn bolts, I use a breaker bar for extra leverage. I’m always careful not to strip the threads or damage the part.
Common Mistakes to Avoid
I’ve made my share of mistakes with Loctite, so let me save you some trouble. One big one is not cleaning the threads. Dirty or oily threads weaken the bond, and I’ve had bolts loosen because I skipped this step. Another mistake is using too much Loctite. Excess can leak into parts or make removal harder. I also learned not to use red Loctite on bolts I’ll need to remove often—it’s a pain to break free. Finally, don’t let Loctite sit on the fastener too long before tightening. It can start curing and lose effectiveness.
Tips for Success
Here are some tricks I’ve picked up. First, store Loctite in a cool, dry place to keep it fresh. I keep mine in a toolbox drawer. Second, use gloves to avoid getting Loctite on your skin—it’s sticky and smells bad. Third, if you’re unsure about torque specs, check your vehicle’s manual or online forums. Over-tightening can damage threads, even with Loctite. Lastly, keep a small bottle of each Loctite type handy. I’ve found travel-sized bottles perfect for my garage.
When Not to Use Loctite
Loctite isn’t for every fastener. I avoid it on bolts that need frequent removal, like oil drain plugs, because it’s overkill and makes maintenance annoying. I also skip it on fasteners with built-in locking features, like nylon-insert nuts. For plastic parts, I’m cautious—Loctite can damage some plastics. I check the product label or test it on a scrap piece first. Knowing when to skip Loctite has saved me from unnecessary headaches.
Loctite in Automotive Applications
I’ve used Loctite on all kinds of car parts. Brake caliper bolts are a big one—vibration can loosen them, and Loctite keeps them secure. I also use it on suspension bolts, like sway bar links, to fight road rattle. Engine bolts, like those on intake manifolds, benefit from Loctite’s oil resistance. I’ve even used it on motorcycle handlebar bolts to keep them tight during rides. Every time, Loctite gives me confidence that my work will hold up, whether I’m cruising highways or tackling off-road trails.
Maintaining Your Loctite Supply
Loctite doesn’t last forever, and I’ve learned to keep my supply fresh. I check the expiration date on the bottle—old Loctite can lose its strength. If it’s thickened or clumpy, I toss it and buy a new one. I store mine upright in a sealed container to prevent leaks. I also keep different types separate to avoid grabbing the wrong one in a rush. A little care keeps my Loctite ready for any project.
Why I Trust Loctite
Using a fastener with Loctite has become second nature to me. It’s not just about keeping bolts tight—it’s about safety and reliability. I’ve driven thousands of miles on vehicles with Loctite-secured fasteners, and I’ve never had one fail. Whether I’m working on my daily driver or a project car, Loctite gives me confidence that my hard work won’t come undone. It’s a small step that makes a big difference, and I love sharing that with other gearheads.
Conclusion
Using a fastener with Loctite is one of those simple tricks that can transform your automotive projects. I’ve been there, cursing a loose bolt that could’ve been avoided with a few drops of this magic stuff. From choosing the right type to applying it cleanly, I’ve shared everything I’ve learned to help you get it right. Whether you’re fixing brakes, bolting on a new exhaust, or building a custom ride, Loctite keeps your fasteners secure through vibration, heat, and time. So, next time you’re in the garage, grab that little bottle and give it a try. You’ll wonder how you ever worked without it. Check out the FAQs below if you have questions, and happy wrenching!
FAQs
What’s the difference between blue and red Loctite?
Blue Loctite, like 242, is medium-strength and removable with hand tools. Red, like 271, is high-strength for permanent applications.
Can I use Loctite on rusty bolts?
I clean rusty bolts with a wire brush and brake cleaner first. Loctite won’t bond well to rust or grime.
How long does Loctite take to cure?
It’s strong enough for light use after an hour, but I wait 24 hours for a full cure.
Can I remove red Loctite without heat?
It’s tough. I usually apply heat with a torch to soften it, then use a wrench or breaker bar.
Is Loctite safe for engine bolts?
Yes, especially Loctite 243, which resists oil. I use it on valve covers and intake manifolds.
What if I get Loctite on my skin?
I wash it off with soap and water right away. If it’s dry, acetone or nail polish remover helps.
Can I use Loctite on aluminum parts?
Yes, but I clean the threads well. Loctite works on most metals, including aluminum.