Building an A-Frame Tarp Shelter (Pros, Cons & Setup Steps)
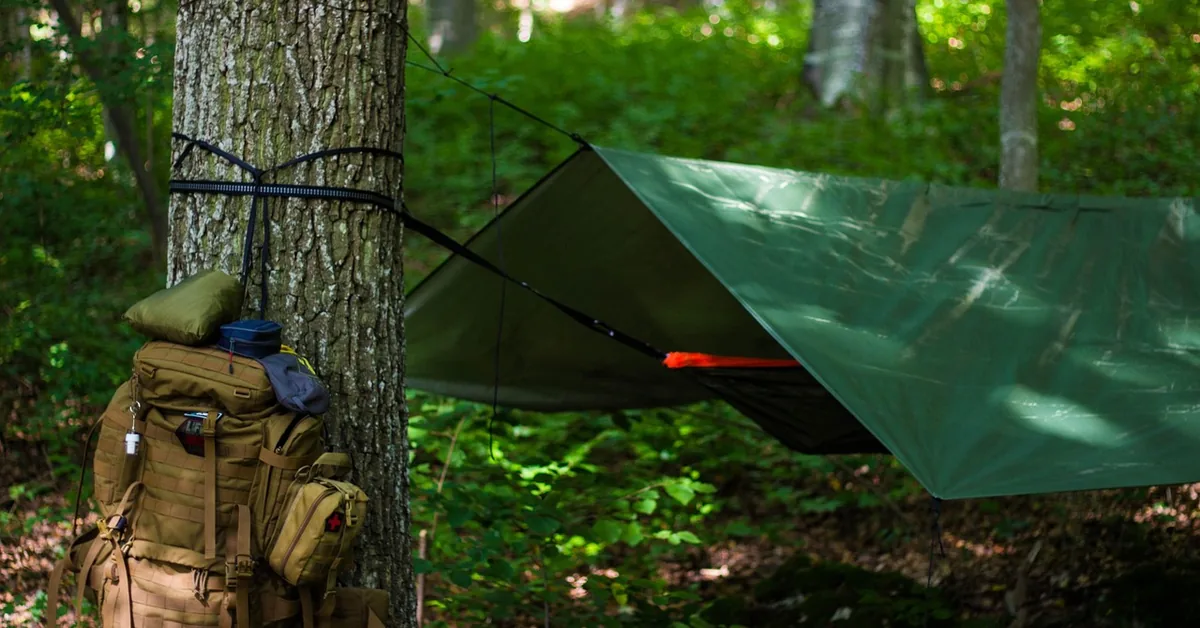
An A-frame tarp shelter is a triangular rain-and-wind shelter made by draping a tarp over a ridgeline between two trees or poles—the steep sides shed water fast, but it stays open on both ends unless you close them off. Pitched wrong, it sags and lets rain through; pitched right, it goes up in about 15 minutes with just a tarp, 50 feet of paracord, and six stakes. This guide covers picking the right tarp, the exact setup steps, and which weather conditions it handles well versus poorly.
Quick Answer
Tie a ridgeline between two trees 8-10 feet apart at 4-5 feet high, drape a 10×10-foot tarp over it evenly, then stake all four corners taut at a 45-degree angle. It takes about 15 minutes and works best against rain and one-directional wind; it’s a poor choice for heavy snow load or sideways storms since both ends stay open.
Why Choose an A-Frame Tarp Shelter?
I’ll never forget my first A-frame tarp shelter. It was a rainy weekend in the Smoky Mountains, and my usual tent felt too bulky for the quick overnight trip. I decided to try a tarp shelter instead, and it was a game-changer. The A-frame design is simple yet effective. It’s shaped like the letter “A,” with a slanted roof that sheds rain and wind while providing enough space underneath for you to sit, sleep, or store gear.
This shelter is perfect for minimalist campers who want to travel light. It’s also great for emergencies, backyard camping with kids, or even as a temporary shade structure during a picnic. The best part? You don’t need fancy equipment. A tarp, some cord, and a few stakes are enough to get started. Plus, it’s customizable. You can make it as basic or as elaborate as you want, depending on your needs and the weather.
Another reason I love the A-frame is its versatility. It works in forests, deserts, or even rocky terrains, as long as you can find a way to secure it. It’s also quick to set up—once you get the hang of it, you can have it ready in 15 minutes or less. For anyone looking to connect with nature without breaking the bank, this shelter is a fantastic option.
Choosing the Right Tarp for Your Shelter
The heart of your A-frame tarp shelter is the tarp itself. I learned this the hard way during a trip to Colorado when I grabbed a cheap, flimsy tarp that tore in the wind. Trust me, investing in a good tarp makes all the difference. Here’s what to look for when choosing one.
First, consider the material. Most tarps are made of polyethylene, silnylon, or canvas. Polyethylene tarps are affordable and widely available at hardware stores. They’re durable for occasional use but can be heavy and noisy in the wind. Silnylon (silicone-coated nylon) is my go-to for backpacking because it’s lightweight, waterproof, and packs down small. Canvas is super sturdy but too heavy for most outdoor adventures.
Size matters too. A 10×10-foot tarp is a good starting point for one or two people. If you’re camping with a group or need extra space, go for a 12×12 or larger. Just keep in mind that bigger tarps require more cord and stakes to secure properly.
Check for reinforced grommets—those metal or plastic rings along the edges. They make it easier to tie down the tarp without tearing. UV resistance is another must, especially if you’re camping in sunny areas like Arizona or California. A tarp that’s UV-treated will last longer and won’t degrade under harsh sunlight.
Here’s a quick table to help you choose the right tarp:
| Tarp Material | Pros | Cons | Best For |
|---|---|---|---|
| Polyethylene | Affordable, durable, widely available | Heavy, noisy, less packable | Casual camping, backyard use |
| Silnylon | Lightweight, waterproof, compact | Expensive, less durable | Backpacking, frequent use |
| Canvas | Very sturdy, long-lasting | Heavy, bulky, slow to dry | Base camping, permanent setups |
Finally, consider the color. I prefer neutral colors like green or brown because they blend into the environment. Bright blue tarps are fine for casual use but can attract attention in the wilderness.
Essential Gear for Building Your A-Frame Shelter
Before you head out, let’s talk about the gear you’ll need. I’ve refined my kit over years of trial and error, and I’m happy to share what works. The beauty of an A-frame tarp shelter is that it doesn’t require much, but each piece plays a crucial role.
You’ll need a tarp, of course, based on the guidelines above. Next, grab some paracord or guyline. I recommend at least 50 feet of 550 paracord—it’s strong, lightweight, and versatile. If you’re in a pinch, any sturdy rope will do, but avoid thin, stretchy cords that might sag.
Stakes are essential for securing the tarp to the ground. I carry six to eight aluminum or titanium stakes because they’re lightweight and hold well in most soils. Plastic stakes are cheaper but can break in rocky ground. If you’re camping in a sandy area like a beach, consider sand stakes or use rocks as anchors.
Poles or trekking poles are great for creating the A-frame’s ridge. I use adjustable trekking poles because they’re easy to pack and let me fine-tune the height. If you don’t have poles, you can use sturdy sticks or even tie the tarp to trees.
A small knife or multi-tool is handy for cutting cord or trimming branches. I also bring a few carabiners to make attaching the cord to grommets quicker. Lastly, pack a groundsheet or footprint to protect your sleeping area from moisture and sharp rocks. An old blanket or a lightweight silnylon sheet works well.
Here’s my go-to gear list:
- Tarp (10×10 or larger)
- 50 feet of paracord
- 6-8 stakes
- 2 trekking poles or sticks
- Knife or multi-tool
- 4 carabiners
- Groundsheet
With these items, you’re ready to build a solid A-frame shelter anywhere.
Best A-Frame Tarp Pick
CAMPMAC Heavy Duty Waterproof Tarp (10×12 ft) – $22.95
Matches the 10×10-to-12×12 size range this guide recommends, with metal grommets every 20 inches for tying down corners without tearing.
- Best for: a first A-frame shelter build without buying a dedicated backpacking tarp
- Why we picked it: reinforced grommets every 20 inches match the “check for reinforced grommets” advice above
- Main drawback: polyethylene is heavier and noisier in wind than silnylon
Round out your A-frame kit
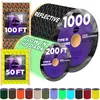 Option 1 TECEUM Type III 550 Paracord (50 ft) – $6.99
|
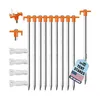 Option 2 Eurmax USA 10-Pack Galvanized Tent Stakes – $13.91
|
 Option 3 SE Survivor Series Adjustable Trekking Poles (2-Pack) – $29.99
|
As an Amazon Associate we earn from qualifying purchases.
Step-by-Step Guide to Setting Up Your A-Frame Tarp Shelter
Now, let’s get to the fun part—building your shelter! I’ll walk you through the process I use every time I set up an A-frame. It’s straightforward, but a few tips can make your shelter sturdy and comfortable.
- Choose a Good Spot: Look for flat ground with no rocks or roots. Avoid low areas where water might pool during rain. Check for overhead hazards like dead branches, especially in windy areas like the Pacific Northwest. Position the shelter so the open ends face away from the prevailing wind.
- Find Your Anchor Points: Lay out your tarp flat on the ground to visualize the setup. Find two anchor points for the ridge—either trees or poles. If using trees, place them about 8-10 feet apart, depending on your tarp size. If using poles, set them up vertically and secure them with stakes or rocks.
- Tie the Ridgeline: Tie a length of paracord to one tree or pole, about 4-5 feet off the ground. Drape the tarp over the cord so it forms a triangle, with equal amounts of tarp on both sides. Pull the cord tight and tie it to the second tree or pole.
- Secure the Corners: Pull each corner taut and tie it to a stake driven into the ground at a 45-degree angle. Use a trucker’s hitch knot if you know it—it’s great for keeping the cord tight. Tie down any extra grommets along the edges for added stability.
- Adjust the Tension: Eliminate sagging—a taut tarp sheds rain better and flaps less in the wind. If you’re expecting bad weather, lower the ridge to reduce wind resistance. Finally, place your groundsheet inside to create a cozy floor.
I once set up an A-frame in a hurry during a sudden storm in Oregon. It took me 10 minutes, and I stayed dry all night. Practice makes perfect, so try setting it up in your backyard first.
Pros, Cons, and the Best Conditions for an A-Frame Shelter
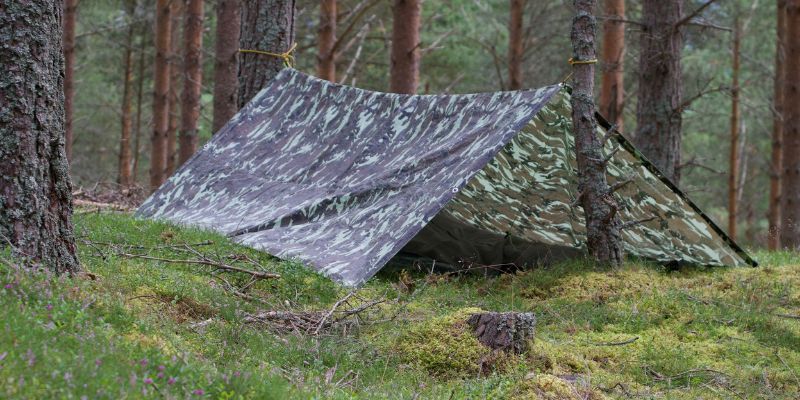
The A-frame’s two sloped panels brace against each other, which is why it handles wind and rain from multiple directions better than a single-panel lean-to. But both ends typically stay open, so it can’t match a fully enclosed tent for keeping out insects, driving rain, or heavy snow load.
| Condition | How the A-Frame Performs |
|---|---|
| Steady rain | Excellent—steep sides shed water fast before it can pool |
| One-directional wind | Good—pitch the closed/low end into the wind |
| Sideways storms or gusty, shifting wind | Poor—open ends on both sides let wind and rain blow through |
| Heavy snow load | Poor—not rated for sustained weight; a low-profile winter tent is safer |
| Hot, still weather | Good—raise the ridge higher for airflow underneath |
📊 An average of 1,301 U.S. deaths per year are associated with exposure to excessive cold — Source: CDC, National Vital Statistics System (Excessive Cold/Hypothermia Death Rates)
That statistic is the reason to be honest about this shelter’s limits: it’s a great rain-and-wind setup for three-season camping, but for freezing overnight temperatures, lower the ridge to 18-24 inches, close one end with extra tarp or branches, and insulate the ground—or switch to a fully enclosed tent instead of pushing an open-ended shelter past what it’s built for.
Customizing Your A-Frame Tarp Shelter
One of the things I love about A-frame shelters is how easy they are to customize. Over the years, I’ve tweaked my setups to suit different environments and needs. Here are some ideas to make your shelter your own.
For extra weather protection, add side walls. You can use another tarp or even natural materials like branches and leaves. In windy areas, I sometimes pile rocks or logs along the bottom edges to block drafts.
If you’re camping in hot weather, raise the ridge higher to improve airflow. You can also prop up one side of the tarp with a stick to create a lean-to hybrid, which gives you more shade and ventilation. I did this during a sweltering trip to Nevada, and it kept me cool all day.
For cold weather, insulate the interior. Lay down pine needles or dry leaves on the groundsheet for extra warmth. If you’re using a silnylon tarp, consider adding a reflective emergency blanket underneath to retain heat.
You can also get creative with the interior. Hang a small battery lantern from the ridge for light—I sometimes string up a lightweight hammock inside for a comfy nap spot instead. If you want a fully enclosed option rather than an open-ended A-frame, our guide on how to make a tent out of tarps covers closing off both ends. If you’re camping with kids, let them decorate the shelter with biodegradable markers—it’s a fun way to make it feel like home.
Maintaining and Storing Your Tarp Shelter Gear
Taking care of your gear ensures it lasts for years. I’ve had the same silnylon tarp for over a decade because I follow a few simple maintenance tips. After every trip, I clean my tarp by shaking off dirt and wiping it with a damp cloth. Avoid harsh detergents—they can damage the waterproof coating.
Dry the tarp completely before storing it. I learned this lesson after storing a damp tarp and finding mildew spots a month later. Hang it in your garage or backyard until it’s bone-dry. Fold it loosely to avoid creasing, which can weaken the material over time.
Check your paracord and stakes for wear. Frayed cord or bent stakes can fail when you need them most. I replace my cord every couple of years and keep spare stakes in my kit. Store everything in a dedicated bag to keep it organized and ready for your next adventure.
Safety Tips for Using an A-Frame Tarp Shelter
Safety is always my top priority when camping. An A-frame tarp shelter is simple, but a few precautions can prevent mishaps. Always check the weather forecast before heading out. These shelters are sturdy but not designed for extreme conditions like heavy snow or hurricane-force winds.
Secure all stakes and cords tightly to avoid collapse. I once woke up to a sagging tarp because I didn’t double-check my knots. If you’re using trees as anchors, make sure they’re healthy and not rotting.
Be mindful of fire safety. Keep campfires at least 10 feet away from the tarp—sparks can easily melt or ignite it. I always clear the ground of dry leaves and grass before setting up a fire.
Finally, practice setting up and taking down your shelter at home. Familiarity builds confidence, and you’ll be better prepared to handle unexpected challenges in the field. If you already own a tent and just need extra rain protection over it instead of a standalone A-frame, see our guide on how to put a tarp over a tent.
Why I Keep Coming Back to the A-Frame Tarp Shelter
After years of exploring the USA’s wild places, from the Appalachian Trail to the deserts of Utah, the A-frame tarp shelter remains my favorite way to camp. It’s more than just a practical solution—it’s a way to connect with nature. There’s something magical about sitting under a tarp you pitched yourself, listening to the rain patter above while you stay dry and cozy.
This shelter is perfect for anyone who loves simplicity and adventure. It’s affordable, lightweight, and endlessly adaptable. Whether you’re a solo backpacker, a family camper, or someone who just wants to try something new in the backyard, the A-frame tarp shelter has you covered—literally.
“I once set up an A-frame in a hurry during a sudden storm in Oregon. It took me about 10 minutes, and I stayed completely dry all night—the trucker’s hitch knot on the ridgeline is what kept it from sagging once the wind picked up.”
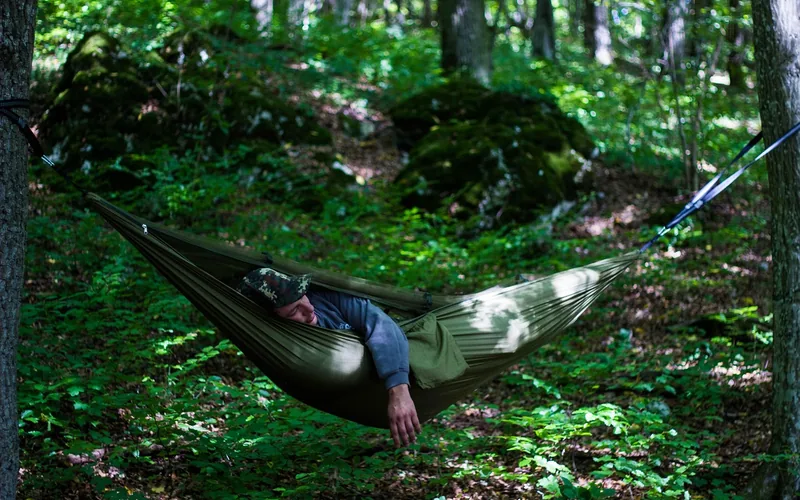
So, grab a tarp, pack your gear, and head outside. Build your shelter, tweak it to make it yours, and enjoy the freedom of sleeping under the stars.
Frequently Asked Questions
What is an A-frame tarp shelter?
An A-frame tarp shelter is a simple outdoor structure made by draping a tarp over a rope or poles to form a triangular shape, like the letter “A.” It protects you from rain, wind, and sun. I love it because it’s lightweight, easy to set up, and perfect for camping or emergencies.
How long does it take to set up an A-frame tarp shelter?
With practice, you can set it up in 10-15 minutes. My first attempt took about 30 minutes, but after a few tries in my backyard, I got much faster. The key is to practice tying knots and choosing a good spot.
Can I use an A-frame tarp shelter in winter?
Yes, but it depends on the conditions. I’ve used mine in light snow by lowering the ridge and insulating the floor with leaves. For heavy snow or extreme cold, a fully enclosed tent is safer. Always check the weather forecast.
What’s the best tarp size for an A-frame shelter?
A 10×10-foot tarp works well for one or two people. For groups or extra space, I recommend a 12×12 or larger. The size depends on your needs and how much gear you’re bringing.
How do I make my A-frame tarp shelter more comfortable?
Add a groundsheet for a dry floor and insulate with leaves or a blanket for warmth. I sometimes hang a lantern inside or prop up one side for better airflow. Small tweaks like these make a big difference.
Conclusion
An A-frame tarp shelter comes down to one tarp, 50 feet of paracord, and six stakes pitched taut in about 15 minutes—reliable in rain and one-directional wind, but not a substitute for an enclosed tent in heavy snow or shifting storms. Match the pitch to the weather, practice it once in the backyard, and it becomes the fastest shelter in your kit. I promise you’ll feel a sense of pride every time you look at your handiwork. Happy camping!
Sponsored / affiliate links. As an Amazon Associate I earn from qualifying purchases. I may earn additional commission from eligible campaigns.