How to Make a Tent Out of Tarps
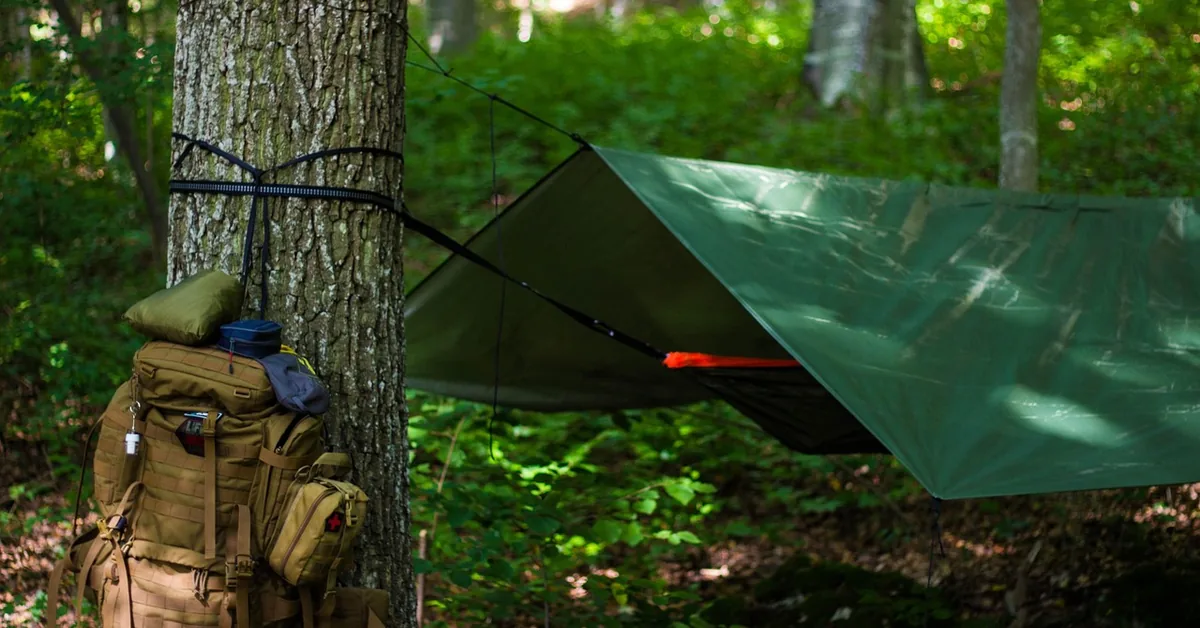
A tarp tent needs only a tarp, paracord, and stakes, pitched at 30 degrees or steeper so rain runs off instead of pooling on top. The three easiest shapes are the A-frame, lean-to, and diamond, each suited to different weather and group sizes. This guide covers gathering supplies, picking a campsite, all three basic designs, and weatherproofing so your shelter survives a surprise storm.
This post contains affiliate links. We may earn a commission at no extra cost to you.
I’ve spent countless weekends camping and tinkering with tarps to build weatherproof shelters, and every design below is one I’ve actually pitched and slept under.
Why Choose a Tarp Tent?
Tarp tents are lightweight, affordable, and versatile. Unlike traditional tents, tarps let you customize your shelter to fit any environment. Whether you’re camping in the woods or setting up in your backyard, a tarp tent can keep you dry and comfortable, and it packs down smaller than a pole tent.
Tarps come in different materials like polyethylene, canvas, and silnylon. Polyethylene tarps are cheap and waterproof but heavier. Canvas is durable but needs waterproofing. Silnylon is lightweight and great for backpacking, and most silnylon is rated around 1,500mm hydrostatic head — for sustained rain, look for at least 3,000mm on any tarp material.
Gathering Your Supplies
Before you start, make a checklist to avoid forgetting anything. Here’s what you’ll need to build a tarp tent:
| Item | Purpose | Where to Find |
|---|---|---|
| Tarp (8×10 ft or larger) | Main shelter material | Hardware stores, online retailers |
| Paracord or rope | Securing tarp and creating tension | Camping stores, hardware stores |
| Tent stakes | Anchoring the tarp to the ground | Outdoor gear shops |
| Poles or trekking poles | Supporting the tarp structure | Camping gear retailers |
| Groundsheet (optional) | Protecting the floor | Old tarps or camping stores |
| Bungee cords (optional) | Adding flexibility to tie-downs | Hardware stores |
Pick a tarp that’s at least 8×10 feet for solo camping. For groups, go bigger — 10×12 or 12×16 feet works well. Make sure your tarp has grommets (those metal holes) for easy tying. If it doesn’t, tarp clips work just as well.

Best Shelter Tarp Pick
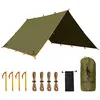
FREE SOLDIER Waterproof Camping Tarp Shelter Awning, 10×10.5ft – $39.99
Sized close to the 8×10 minimum this guide recommends for solo camping, with reinforced grommets at every corner so it holds a tight A-frame or diamond pitch without clips.
- Best for: Solo or 2-person A-frame, lean-to, or diamond setups
- Why we picked it: Purpose-built as a shelter tarp, not a general-purpose cover
- Main drawback: Heavier to pack than a dedicated silnylon backpacking tarp
Compare more shelter tarp options
 Option 1 Amazon Basics Waterproof Camping Tarp – $17.11
|
 Option 2 Winpull 10x20ft Heavy Duty Tarp – $34.98
|
 Option 3 TICONN Heavy Duty Tarp Cover – $9.95
|
As an Amazon Associate we earn from qualifying purchases.
Choosing the Perfect Campsite
Where you set up your tarp tent matters a lot — a tarp pitched on uneven ground means sliding downhill by morning. Look for a flat, clear area free of rocks and roots, and avoid low spots where water might pool if it rains.
Check for natural supports like trees or boulders; they make setup easier by giving you anchor points. Face your tent’s opening away from the wind, and picture how rain or wind would hit the site before you commit to it — it saves headaches later.
Basic Tarp Tent Designs
There are many ways to shape a tarp tent, but three setups cover most needs and weather. Each one is easy once you get the hang of it.
A-Frame Tarp Tent
The A-frame is the go-to for quick setups. It sheds rain well when pitched steep enough. Here’s how to build it:
- Find two trees about 10 feet apart.
- Tie a ridgeline (a tight rope) between them, about 4-5 feet high.
- Drape your tarp over the ridgeline, centering it.
- Pull the corners tight and stake them to the ground at a 30-45 degree angle so rain runs off instead of pooling.
- Adjust the tension so the tarp doesn’t sag.
This design is stable and gives plenty of headroom. If you don’t have trees, use trekking poles or sticks as supports. For a deeper breakdown of this specific design, see our A-frame tarp shelter guide.
Lean-To Tarp Tent
The lean-to is perfect for sunny days when you want shade and a breeze. It’s open on one side, so it’s not great for storms, but it’s easy to set up:
- Tie a rope between two trees or poles, about 6 feet high.
- Drape one edge of the tarp over the rope.
- Stake the opposite edge to the ground at an angle.
- Secure the sides with stakes or rocks.
Good for daytime hangouts or stargazing. It’s airy but can feel chilly at night, so bring a blanket.
Diamond Tarp Tent
The diamond shape suits solo campers who want a compact, wind-resistant shelter:
- Tie one corner of the tarp to a tree or pole about 3-4 feet high.
- Stake the opposite corner to the ground, pulling it tight.
- Stake the other two corners to form a diamond shape.
- Adjust to keep the tarp taut.
This setup holds up well in windy conditions, but it’s snug — best for one person and minimal gear.
Step-by-Step Setup Guide
Here’s how to build an A-frame tarp tent, the most reliable design for beginners. Grab your supplies and follow along.
- Pick Your Spot: Find a flat area with two trees or poles 10-12 feet apart. Clear any debris and test the ground’s firmness.
- Set Up the Ridgeline: Tie your paracord between the trees or poles at about 4-5 feet high, tight enough that it doesn’t sag — a loose ridgeline means a floppy tent.
- Drape the Tarp: Throw your tarp over the ridgeline so it’s even on both sides. Mark the tarp’s middle with tape for quicker setups next time.
- Stake It Down: Pull each corner of the tarp tight and hammer in stakes at a 30-45 degree angle. If the ground’s hard, use a rock as a hammer.
- Tighten Everything: Walk around and tug gently on the tarp to adjust tension until it’s smooth with no wrinkles.
- Add a Groundsheet: Lay a smaller tarp or groundsheet inside to keep your sleeping area clean, tucking the edges under to avoid tripping.
This setup takes about 10 minutes with practice, though a first attempt often takes closer to an hour.
Weatherproofing Your Tarp Tent
A tarp tent is only as good as its ability to keep you dry. Here’s how to make your shelter weatherproof:
- Seal the Seams: If your tarp isn’t fully waterproof, apply seam sealer to the edges — silicone-based sealers work well for polyethylene tarps.
- Angle for Runoff: Pitch your tarp at 30 degrees minimum, steeper (45-60 degrees) in heavy rain. Flat tarps pool water, and a sagging tarp at 2 a.m. is no fun.
- Use a Drip Line: Tie small loops of cord on the ridgeline to divert dripping water away from the tarp opening.
- Check for Tears: Inspect your tarp for holes before every trip and patch them with duct tape or a tarp repair kit.
📊 For sustained rain, look for a tarp rated at least 3,000mm hydrostatic head — most silnylon tarps rate closer to 1,500mm, which handles light rain but not a steady downpour. Source: manufacturer waterproof-rating standards (AATCC 127 / ISO 811 test methods).
If you’re expecting heavy wind, lower your ridgeline and use extra stakes — a high ridgeline in a gust is how tarps get lost.
Customizing Your Tarp Tent
Once you’ve mastered the basics, it’s time to get creative with small upgrades:
- Add a Door: Drape a smaller tarp over the entrance and secure it with clips for privacy or wind-blocking.
- Create Ventilation: Prop up one corner slightly with a stick or extra cord to let air flow.
- Hang a Light: Clip a lightweight LED lantern inside for nighttime reading.
- Organize Gear: Tie bungee cords across the ridgeline to create a makeshift shelf that keeps gear off the ground.
These small touches make camping more comfortable — experiment and find what works for your trips.
Packing and Maintaining Your Tarp Tent
Taking care of your tarp tent helps it last for years. Here’s how to keep it in top shape:
- Dry Before Packing: Wet tarps get moldy fast, so air-dry yours before storing it.
- Fold Neatly: Roll or fold your tarp to avoid creases that weaken the material; stuff it loosely in a sack for backpacking instead of folding tight.
- Store Properly: Keep your tarp in a cool, dry place like a garage shelf.
- Clean Gently: If it’s dirty, rinse with water and mild soap. Avoid harsh chemicals that can damage waterproof coatings.
Check your ropes and stakes too, and replace frayed cords before they snap during a trip.
Why I Love Tarp Camping
Tarp camping has changed how I enjoy the outdoors. It’s not just about saving money — it’s about freedom. I feel closer to nature without a bulky tent blocking my view, and every time I set up a tarp tent, I learn something new about the land and myself.
I’ve camped in deserts, forests, and mountains with my tarp setups. Each trip brings surprises, like the time I woke up to a deer sniffing my lean-to. These moments make the effort worthwhile.
Frequently Asked Questions
What’s the Best Tarp Size for a Tent?
An 8×10-foot tarp works for solo camping — big enough for one person and gear but easy to carry. For two or more people, go for a 10×12 or 12×16-foot tarp.
Can I Make a Tarp Tent Without Trees?
Yes. Trekking poles or sturdy sticks work as supports when trees aren’t around. Just make sure they’re secure and can handle the tarp’s weight.
How Do I Keep My Tarp Tent Warm?
Layer a groundsheet and sleeping pad for insulation. You can also hang a blanket inside or choose a smaller setup like the diamond tarp to trap heat.
Is a Tarp Tent Waterproof?
Most tarps are water-resistant rather than fully waterproof. Check the hydrostatic head rating (aim for 3,000mm or higher for sustained rain), apply seam sealer, and set up at a steep angle to keep rain out.
How Long Does It Take to Set Up a Tarp Tent?
It depends on experience. A first attempt often takes about an hour, but an A-frame goes up in around 10 minutes once you’ve practiced the ridgeline and staking steps a few times.
Conclusion
Building a tarp tent is more than pitching a shelter — it’s an exercise in creativity and resourcefulness. With a tarp, paracord, and stakes, you can craft a weatherproof shelter almost anywhere. Start with the A-frame if you’re new to it, angle it at 30 degrees or steeper for rain, and adjust from there. For a different take on the same core method, see our guide on how to make a tent with a tarp.
Sponsored / affiliate links. As an Amazon Associate I earn from qualifying purchases. I may earn additional commission from eligible campaigns.