Cabinet Hinges, Pulls and Drawer Hardware: Install, Adjust and Placement — Complete Guide
Use the right hinge type for the door, keep center pulls on a fixed layout, and adjust the doors last: about 2-1/2-inch pulls on many drawers, knobs about 1 inch from the corner, and hinges set for about 1/8-inch reveals. Poor placement causes crooked doors, binding drawers, stripped screw holes, and hardware that looks uneven. This guide covers cabinet hinges, pulls and drawer hardware selection, drilling, placement, and post-install adjustment for doors and drawers.
Cabinet hardware basics and measurements



Good cabinet hardware work starts with three measurements: overlay, center-to-center spacing, and reveal. If those numbers are wrong, the door can fit poorly, the pull holes may not match the replacement part, and the finished run can look off even when the screws are tight.
Concealed hinges, knobs, pulls, and handles
Concealed cabinet hinges are the usual choice for cabinet doors when you want accurate alignment and a cleaner front. They need the right hinge style for the door build, and they often go in with a hinge jig so the cup and screw holes land in the same place on every door.
Cabinet pulls mount with two screws and are sized by center-to-center measurement, which is the distance between the screw holes. Cabinet knobs use one screw point and are often simpler for small doors or compact drawers. The same jig family can usually mark both layouts.
Center-to-center, overlay, reveal, stile, and rails
Center-to-center means the hole spacing for a pull. If a replacement pull is 3 inches center-to-center, the new holes must match that distance. Overlay is the amount the door covers the cabinet opening edge. That number helps determine which concealed hinge will fit the cabinet.
Reveal is the visible gap around the door after installation. Stile means the vertical edge of the door, and rails are the horizontal top and bottom pieces. Hardware on doors is often placed on the stile opposite the hinges, with the rail edges helping you keep the handle line consistent.
How door and drawer construction changes placement
Inset, overlay, and tall-door cabinets do not use the same placement rules. Inset doors need tighter hinge choice and more careful reveal control. Overlay doors give more room for handle placement, but the hardware still needs clearance from adjacent doors, drawer fronts, and appliance panels.
Drawers change the rules again. Short drawers can take a centered knob or pull. Wider drawers usually read better with a centered pull, but very wide fronts may need a larger pull or a pair of pulls so the hardware does not look undersized.
📊 This Old House says cabinet hardware installation can take around 2 hours. Source: How To Install Cabinet Hardware.
Which hardware fits which cabinet?
Choose the hardware by cabinet construction first, then by look. Overlay doors usually work well with concealed hinges and door pulls on the stile opposite the hinges. Inset doors need hinge styles that support the tighter fit. Demountable hinges are another option when the cabinet build calls for them, and some versions offer three-way adjustability.
Overlay versus inset doors
Overlay doors cover part of the cabinet frame or box edge, so hinge selection starts with the overlay dimension. Inset doors sit flush within the opening and need more careful gap control. If the wrong hinge type is used, the door may bind, sit proud, or leave an uneven reveal that cannot be fixed by handle placement alone.
Tall doors, base cabinets, and drawer fronts
Tall pantry doors are harder to keep aligned because small errors show up along the full height. Base cabinet doors are more forgiving, but they still need square drilling and even reveals. Drawer fronts are easier to standardize, which is why handle placement can be repeated across a run with a jig.
When knobs make more sense than pulls
Knobs make sense on narrow doors, short drawers, or spots where a pull would hit an adjacent front. They also simplify drilling because they need one hole instead of two. Pulls are better when you want a stronger grip, especially on larger drawers and long doors.
Picture a 12-inch wide drawer stacked under a dishwasher panel. A long pull can crowd the panel edge. A centered knob or a shorter pull with a smaller footprint may fit better and still leave enough finger clearance.
Tools and setup for accurate drilling
Accurate drilling comes from a steady layout, the correct bit, and a jig that fits the job. Kreg’s Cabinet Hardware Jig Pro helps install cabinet hardware in seconds and is priced at $49.99. Kreg also sells a concealed hinge jig for cabinet door hinges at $32.99, plus a drawer slide jig at $32.99.
Hardware jig options and limits
A cabinet hardware jig reduces measuring errors and helps you repeat the same placement across many doors and drawers. A DIY jig can be enough for a few cabinets or a one-room update. A commercial jig helps more when you have a large run, mixed drawer sizes, or repeated hinge layouts where small drift becomes obvious.
Kreg’s ultimate hardware installation kit is reduced from $131.96 to $117.96, which matters only if you need a full setup for multiple cabinet tasks. The better question is whether the jig holds spacing accurately enough for the run you are installing. If it does not lock in the hole position, it will not save you from misalignment.
Bits, drivers, clamps, tape, and square
Use a drill bit that matches the screw shank and pilot hole need for the material. Pilot holes should be straight, sized for the screw, and drilled before the screw goes in. That helps avoid splitting and makes it less likely that the screw will wander or strip the face frame or door core.
Keep a square, tape, clamp, and driver on hand. The square helps check the jig and door edge. Tape can mark a stop line. A clamp keeps the jig from shifting while you drill.
Marking lines before you drill
Mark the door or drawer front before you touch the drill. For doors, mark the stile opposite the hinges and use the rail edges to keep the handle line even. For drawers, mark the centerline or the chosen offset line, then confirm the pull will clear neighboring fronts when opened.
A common first-timer mistake is drilling one pull hole by eye and using that spot as a pattern. That works until a tall door, a short drawer, and a wide drawer all need different placement. A line system is faster and more reliable than guessing each time.
Where should cabinet pulls and knobs go?

Pulls and knobs should go where the hand naturally lands, while staying clear of hinges, rails, and nearby fronts. On drawers, that often means centered placement. On doors, the hardware usually belongs on the stile opposite the hinges. The exact spot depends on door size, reveal, and surrounding clearance.
Drawer placement by width and height
Family Handyman says cabinet handles are most often placed in the middle of the drawer. That is a useful baseline for standard drawer fronts. For narrow drawers, a centered knob can be enough. For wider drawers, a centered pull usually looks balanced and gives better grip. (Familyhandyman)
For very tall drawer fronts, the center point can land too high or too low for comfort. In that case, many installers keep the pull centered left to right but shift the vertical position slightly to suit the drawer stack and hand reach. The key is to keep every drawer in the same run consistent.
Door placement on the stile opposite the hinges
Family Handyman also notes that door hardware is usually installed on the opposite side of the hinges. That gives the hand the best motion and keeps the hardware away from the hinge swing. On upper cabinets, Family Handyman recommends aligning the top of the handle with the bottom edge of the top rail.
That rail-based line gives you a repeatable reference on doors of different heights. On lower doors, the same idea can be used with the bottom rail as the line reference. The handle does not need to sit in the exact middle of the door if the rail layout would put it in an awkward spot.
Avoiding interference with adjacent doors and drawers
Pull interference is common on corner runs, narrow door gaps, and appliance-adjacent cabinets. A pull that is too long can strike a neighboring front before the door opens fully. Check the swing path before drilling, and keep the hardware far enough from the edge that your fingers do not rub the adjacent cabinet.
Suppose a 5-inch pull is centered on a narrow pantry door beside a fridge panel. The door may open, but the end of the pull can brush the panel edge. Moving the pull slightly inward on the stile or choosing a shorter pull may solve the problem without changing the hinge layout.
How do you install cabinet hinges?
Install concealed cabinet hinges by choosing the right hinge type for the overlay, marking the cup location accurately, drilling pilot holes or cup holes to the correct layout, and hanging the door before final tightening. The goal is not only to mount the hinge, but to let the door open, close, and align without rubbing.
Measuring overlay before you drill
Start with overlay. Measure from the cabinet opening edge to the door edge when the door is in position. That number determines the compatible hinge style. If you skip this step, the hinge can place the door too far out, too far in, or at the wrong reveal.
For inset doors, confirm that the hinge is made for inset use. For overlay doors, confirm the overlay amount and whether the hinge is intended for partial or full overlay. For demountable setups, check the cabinet construction before buying hinges, since not every hinge type fits every frame style.
Hinge cup location and screw layout
Use a hinge jig to mark the cup and screw locations so each door matches the next one. The cup needs to sit at the same distance from the door edge on every hinge pair. Uneven cup placement is a common cause of tilted doors and an uneven reveal along the top or latch side.
Drill straight. A crooked cup hole can twist the hinge and make the door rack as it closes. Tighten the screws only after the door is hung and checked against the cabinet opening. If the hinge is forced into place with the screws alone, the door may bind later.
Installing the door and checking swing
Hang the door, close it slowly, and check the swing before you call it done. The door should clear the frame, sit even at the top and bottom, and meet the adjacent cabinet front without rubbing. If it drags at one corner, the issue is usually alignment, not the hinge brand.
Door work often looks finished before it is actually finished. That is why adjustment comes after mounting, not before. Once the door hangs, the small side-to-side and height corrections are what turn a rough fit into a clean line.
Hardware placement matrix
This placement matrix links door type, drawer height, hardware type, measurement method, common mistakes, and the check to make after installation. Use it as a repeatable layout guide, not as a substitute for the cabinet’s own dimensions or the hinge maker’s instructions.
| Cabinet type | Hardware type | Recommended placement method | Required measurements | Common mistakes | After-install check |
|---|---|---|---|---|---|
| Overlay door | Concealed hinge | Match hinge to overlay, place cup with jig, mount on door edge opposite the pull | Overlay dimension, cup setback, reveal target | Wrong hinge style, cup too close to edge, uneven reveal | Door closes flush and clears frame without rubbing |
| Inset door | Concealed hinge | Use inset-rated hinge and keep reveal gaps even around the opening | Opening size, reveal gap, hinge setback | Hinge meant for overlay, door sits proud, latch-side rub | Gap stays even on all four sides |
| Tall door | Pull | Place on stile opposite hinges with rail edge used as the layout reference | Door height, stile width, rail reference line | Pull too close to edge, hardware too low for reach | Door opens clear and hardware does not strike nearby fronts |
| Standard drawer, up to mid-height | Knob or pull | Center left to right; knob on one hole, pull on center-to-center spacing | Drawer width, centerline, pull spacing | Off-center look, holes drilled to the wrong spacing | Front looks balanced and hand clearance is clean |
| Wide drawer | Pull | Center the pull unless adjacent fronts require a slight offset for clearance | Drawer width, adjacent clearance, pull center-to-center | Pull too small, interference with adjacent drawer or appliance panel | Pull clears all nearby fronts through full travel |
| Short drawer | Knob | Center the single screw point or use the same jig family for repeat spacing | Drawer width, centerline, hole location | Knob too low or too close to an edge | Finger grip feels natural and the screw does not split the front |
How do you fix alignment after installation?
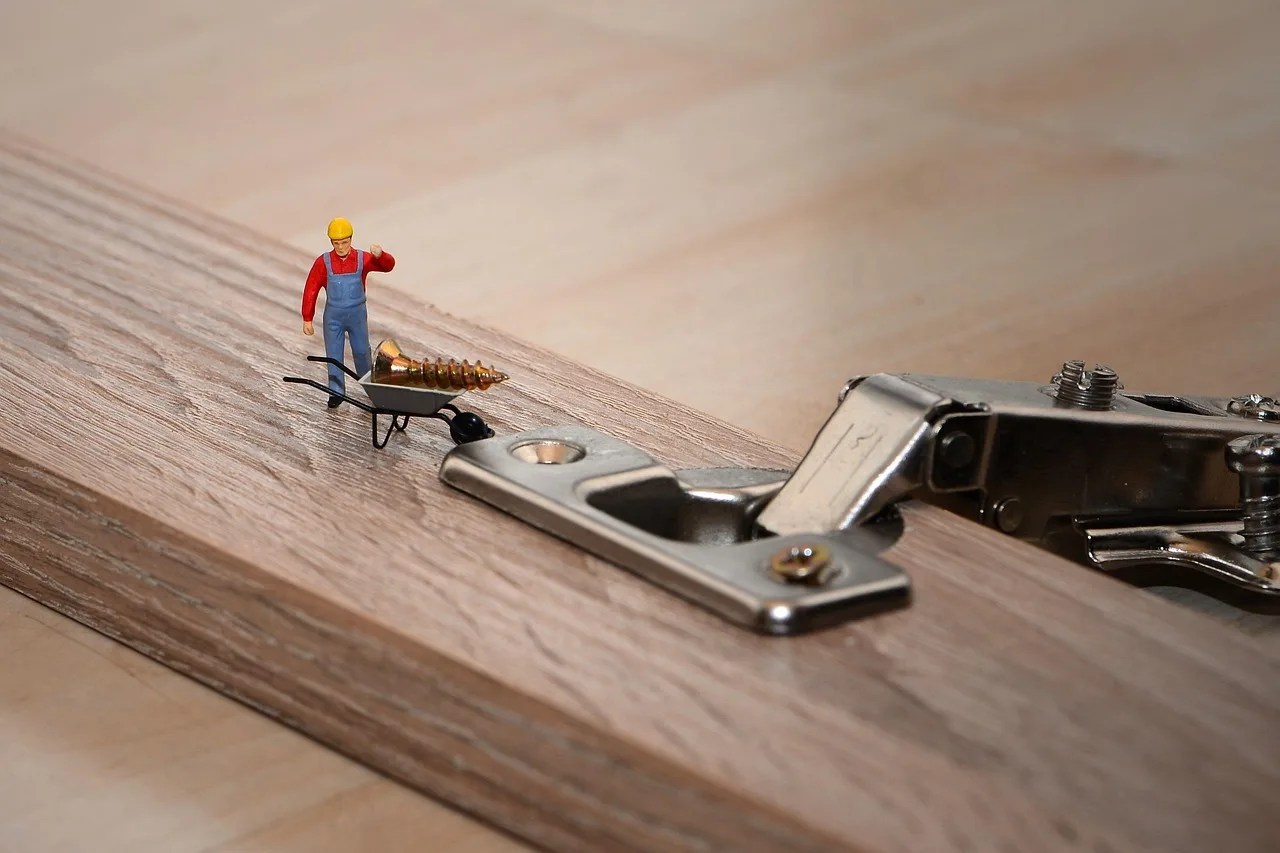
Fix alignment by using the hinge adjustments in the order that changes the door most predictably: height first, then side-to-side, then depth or in-out if the hinge allows it. Uneven reveal, rubbing corners, and a crooked door usually point to a mount that is close, not to a bad door.
Raising, lowering, and side-to-side hinge adjustments
Start by checking whether the door sits too high or too low at the top rail. Loosen the mounting screws just enough to shift the door, then retighten. If the latch side is too tight or too wide, use the side adjustment on the concealed hinge to move the door left or right in small steps.
HardwareSource offers single and double demountable hinges, and it describes demountable hinges as having three-way adjustability. That matters because three-way adjustment can help correct a small misfit without redrilling the door. The hinge still needs to be mounted squarely, though; adjustment is not a cure for bad hole placement.
Fixing reveal gaps, rubbing, and door tilt
If the reveal is wider at the top than the bottom, the door is tilted. If one corner rubs when the door shuts, the hinge spacing or height is off. Shift the door in small increments, then recheck the gap against the cabinet opening. A tiny change at the hinge can create a visible change at the far edge.
Common failure cases are easy to spot once you know the pattern. A door that bows inward at the latch side may need a small hinge-depth correction. A door that sticks out at the top usually needs a height or side shift, not a new hole. A door that closes crooked often needs both.
What to do when a hole is mis-drilled
If a pilot hole is off by a small amount, the screw may still bite if the hinge plate gives enough adjustment. If the hole is too large or split, do not force the screw tighter. Fill the hole with a proper plug or dowel, let it set, and redrill in the correct spot.
When a pull hole is mis-drilled, a replacement handle with the same center-to-center spacing may hide the error only if the hole centers still match. This Old House notes replacement handles should fasten through the same holes as the old ones when possible. If they do not match, plug the old holes and remeasure before drilling again.
Frequently asked questions
Where should cabinet hinges be placed on doors?
Place concealed hinges according to the door’s overlay and the hinge maker’s layout, not by guesswork. The cup position must line up with the door edge, and the hinge plate must match the cabinet style. For most doors, the hinges go on the inside edge that keeps the outer face clean.
Where should cabinet pulls be placed on drawers and doors?
Drawers are usually centered left to right, while doors usually get hardware on the stile opposite the hinges. On upper doors, a common reference is to line up the top of the handle with the bottom edge of the top rail. That keeps placement consistent across a run.
How do you install cabinet hinges without misalignment?
Measure overlay first, use a hinge jig, drill straight, and hang the door before final tightening. Then check the reveal at the top, bottom, and latch side. Small changes are easier to make before the screws are fully locked down, which is why dry fitting matters.
How do you adjust cabinet door hinges after installation?
Use the hinge’s adjustment screws to move the door up, down, left, right, or slightly in and out, depending on the hinge design. Make one change at a time and recheck the reveal after each turn. That prevents overcorrecting one side while trying to fix another.
What size pull should I choose for my cabinet doors and drawers?
Choose a pull that matches the cabinet scale and leaves room for the hand and neighboring fronts. A 2-1/2-inch pull is a common fit for many drawers, but larger drawers may need a longer pull for proportion and grip. Replacement hardware should match existing hole spacing when possible.
What tools do I need to install cabinet hardware?
You need a jig, drill, correct bits, driver, tape, square, and clamps. The jig keeps spacing repeatable, the bit size helps prevent splitting, and the square helps keep the layout straight. For many cabinet runs, those basics matter more than any one brand of hardware.
Sponsored / affiliate links. As an Amazon Associate I earn from qualifying purchases. I may earn additional commission from eligible campaigns.