How to Adjust Cupboard Door Hinges: 3-Screw Alignment Guide
Cupboard door hinges are realigned by turning the three adjustment screws on a concealed European hinge — side, depth, and height — a quarter-turn at a time until the door sits flush. Over-tightening strips the mounting plate, while skipping the depth screw leaves doors sticking out unevenly even after the rest is aligned. This guide covers identifying your hinge type, adjusting each of the three screws, and fixing a cupboard door that still won’t close right.
Tools Required
Most cupboard hinge adjustments only need a screwdriver, but having the full set on hand saves trips back and forth. This is standard door hardware maintenance that takes under 10 minutes per door once you know which screw does what.
- Phillips or flathead screwdriver — matched to the hinge screw heads; most European hinges use Phillips.
- Tape measure — checks gap and overlay consistency between doors.
- Pencil — marks the current door position before adjusting, so you can compare.
- Torpedo level — confirms the door hangs straight, not just level to the eye.
- Hex key (2.5mm) — required if your hinges use hex-drive adjustment screws instead of Phillips.
Best Cabinet Hinge Replacement Pick
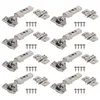
Blum Clip top BLUMOTION Hinge Kit (4-Pack) – $43.99
If a hinge won’t hold alignment even after adjusting all three screws in this guide, the mounting plate or cup is usually worn out — this kit replaces it with the same 3-way (side/depth/height) adjustable hinge covered above.
- Best for: replacing a hinge that won’t stay adjusted
- Why we picked it: same 3-way adjustment system this guide explains, from the brand that standardized it
- Main drawback: costs more per hinge than generic replacements
Compare more cabinet hinge options
 Option 1 Blum BLUMOTION Hinge Kit (1-Pack) – $14.49
|
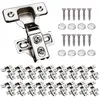 Option 2 Soft Close Cabinet Hinges (20-Pack) – $24.69
|
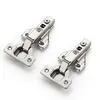 Option 3 Ravinte Full Overlay Hinges (2-Pack) – $7.39
|
As an Amazon Associate we earn from qualifying purchases.
Identifying Hinge Type
Cupboard doors use several different hinge types, and the adjustment method depends on which one you have.
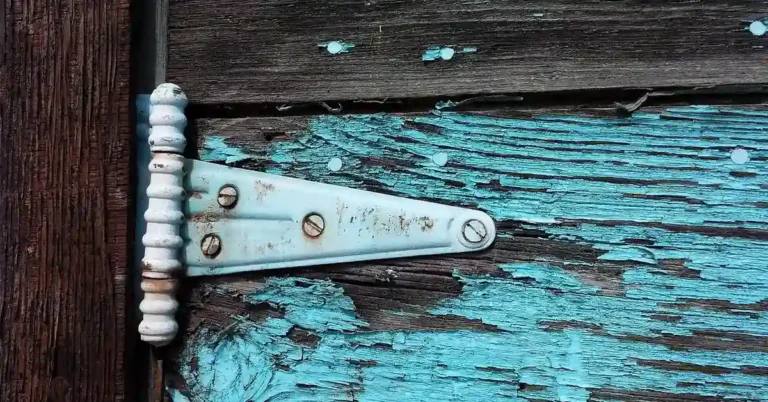
Butt hinges are the traditional type — two visible plates joined by a pin, with no built-in adjustment.
European (concealed) hinges are hidden inside the cabinet when the door is closed and offer the 3-way adjustment this guide focuses on.
Pivot hinges let doors swing open fully and are common on corner cabinets.
Continuous (piano) hinges run the full length of the door for extra support on larger doors.
Spring-loaded hinges close the door automatically without a separate catch.
A concealed (European) hinge is a spring-loaded cabinet hinge that mounts inside a 35mm cup bore drilled into the door, hiding the hinge barrel when the door is closed. It provides three-way adjustment — side, depth, and height — through screws on the mounting plate and hinge arm. It works on frameframe and face-frame cabinets alike, but it is not a direct swap for a surface-mounted decorative hinge without extra drilling.
📊 Concealed cabinet hinges use a standardized 35mm cup bore and a three-way adjustment system (side, depth, height) — a design Blum pioneered in the 1950s that is now the industry standard across hinge brands. Source: Blum, official hinge manufacturer
Quick 4-Step Hinge Adjustment Overview
- Find the three screws: open the door and locate the side screw on the hinge arm, the height screw in the vertical slot on the mounting plate, and the depth screw near the base of the mounting plate.
- Adjust side position first: turn the side screw clockwise to pull the door toward the hinge, counterclockwise to move it away, in small quarter-turns.
- Set the height: loosen the height screw slightly, slide the door up or down until it lines up with neighboring doors, then retighten.
- Fine-tune the depth last: turn the depth screw until the door sits flush with the adjacent doors, then recheck the other two screws since depth changes can shift alignment slightly.
Adjusting Vertical Alignment
A cupboard door that hangs too high or too low usually needs the height screw adjusted, not the whole hinge replaced. Open the door and find the vertical adjustment screw on the mounting plate — it sits in a slotted opening that lets the plate (and the door with it) slide up or down.
Loosen the screw slightly, then move the door up or down by hand until it lines up with the doors beside it. Retighten once it’s in position, and check the alignment again after tightening — the door can shift slightly as the screw seats.
Adjust both hinges on a door in small, even increments rather than maxing out one hinge first — uneven adjustment between the top and bottom hinge is a common cause of a door that looks twisted rather than simply high or low.
Correcting Horizontal Position
Open the cupboard door fully and locate the side screw, usually on the back of the hinge arm itself rather than the mounting plate. Turning this screw moves the door left or right relative to the cabinet frame, which is what closes gaps between doors or fixes a door that rubs against its neighbor.
Turn the screw clockwise to pull the door closer to the hinge side, counterclockwise to move it away. Work in small increments, checking the door’s position and closure after each turn, and repeat on both hinges for even alignment.
If the door still won’t sit right after adjusting both hinges, the cabinet frame itself may be out of square rather than the hinges being at fault — check the frame with a level before assuming the hinge needs further adjustment.
Fixing Depth Misalignment
Depth misalignment is what makes one cupboard door stick out further than the ones next to it, even after side and height are already adjusted. Find the depth screw on the hinge — on most European hinges it’s a small screw near where the mounting plate meets the hinge arm. Turning it one way pushes the door inward, the other way pulls it outward.
Make small adjustments and check the door against its neighbors after each turn, since depth is the adjustment most people skip and the one most likely to need repeating on both hinges of a larger door.
Tightening Loose Hinges
A loose hinge makes a cupboard door sag and stop closing properly, and it’s a separate problem from misalignment — the screws just need retightening, not readjusting. Use a screwdriver that matches the screw head exactly; a worn screwdriver tip strips the screw and makes the fix harder.
Turn each mounting screw clockwise to tighten, checking the door after each screw to see if it’s holding straight. If a screw spins without tightening, the pilot hole has worn out — back the screw out, insert a wooden toothpick with wood glue into the hole, let it dry, then reinsert the screw so it has fresh material to bite into.
Maintaining Cupboard Hinges
Once hinges are aligned and tight, a quick check every few months keeps them that way. Open and close each door and listen for squeaking or grinding — both are early signs a hinge needs lubrication before it needs full readjustment. See our guide to greasing door hinges for the right lubricant and how often to apply it.
If a door starts sagging again a few weeks after adjustment, check whether the cabinet itself has shifted (common in older homes as floors settle) before re-adjusting the same hinge repeatedly — readjusting a hinge that’s compensating for a shifting cabinet only masks the real problem temporarily.
Frequently Asked Questions
How to adjust cabinet door hinges step by step?
Adjust cabinet door hinges by tightening the mounting screws first, then aligning the door vertically with the height screw, horizontally with the side screw, and finally the depth using the screw near the mounting plate. Recheck alignment after each adjustment since the three screws interact.
How to fix a cabinet door that won’t close all the way?
Tighten or adjust the hinges using a screwdriver, and check for obstructions or misaligned parts first. Replace worn-out hinges if the mounting plate no longer holds adjustment. Use a level to confirm the cabinet itself is square, and adjust the catch or magnet if that’s what’s preventing full closure.
How to adjust full overlay cabinet hinges?
Loosen the screws on full overlay hinges slightly, then shift the door up, down, left, or right as needed before retightening. Adjust the depth screw to set how far the door sits from the cabinet face. Regularly checking these hinges keeps doors closing smoothly and sitting flush with their neighbors.
How to realign a hinge?
To realign a hinge, loosen its screws slightly first, then gently move the door into the desired position by hand. Tighten the screws securely once the door sits correctly, check the door’s movement, and repeat if it shifts. Confirm every screw is tight to prevent the alignment from slipping again.
Why won’t a cupboard door close flush after adjusting the hinges?
Usually the depth screw was skipped — tightening only the side and height screws can still leave the door sticking out past the frame. Turn the depth screw a quarter-turn at a time until the door sits flush, then recheck the other two screws, since a depth change can shift the door’s height and side position slightly.
Conclusion
Adjusting cupboard door hinges comes down to three screws — side, depth, and height — adjusted a quarter-turn at a time until the door sits flush and closes without rubbing. Work on both hinges evenly, recheck after each adjustment, and if a hinge won’t hold its setting after tightening, replace it rather than keep readjusting a worn mounting plate. Once your doors are squeak-free and aligned, a quick check every few months is all it takes to keep them that way.
Sponsored / affiliate links. As an Amazon Associate I earn from qualifying purchases. I may earn additional commission from eligible campaigns.