Are Oil Lamps Safe: Essential Guide
Quick Summary:
**Are oil lamps safe? Yes, when used correctly with proper fuel, ventilation, and safety precautions. Understanding the risks and following guidelines is key to enjoying their ambiance without compromising safety. This guide provides essential information for safe oil lamp operation.
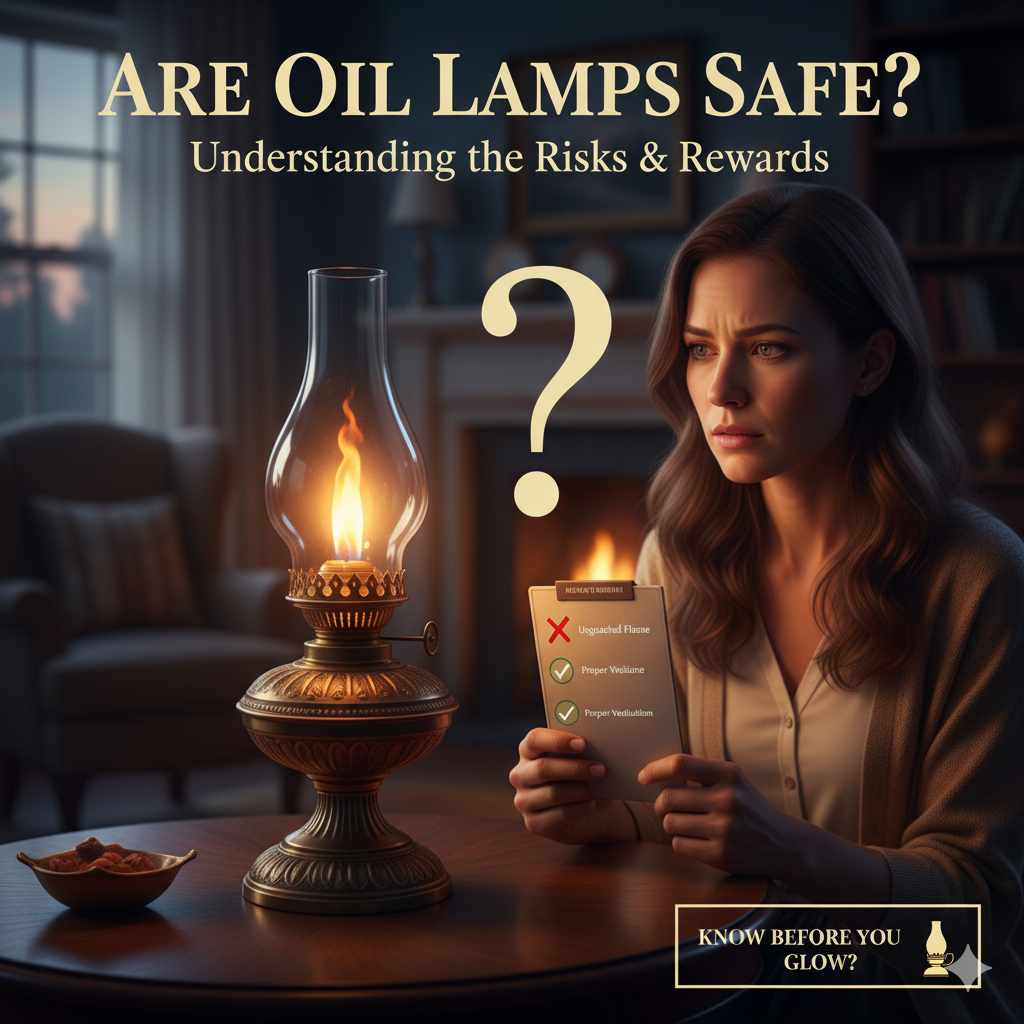
The soft glow of an oil lamp can create a wonderfully cozy atmosphere, reminiscent of simpler times. Many of us are drawn to their charm, perhaps for power outages, rustic decor, or just a bit of nostalgic flair. But a common question pops up: are oil lamps safe to use in our homes? It’s a valid concern, and one that deserves a clear answer. You might feel a little unsure about bringing an open flame into your living space, and that’s perfectly normal. Don’t worry! With the right knowledge and a few simple practices, you can enjoy the beauty of oil lamps with confidence. This guide is here to walk you through everything you need to know to keep your home safe and sound while embracing the warm light of an oil lamp.
Understanding Oil Lamps: A Beginner’s Look
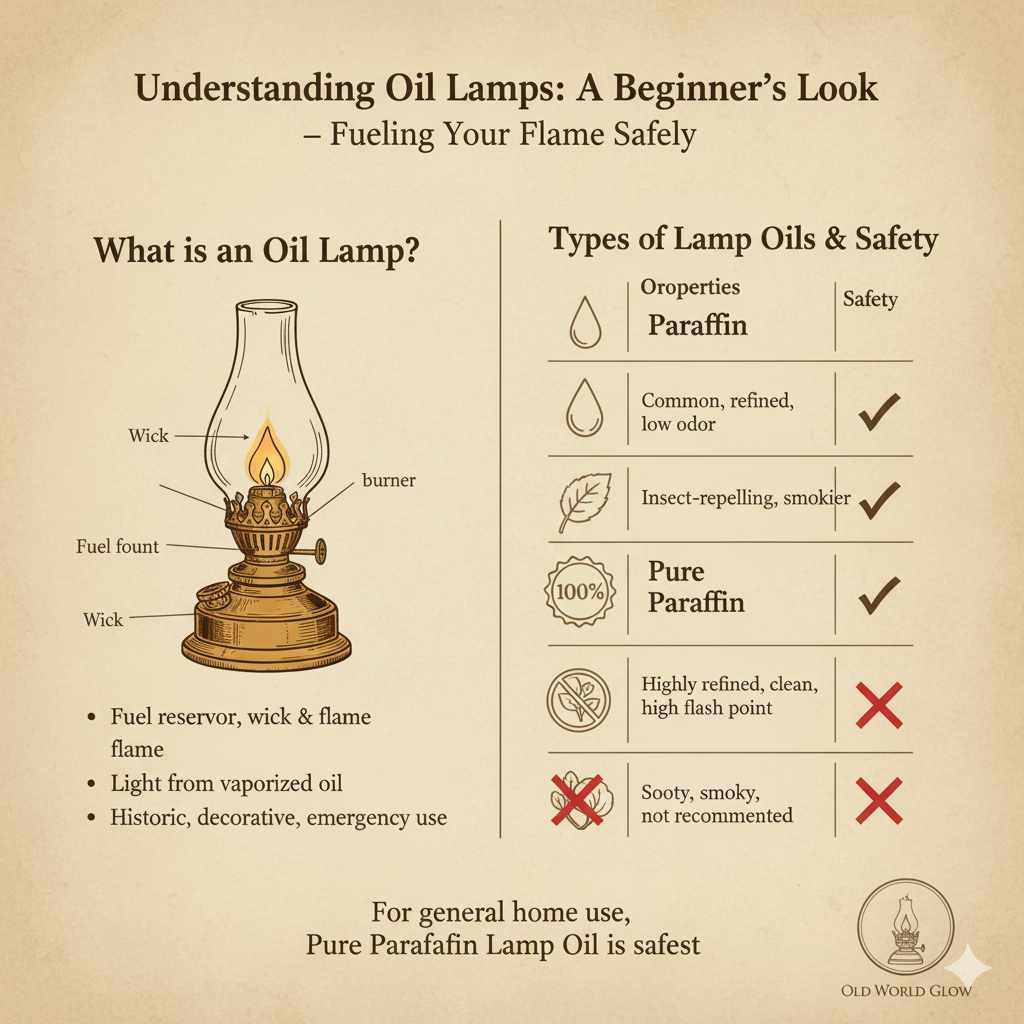
Oil lamps, at their core, are quite simple devices. They consist of a fuel reservoir, a wick, and a mechanism to hold the wick in place and allow it to draw fuel. The magic happens when the wick, saturated with oil, is lit. The flame then burns the vaporized oil, producing light. Historically, these were a primary source of illumination before electricity became widespread. Today, they’re often used for decorative purposes, during power outages, or in settings where electricity isn’t readily available.
The type of oil used is crucial to both the lamp’s performance and its safety. Different oils have different burning properties, smoke levels, and safety profiles. Understanding these differences is the first step in ensuring safe operation.
Types of Lamp Oils and Their Safety
Not all oils are created equal when it comes to fueling an oil lamp. The wrong type of oil can lead to excessive smoke, soot, unpleasant odors, and, most importantly, increased fire hazards. Here’s a breakdown of common lamp oils and their safety considerations:
- Paraffin Oil (Kerosene): This is a common and relatively safe option when refined for lamp use. It burns cleanly with minimal odor if it’s high-quality, deodorized kerosene. However, “regular” kerosene can still produce more soot and smell. It’s important to use kerosene specifically designated for lamps.
- Citronella Oil: Primarily used for its insect-repelling properties, citronella oil can be used in lamps. It has a distinct scent and can burn a bit smokier than pure paraffin. It’s generally considered safe but may require more frequent wick trimming.
- Pure Paraffin Lamp Oil: This is often the best choice for indoor use. It’s highly refined, burns very cleanly, produces little to no odor, and has a higher flash point than some other fuels, making it less prone to accidental ignition. Look for products labeled as “100% pure paraffin” or “odorless lamp oil.”
- Vegetable Oils (e.g., Olive Oil, Canola Oil): While technically possible to burn vegetable oils, they are generally NOT recommended for modern wick-style oil lamps. They tend to burn very inefficiently, produce a lot of soot and smoke, and can clog wicks. They also have lower flash points, increasing risk.
- Alcohol-Based Fuels: Some decorative tabletop fireplaces or specialty lamps use alcohol-based fuels. These often burn with a blue flame and can be very hot. They require specific lamp designs and careful handling due to their volatility.
For general home use and safety, pure paraffin lamp oil is your safest bet. It offers a good balance of clean burning, minimal odor, and safety. Always check the manufacturer’s recommendations for your specific lamp.
Key Safety Considerations for Oil Lamps
Using an oil lamp involves an open flame, so safety must always be the top priority. By understanding and implementing a few key practices, you can significantly reduce any potential risks.
1. Proper Ventilation
This is arguably the most critical safety aspect. Burning any fuel, including lamp oil, consumes oxygen and produces byproducts, including carbon monoxide, especially if combustion is incomplete. Always ensure the room where the oil lamp is burning is well-ventilated.
- Open a window or door slightly.
- Avoid using oil lamps in small, enclosed spaces like closets or bathrooms without ventilation.
- Never use an oil lamp in a basement or any area where flammable vapors might accumulate.
- If you notice any signs of incomplete combustion like excessive soot, a smoky flame, or a strong chemical smell, extinguish the lamp immediately and increase ventilation.
For more information on indoor air quality and ventilation, the U.S. Environmental Protection Agency (EPA) offers valuable resources.
2. Fuel Selection and Storage
As discussed, using the correct fuel is paramount. Always use a high-quality lamp oil specifically designed for your type of lamp. Never substitute gasoline, alcohol, or other volatile fuels, as they are highly flammable and can cause explosions or fires.
Store your lamp oil safely:
- Keep fuel containers tightly sealed.
- Store them in a cool, dry place, away from heat sources, direct sunlight, and open flames.
- Keep them out of reach of children and pets.
- Never store fuel inside the lamp itself when not in use.
3. Placement and Stability
An oil lamp is a source of open flame, so its placement is crucial to prevent accidental tipping or contact with flammable materials.
- Always place the lamp on a stable, level surface.
- Keep it away from curtains, drapes, bedding, paper, and other combustible materials.
- Ensure it’s out of reach of children and pets who might knock it over.
- Avoid placing it near drafts from open windows or fans, which can cause the flame to flicker and potentially ignite nearby items.
4. Wick Maintenance
The wick is the heart of the oil lamp. Proper maintenance ensures a clean, steady flame and reduces the risk of problems.
- Trimming: Trim the wick regularly (ideally before each use) to about 1/4 inch. A properly trimmed wick produces a clean, steady flame. If the flame is too high, smoky, or flickering excessively, trim the wick.
- Soaking: Ensure the wick is fully saturated with oil before lighting. This might take 15-30 minutes after filling the reservoir. A dry wick can burn itself away or cause a weak flame.
- Wick Type: Use the correct type and size of wick recommended for your lamp. Different lamps require different wick materials and widths for optimal performance.
5. Extinguishing the Flame Safely
When it’s time to turn off the light, do so carefully.
- Use a wick trimmer or snuffer to gently lower the wick into the oil reservoir. Do not blow on the flame, as this can spread embers or cause the lamp to smoke excessively.
- Allow the lamp to cool completely before moving it or refilling it.
6. Fire Safety Equipment
As with any open flame or potential fire hazard, it’s wise to have fire safety equipment readily available.
- Keep a fire extinguisher (ABC rated) or a fire blanket nearby.
- Ensure your smoke detectors are working and have fresh batteries.
How to Use an Oil Lamp Safely: A Step-by-Step Guide
Let’s walk through the process of setting up and using your oil lamp safely. Following these steps will help you enjoy its light with peace of mind.
Step 1: Choose the Right Lamp and Fuel
Ensure your lamp is designed for liquid lamp oil and is in good working condition. Inspect it for any cracks or damage. Select a high-quality, pure paraffin lamp oil. Avoid using fuels not recommended by the lamp manufacturer.
Step 2: Prepare the Wick
If your lamp has a new wick, it might need to be pre-burned or trimmed to the correct length. For existing wicks, trim them to about 1/4 inch above the wick holder, ensuring a clean, even cut. If the wick is old or heavily carbonized, it might be time to replace it. You can find wick replacement guides on many manufacturer websites or through online DIY communities.
Step 3: Fill the Reservoir
Carefully pour the lamp oil into the reservoir. Do not overfill; leave about 1/2 to 1 inch of space at the top. Always fill the lamp in a well-ventilated area, away from any open flames or heat sources. Clean up any spills immediately with a cloth.
Tip: It’s best to fill your lamp during the day when you can see spills easily and have good lighting. Avoid filling in dim light or near your intended spot of use.
Step 4: Let the Wick Soak
Once filled, let the wick soak in the oil for at least 15-30 minutes. This allows the oil to travel up the wick completely. A properly saturated wick will produce a steady flame. If you try to light it too soon, the flame will be weak, smoky, and may burn the wick itself.
Step 5: Light the Lamp
Once the wick is saturated, carefully light the tip of the wick with a long match or a utility lighter. Allow the flame to establish itself for a moment. If the flame is too high or flickers wildly, gently blow it out, let the wick cool slightly, trim it if necessary, and try again.
Step 6: Adjust the Flame
Most lamps have a mechanism to adjust the flame height by raising or lowering the wick. Aim for a flame that is about 1 inch high, with a steady, clear flame. A flame that is too high will produce soot and smoke, while a flame that is too low will be dim and may not burn efficiently.
Step 7: Place the Lamp Safely
Position the lit lamp on a stable, heat-resistant surface, well away from any flammable materials. Ensure it is in a location with good air circulation but protected from drafts.
Step 8: Extinguish Safely
When you are finished using the lamp, use a wick snuffer or trimmer to gently extinguish the flame by lowering the wick into the oil. Do not blow out the flame. Allow the lamp to cool completely before attempting to move or store it.
Oil Lamps vs. Other Light Sources: A Safety Comparison
When considering lighting options, it’s helpful to compare oil lamps to alternatives. Each has its own set of safety considerations.
| Light Source | Pros | Cons | Primary Safety Concerns |
|---|---|---|---|
| Oil Lamps | Ambiance, off-grid power, decorative | Open flame, requires fuel, ventilation needed, potential for spills | Fire hazard, carbon monoxide production, fuel storage, tipping |
| Candles | Ambiance, decorative, portable | Open flame, short burn time, wax drips, can be knocked over | Fire hazard, wax spills, tipping, proximity to combustibles |
| Battery-Powered LED Lights | Safe (no flame), long-lasting, portable, various styles | Requires batteries, can lack ambiance of real flame | Battery disposal, potential for battery leakage (rare) |
| Propane/Gas Lanterns | Bright, good for camping/outdoors | Requires fuel canisters, ventilation critical, hot surfaces, potential for gas leaks | Fire hazard, carbon monoxide, gas leaks, burns |
As you can see, all light sources have potential safety concerns. Oil lamps, when used with awareness and adherence to safety guidelines, are a viable and safe option for creating a specific ambiance or providing light when electricity is unavailable. The key is understanding the risks associated with open flames and managing them effectively.
Troubleshooting Common Oil Lamp Issues
Even with the best practices, you might encounter a few hiccups. Here’s how to address them:
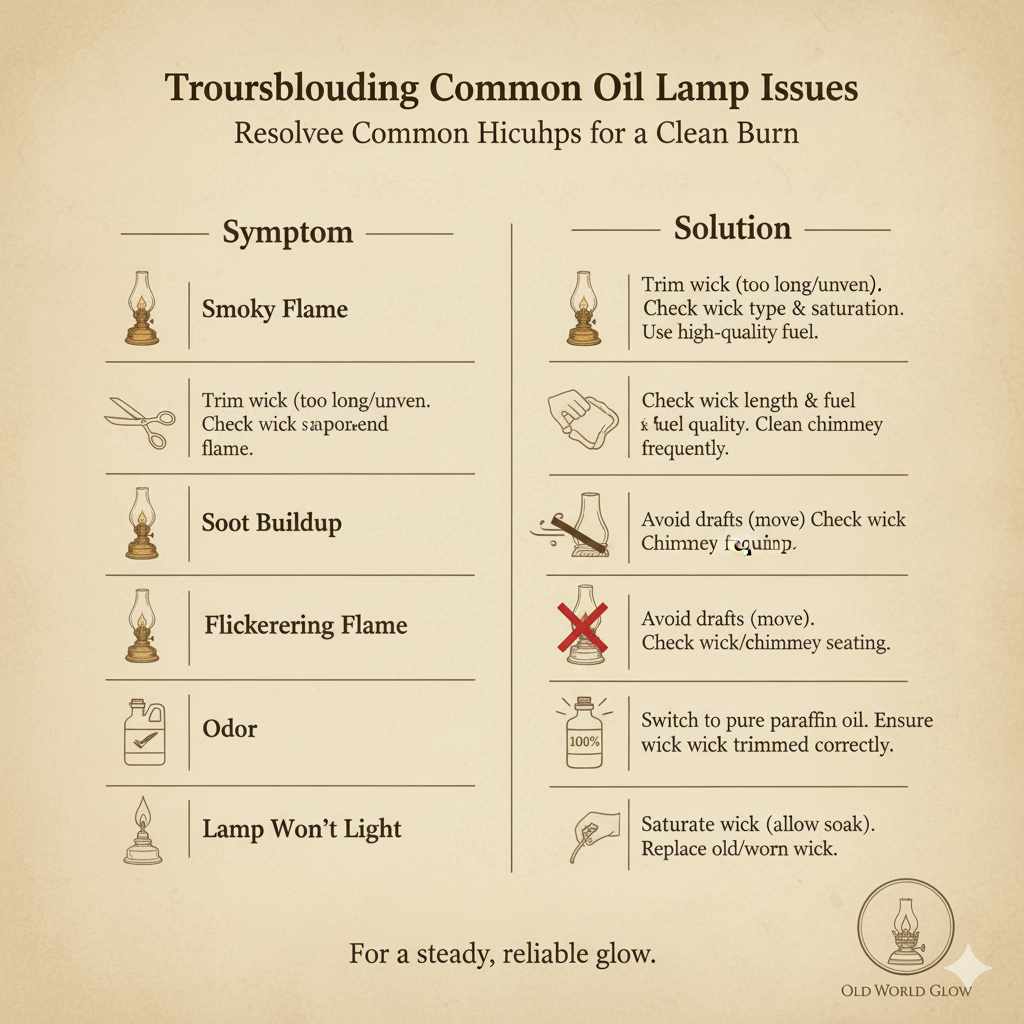
- Smoky Flame: This is usually due to a wick that is too long, unevenly trimmed, or the wrong type of wick. Trim the wick, ensure it’s properly saturated, and check that you’re using the correct wick for your lamp. Using a low-quality fuel can also cause smoke.
- Soot Buildup: Similar to a smoky flame, soot is a sign of incomplete combustion. Address wick length and fuel quality. Frequent cleaning of the chimney (the glass part) might also be necessary.
- Flickering Flame: Drafts are the most common culprit. Move the lamp away from windows, fans, or vents. A damaged wick or an improperly seated chimney can also cause flickering.
- Odor: This typically points to using a fuel that isn’t highly refined or deodorized. Switching to a pure paraffin lamp oil should resolve this. Ensure the wick is trimmed correctly; an improperly burning wick can also create odors.
- Lamp Won’t Light: The wick might not be saturated enough, or it might be too old and worn out. Ensure you’ve given it enough time to soak and consider replacing the wick if it’s several years old.
For more detailed maintenance tips, resources like Popular Mechanics often provide excellent practical advice.
Frequently Asked Questions About Oil Lamp Safety
Q1: Can I use regular kerosene in my oil lamp?
It’s best to use kerosene specifically labeled for lamps (often called “lamp oil” or “deodorized kerosene”). Regular kerosene may contain impurities that cause excessive smoke, odor, and soot. Always check your lamp’s manual for recommended fuels.
Q2: Are oil lamps safe to use during a power outage?
Yes, oil lamps can be a safe and effective light source during power outages, provided you follow all safety guidelines regarding ventilation, placement, and fire prevention. They offer a warm, reliable light when you need it most.
Q3: How much ventilation is needed for an oil lamp?
A good rule of thumb is to ensure the room has at least one open window or door, or that there’s adequate airflow. If you start to notice any smell of fumes or feel lightheaded, increase ventilation immediately or extinguish the lamp.
Q4: Can oil lamps cause a fire?
Like any open flame, oil lamps pose a fire risk if not used properly. Risks include tipping, placement too close to flammable materials, or using incorrect fuel. Strict adherence to safety practices minimizes this risk.
Q5: How often should I trim the wick?
It’s recommended to trim the wick before each use for optimal performance and safety. A clean, even trim to about 1/4 inch helps ensure a steady, smoke-free flame.
Q6: What is the safest type of oil to use in a lamp?
Pure paraffin lamp oil is generally considered the safest and cleanest burning option for indoor use. It’s highly refined, produces minimal odor and soot, and has a higher flash point than many other lamp fuels.
Conclusion
The allure of an oil lamp is undeniable, offering a unique ambiance that electric lights often can’t replicate. And the good news is, when you approach their use with informed caution, oil lamps are indeed safe. The key lies in understanding the simple principles of fire safety, proper fuel selection, adequate ventilation, and consistent maintenance. By following the steps and tips outlined in this guide, you can confidently bring the warm, inviting glow of an oil lamp into your home. Remember, knowledge is your best tool for safety, and with a little practice, you’ll be a pro at enjoying your oil lamps responsibly.