How to Install a Ceiling Fan With Light (Wiring Explained)
Installing a ceiling fan with a light means running four wire connections instead of two — black and blue both carry power, to the fan motor and light kit separately — so mixing them up leaves one or the other dead. Get the mounting bracket wrong and a spinning fan can pull loose from the ceiling box over time. This guide covers the wiring, the bracket, and testing before you put the blades on.
Preparation And Tools
Installing a ceiling fan with a light can transform any room. This task requires some preparation and the right tools. Before diving into the installation, proper planning is key. Ensuring you have everything ready will make the process smooth and efficient. In this section, we’ll guide you through the preparation steps. Let’s get started!
Gather Necessary Tools
First, gather all the tools you need. A screwdriver is essential. You’ll also need a ladder to reach the ceiling. A voltage tester helps ensure safety. Keep a wrench handy for tightening screws. Don’t forget wire strippers for electrical connections. Having these tools ready saves time.
Safety Precautions
Safety is crucial during installation. Turn off the power at the circuit breaker. This prevents electrical shocks. Wear safety goggles to protect your eyes. Use a sturdy ladder to reach the installation area. Ensure the ladder is on a stable surface. Always have a partner nearby for assistance.
Choosing The Right Fan
Installing a ceiling fan with light can brighten your room efficiently. Begin by turning off the electricity. Follow the manufacturer’s instructions for assembly. Secure the fan to the ceiling mount. Finally, connect the wiring carefully and attach the light fixture.
Enjoy a well-lit, breezy space with your new fan.

Installing a ceiling fan with a light can transform your space, offering both comfort and illumination. However, before diving into the installation process, choosing the right fan is crucial. You want a fan that not only fits your room’s decor but also meets your functional needs. Let’s break down what you should consider to make the best choice.
###
Size And Style Considerations
The size of your fan matters more than you might think. A fan that’s too small won’t circulate air effectively, while one that’s too big can overpower the room. Measure your room’s dimensions to determine the appropriate fan size. For example, a room up to 75 square feet might need a fan with a 29-36 inch blade span, while larger rooms up to 400 square feet could require a fan with a 52-56 inch span.
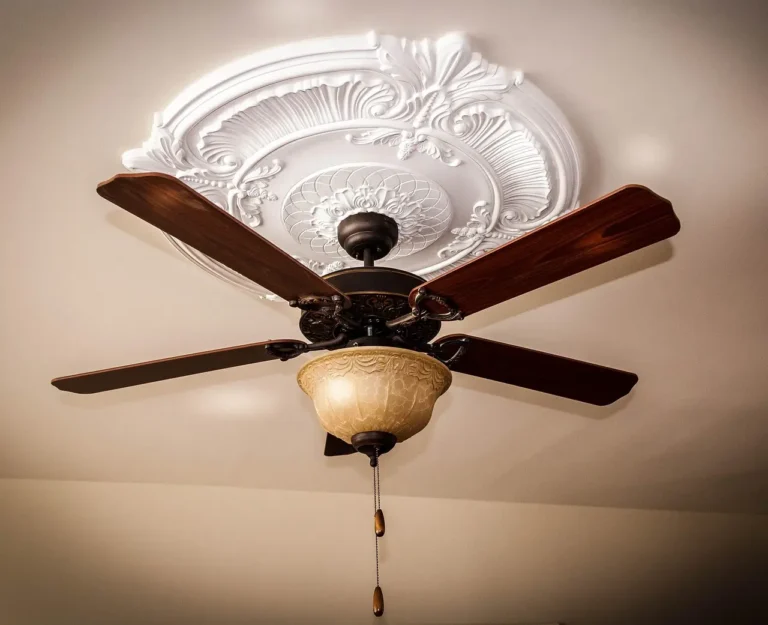
Style is equally important. Imagine your fan as a piece of furniture, complementing your decor. Whether you prefer a modern, sleek design or a classic wooden finish, the options are vast. Pay attention to the fan’s finish and blade style. Do you want something that blends in or stands out as a focal point?
Energy Efficiency Options
Energy efficiency can save you money and reduce your environmental footprint. Look for fans with an Energy Star rating, which signifies they use less energy compared to standard models. Energy-efficient fans often have more advanced motors and blade designs that enhance performance while using less power.
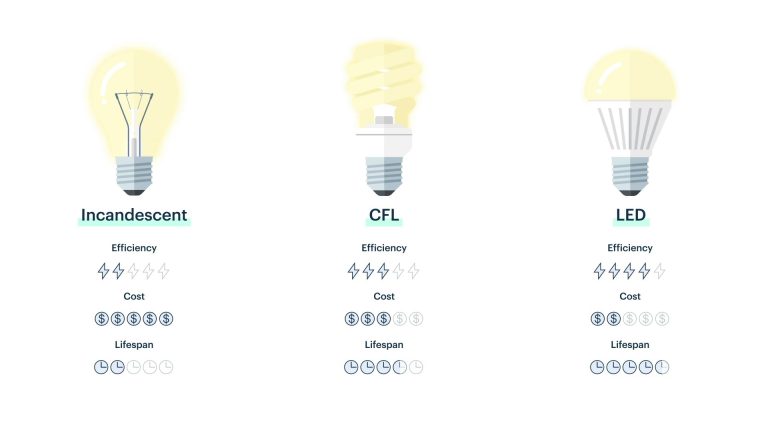
Consider fans with LED lights. They consume less electricity and last longer than traditional bulbs. This small change can lead to significant savings over time. Plus, LED lights come in various shades, allowing you to customize the ambiance of your room.
Have you thought about using a fan with a reversible motor? It allows you to change the direction of the blades, providing a cooling breeze in the summer and circulating warm air during the winter. This feature can improve comfort year-round, making it a worthy consideration.
Choosing the right fan involves more than just picking a design you like. Size, style, and energy efficiency are key factors that can impact your comfort and utility bills. What features are most important to you? Once you’ve decided, you’ll be one step closer to enjoying your new ceiling fan with light.
Best Ceiling Fan With Light Pick
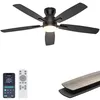
Ohniyou 52″ Low Profile Ceiling Fan with Light
Low-profile flush mount, good for standard 8-foot ceilings where a downrod fan hangs too low.
- Best for: bedrooms and living rooms with standard ceiling height
- Why we picked it: integrated light and remote, no separate light kit to wire in
- Main drawback: flush mount means less airflow than a downrod-mounted fan in taller rooms
Compare more installation essentials
 Option 1 Klein Tools Non-Contact Voltage Tester
|
 Option 2 Universal Mounting Bracket with Ground Wire
|
 Option 3 KAIWEETS Budget Voltage Tester
|
As an Amazon Associate we earn from qualifying purchases.
Understanding Wiring Basics
Installing a ceiling fan with a light requires basic wiring knowledge. Understanding the wires ensures a safe and functional installation. Knowing the right wires connects your fan to power and controls. Let’s dive into the essentials of wiring.
Identifying Wires
First, identify the wires you encounter. Most ceiling fans have a few standard wires. The black wire powers the fan. The blue wire usually powers the light kit. The white wire is the neutral wire. The green or bare wire is the ground wire. Each wire has a distinct role in the setup.
Recognizing these wires helps you connect them correctly. Use a voltage tester for safety before touching any wire. This tool ensures no live current flows, protecting you from shock.
Common Wiring Configurations
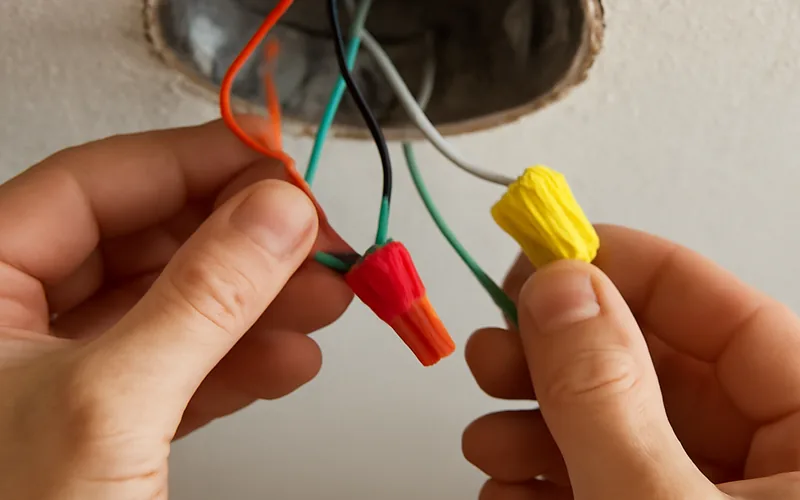
Wiring configurations vary based on your home’s system. A common setup has a single switch controlling both fan and light. In this case, connect the fan’s black and blue wires to the ceiling’s black wire. Connect the white wires from the fan and ceiling together. Finally, connect the ground wires.
In homes with separate switches, the setup differs. The fan’s black wire connects to one switch. The blue wire connects to the other switch. This allows independent control of the fan and light. Always refer to the fan’s manual for guidance. It provides specific instructions for wiring configurations.
Removing The Old Fixture
Removing the old fixture is a crucial step in installing a new ceiling fan with light. It ensures a clean slate for your new installation. This process is straightforward but requires careful attention to safety. Follow these steps to safely remove your old light fixture.
Disconnecting Power
Safety first. Turn off the electricity at the circuit breaker. Confirm the power is off by testing the light switch. Use a voltage tester for added safety. Ensuring no power flows can prevent accidents.
Detaching The Fixture
Begin by unscrewing the light bulb from the fixture. This makes the fixture lighter and easier to handle. Next, remove the screws or nuts holding the fixture to the ceiling. Hold the fixture steady while detaching. Carefully lower it to avoid damage.
Once detached, you’ll see wires. Disconnect these by unscrewing the wire nuts. Take note of wire colors and connections. This will help during installation of the new fan. Place the old fixture aside once fully detached.
Installing Mounting Bracket
Installing a ceiling fan with a light involves several important steps. One crucial step is installing the mounting bracket. This piece connects the fan to the ceiling, ensuring it stays secure. A properly installed bracket is essential for safety and stability. Follow these steps for a successful installation.
Securing The Bracket
First, turn off the power at the breaker box. Safety comes first. Next, locate the ceiling joist where you’ll attach the bracket. Use a stud finder to help. Drill pilot holes for the screws. This prevents wood splitting. Align the bracket with the holes. Insert and tighten the screws firmly. Use a screwdriver or drill for this task. The bracket should sit flush against the ceiling.
Ensuring Stability
Check the bracket’s stability once secured. Wiggle it gently. It should not move. If it shifts, tighten the screws further. Stability ensures the fan operates smoothly. A loose bracket can cause wobbling or noise. For added safety, use a leveling tool. This ensures the bracket is even. An uneven bracket affects fan balance.
Consider using additional support if needed. Heavy fans may require reinforcement. Follow the manufacturer’s instructions for your specific fan. Properly securing the mounting bracket is key to a successful installation.
Assembling The Fan
Assembling a ceiling fan with a light can seem tricky. But with the right steps, it becomes manageable. This guide will help you put the pieces together. We’ll focus on attaching the blades and mounting the light kit. Follow each step carefully for a successful installation.
Attaching Blades
Before attaching the blades, gather all necessary parts. Check the instruction manual for specific blade types. Use the screws provided to fix each blade to the motor. Ensure each blade is securely attached. Tight screws prevent wobbling during operation. Balance the blades for smooth performance. Misaligned blades can cause noise or vibration.
Mounting Light Kit
Start by identifying the light kit components. Some fans include a light cap. Remove it before attaching the light kit. Connect the light kit wires to the fan wires. Match colors according to the manual. Use wire nuts for a secure connection. Secure the light kit to the fan housing. Ensure it is firmly in place. Test the light by turning on the switch. Proper function indicates a successful installation.
Connecting The Wiring
Match the wire colors from the ceiling to the fan, twist matching pairs together with a wire nut, then tuck them into the junction box before mounting the fan.
| Wire Color | Function |
|---|---|
| Black | Hot — powers the fan motor |
| Blue (if present) | Hot — powers the light kit separately from the fan |
| White | Neutral |
| Green or bare copper | Ground |
Check your fan manufacturer’s instructions before assuming these colors — some brands vary. Once matched, twist each pair of wires clockwise with pliers, then twist a wire nut on until it’s snug. A loose connection is the most common cause of a fan or light that flickers or stops working after installation.
Testing And Final Adjustments
Once you’ve installed your ceiling fan with a light, it’s time to test it. This step ensures everything works correctly. You’ll check the fan’s operation and make final adjustments. This process guarantees a smooth and efficient running fan. Follow these steps to complete your installation successfully.
Power Restoration
Start by restoring power to the circuit. Go to your main electrical panel. Switch the circuit breaker back to the “ON” position. This action allows electricity to flow to your fan.
Ensure all connections are secure. Loose wires can cause malfunctions. Tighten any connections if needed. Safety first!
Checking Fan Operation
Turn on the fan using its switch. Observe the fan blades. They should rotate smoothly without wobbling. If there’s wobbling, check the blade alignment. Adjust them until they balance.
Test each speed setting. The fan should change speeds without issues. Listen for any unusual noises. A quiet operation indicates a successful installation.
Next, test the light. Use the switch to turn it on. Ensure it illuminates evenly. If not, check the bulb installation. Adjust the bulb until it sits correctly.
Your ceiling fan with light should now be fully operational. Enjoy the comfort and efficiency it brings to your room.
Troubleshooting Common Issues
Installing a ceiling fan with a light can transform your space, adding both style and function. However, encountering issues during or after installation is common. Understanding how to troubleshoot these problems will save you time and frustration. Let’s dive into some common challenges you might face, and how you can overcome them.
Fan Not Turning On
It can be disheartening when your new ceiling fan doesn’t turn on. Start by checking the power source. Is the circuit breaker on? If the breaker is fine, inspect the wiring connections. Sometimes wires can loosen during installation, especially if you’re not familiar with electrical work.
Consider using a voltage tester. It’s a handy tool that can confirm whether electricity is reaching your fan. If it’s still not working, ask yourself: could the fan switch be the culprit? A faulty switch can cause power issues. Replacing it might solve the problem.
Lights Flickering
Flickering lights can be more than just annoying—they can indicate a deeper issue. Begin by checking the bulbs. Are they securely screwed in? Loose bulbs can flicker, causing unnecessary stress. If they’re secure, look at the connections between the fan and the light fixture.
Sometimes, incompatible dimmer switches can lead to flickering. If you’re using a dimmer, ensure it’s compatible with your fan’s light. You might also consider the wattage. Using bulbs with the wrong wattage can cause flickering. Double-check what your fan requires, and make sure your bulbs match.
As you address these issues, remember that patience is key. It’s easy to get frustrated when things don’t work as expected. But each challenge is an opportunity to learn and improve your DIY skills. Have you ever faced a problem with home installations that turned into a learning experience? Share your thoughts below!
Frequently Asked Questions
How To Install A Ceiling Fan Step By Step?
Turn off electricity. Assemble fan parts. Mount the bracket. Connect wires securely. Attach fan blades and light kit. Test fan operation.
Can I Install A Ceiling Fan By Myself?
Yes, you can install a ceiling fan yourself. Ensure you have the right tools and safety measures. Follow the manufacturer’s instructions carefully for successful installation. If unsure, consider hiring a professional for guidance. Proper installation enhances fan efficiency and safety.
How Do You Wire A Ceiling Fan With A Light?
Turn off power at the circuit breaker. Connect ceiling wires to fan and light according to color codes. Secure connections with wire nuts. Attach fan and light to the ceiling bracket. Restore power and test the fan and light. Follow the manufacturer’s instructions for specific model details.
What Do I Do With The Red Wire When Installing A Ceiling Fan With Remote?
Connect the red wire to the ceiling fan’s light kit if included. Otherwise, cap it with a wire nut for safety. Ensure connections are secure, and follow the fan manufacturer’s instructions for proper installation. Always turn off power before starting electrical work to prevent accidents.
Conclusion
Installing a ceiling fan with light can be simple. Follow the steps carefully. Gather your tools and read the instructions. Ensure all connections are secure. Check the fan works safely before use. Enjoy the comfort of a cool breeze and bright light.
This DIY project saves time and money. Plus, it adds style to your room. Now, you’re ready to relax under your new fan. Remember, practice makes perfect. Happy installing!
Sponsored / affiliate links. As an Amazon Associate I earn from qualifying purchases. I may earn additional commission from eligible campaigns.