
How to Install a Flush Mount Ceiling Fan: A Step-by-Step Guide for Your Home or Garage
Hey there! If you’ve ever walked into a stuffy room or garage and wished for a cool breeze, you’re in for a treat. A couple of years ago, I decided to install a flush mount ceiling fan in my garage to keep things comfortable while I worked on my car, and it was one of the best decisions I made. The process was easier than I expected, and the result was a cooler, more inviting space.
If you’re wondering how to install a flush mount ceiling fan, I’m thrilled to share my experience with you. Whether you’re a car enthusiast looking to upgrade your garage or a homeowner wanting better airflow in your living space, this guide is for you. Grab a cold drink, and let’s get started on this fun DIY project!
Why Choose a Flush Mount Ceiling Fan?
When I started shopping for a ceiling fan, I noticed there were two main types: standard fans with a downrod and flush mount fans that hug the ceiling. I chose a flush mount for my garage because the ceiling is low, and I didn’t want to duck under a dangling fan while carrying tools. Flush mount fans sit snug against the ceiling, making them perfect for rooms with low ceilings, like basements, garages, or cozy bedrooms.
Besides saving headspace, flush mount fans are sleek and modern. They circulate air just as well as standard fans, keeping your space cool and comfortable. In my garage, the fan makes summer wrenching sessions bearable, and it even helps push out fumes when I’m working with paint or oil. Plus, many flush mount fans come with lights, adding brightness to your workspace or home.
Understanding Flush Mount Ceiling Fans
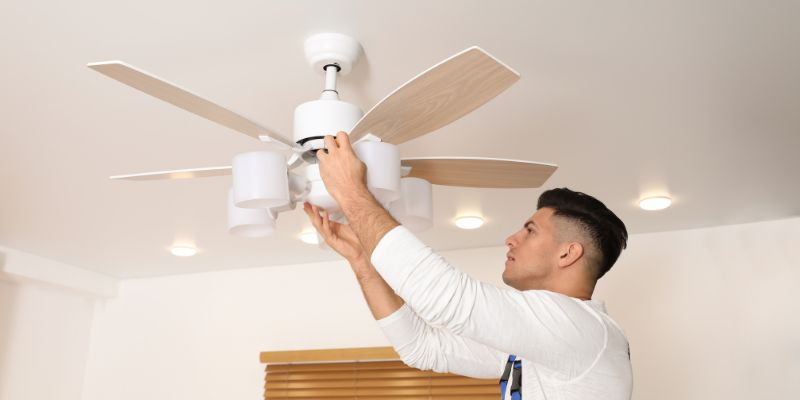
Before I dove into the installation, I wanted to know exactly what I was working with. A flush mount ceiling fan is designed to attach directly to the ceiling without a downrod, so it sits close to the surface. It has a motor, blades, and often a light kit, all connected to a mounting bracket that secures to a ceiling junction box.
I learned that installing a flush mount fan is a bit different from a standard fan because there’s no rod to adjust the height. The key is making sure your ceiling has a sturdy junction box that can support the fan’s weight, usually around 15-50 pounds. My garage had an old light fixture, so I had to swap out the junction box for a fan-rated one, but I’ll cover that later.
Tools and Materials You’ll Need
I’m a big fan of being prepared, so before I started, I gathered everything I’d need. Here’s what I used to install my flush mount ceiling fan:
- Flush mount ceiling fan: Pick one that fits your style and room size.
- Screwdriver (Phillips and flathead): For securing screws and removing old fixtures.
- Wire cutters/strippers: To trim and prepare electrical wires.
- Voltage tester: To ensure the power is off.
- Ladder: To reach the ceiling safely.
- Fan-rated junction box: If your existing box isn’t strong enough.
- Wire nuts and electrical tape: For safe wire connections.
- Stud finder: To locate ceiling joists for secure mounting.
- Wrench or pliers: For tightening bolts and brackets.
- Safety glasses and gloves: To protect yourself while working.
I also grabbed a drop cloth to keep my garage floor clean and a flashlight for better visibility. If you’re installing in a garage like me, make sure the fan is rated for damp or dusty environments to handle humidity or grime.
Preparing Your Space for Installation
Before I touched a single screw, I set up my workspace. In my garage, I moved my car out and cleared my workbench to give myself room to maneuver. I laid down a drop cloth to catch any dust or debris. If you’re installing in a home, move furniture out of the way to avoid tripping or making a mess.
The most important step is turning off the power. I went to my breaker box and flipped off the circuit for the garage. Then, I used a voltage tester to confirm the wires were dead. I learned the hard way years ago that assuming the power is off can lead to a nasty shock, so always double-check. Once the power was off, I removed the old light fixture, which was just a basic bulb holder in my case.
Checking or Installing a Fan-Rated Junction Box
This was a big lesson for me. My garage had an old junction box that wasn’t rated for the weight of a ceiling fan. Ceiling fans are heavier than most light fixtures, so they need a special junction box that can handle the load and vibrations. I checked the label on my existing box, and sure enough, it wasn’t fan-rated.
I bought a fan-rated junction box from the hardware store for about $10. To install it, I used a stud finder to locate a ceiling joist, then secured the new box to the joist with screws. If your ceiling already has a fan-rated box, you’re good to go. If not, this step is crucial for safety and stability. I also made sure the box was flush with the ceiling to keep the fan snug.

Step-by-Step Guide to Installing the Fan
Now for the fun part—installing the fan! I’ll walk you through the steps I followed to get my flush mount ceiling fan up and running.
Step 1: Assemble the Fan
I started by assembling the fan on the floor to make things easier. My fan came with a manual, which I read carefully. I attached the blades to the blade brackets using the provided screws. Some fans come with the blades pre-attached, but mine didn’t. I made sure each screw was tight to avoid wobbling later. I also attached the light kit, if your fan has one, following the instructions.
Step 2: Mount the Bracket
Next, I climbed my ladder and attached the fan’s mounting bracket to the junction box. The bracket is a metal plate that holds the fan to the ceiling. I used the screws provided with the fan to secure it tightly. I double-checked that the bracket was level using a small bubble level—crooked brackets make for wobbly fans.
Step 3: Connect the Wiring
Wiring was the part I was most nervous about, but it turned out to be straightforward. My fan had three wires: black (hot), white (neutral), and green or bare (ground). I matched these to the ceiling wires: black to black, white to white, and ground to ground. I used wire nuts to secure the connections and wrapped them with electrical tape for extra safety.
If your fan has a light kit, there might be an extra blue wire for the light. I connected it to the black ceiling wire along with the fan’s black wire. I took a picture of the wiring before starting, which helped me keep track. If you’re not comfortable with wiring, this is a good time to call an electrician.
Step 4: Attach the Fan to the Bracket
With the wires connected, I lifted the fan’s motor housing to the mounting bracket. This part was a bit heavy, so I had a friend hold the ladder steady. The fan slid into the bracket and locked in place with screws or a twist mechanism—my manual showed exactly how. I made sure it was secure before letting go, because a falling fan is no joke.
Step 5: Install the Light Kit and Blades
If your fan has a light kit, now’s the time to attach it. I screwed the light kit onto the fan and connected its wires to the fan’s wiring, following the manual. Then, I attached the blade brackets to the motor, making sure each one was evenly spaced. I double-checked that all screws were tight to prevent buzzing or wobbling later.
Step 6: Add the Light Cover and Bulbs
Finally, I attached the light cover, which was a glass dome in my case. I screwed in LED bulbs rated for ceiling fans to avoid flickering or buzzing. I chose warm white LEDs for a cozy vibe in my garage. Once everything was in place, I cleaned up any fingerprints or dust on the blades and cover.
Step 7: Test the Fan
With everything installed, I turned the power back on at the breaker. I flipped the switch, and my fan came to life, spinning quietly and casting a cool breeze. I tested all the speeds and the light to make sure everything worked. If something’s off, double-check the wiring or blade alignment. My first attempt had a slight wobble, but tightening the blade screws fixed it.
Choosing the Right Flush Mount Ceiling Fan
Picking the right fan is key to a successful project. I learned to consider a few things when shopping:
- Room Size: For my 200-square-foot garage, a 44-inch fan was perfect. Smaller rooms need 36-42 inches, while larger spaces might need 52 inches or more.
- Style: I chose a sleek, industrial-style fan for my garage, but there are modern, traditional, and even fancy options for homes.
- Light Kit: My fan has a light, which is great for working at night. Make sure the bulbs are compatible with your fan’s wattage limit.
- Damp Rating: For garages or bathrooms, get a damp-rated fan to handle humidity. My garage gets humid in summer, so this was a must.
- Motor Quality: DC motors are quieter and more efficient. My fan has one, and it’s whisper-quiet compared to older AC models.
I also checked reviews to make sure the fan was easy to install and reliable. Spending a bit more on a quality fan saved me headaches down the road.
Benefits of a Flush Mount Ceiling Fan
Installing my fan was a game-changer. Here’s why I love it:
- Saves Space: The flush mount design is perfect for low ceilings. I can walk under it without worrying about hitting my head.
- Improves Airflow: My garage stays cool, even on hot days. It also helps clear out fumes when I’m working with chemicals.
- Adds Light: The built-in light brightens my workspace, making it easier to see small parts or read labels.
- Energy Efficient: My fan uses less power than an AC unit, and pairing it with LED bulbs keeps my energy bill low.
- Stylish Look: It adds a touch of class to my garage, making it feel like a pro shop instead of a cluttered workspace.
For car enthusiasts, a flush mount fan is a must for keeping your garage comfortable while you wrench. At home, it’s a stylish way to stay cool without cranking the air conditioner.
Common Challenges and How to Overcome Them
I hit a few snags during my installation, so let me save you some trouble. Wiring was my biggest worry, but taking it slow and following the manual helped. If your wires don’t match up perfectly, a quick call to the fan’s customer support can clarify things. I did this once, and they were super helpful.
Another issue was balancing the blades. My fan wobbled at first, but a $5 blade balancing kit fixed it. You stick adhesive weights on the blades until they spin smoothly. Also, make sure your ceiling is sturdy—my old junction box was wobbly, and replacing it made a big difference.
If you’re installing in a garage, dust and humidity can be a problem. I clean my fan blades every few months to keep them spinning smoothly. If you’re not comfortable on a ladder or with wiring, don’t hesitate to hire a pro. I almost did, but I’m glad I pushed through.
Safety Tips for a Smooth Installation
Safety is huge when working with electricity and heavy fans. Here’s what kept me safe:
- Turn off the power at the breaker and use a voltage tester to confirm it’s off.
- Use a sturdy ladder and have someone hold it if you’re high up.
- Wear safety glasses to protect your eyes from dust or debris.
- Double-check all wire connections to avoid shorts or fire hazards.
- If you’re unsure about any step, call an electrician. It’s worth the cost for safety.
I had my wife spot me while I was on the ladder, and it made the process less stressful. Plus, she got to cheer me on when the fan started spinning!
Maintaining Your Flush Mount Ceiling Fan
To keep my fan running smoothly, I do a little maintenance every few months. I clean the blades with a damp cloth to remove dust, which can cause wobbling or buzzing. I also check the screws and tighten any that are loose. If your fan has a light, use bulbs rated for ceiling fans to avoid flickering.
In my garage, I run a dehumidifier in summer to keep moisture from affecting the fan. I also check the manual for any lubrication instructions—some fans need a drop of oil in the motor. Regular upkeep keeps your fan quiet and efficient for years.
Why This Project Is Worth It
Installing a flush mount ceiling fan was one of my favorite DIY projects. It took a Saturday afternoon, cost less than $200, and made my garage a much nicer place to work. The cool breeze and bright light make wrenching sessions more enjoyable, and I’ve even gotten compliments from buddies who visit. At home, a flush mount fan would do the same, adding comfort and style to any room.
This project is perfect for anyone who loves a hands-on challenge. You don’t need to be an expert—just follow the steps, stay safe, and enjoy the process. The result is a cooler, brighter space that you’ll love spending time in.
Conclusion
So, there you have it—everything I learned about how to install a flush mount ceiling fan. From picking the right fan to wiring it up and spinning those blades, this project was a blast. My garage is now a comfortable, well-lit haven where I can work on my car without breaking a sweat. Whether you’re cooling down a garage, bedroom, or living room, a flush mount fan is a stylish and practical upgrade. Grab your tools, follow these steps, and get ready to enjoy a breezy, beautiful space. You’ll be amazed at how easy it is and how big a difference it makes. Here’s to staying cool and looking good!
Frequently Asked Questions
Can I install a flush mount ceiling fan myself?
Yes, you can! I did it with basic tools and no prior experience. Just follow the manual, turn off the power, and take your time with the wiring.
Do I need a special junction box for a ceiling fan?
Yup, you need a fan-rated junction box. My old light box wasn’t strong enough, so I swapped it for one that could handle the fan’s weight.
Can I install a flush mount fan on a low ceiling?
Absolutely! That’s what they’re made for. My garage ceiling is low, and the flush mount fan fits perfectly without taking up headspace.
What if my fan wobbles after installation?
Mine wobbled at first, too. I used a blade balancing kit to add weights to the blades, and it spins smoothly now. Check that all screws are tight too.
Are flush mount fans good for garages?
They’re awesome for garages! Mine keeps me cool and clears out fumes. Just get a damp-rated fan if your garage gets humid.
Can I use LED bulbs in my fan’s light kit?
Yes, but make sure they’re dimmable and rated for ceiling fans. I used warm white LEDs for a cozy vibe, and they work great.
Do I need an electrician for this project?
Not always. If you’re comfortable with wiring and your junction box is good, you can do it yourself. I called a pro for a wiring check, but it wasn’t necessary.