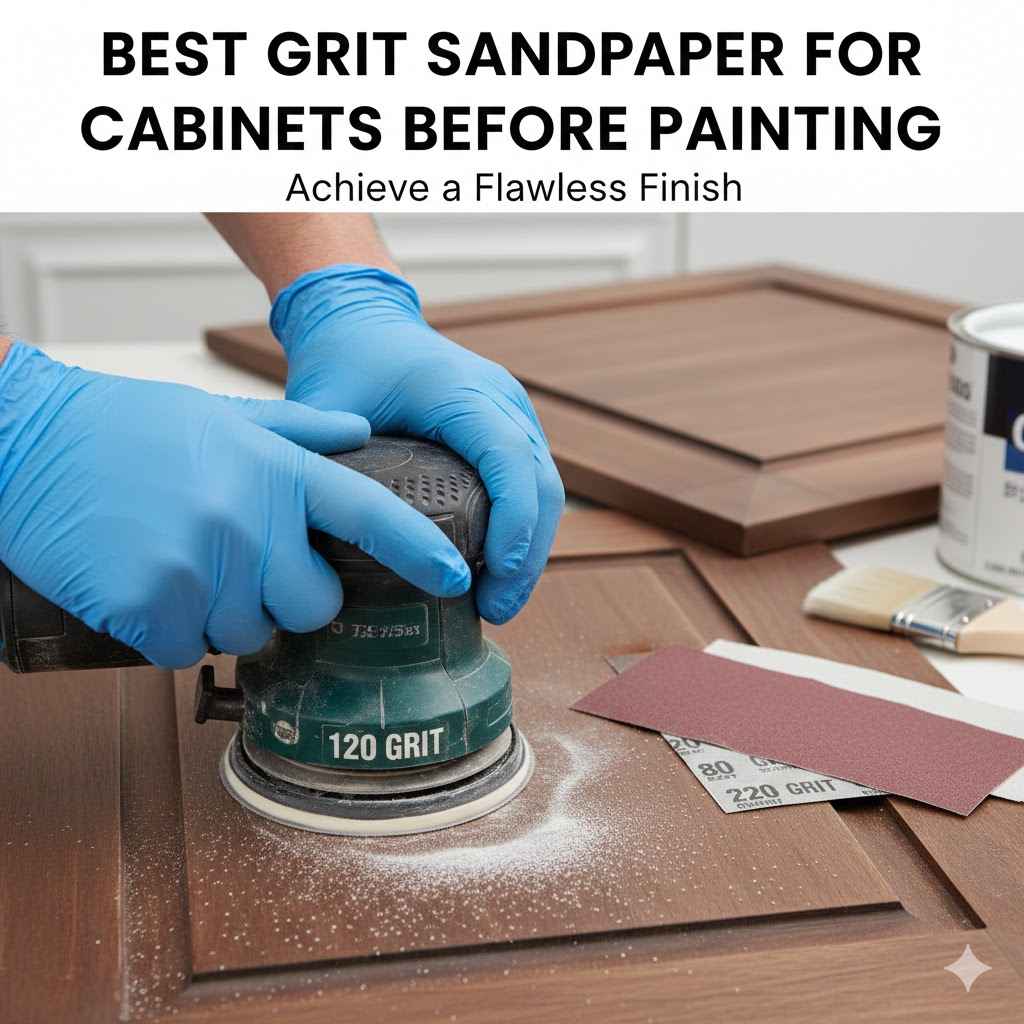
Best Grit Sandpaper for Cabinets Before Painting
Choosing the right sandpaper for your kitchen or bathroom cabinets is super important before you paint them. For many DIYers, figuring out the Best Grit Sandpaper for Cabinets Before Painting can feel tricky. There are so many numbers and types!
Don’t worry, though. We’ll walk you through exactly what you need to know, step by step, so you can get a smooth, beautiful finish on your cabinets. Get ready to prep your cabinets for their best look ever.
Choosing the Best Grit Sandpaper for Cabinets Before Painting
Selecting the proper grit sandpaper for preparing cabinets before painting is a critical step for achieving a smooth, professional finish. The grit number directly indicates the coarseness of the sandpaper; a lower number means a coarser grit, while a higher number signifies a finer grit. Using the wrong grit can lead to ineffective surface preparation or even damage the cabinet material.
This section explores the essential factors in selecting the ideal sandpaper, ensuring your cabinets are perfectly prepped for paint. We will cover why different grits are used and what to look for.
Understanding Sandpaper Grits
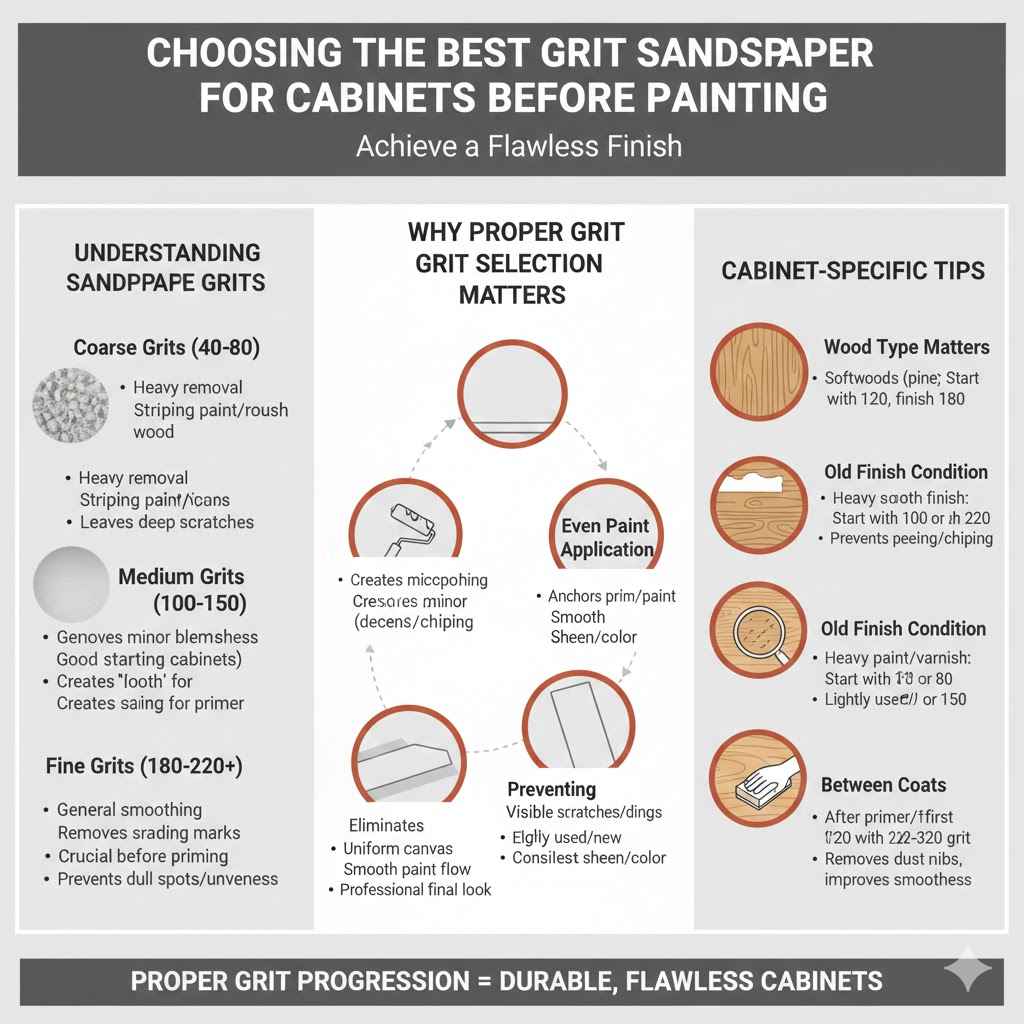
Sandpaper is categorized by its grit, which is the number of abrasive particles per square inch of sandpaper. Coarser grits, with lower numbers like 40, 60, or 80, have fewer but larger abrasive particles. These are used for aggressive material removal, such as stripping old paint or smoothing rough wood.
Medium grits, typically ranging from 100 to 150, are good for general smoothing and removing minor imperfections. Fine grits, such as 180, 220, and even higher, have smaller particles and are used for creating a very smooth surface, removing sanding marks from coarser grits, and preparing surfaces for finishing.
Coarse Grits (40-80)
Coarse grit sandpaper is your go-to for the heavy lifting. If your cabinets have thick layers of old paint, significant damage, or very rough wood, this is what you’ll start with. It quickly removes material, but it also leaves behind deep scratches.
It’s not something you’d use on its own for painting prep, but it’s an essential first step for very rough surfaces. Think of it as the rough draft of your sanding process. You’ll always follow up with finer grits to smooth out the marks left by these aggressive papers.
Using too coarse a grit for too long can actually damage the cabinet, so it’s about applying just enough pressure and then moving on.
Medium Grits (100-150)
Medium grit sandpaper is like the middle child of the sandpaper world. It’s not too aggressive, but it’s not too fine either. This is where you start to really smooth things out after you’ve tackled any major issues with a coarser grit.
If your cabinets are in decent shape, you might even start here. It’s effective at removing minor blemishes and preparing the surface for the final smooth layers. For most cabinet painting projects, 120 or 150 grit is a great starting point after any initial rough sanding.
It creates a surface that is smooth enough to accept paint well without being so fine that it fills pores or makes it hard for primer to adhere.
Fine Grits (180-220+)
Fine grit sandpaper is all about achieving that polished, professional feel. Once you’ve used your medium grits, you’ll switch to finer grits to get rid of any faint scratches left behind. For cabinet painting, 180 grit is often the sweet spot for a final sanding before priming.
Some professionals might go up to 220 grit for an ultra-smooth finish, especially if they are using a high-gloss paint. This step is crucial for preventing any dull spots or unevenness in your paint job. It ensures the primer and paint can lay down evenly and smoothly.
Skipping this step can mean your paint job looks okay up close, but dull or uneven from a distance.
Why Proper Grit Selection Matters for Cabinets
Selecting the correct sandpaper grit before painting cabinets is crucial for several reasons. Firstly, it ensures a smooth surface that paint can adhere to properly. If the surface is too rough, paint may not lay evenly, leading to an undesirable texture.
Conversely, if it’s too smooth (using grits that are too fine prematurely), the primer and paint might struggle to bond effectively, increasing the risk of peeling or chipping later on. The goal is to create a surface that is receptive to paint but also has enough “tooth” for the finish to grip onto.
Surface Adhesion
A well-sanded surface provides the ideal foundation for paint adhesion. When you sand, you’re not just making the surface smooth; you’re also creating tiny, microscopic pores. These pores act like little anchors for the primer and subsequent paint layers.
If the grit is too fine, you might buff the surface to a sheen without creating enough of these anchoring points. This can lead to a finish that looks good initially but might flake or peel down the road. Using the appropriate grits ensures you get that balance of smoothness and “tooth” for a long-lasting paint job.
Even Paint Application
The texture of the sanded surface directly impacts how paint applies. Sanding with the right grits removes imperfections, old finishes, and fills, creating a uniform canvas. This uniformity allows primer and paint to flow smoothly and evenly across the entire cabinet surface.
Imagine trying to paint on a bumpy road versus a freshly paved one – the paint will look and feel vastly different. Proper sanding ensures no low spots or high spots catch or repel the paint, resulting in a consistent sheen and color throughout your cabinets.
Preventing Visible Imperfections
Visible imperfections are the bane of any DIY painting project. Using the wrong sandpaper grit can either leave behind deep scratches that show through the paint or fail to remove subtle dings and gouges. The progression from coarser to finer grits is designed to remove the sanding marks of the previous step.
This systematic approach ensures that by the time you reach your final sanding, all you’re left with is a smooth, clean surface free of unwanted textures or marks that would detract from the final painted look. It’s about creating a flawless foundation.
The Step-by-Step Guide to Sanding Cabinets Before Painting
Sanding cabinets for painting might sound simple, but following a specific order of grits and techniques makes a big difference. This guide breaks down the process into easy steps, from choosing your tools to the final wipe-down. We’ll cover when to use different sandpaper grits and how to ensure you’re getting the most out of your sanding efforts.
By the end, you’ll know exactly how to prep your cabinets for a smooth, professional paint finish that will make them look brand new.
Preparing Your Workspace and Cabinets
Before you even touch sandpaper to cabinets, it’s essential to prepare both your workspace and the cabinets themselves. This involves protecting your surroundings from dust and ensuring the cabinets are clean and free of grease or grime. Proper preparation prevents dust from settling back onto the freshly sanded surfaces and makes the sanding process more efficient.
It also protects your home from the mess that sanding inevitably creates. Taking these initial steps will save you time and frustration later on.
Clean the Cabinets Thoroughly
Grease, grime, and dirt on cabinets can clog your sandpaper, making it less effective and potentially smearing onto the surface. Before sanding, give your cabinets a good cleaning. Use a degreaser or a mild soap and water solution.
Make sure to rinse them well with clean water and allow them to dry completely. This step is non-negotiable for a smooth, clean sanding job. Residue from cooking or everyday use can prevent sandpaper from gripping the surface properly and can even embed themselves into the wood, causing issues with paint adhesion.
Protect Your Workspace
Sanding creates a lot of fine dust that can spread throughout your home. It’s wise to cover floors, countertops, and appliances near the cabinets you’re working on with drop cloths or plastic sheeting. If you’re working in a kitchen, remove all items from the cabinets and drawers and cover them.
Ventilating the area by opening windows (if weather permits) can help, but it won’t eliminate the need for dust protection. For a more enclosed space, consider using a shop vacuum with a dust collection system attached to your sander to significantly reduce airborne dust.
Remove Hardware
For the most thorough and professional-looking job, remove all hardware like knobs, handles, and hinges. This allows you to sand evenly without having to work around these pieces, ensuring you don’t miss spots or create uneven surfaces. It also prevents damage to the hardware itself.
Keep the hardware organized in a baggie, perhaps labeling which cabinet door or drawer it came from, to make reassembly easier. This simple step makes a huge difference in the final quality of your painted cabinets.
The Sanding Grit Progression
The key to smooth cabinets is a gradual progression of sandpaper grits. You don’t just grab one type of sandpaper and go to town. Instead, you start with a slightly coarser grit to smooth out imperfections and then move to finer grits to erase the scratches left by the previous grit.
This systematic approach ensures that by the time you reach your final sanding, the surface is as smooth as glass, ready for primer and paint. This layered approach is what separates a good paint job from a great one.
Start with 120-150 Grit Sandpaper
For most cabinet painting projects, starting with a 120 or 150 grit sandpaper is ideal. If your cabinets are in pretty good condition and don’t have major flaws, this is where you’ll begin. This grit is effective at scuffing up the existing finish (if any) and creating a surface that primer can easily stick to, without being so aggressive that it gouges the wood.
It removes any minor blemishes or gloss from the current finish. Make sure to sand in the direction of the wood grain.
Move to 180 Grit Sandpaper
After you’ve finished with the 120 or 150 grit, it’s time to move to a finer grit. 180 grit sandpaper is excellent for removing the faint scratches left by the previous grit. This step is crucial for achieving that silky-smooth feel.
You’ll sand the entire surface again with the 180 grit, ensuring you’ve gone over all areas previously sanded. This fine grit refines the surface, making it ready for the primer. It further smooths out any imperfections you might have missed and ensures a uniform surface.
Optional: 220 Grit Sandpaper for Extra Smoothness
If you are aiming for an exceptionally smooth, furniture-like finish, or if you plan to use a high-gloss paint that highlights every tiny imperfection, you might consider an additional sanding step with 220 grit sandpaper. This is the final stage of sanding and creates a very refined surface. It ensures that any remaining micro-scratches are gone.
For most projects, 180 grit is sufficient, but 220 offers that extra touch of polish. Always sand with the grain.
Sanding Techniques and Best Practices
How you sand is just as important as the grit you use. Applying the right pressure, sanding in the correct direction, and ensuring even coverage are all key to a successful prep job. These techniques will help you avoid common mistakes and achieve a superior finish.
They are simple to learn but have a big impact on the final look of your cabinets.
Always Sand With the Grain
This is a cardinal rule of sanding. Wood has a natural grain pattern, like lines running through it. Always move your sandpaper in the same direction as the wood grain.
Sanding against the grain creates visible scratches that can be very difficult to hide, even after painting. These cross-grain scratches will show through your paint, especially in certain lighting, and can ruin the appearance of your finished cabinets. Pay close attention to the direction of the wood on each part of your cabinets.
Apply Light, Even Pressure
You don’t need to press down hard when sanding. Let the sandpaper do the work. Applying too much pressure can lead to uneven sanding, deep gouges, and can wear out your sandpaper much faster.
Keep your strokes consistent and even across the surface. If you’re using an electric sander, guide it smoothly; for hand sanding, use a sanding block for even pressure. The goal is to create a uniform surface, not to try and force the sandpaper to remove material quickly.
Check Your Progress Frequently
Periodically stop sanding and examine the surface. Feel it with your hand to detect any rough spots or missed areas. Good lighting is essential here; look at the cabinets from different angles to spot any unevenness or scratches.
If you’re using a power sander, be extra vigilant, as they can remove material very quickly. It’s better to sand a little and check often than to over-sand one spot and have to try and fix it. This careful observation ensures a consistently smooth finish.
Clean Between Grits
After you finish with one grit of sandpaper, and before moving to the next, it’s crucial to clean off all the dust. Use a vacuum with a brush attachment or a tack cloth. This prevents the coarser grit particles from being carried over to the finer grit sanding, which could create unwanted scratches.
A clean surface is essential for the next stage of sanding to be effective and to ensure the fine dust doesn’t interfere with primer adhesion later.
Cleaning After Sanding
Once you’ve finished all your sanding steps, the most critical part of the preparation is cleaning off all the dust. Sanding creates very fine dust particles that cling to surfaces. If you don’t remove them thoroughly, they will get mixed into your primer and paint, resulting in a bumpy, unprofessional finish.
This cleaning stage is as important as the sanding itself. Taking your time here will pay off with a smooth, clean surface ready for paint.
Vacuum Thoroughly
Begin by using a shop vacuum with a soft brush attachment to go over all surfaces, nooks, and crannies. This will remove the bulk of the sanding dust. Pay special attention to corners, edges, and any grooves in the cabinet doors.
Vacuuming is the first line of defense against sanding dust. If you have a vacuum that can attach to a sander, it captures a lot of dust as you work, making this final cleanup much easier.
Wipe Down with a Tack Cloth
After vacuuming, use a tack cloth to pick up any remaining fine dust particles. Tack cloths are slightly sticky and are designed to trap dust without leaving any residue. Wipe the cabinets gently with the tack cloth.
You’ll be amazed at how much dust it picks up, even after vacuuming. Repeat with a clean section of the tack cloth if necessary. This step ensures your cabinets are truly dust-free and ready for priming.
Wipe with a Damp Cloth (Optional but Recommended)
For an extra layer of cleanliness, you can follow up the tack cloth with a clean, lint-free cloth lightly dampened with water or a mineral spirit solution (if you’ve used oil-based products and need to ensure all residue is gone). Make sure the cabinets are completely dry before you apply primer. This final wipe ensures no lingering dust or contaminants are present.
It’s the last chance to ensure a perfectly clean surface.
Choosing the Right Sanding Tools
The tools you use for sanding can significantly impact the efficiency and quality of your work. While hand sanding is effective, power sanders can speed up the process, especially for larger areas. Understanding the different types of sanders and when to use them, along with the benefits of sanding blocks, will help you choose the right tools for your cabinet project.
The right tool makes the job easier and often yields better results.
Hand Sanding vs. Power Sanding
The choice between hand sanding and using a power sander depends on your project’s scale, your personal preference, and the condition of the cabinets. Hand sanding offers more control for detailed areas and is less likely to remove too much material quickly, which is great for beginners. Power sanders, like orbital or detail sanders, can save a lot of time and effort, especially on larger, flat surfaces.
However, they require a gentler touch and more experience to avoid damaging the wood.
| Tool Type | Pros | Cons | Best For |
|---|---|---|---|
| Hand Sanding with Sanding Block | Precise control, low cost, portable, ideal for detailed areas and beginners. | Time-consuming for large areas, can be tiring. | Small projects, intricate details, touch-ups, and when maximum control is needed. |
| Orbital Sander | Fast material removal, good for flat surfaces, reduces fatigue. | Can be aggressive, may leave circular marks if not used carefully, less control on edges. | Larger cabinet doors, drawer fronts, and relatively flat cabinet frames. |
| Detail Sander | Compact and maneuverable, good for corners and edges. | Slower than orbital sanders, less power for large areas. | Corners, edges, and detailed areas that orbital sanders might miss or damage. |
For cabinet painting, a combination of tools often works best. You might use an orbital sander for the large, flat surfaces of doors and drawer fronts and then switch to a detail sander or hand sanding with a block for the more intricate areas and cabinet frames. This hybrid approach leverages the speed of power tools where appropriate and the precision of hand tools where it matters most.
Always start with a less aggressive approach and increase as needed.
The Importance of Sanding Blocks
A sanding block is a simple yet incredibly useful tool for hand sanding. It’s a rectangular block, often made of rubber, cork, or wood, that you wrap sandpaper around. Using a sanding block provides a flat, firm surface that distributes pressure evenly across the sandpaper.
This prevents you from pressing too hard in one spot and creating an uneven surface or gouges. It’s especially helpful for achieving a smooth, consistent finish on flat areas of your cabinets.
Even Pressure Distribution
When you sand with just your hand, it’s very difficult to apply the same amount of pressure across the entire surface. Your fingers naturally press harder in some areas and less in others, leading to an inconsistent sanding job. A sanding block acts as a buffer, ensuring that the sandpaper makes even contact with the cabinet surface.
This even contact means the material is removed uniformly, preventing dips and peaks that would be noticeable after painting.
Protection for Hands
Sanding can be tough on your hands, especially for extended periods. A sanding block provides a comfortable grip and protects your hands from friction and the abrasive surface of the sandpaper. This makes the sanding process less physically demanding and allows you to maintain better control and endurance throughout the job.
You can sand for longer periods without your hands becoming fatigued or sore.
Ideal for Flat Surfaces
Sanding blocks are particularly effective on flat surfaces like cabinet doors and drawer fronts. They help maintain the flatness of these panels, ensuring they don’t develop any slight curves or unevenness from sanding. This flatness is crucial for a professional-looking painted finish.
The block ensures that the sandpaper is held taut and flat against the cabinet, leading to a perfectly uniform result.
Common Mistakes and How to Avoid Them
Even with the best intentions, some common mistakes can derail your cabinet sanding efforts. Knowing what to watch out for can help you avoid these pitfalls and ensure a smooth, beautiful result. Most issues arise from rushing the process, using the wrong tools, or not cleaning properly.
By understanding these potential problems, you can take steps to prevent them.
Rushing the Process
This is perhaps the most common mistake. People want to get to the painting part quickly. However, skipping steps, not sanding thoroughly with each grit, or not cleaning properly because you’re in a hurry will lead to a poor paint finish.
Take your time with each grit of sandpaper and each cleaning step. Patience here is rewarded with a durable and attractive final product that you’ll be proud of.
Using the Wrong Grit
Starting with sandpaper that is too coarse (like 40 or 60 grit) unless absolutely necessary for heavy stripping can create deep scratches that are hard to remove. Conversely, using sandpaper that is too fine from the start won’t effectively prepare the surface for primer adhesion. Always follow the progression from medium to fine grits.
For most cabinet repainting, 120-150 grit followed by 180 grit is the standard.
Sanding Against the Grain
As mentioned earlier, sanding perpendicular to the wood grain creates visible scratches that mar the final paint job. Always sand in the direction of the wood grain. This is critical for a smooth, professional appearance.
If you notice you’ve accidentally sanded against the grain, you may need to re-sand that area with finer grits to minimize the damage.
Inadequate Dust Removal
Failing to clean up all the sanding dust is a major cause of a bumpy or gritty paint finish. Dust particles get trapped in the primer and paint, creating imperfections that are difficult to fix without re-sanding. Always vacuum thoroughly and then use a tack cloth.
Don’t skip this essential step, no matter how clean you think the surface is.

Frequently Asked Questions
Question: What is the best grit sandpaper for cabinets before painting
Answer: The best grit sandpaper for cabinets before painting is typically a progression starting with 120-150 grit for initial scuff sanding, followed by 180 grit for a smooth finish. Some prefer to use 220 grit for an ultra-smooth surface, especially for high-gloss paints.
Question: Do I need to sand cabinets if they are already painted
Answer: Yes, even if cabinets are already painted, you should lightly sand them. This process, called scuff sanding, creates a slightly rough surface that helps the new primer and paint adhere better, preventing chipping and peeling.
Question: Can I use a power sander on my cabinets
Answer: Yes, you can use a power sander like an orbital or detail sander, but with caution. They speed up the process but can remove too much material quickly if not used carefully. Always start with a fine grit and use light pressure, especially on edges or detailed areas.
Question: How long does it take to sand cabinets
Answer: The time it takes to sand cabinets varies greatly depending on their size, the number of doors and drawers, and the condition of the existing finish. Hand sanding can take many hours, while using power sanders can significantly reduce the time, potentially to a few hours for a standard kitchen.
Question: What grit sandpaper should I use for stripping old paint
Answer: For stripping old paint, you would start with a much coarser grit, such as 40, 60, or 80 grit sandpaper. This is to remove the bulk of the old finish quickly. After stripping, you would then move to finer grits like 120-150 and then 180 to smooth the surface before painting.
Summary
Choosing the best grit sandpaper for cabinets before painting involves a thoughtful progression. Start with 120-150 grit to prepare the surface, then move to 180 grit for a smooth finish. Always sand with the grain, use light pressure, and clean thoroughly between grits and after sanding.
Using a sanding block and proper cleaning tools like tack cloths ensures a dust-free, perfectly prepped surface for a flawless paint job.