Brushed Nickel Light Fixtures for Bathroom: Brighten Your Space with Style
Hey there! So, you’re thinking about sprucing up your bathroom with brushed nickel light fixtures? I love that idea! A bathroom is more than just a place to get ready—it’s your little sanctuary, and the right lighting can make it feel luxurious and cozy. I’ve spent a lot of time exploring bathroom upgrades, from my own home renovations to helping friends pick out fixtures, and brushed nickel is one of my favorite finishes.
It’s sleek, modern, and doesn’t show every smudge like some shinier options. Whether you’re tackling a full remodel or just swapping out an old light, I’m here to share everything I’ve learned about choosing, installing, and maintaining brushed nickel light fixtures for your bathroom. Let’s dive in and make your space shine!
Why Choose Brushed Nickel for Bathroom Lighting?
First, let’s talk about why brushed nickel is such a great pick. It’s a finish that’s silvery and slightly warm, with a soft, brushed texture that looks sophisticated without being too flashy. I remember when I first swapped out a dated brass fixture in my bathroom for a brushed nickel one—it was like giving the room a whole new vibe!
Unlike polished chrome, which can feel cold and show fingerprints, or brass, which can look old-school, brushed nickel strikes a perfect balance. It’s versatile enough to fit all sorts of styles—modern, farmhouse, industrial, you name it.
Another big plus is that brushed nickel is low-maintenance. Bathrooms are damp, steamy places, and this finish resists corrosion and doesn’t show water spots or dust as easily as shinier metals. I’ve found it’s a lifesaver in my kids’ bathroom, where things get messy fast. Plus, it pairs beautifully with other bathroom hardware like faucets and towel bars, making it easy to create a cohesive look.
Types of Brushed Nickel Light Fixtures for Bathrooms
Not all light fixtures are created equal, and bathrooms have unique needs. I’ve tried a few different types in my home and helped friends pick theirs, so here’s a rundown of the most popular options for brushed nickel fixtures.
Vanity Lights
These are the workhorses of bathroom lighting, usually mounted above or beside the mirror. They provide bright, even light for tasks like shaving or putting on makeup. I have a three-bulb brushed nickel vanity light over my double sink, and it lights up the whole area without harsh shadows. You can find them in 2, 3, or 4-bulb designs, depending on your sink size.
Wall Sconces
Sconces are great for adding a touch of elegance. They’re mounted on the wall, often on either side of the mirror, and give a softer, more focused light. I put a pair of brushed nickel sconces in my guest bathroom, and they make the space feel like a fancy hotel. They’re perfect if you want both style and function.
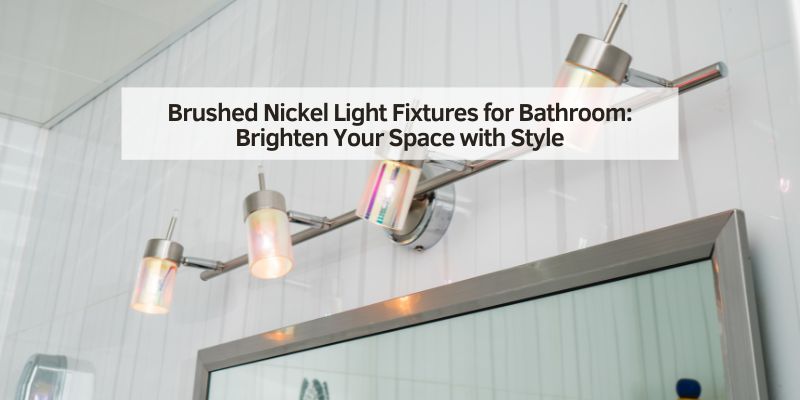
Bath Bars
Bath bars are long, linear fixtures that stretch across the wall, often above a large mirror. They’re sleek and modern, and I’ve seen them work wonders in bigger bathrooms. A friend of mine installed a 36-inch brushed nickel bath bar, and it lights up her double vanity like a dream.
Flush or Semi-Flush Mounts
If your bathroom has low ceilings or you want overhead lighting, flush or semi-flush mounts are the way to go. I used a brushed nickel flush mount in my small powder room, and it’s just enough light without feeling bulky. These are great for general lighting, but might need a vanity light for tasks.
How to Choose the Right Brushed Nickel Fixture
Picking the perfect fixture can feel overwhelming with so many options out there. I’ve made a few mistakes—like buying a fixture that was too small for my space—so here’s what I’ve learned to help you choose wisely.
Consider Your Bathroom Size
The size of your bathroom matters. In a small powder room, a single sconce or a two-bulb vanity light might be enough. For a larger bathroom with a double vanity, go for a wider fixture with three or four bulbs. I once put a tiny light in a big bathroom, and it looked lost and didn’t give enough light.
Check the Lumens
Lumens measure how bright a light is, and bathrooms need plenty of light for grooming. Aim for at least 1600 lumens for a vanity area. I learned this when I bought a gorgeous brushed nickel fixture that was too dim for putting on eyeliner. Check the bulb specs—LEDs are great for bright, energy-efficient light.
Match Your Style
Brushed nickel works with tons of styles, but the fixture’s design matters. For a modern look, go for clean lines and geometric shapes. For a farmhouse vibe, look for fixtures with seeded glass shades or caged designs. I helped a friend pick a brushed nickel fixture with clear glass shades for her industrial-style bathroom, and it’s stunning.
Ensure It’s Damp-Rated
Bathrooms are humid, so your fixture needs to be damp-rated to handle moisture. I made the mistake of installing a non-damp-rated light once, and it rusted within a year. Most brushed nickel fixtures are damp-rated, but always check the label to be safe.
Think About Bulb Count
More bulbs usually mean more light, but too many can be harsh. For a single sink, a two-bulb fixture is often enough. For a double vanity, three or four bulbs work better. I’ve found that three-bulb fixtures are my sweet spot for medium-sized bathrooms.
Installing Brushed Nickel Light Fixtures
Installing a light fixture might sound intimidating, but I’ve done it a few times, and it’s not as hard as it seems. Here’s how I approach it, step by step.
Step 1: Turn Off the Power
Safety first! Turn off the power at the circuit breaker. I learned this the hard way when I got a little shock while swapping a fixture. Double-check with a voltage tester to be sure.
Step 2: Remove the Old Fixture
Unscrew the old fixture from the wall and disconnect the wires. I always take a picture of the wiring before I start, so I know how to reconnect everything. Keep the mounting bracket if it fits the new fixture.
Step 3: Connect the New Fixture
Your new brushed nickel fixture should come with a mounting bracket. Attach it to the electrical box in the wall. Connect the wires—black to black (hot), white to white (neutral), and green or copper to the ground wire. I use wire nuts to secure them and wrap them with electrical tape for extra safety.
Step 4: Mount the Fixture
Screw the fixture onto the mounting bracket and secure it tightly. Pop in the bulbs, attach any shades, and make sure everything’s snug. I once forgot to tighten a shade, and it fell off during a steamy shower—oops!
Step 5: Test It Out
Turn the power back on and flip the switch. If the light works and looks good, you’re done! If not, double-check the wiring or call an electrician. My first install took me about 30 minutes, and now I can do it in half that time.
If you’re not comfortable with electrical work, hire a pro. It’s worth the peace of mind, especially in a bathroom where moisture is a factor.
Matching Brushed Nickel Fixtures with Your Bathroom Decor
One of the best things about brushed nickel is how well it plays with other elements in your bathroom. Here’s how I’ve seen it work with different styles and hardware.
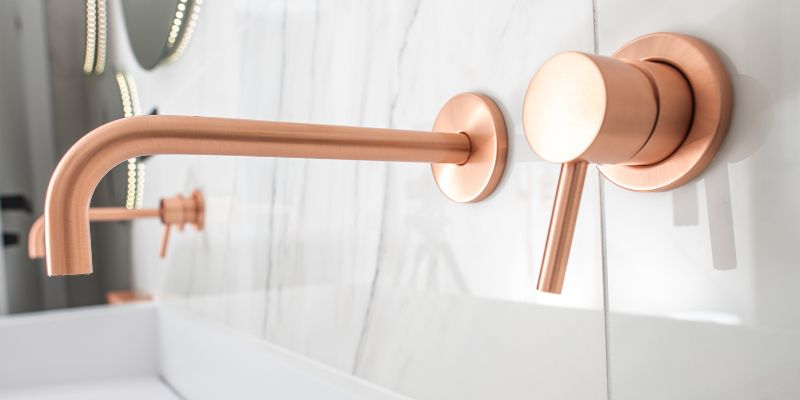
Pairing with Faucets and Hardware
Brushed nickel looks great with matching faucets, towel bars, and cabinet pulls. I went all-in with brushed nickel in my master bathroom, and it ties everything together beautifully. If you have chrome or brass faucets, brushed nickel can still work, but try to keep the finishes consistent for a polished look. I’ve seen mixed metals done well, but it takes a careful eye to avoid a clashing vibe.
Complementing Colors
Brushed nickel pairs well with neutral colors like white, gray, or beige, which are common in bathrooms. I’ve also seen it pop against navy or black vanities for a bold contrast. In my guest bathroom, I paired a brushed nickel sconce with a white subway tile wall, and it feels clean and timeless.
Glass Shades and Accents
Many brushed nickel fixtures come with glass shades—clear, seeded, or frosted. I love seeded glass for a touch of texture; it gives a soft, diffused light that’s perfect for a cozy bathroom. Clear glass is great for a modern look, while frosted glass hides bulbs and reduces glare.
Maintaining Your Brushed Nickel Fixtures
Brushed nickel is low-maintenance, but it still needs a little TLC to stay shiny. Here’s how I keep mine looking brand new.
Regular Cleaning
Wipe down your fixtures with a soft, damp cloth to remove dust and water spots. I do this once a month, and it keeps them sparkling. Avoid harsh chemicals like bleach—they can damage the finish. A mix of mild dish soap and water works great.
Handling Hard Water Stains
If you have hard water, you might see mineral deposits. I had this issue in my old house, and a solution of equal parts water and white vinegar worked wonders. Soak a cloth in the mixture, wrap it around the fixture for 10 minutes, then wipe clean.
Checking for Rust
Brushed nickel is resistant to rust, but in super humid bathrooms, check for any signs of corrosion, especially around screws. I’ve never had this problem, but a quick inspection every few months keeps things in check.
Where to Buy Brushed Nickel Light Fixtures
You’ve got tons of options for buying brushed nickel fixtures, and I’ve shopped around enough to know where to look. Big-box stores like Home Depot or Lowe’s have a wide selection, and I’ve found great deals there on brands like Progress Lighting. Online retailers like Amazon and Wayfair offer tons of choices, often with free shipping if you spend over a certain amount.
Specialty lighting stores, like Lamps Plus or Destination Lighting, have high-end options if you want something unique. I once scored a gorgeous four-bulb vanity light on Amazon for under $100, and it’s still a showstopper in my bathroom.
Cost of Brushed Nickel Light Fixtures
Prices vary depending on the brand, size, and design. Basic two-bulb vanity lights can start at $20–$50, while larger, designer fixtures might run $100–$300 or more. I usually set a budget of $50–$150 for a good-quality fixture that looks great and lasts. If you’re on a tight budget, check for sales or open-box deals at places like Home Depot or Amazon.
Here’s a quick table to give you an idea of what to expect:
| Fixture Type | Price Range | Best For |
|---|---|---|
| Two-Bulb Vanity Light | $20–$80 | Small bathrooms, single sinks |
| Three-Bulb Vanity Light | $50–$150 | Medium bathrooms, single or double sinks |
| Four-Bulb Bath Bar | $100–$250 | Large bathrooms, double vanities |
| Wall Sconces (Pair) | $50–$200 | Flanking mirrors, elegant look |
| Flush/Semi-Flush Mount | $30–$150 | Overhead lighting, low ceilings |
Energy Efficiency and Bulb Choices
Brushed nickel fixtures often come with LED-compatible options, which I love for saving energy. LED bulbs last longer and use less electricity than traditional incandescent bulbs. I switched to LEDs in my bathroom, and my electric bill dropped noticeably. Look for bulbs with a color temperature of 2700K–3000K for a warm, inviting glow, or 3500K–4000K for brighter, task-friendly light. Dimmer switches are another great addition—I installed one in my master bathroom, and it’s perfect for setting a relaxing mood at night.
My Personal Experience with Brushed Nickel Fixtures
I’ll never forget the first time I installed a brushed nickel light fixture in my bathroom. My old fixture was a tacky gold thing from the 80s, and it made the whole room feel dated. I picked a sleek three-bulb vanity light with clear glass shades, and it transformed the space.
The soft, brushed finish didn’t show fingerprints, and the light was bright enough for morning routines but cozy for evening baths. Since then, I’ve helped friends and family pick their fixtures, and I always recommend brushed nickel for its versatility and durability. It’s one of those upgrades that feels like a splurge but doesn’t have to break the bank.
Conclusion
So, there you have it—everything I’ve learned about brushed nickel light fixtures for bathroom spaces. From their stylish, low-maintenance finish to the variety of designs like vanity lights, sconces, and bath bars, they’re a fantastic way to elevate your bathroom’s look and feel. I love how they blend with any style, from modern to farmhouse, and how they make daily tasks like grooming easier while adding a touch of luxury.
Whether you’re installing one yourself or calling in a pro, choosing the right fixture comes down to matching your space, style, and lighting needs. So go ahead, pick out that perfect brushed nickel fixture, and watch your bathroom shine! Got more questions? Check out the FAQs below for quick answers.
FAQs
Are brushed nickel light fixtures good for bathrooms?
Yes, they’re perfect! They’re durable, resist corrosion, and don’t show fingerprints or water spots easily. Plus, they look sleek and modern.
Can I mix brushed nickel with other finishes like chrome?
You can, but it’s tricky. For a cohesive look, stick to one finish. If you mix, make sure the styles complement each other, like pairing with neutral colors.
How many lumens do I need for bathroom lighting?
Aim for at least 1600 lumens for a vanity area. Larger bathrooms or double vanities might need more, so check bulb specs.
Do brushed nickel fixtures need special cleaning?
Not really. Wipe them with a damp cloth and mild soap. For hard water stains, use a water-vinegar mix, but avoid harsh chemicals.
Are brushed nickel fixtures expensive?
They range from $20 for basic models to $300 for designer ones. You can find great options for $50–$150 that look high-end.
Can I install a brushed nickel fixture myself?
Yes, if you’re comfortable with basic wiring. Turn off the power, follow the instructions, and use a voltage tester. If you’re unsure, hire an electrician.