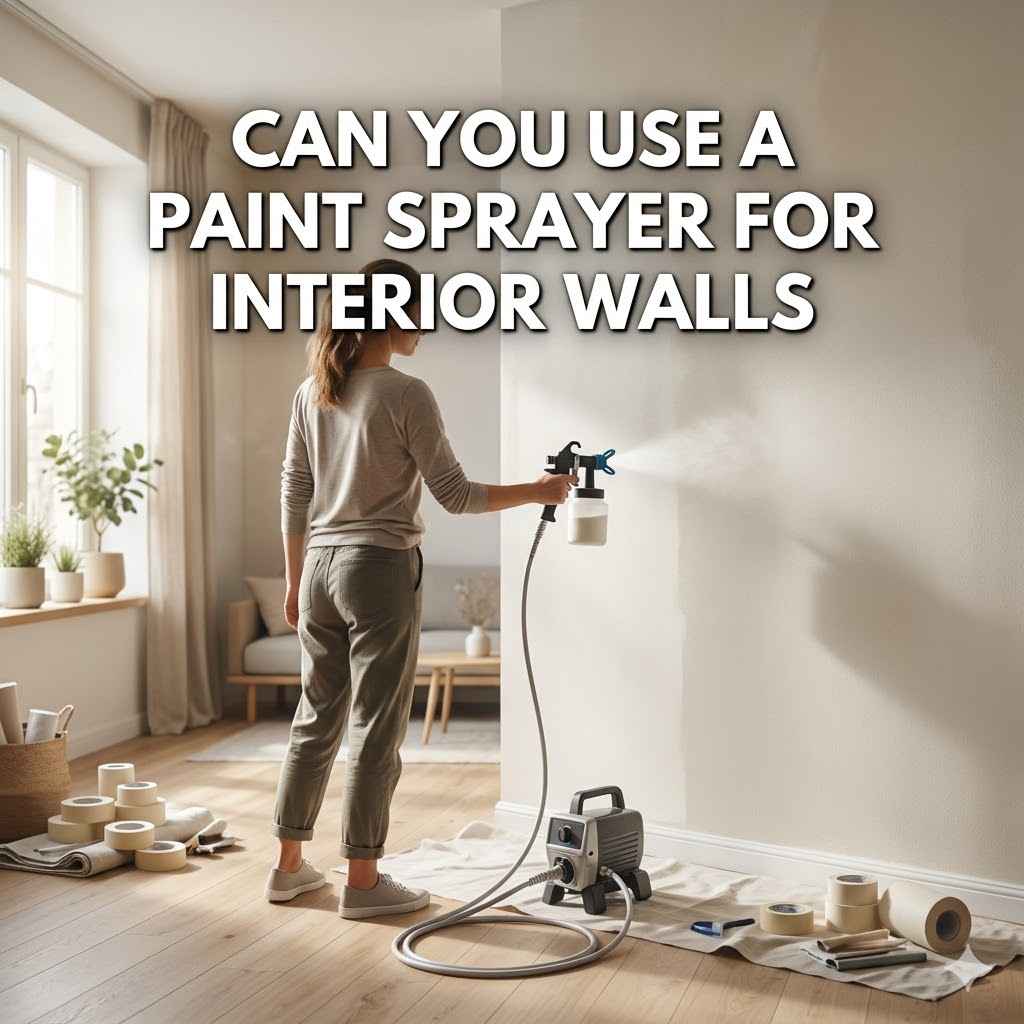
Can You Use a Paint Sprayer for Interior Walls
Thinking about painting your interior walls and wondering, Can You Use a Paint Sprayer for Interior Walls? It’s a question many folks ask, especially if they’ve only ever used rollers and brushes. Getting started with a paint sprayer might seem tricky, but it doesn’t have to be complicated. We’ll walk through it step by step, making it simple for anyone to get a smooth, professional finish.
Get ready to learn how to tackle your next painting project with confidence.
Spraying Interior Walls The Basics
Many people wonder, Can You Use a Paint Sprayer for Interior Walls? The answer is a resounding yes, and it can be a great way to get a smooth, even coat of paint quickly, especially on large areas. For beginners, the thought of using a paint sprayer can bring up questions about overspray, setup, and achieving a good finish without making a mess.
It’s a different tool than a roller or brush, and like any new tool, there’s a learning curve. However, with the right approach and a few key tips, anyone can use a paint sprayer effectively for interior walls. We’ll cover everything you need to know to feel comfortable and confident.
What Is a Paint Sprayer
A paint sprayer is a tool that atomizes paint, meaning it breaks it down into tiny droplets, and then pushes these droplets onto a surface using air pressure. This creates a fine mist of paint that coats the surface evenly and quickly. Unlike brushes and rollers that apply paint in thicker, more visible strokes, a sprayer can lay down a very thin, uniform layer of paint.
This results in a smooth finish that is often difficult to achieve by hand, especially on large, flat surfaces like walls and ceilings.
There are a few main types of paint sprayers. The most common for DIYers are electric airless sprayers. These work by using a pump to force paint through a small nozzle at high pressure.
This high pressure is what breaks the paint into a fine spray. Another type is an HVLP (High Volume Low Pressure) sprayer. These sprayers use a turbine to generate a large volume of air at low pressure.
HVLP sprayers are great for achieving a very fine finish and have less overspray, making them ideal for furniture or detailed work, but they can be slower for large walls compared to airless sprayers.
Understanding how these sprayers work is key to using them. The atomization process is what gives you that smooth, professional look. The pressure in an airless sprayer pushes the paint out with force, while an HVLP sprayer uses a steady stream of air.
Both methods aim to deliver paint in a fine, even pattern. Learning to control the spray gun, adjust the pressure or air flow, and maintain a consistent distance from the wall are all part of mastering the technique.
Paint Sprayer Benefits for Interior Walls
Using a paint sprayer for interior walls offers several significant advantages over traditional methods like brushing and rolling. The most noticeable benefit is the speed at which you can cover large areas. A sprayer can paint a wall in a fraction of the time it would take with a roller, making it ideal for rooms with extensive wall space or when you need to complete a project quickly.
The efficiency gained can save you hours of labor.
Beyond speed, paint sprayers deliver a superior finish. They create a smooth, even coating with no roller marks or brush strokes, giving your walls a professional, factory-like appearance. This is particularly valuable in areas where smooth finishes are desired, like living rooms or hallways.
The fine mist of paint settles evenly, covering imperfections and providing a consistent sheen across the entire surface. This uniformity can make a dramatic difference in the overall look of your home.
Here are some key benefits:
Speed and Efficiency: Paint sprayers cover surfaces much faster than rollers or brushes. For large rooms, this means less time spent painting and more time enjoying your freshly painted space. Imagine painting an entire bedroom in under an hour instead of half a day. This efficiency is a major draw for anyone tackling a significant painting job.
Superior Finish Quality: The atomization process creates a seamless, streak-free finish that rollers and brushes often struggle to match. This smooth, even coat enhances the appearance of your walls, making them look professionally done. It’s the kind of finish that makes you proud to show off your home to guests.
Better Coverage in Tight Spots: Corners, trim, and textured surfaces can be challenging with rollers. A paint sprayer can easily reach these areas, providing consistent coverage without the need for painstaking manual work. This is especially helpful around windows, doors, and intricate architectural details.
Reduced Labor Intensity: Painting can be physically demanding. Spraying reduces the repetitive motion of rolling or brushing, making the task less tiring, especially for large projects. You can cover more ground with less physical strain.
Can You Use a Paint Sprayer for Interior Walls Effectively
Yes, you can absolutely use a paint sprayer for interior walls, and doing so effectively involves understanding a few key principles. The main goal is to achieve an even, consistent coat of paint without excessive overspray. This means proper preparation, thinning the paint correctly if necessary, and mastering the technique of spraying.
For beginners, it might seem overwhelming, but breaking it down makes it manageable. The results can be very rewarding, offering a speed and finish that’s hard to beat.
Effectiveness also comes down to choosing the right type of sprayer for your project. While airless sprayers are powerful and fast, they can create significant overspray. HVLP sprayers are gentler but might require thinning the paint more and can be slower.
For interior walls, an electric airless sprayer is often the preferred choice for its speed and ability to handle a wide range of paint types without excessive thinning. The key is learning to control the spray pattern and distance.
To use a paint sprayer effectively on interior walls, consider these points:
Paint Consistency: Most paints are designed for brushing or rolling and may need to be thinned for spraying. Not thinning properly can lead to clogs and an uneven spray. Always follow the paint manufacturer’s recommendations for thinning for spray application. Over-thinning can affect the paint’s adhesion and durability.
Sprayer Settings: Adjusting the pressure is crucial. Too high a pressure creates excessive overspray and can cause the paint to bounce off the surface. Too low a pressure results in poor atomization and an uneven finish. Finding the sweet spot takes practice and experimentation.
Technique Matters: Spray in consistent, overlapping passes. Hold the gun at a consistent distance from the wall (usually 10-12 inches) and move your arm and the sprayer in unison. Start spraying before you reach the edge of your pass and stop spraying after you pass the edge to avoid paint buildup at the ends.
Preparing Your Space for Spray Painting
When you’re ready to take on interior walls with a paint sprayer, preparation is your best friend. This step is absolutely critical because paint sprayers can cover large areas very quickly, and that includes areas you don’t want painted. Proper masking and covering are essential to protect everything from furniture to floors and even adjacent walls or trim.
Skipping this part can lead to a huge cleanup job. Taking your time here will save you a lot of stress and work later on.
The goal is to create a contained painting environment. This means covering anything that won’t be painted with a protective material and sealing off any gaps where paint mist might escape. Think of it as building a temporary, protective shield around your project area.
Doing this diligently ensures that only your intended surfaces get a fresh coat of paint. Once you’ve masked everything, you’ll be ready to focus on the actual spraying.
Masking and Protecting Surfaces
Protecting surfaces from overspray is perhaps the most important step when using a paint sprayer for interior walls. Paint sprayers atomize paint into a fine mist that can travel surprisingly far. This mist can settle on furniture, floors, windows, light fixtures, ceilings, and even other walls you don’t plan to paint.
Therefore, thorough masking is not optional; it’s fundamental to a successful and tidy paint job.
Start by removing as much as possible from the room. For items that cannot be moved, cover them completely with plastic sheeting or drop cloths. Use painter’s tape to secure the edges of the plastic sheeting.
This ensures the plastic stays in place and prevents paint from seeping underneath. Pay close attention to where walls meet ceilings, floors, and trim. Use masking paper or plastic sheeting to cover large floor areas, ensuring it’s taped down securely along the edges to prevent paint mist from getting underneath and onto your subflooring.
Areas that are difficult to cover completely, like electrical outlets and light switches, should be removed if possible. If not, cover them very carefully with tape and plastic. Use masking tape to protect trim, windows, and door frames.
For large areas like entire doorways or built-in cabinets, consider using large rolls of masking paper or plastic that can be taped over the entire opening. The more thorough you are with masking, the less cleanup you’ll have to do later, and the more professional your finished project will look.
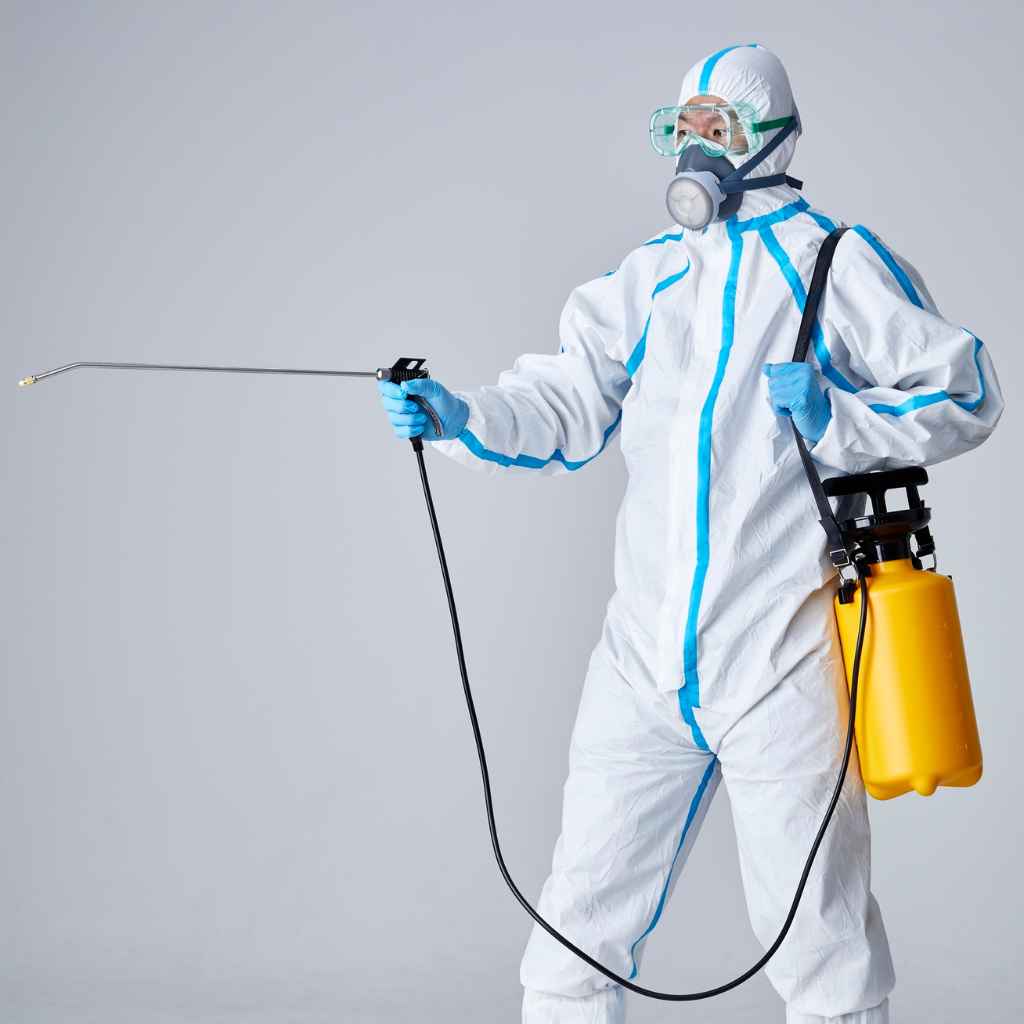
Ventilation and Safety Considerations
When you use a paint sprayer, especially indoors, ventilation is a key safety concern. Paint fumes can be harmful to breathe. While modern paints have fewer VOCs (Volatile Organic Compounds), it’s still important to ensure good airflow.
Open windows and doors to create cross-ventilation if weather permits. If natural ventilation is limited, consider using fans to help move air out of the room and fresh air in.
Beyond ventilation, personal protective equipment (PPE) is essential. You must wear a respirator mask that is rated for paint fumes. A simple dust mask is not enough.
The fine paint mist can be inhaled and cause respiratory irritation or more serious health problems over time. Eye protection is also crucial; wear safety glasses or goggles to prevent paint from getting into your eyes. Long sleeves, pants, and gloves will protect your skin from paint drips and reduce cleanup time later.
Here are some safety tips:
Respirator Mask: Always wear a respirator mask designed for organic vapors. This is the most critical piece of PPE for spray painting. Ensure it fits snugly to your face for maximum protection.
Eye Protection: Safety glasses or goggles will shield your eyes from any stray paint droplets that might get past your mask or fall from the sprayer.
Protective Clothing: Wear old clothes that cover your arms and legs completely. Disposable coveralls are a great option. Consider gloves to keep your hands clean and protected from paint.
Proper Ventilation Setup: Position fans to draw air out of the room, not blow it around. This helps remove fumes and reduces the amount of paint mist settling on surfaces outside your immediate work area.
Preparing the Paint and Sprayer
Getting the paint and the sprayer ready is just as important as masking. The type of paint you use and how you prepare it can greatly affect your spraying experience and the final result. Most paints designed for brushes and rollers will need to be thinned to spray properly.
Not all paints are created equal for spraying; some are too thick, and some have additives that can clog the sprayer. Always check the paint can or the manufacturer’s website for spray application recommendations.
For airless sprayers, you might need to thin the paint with water (for latex or acrylic paints) or a solvent (for oil-based paints) as recommended by the paint manufacturer. Thinning should be done gradually, stirring the paint well after each addition, until it reaches the correct consistency. A viscosity cup can help you measure this accurately.
For HVLP sprayers, thinning is almost always necessary and usually requires a more significant reduction in paint thickness.
Once the paint is ready, you’ll need to prime the sprayer. This involves running the paint through the sprayer to coat the internal components and ensure a consistent flow. For airless sprayers, this means placing the intake hose into the paint and running the sprayer on a low setting to flush out any air or residual cleaning solution.
For HVLP sprayers, you fill the cup with thinned paint and adjust the flow to get an even spray pattern.
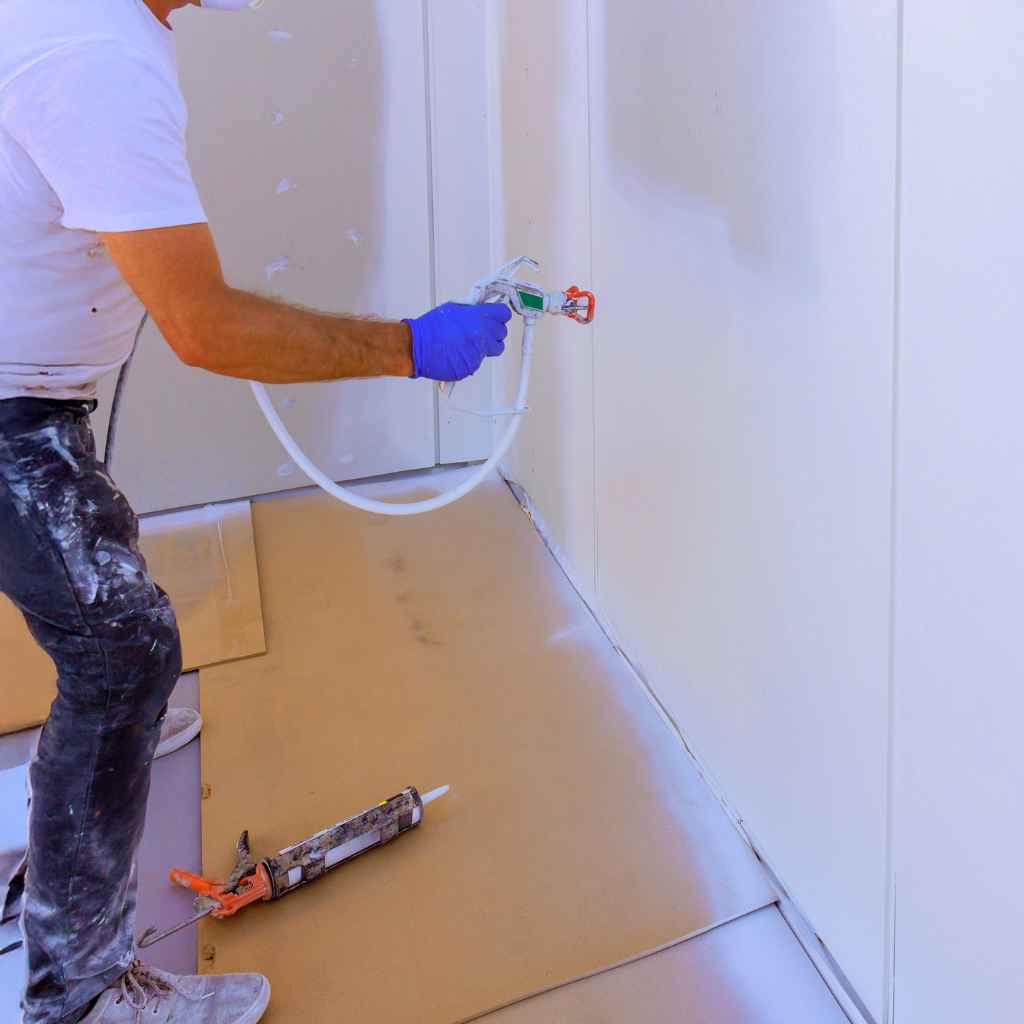
The Spray Painting Process for Interior Walls
Now that your space is prepped and your paint and sprayer are ready, it’s time for the actual painting. This is where technique comes into play. The goal is to apply the paint in a smooth, even layer without runs, drips, or uneven patches.
It might feel a bit foreign at first, but by following a methodical process, you’ll quickly get the hang of it. Remember that practice makes perfect, so don’t be discouraged if your first few passes aren’t flawless.
The key to a good spray finish is consistency. This means maintaining the same distance from the wall, moving at the same speed, and overlapping your spray passes correctly. Think of it like drawing with a continuous line, but with paint.
Each stroke needs to connect smoothly with the next to create a unified surface. We’ll break down the steps to help you achieve that beautiful, even coating.
Setting Up Your Paint Sprayer
Setting up your paint sprayer involves a few crucial steps to ensure it operates correctly and safely. For an electric airless sprayer, the first step is to prime it. This usually involves placing the intake hose into your paint bucket and the return hose back into the bucket or a waste container.
You then turn on the sprayer, and it will begin to draw paint through the system. You’ll need to “flush” it by pulling the trigger for a bit until the paint flows evenly without air bubbles. This primes the pump and the hose.
Next, connect the spray gun and the extension wand if you’re using one. Attach the correct spray tip for your paint and wall surface. The tip size dictates the fan width and the amount of paint that comes out.
A wider fan is usually better for walls, and a smaller orifice size is better for thinner paints, while a larger orifice is for thicker paints. You’ll also need to adjust the pressure. Start at a lower pressure and gradually increase it until you achieve a good atomization—a fine, even mist without sputtering or a “fog” pattern (which indicates too low pressure).
For HVLP sprayers, the setup is a bit different. You’ll fill the cup with thinned paint. Then, you’ll connect the turbine and adjust the airflow.
The goal is to get a consistent spray pattern, often a round or oval shape, depending on the nozzle. You’ll also adjust the fluid needle to control how much paint is released. Like with airless sprayers, testing the spray pattern on a piece of cardboard is essential before you start on the wall.
Technique for Even Coverage
Achieving even coverage with a paint sprayer comes down to mastering your technique. The most important aspect is maintaining a consistent distance from the wall and moving the spray gun at a steady pace. Hold the gun perpendicular to the surface you’re painting.
A common distance is between 10 and 12 inches, but this can vary slightly depending on the paint, the sprayer, and the tip size. Keep your arm and the spray gun moving together in a smooth, fluid motion.
When you start a pass, begin moving the spray gun before you pull the trigger, and release the trigger only after you’ve moved past the edge of your intended spray area. This creates clean edges for each pass and prevents paint from building up at the beginning and end of your strokes. Overlap each pass by about 50%.
This means that each new spray pattern should cover half of the previous one. This overlapping ensures you don’t miss any spots and creates a seamless, uniform coat.
Here’s a breakdown of the spraying technique:
Consistent Distance: Hold the spray gun about 10-12 inches away from the wall. Varying this distance will result in an uneven coat—too close can cause drips, and too far can lead to overspray and poor adhesion.
Steady Movement: Move the spray gun in a steady, consistent motion. Avoid stopping or slowing down mid-pass, as this will create thicker paint application in those areas. Keep your wrist straight and move your entire arm.
Trigger Control: Press the trigger as you begin your movement and release it as you finish. This “spray and release” method ensures a consistent line of paint.
Overlapping Passes: Each pass should overlap the previous one by roughly half. This creates a uniform finish without visible lines between passes. Imagine painting stripes side-by-side, but each stripe is half covered by the next.
Control for Corners and Edges: For corners, slightly angle the spray gun to ensure even coverage on both walls. For edges, you might move the gun slightly closer or adjust the angle to maintain a clean line.
Dealing with Overspray and Runs
Overspray is the fine mist of paint that misses the target surface. While some overspray is inevitable, excessive amounts can be a problem. If you’re seeing too much overspray, you might be holding the gun too far away, moving too quickly, or the pressure might be too high.
Adjust your technique, distance, and sprayer settings. Making sure you have adequate ventilation to carry the overspray away from you is also important.
Runs and drips happen when too much paint is applied in one area. This can occur if you move too slowly, hold the gun too close, or overlap your passes too much. If you notice a run or drip forming, stop spraying immediately and try to smooth it out gently with a brush while the paint is still wet.
If the paint has already started to dry, you’ll need to let it dry completely and then sand down the imperfection before applying another thin coat. It’s always better to apply multiple thin coats than one thick one.
Tips for managing common issues:
Overspray Control: Reduce the spray pressure slightly, move closer to the wall, or ensure you are overlapping your passes by 50%. Ensure good ventilation to direct overspray away from you.
Preventing Runs: Maintain a consistent speed and distance. Avoid stopping the spray motion mid-pass. If you get a run, try to feather it out with a brush while the paint is wet.
Correcting Imperfections: For dried drips or runs, let them cure fully, then gently sand them down with fine-grit sandpaper. Clean the area and apply a thin, even coat with the sprayer or a brush.
Maintaining Your Paint Sprayer
After you’ve successfully painted your interior walls, the work isn’t quite done. Proper maintenance of your paint sprayer is essential to ensure it continues to work well for future projects and to prevent costly damage. Cleaning your sprayer immediately after use is the most critical step.
Paint left in the system can dry, clog the components, and render the sprayer unusable.
Taking care of your equipment means it will last longer and perform better. This involves cleaning the different parts of the sprayer, flushing the system thoroughly, and storing it correctly. A well-maintained sprayer makes your next painting job much easier and more enjoyable.
It’s an investment of time that pays off in the long run.
Cleaning Your Paint Sprayer
Cleaning your paint sprayer immediately after you finish painting is non-negotiable. For latex or acrylic paints, you’ll start by flushing the system with water. Remove as much excess paint from the hose and gun as possible by placing the intake hose back into the paint bucket and running the sprayer into a waste container until only clear water comes out.
You’ll then need to fill the pump reservoir or a separate cleaning container with clean water and circulate it through the sprayer until the water runs completely clear.
For oil-based paints, you’ll use a mineral spirit or paint thinner instead of water. Follow the same flushing process: run the solvent through the sprayer until it comes out clean. After flushing, it’s a good idea to run a cleaning solution through the sprayer.
Some manufacturers offer specific cleaning solutions, or you can use a mixture of water and a mild detergent for latex paints, or a suitable solvent for oil-based paints. This helps remove any residual paint and keeps the internal components clean.
Don’t forget to clean the spray gun, tip, and extension wand. Disassemble the gun as much as the manual allows and clean all the parts with a brush and the appropriate cleaning fluid. Use a thin wire or the tool provided with your sprayer to clean out the spray tip.
Ensure all parts are thoroughly rinsed and dried before reassembly.
Storage and Long-Term Care
Once your paint sprayer is clean and dry, proper storage is key to its longevity. Store the sprayer in a clean, dry place, away from extreme temperatures. Extreme heat can cause residual paint or cleaning fluids to degrade, while freezing temperatures can damage internal components.
If you live in an area with freezing temperatures, make sure your sprayer is completely free of water or solvent before storing it for the winter.
For airless sprayers, it’s often recommended to store them with a pump protector or storage fluid in the pump. This fluid acts as a lubricant and prevents corrosion. Follow your manufacturer’s instructions for the specific type of fluid to use.
Some sprayers come with a dedicated storage bottle or cap that makes this process easier. Always ensure all components are reassembled correctly before storing to prevent loss of small parts.
Regular maintenance goes beyond just cleaning. Periodically check the intake screens and filters for clogs or damage. Replace them as needed.
Inspect hoses for any signs of wear or leaks. Keeping a maintenance log can help you track when you last performed certain tasks, like replacing a pump or filter, ensuring your sprayer is always in top working condition.
FAQ
Question: Can I use a paint sprayer for small interior rooms
Answer: Yes, you can use a paint sprayer for small interior rooms. While they are often associated with larger projects, a paint sprayer can be very efficient for small rooms, helping you achieve a smooth finish quickly. Just be sure to properly mask off all surrounding areas, as overspray can be an issue even in small spaces.
Question: What type of paint is best for interior wall spraying
Answer: Latex or acrylic latex paints are generally the best choices for interior wall spraying. They are water-based, making cleanup easier, and most can be thinned with water for spraying. Ensure the paint is specifically recommended for spray application by the manufacturer.
Question: How much overspray can I expect
Answer: The amount of overspray depends on the type of sprayer, the paint viscosity, and the pressure settings. Airless sprayers tend to produce more overspray than HVLP sprayers. Proper technique, correct pressure, and consistent distance from the wall can significantly reduce overspray.
Question: Do I need to thin paint for a paint sprayer
Answer: Yes, often you need to thin paint, especially for HVLP sprayers. For airless sprayers, thinning might be necessary if the paint is very thick. Always check the paint manufacturer’s instructions.
Thinning is typically done with water for latex paints and mineral spirits or thinner for oil-based paints.
Question: How long does it take to paint interior walls with a sprayer
Answer: Painting interior walls with a sprayer is significantly faster than using rollers or brushes. You can typically paint the walls of a standard-sized room in under an hour once everything is set up. However, this doesn’t include the time for preparation, masking, and cleanup, which can take several hours.
Summary
So, Can You Use a Paint Sprayer for Interior Walls? Absolutely. It offers speed and a beautiful finish.
Proper masking, setup, and technique are key. Always prioritize safety with good ventilation and protective gear. Clean your sprayer thoroughly afterward for lasting performance.
You’ll find it’s a rewarding way to get professional-looking walls.