Can You Use Pressure Treated Wood for Floor Joists: Proven?
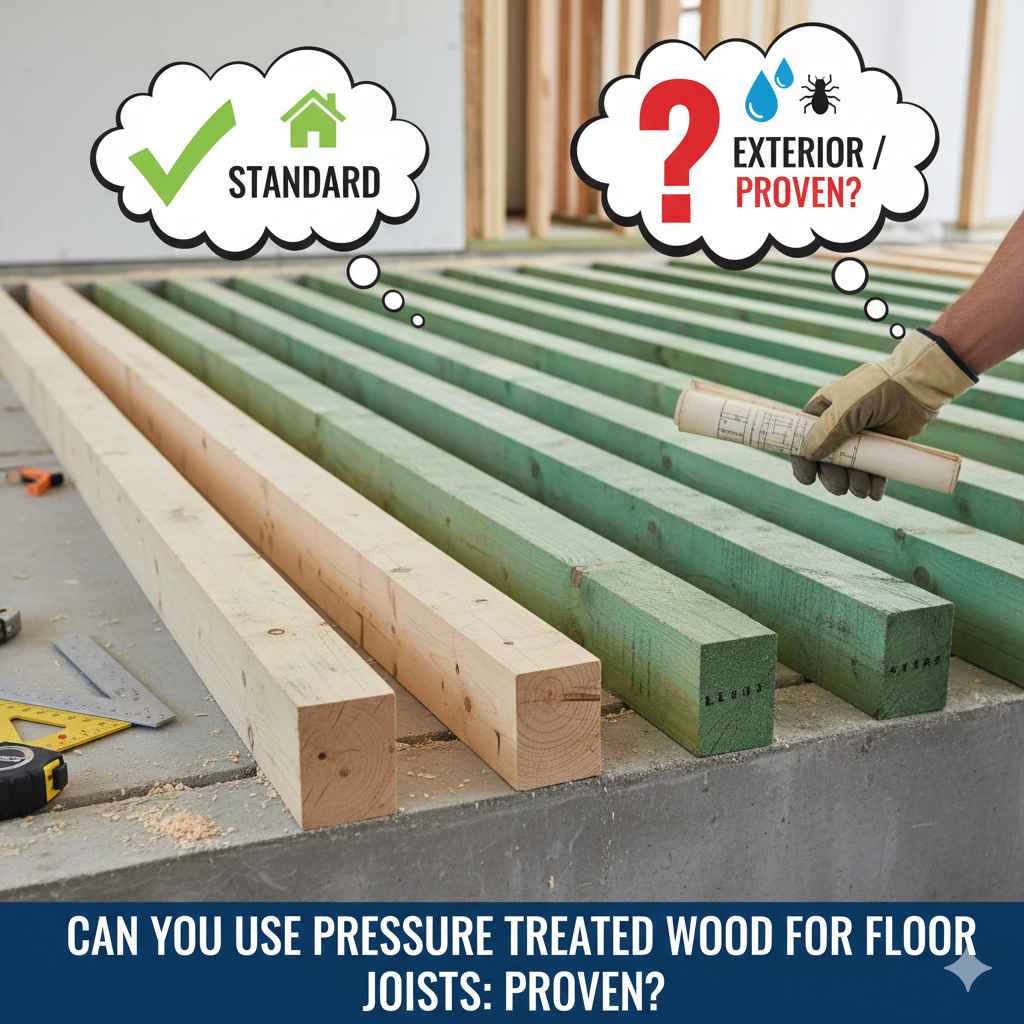
Yes, you absolutely can use pressure-treated wood for floor joists, and it is often required by building codes in specific areas. It is the best choice for floor systems in high-moisture locations like basements, crawl spaces, or any area where the wood is close to the ground or concrete.
Planning a new floor for your basement or a room over a crawl space? You’ve probably found yourself staring at stacks of lumber, wondering which type is right for the job. It’s a common question, and the answer can feel confusing with so many options available. Seeing both regular and greenish-tinted pressure-treated wood can leave you wondering, “Which one do I need for my floor joists?”
Don’t worry, you’re in the right place! Making the right choice is simpler than it seems. This guide is here to walk you through everything you need to know in plain, easy-to-understand language. We’ll explore exactly when you should use pressure-treated joists, when it’s better to stick with standard lumber, and how to install them safely. By the end, you’ll have the confidence to build a strong, durable floor that will last for years.
What Exactly Is Pressure-Treated Wood?
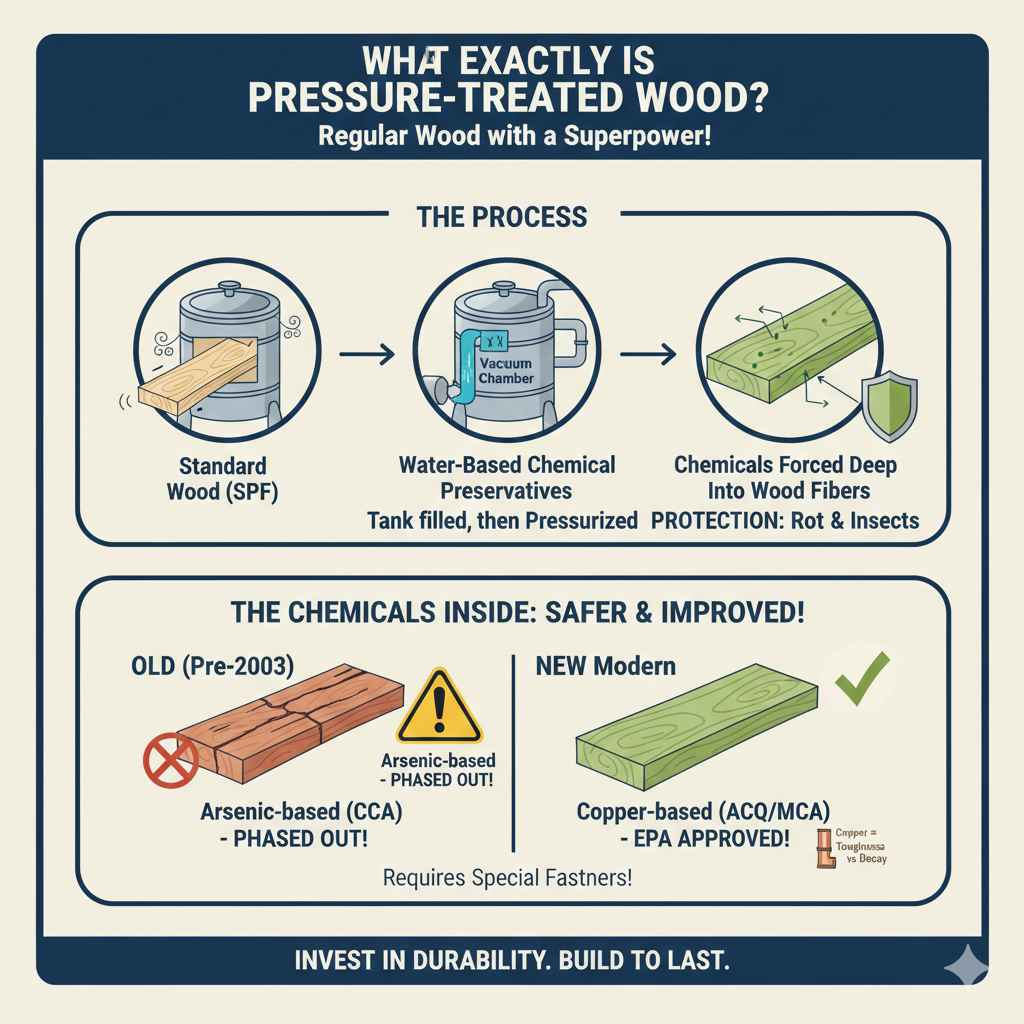
Before we dive into using it, let’s quickly cover what pressure-treated (PT) wood is. Think of it as regular wood that’s been given a superpower. Standard lumber, like Spruce-Pine-Fir (SPF), is placed inside a large, sealed tank. All the air is vacuumed out of the tank and the wood’s pores.
Next, the tank is filled with a water-based solution of chemical preservatives. The tank is then pressurized, which forces these protective chemicals deep into the wood fibers. This process gives the wood long-lasting protection against its two biggest enemies: rot and insects.
The Chemicals Inside
You might have heard stories about the old chemicals used in treated wood. The good news is that the industry has made huge safety improvements. The arsenic-based preservatives (CCA) were phased out for residential use over a decade ago. Today’s pressure-treated lumber typically uses copper-based formulas, like Alkaline Copper Quaternary (ACQ) or Micronized Copper Azole (MCA).
These modern treatments are approved by the U.S. Environmental Protection Agency (EPA) for residential use and are much safer to handle. The main thing to remember is that the copper content is what makes this wood so tough against decay, but it also means we need to use special fasteners, which we’ll talk about later.
When Is It a Good Idea to Use Pressure-Treated Floor Joists?
The golden rule is simple: use pressure-treated wood anywhere your floor structure might get damp. Moisture is the enemy of wood, leading to mold, mildew, and rot that can compromise the strength of your home. Using PT lumber in these key areas acts like a permanent insurance policy against decay.
Key Areas Where PT Joists Are a Must
- Crawl Spaces: The ground beneath your house constantly releases moisture. Even with a vapor barrier, the air in a crawl space is often damp, making it a perfect breeding ground for rot and termites. Pressure-treated joists are essential here.
- Basements: Basements, especially unfinished ones, are prone to humidity, condensation, and the occasional leak. Any floor joists near a concrete slab or foundation wall should be pressure-treated.
- Sill Plates: The sill plate is the very first piece of wood that sits directly on top of your home’s concrete or block foundation. According to the International Residential Code (IRC), this piece of wood must be pressure-treated to prevent it from wicking moisture up from the foundation.
- Garages: A floor system built over a concrete garage slab should use pressure-treated joists. Concrete can “sweat” or transfer moisture, and cars can bring in rain and snow.
- Decks and Porches: While not technically “interior” floor joists, the entire substructure of any outdoor deck or porch must be built with pressure-treated lumber to withstand the elements.
In many of these cases, using pressure-treated lumber isn’t just a good idea—it’s required by local building codes. Always check with your local building department before you start a project to ensure you are meeting the safety standards for your area.
When Should You AVOID Using Pressure-Treated Wood for Joists?
While pressure-treated wood is fantastic for damp areas, it’s not the right choice for every situation. Using it where it isn’t needed can add unnecessary cost and complexity to your project. Here’s when to stick with standard kiln-dried lumber.
Dry, Interior Spaces
For any upper-level floors in your home—like the second story or a main floor that sits above a dry, finished basement—there’s no need for pressure-treated joists. These areas are protected from the elements and ground moisture, so standard framing lumber (like SPF or Douglas Fir) is perfectly fine and more economical.
Reasons to Stick with Standard Lumber in Dry Areas:
- Cost: Pressure-treated wood typically costs 20-30% more than its untreated counterpart. Over an entire floor system, that price difference adds up quickly.
- Weight and Moisture Content: PT lumber is delivered wet from the treatment process. This makes it heavier and more difficult to handle. It also needs time to dry out. If you enclose it too soon, the wood will shrink as it dries, which can cause squeaky floors, drywall cracks, and other issues.
- Corrosion Concerns: The high copper content in modern PT wood is corrosive to standard metal fasteners. This means you must buy more expensive hot-dipped galvanized or stainless steel nails, screws, and joist hangers. Using the wrong fasteners will cause them to rust and fail over time.
- Handling Precautions: Because it contains chemical preservatives, you should always wear gloves when handling PT wood and a dust mask and safety glasses when cutting it. The sawdust should never be burned.
Quick Comparison: Pressure-Treated vs. Kiln-Dried Lumber
Here’s a simple table to help you decide at a glance:
| Feature | Pressure-Treated Lumber | Kiln-Dried Lumber (Standard) |
|---|---|---|
| Best Use | Floor joists in basements, crawl spaces, and areas near concrete. | Floor joists in dry, interior spaces (upper floors). |
| Cost | Higher | Lower |
| Resistance | Excellent against rot and insects. | Vulnerable to rot and insects if it gets wet. |
| Fasteners Required | Hot-dipped galvanized or stainless steel. | Standard framing nails or screws. |
| Moisture Content | High when new; needs to dry. | Low and stable. |
| Handling | Requires gloves and a mask when cutting. | Standard safety precautions. |
Step-by-Step Guide: Installing Pressure-Treated Floor Joists Safely
Ready to get started? Installing pressure-treated joists is very similar to framing with standard lumber, but with a few extra steps to ensure a safe and long-lasting result. Let’s walk through it together.
Step 1: Check Your Local Building Codes
I can’t say this enough: this is your most important first step. Your local building department will tell you the required size and spacing for your floor joists based on the span (the distance they need to cover). They will also confirm exactly where pressure-treated material is mandatory. A quick phone call or visit to their website can save you a huge headache later.
Step 2: Gather the Right Tools and Materials
Having everything on hand before you start makes the job go much smoother. Here’s a basic checklist:
- Pressure-treated lumber (2×8, 2×10, or 2×12 as specified by your codes)
- A circular saw or miter saw with a sharp blade
- Measuring tape and a pencil
- Carpenter’s square or speed square
- Safety gear: safety glasses, work gloves, and a dust mask (N95-rated is best)
- Corrosion-resistant fasteners: hot-dipped galvanized (HDG) or stainless steel framing nails or structural screws
- Corrosion-resistant joist hangers and connector nails
- A drill/driver and hammer
- End-cut wood preservative
Step 3: Measure and Cut Your Joists
Follow the old woodworker’s wisdom: “Measure twice, cut once.” Carefully measure the length you need for each joist and mark it clearly with your pencil and square. When cutting, always wear your safety glasses and dust mask. The chemicals in the sawdust are not something you want to breathe in or get in your eyes. Work in a well-ventilated area, preferably outdoors.
Step 4: Protect the Cut Ends
This is a critical step that many people skip! The pressure-treatment process forces chemicals in from all sides, but when you cut a piece of lumber, you expose a fresh, untreated wood end. This exposed end is now a weak spot where moisture and insects can get in.
To fix this, apply a brush-on end-cut wood preservative to every cut you make. You can find this product at any home improvement store, usually right next to the wood stains. It will seal the wood and maintain the protective barrier.
Step 5: Install the Joists
Your building plans will tell you the proper spacing for your joists, which is typically 16 inches “on center.” This means the center of one joist is 16 inches away from the center of the next one.
- Mark the Layout: Mark your joist locations on the sill plate and the main beam or ledger board where they will rest.
- Install Joist Hangers: Nail your corrosion-resistant joist hangers into place at each marked location. Use the specific connector nails designed for hangers—regular nails don’t have the shear strength.
- Place the Joists: Set each joist into its hanger. It should fit snugly.
- Fasten the Joists: Secure each joist by driving the correct nails or screws through the joist hanger holes into the joist. You will also need to “toenail” or drive nails at an angle through the joist into the sill plate at the other end.
Once your joists are in, you may need to install blocking (short pieces of wood) between them to keep them from twisting as they dry. This adds stability to the entire floor system.
Potential Problems and How to Avoid Them
Building with pressure-treated wood is straightforward, but being aware of a few potential issues will help you build a flawless floor.
Problem 1: Warping and Shrinking
Cause: Pressure-treated lumber is full of moisture from the treatment process. As it dries out over weeks or months, it will naturally shrink and can sometimes warp, twist, or cup.
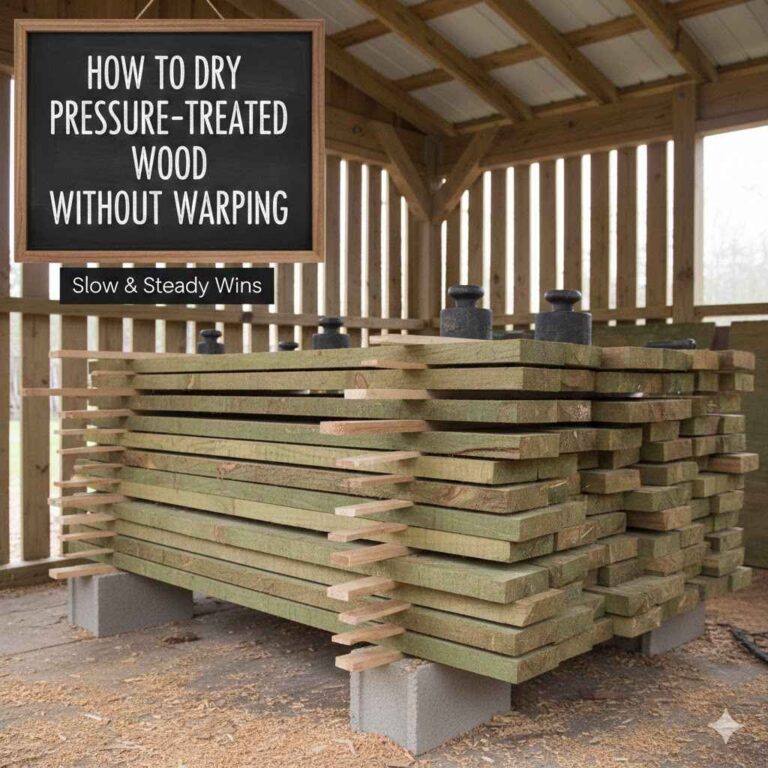
Solution: If possible, let your lumber acclimate for a week or two before you install it. Stack it with spacers (a technique called “stickering”) to allow for good airflow. When installing, secure the joists firmly with proper blocking or bridging. This bracing holds them straight and minimizes movement as they dry in place.
Problem 2: Corroded Fasteners
Cause: Using standard steel screws or electro-plated galvanized nails. The copper in the PT wood will react with the zinc coating on these fasteners, causing them to rust away in just a few years and compromising the safety of your structure.
Solution: This is non-negotiable. You must use fasteners specifically rated for contact with modern pressure-treated wood. Look for labels that say “Hot-Dipped Galvanized” (HDG) or “Stainless Steel.” They cost a little more, but they are essential for a safe, long-lasting structure. Purdue University’s extension provides a great resource on selecting the right fasteners.
Problem 3: Indoor Air Quality Concerns
Cause: People sometimes worry about having chemically treated wood inside their homes.
Solution: Modern pressure-treated wood is safe for indoor structural use, especially when it is not in direct contact with the living space (like in a basement or crawl space). Once the subfloor and finished flooring are installed, the joists are completely sealed off. Always ensure good ventilation in the area during and after construction to help dissipate any odors as the wood dries.
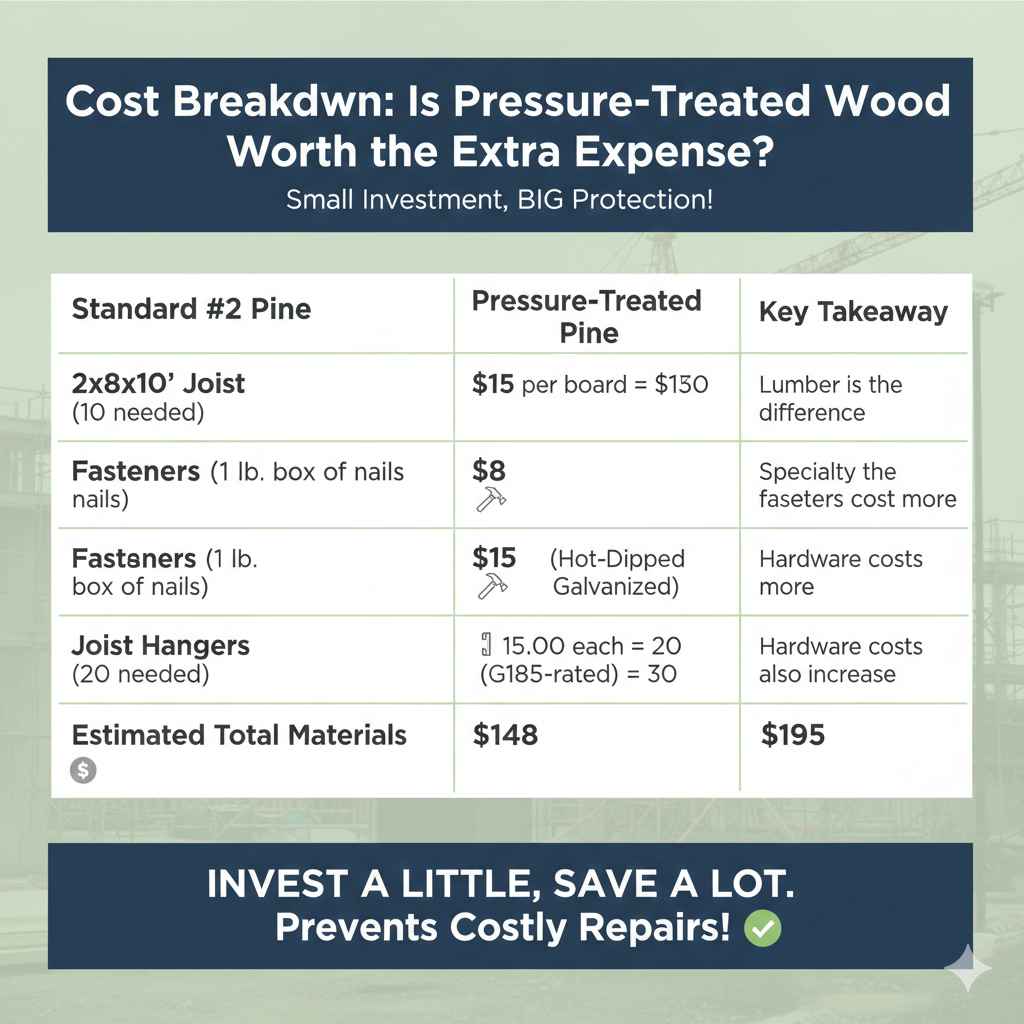
Cost Breakdown: Is Pressure-Treated Wood Worth the Extra Expense?
Let’s look at a simple cost comparison for a small 10×12 foot room. Prices will vary by location, but this gives you a general idea.
| Item | Standard #2 Pine (Approx. Cost) | Pressure-Treated Pine (Approx. Cost) | Key Takeaway |
|---|---|---|---|
| 2x8x10′ Joist (10 needed) | $12 per board = $120 | $15 per board = $150 | The lumber itself is the biggest cost difference. |
| Fasteners (1 lb. box of nails) | $8 | $15 (Hot-Dipped Galvanized) | Specialty fasteners nearly double the cost. |
| Joist Hangers (20 needed) | $1.00 each = $20 | $1.50 each (G185-rated) = $30 | Hardware costs also increase by about 50%. |
| Estimated Total Materials | $148 | $195 | About a 32% increase for this small project. |
While the upfront cost is higher, think of it as an investment. Spending an extra $50 on this small project protects your floor structure from rot that could cost thousands of dollars to repair down the road. In damp areas, the peace of mind is absolutely worth it.
Frequently Asked Questions (FAQ)
Can I use pressure-treated wood for my entire house frame?
You could, but it would be very expensive and unnecessary. It’s best to use PT lumber only where it’s needed—at the foundation level and in high-moisture zones. For interior walls and upper floors, standard kiln-dried lumber is the more practical and economical choice.
Do I really need to wear a mask when cutting pressure-treated wood?
Yes, always. The sawdust contains chemical preservatives that should not be inhaled. A good-quality dust mask (N95-rated) and safety glasses are essential for your safety. Also, never burn pressure-treated wood scraps, as this can release toxic chemicals into the air.
What happens if I use regular screws with pressure-treated joists?
Regular screws or nails will corrode and break down surprisingly quickly when in contact with the copper in the treated wood. This can cause structural connections to fail, making the floor unsafe. Always use hot-dipped galvanized or stainless steel fasteners.
How long does pressure-treated wood need to dry before I can install subflooring?
There’s no single answer, as it depends on the humidity and airflow in your space. Ideally, you’d let it acclimate for a few weeks. A practical approach is to install the joists and bracing, then give it as much time as your project schedule allows before covering it with subflooring. The more it dries, the less it will shrink later.
Is modern pressure-treated wood safe to have inside my home?
Yes, it is safe for structural use inside a home. The preservatives are bonded to the wood fibers and are not in the living space. Once your subfloor, underlayment, and final flooring are installed, the joists are well-isolated.
Can I mix pressure-treated and regular joists in the same floor?
Yes, this is a common practice. For example, if a portion of your main floor extends over a damp crawl space but the rest is over a dry, conditioned basement, you can use pressure-treated joists for the section over the crawl space and transition to standard joists for the rest of the floor.
Conclusion: Making the Right Choice for Your Home
So, can you use pressure-treated wood for floor joists? The answer is a clear and confident “yes”—when used in the right places.
Let’s recap the main idea: For any floor structure in a basement, over a crawl space, or touching a concrete foundation, pressure-treated joists are your best friend. They provide essential, long-term protection against rot and insects, ensuring your home stands on a solid and durable foundation. For the dry, protected upper levels of your home, standard kiln-dried lumber is the smarter, more cost-effective option.
By understanding the “why” behind each choice and following the simple safety steps for installation, you’re no longer just guessing. You’re making an informed decision that will protect your home and your investment for decades to come. Now you have the knowledge to pick the right materials with confidence. Go ahead and build something great—you’ve got this!