Create Your Own DIY Wood Desk Top: Step-By-Step Guide
In the realm of modern interior design, the concept of a DIY wood desk top has gained significant traction, merging functionality with creative expression. By utilizing various woodworking techniques and sustainable materials, enthusiasts are crafting bespoke surfaces that not only enhance workspace ergonomics but also reflect personal aesthetics. The incorporation of joinery methods, such as mortise and tenon or biscuit joints, and the selection of premium finishes can dramatically elevate the project’s outcome. As the demand for customizable and eco-friendly furniture grows, understanding the intricacies of building your own wood desk top becomes increasingly relevant.
Explore the fascinating journey of transforming raw lumber into a tailored workspace masterpiece.
Transform Your Workspace With A DIY Wood Desk Top
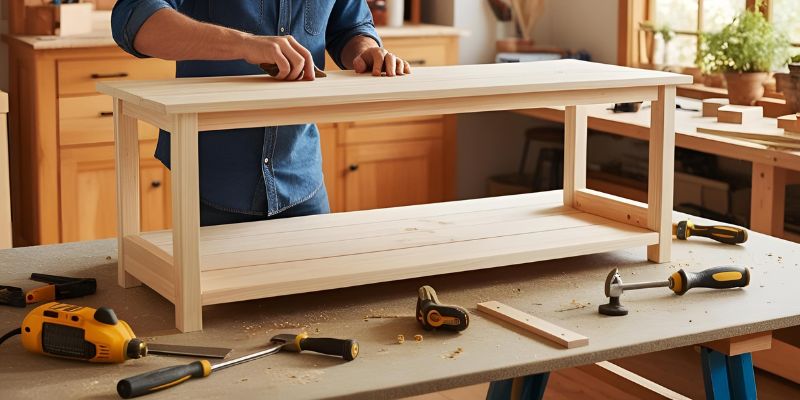
Creating a DIY wood desk top can transform your workspace into a personalized haven, combining functionality with aesthetic appeal. This guide highlights essential materials, tools, and step-by-step instructions to help you craft a durable and stylish desk top tailored to your needs. From selecting the right type of wood to finishing touches that enhance its beauty, this overview prepares you to embark on your woodworking journey. Whether a beginner or seasoned craftsman, the benefits of a custom desk top await.
Choosing the Right Wood for Your Desk Top
Types of wood suitable for desk tops. Pros and cons of each wood type. Factors to consider: cost, durability, aesthetics.
When making a DIY wood desk top, choosing the right wood makes a big difference. Here are some suitable types:
- Oak:Pros: Strong and durable. Cons: Higher cost.
- Pine:Pros: Affordable and lightweight.Cons: Softer, can dent easily.
- Maple:Pros: Hard and looks beautiful. Cons: Can be pricey.
Consider factors like cost, durability, and style before choosing. Each wood has its own charm and features, making this choice important for your desk top.
Calculating the Perfect Dimensions for Your Desk
How to measure your workspace. Recommended height and width based on usage. Customization options for different needs.
Measuring your workspace is the first step to creating a perfect desk. Use a tape measure for accurate results. Remember these dimensions:
- Height: Generally, 28 to 30 inches is ideal for most users.
- Width: Aim for at least 48 inches for comfortable use.
Consider your activities. If you draw or work with multiple monitors, a deeper desk may help. Customization can be fun!
Add shelves or cable management to fit your needs.
Tools and Materials Needed for DIY Wood Desk Top
Essential tools for woodwork. Recommended types of screws, glue, and finishes. Safety equipment and precautions.
Building your own desk can be fun and rewarding. First, gather essential tools like a saw, drill, and sandpaper. These are your trusty sidekicks in the woodwork adventure!
Use wood screws and wood glue to keep everything together. Remember safety first! Always wear goggles and gloves to protect yourself. Here’s a handy table with some top picks:
| Tool/Material | Purpose |
|---|---|
| Saw | Cutting wood to size |
| Drill | Creating holes for screws |
| Screws | Securing pieces together |
| Glue | Extra hold for your project |
| Finishing Stain | Adding a personal touch |
With these tools and a safety shield, you’re ready to conquer your DIY wood desk top!
Step-by-Step Guide to Building Your DIY Wood Desk Top
Preparing the wood: cutting and sanding. Assembling your desk top: techniques and methods. Finishing touches: staining and sealing.
Start by preparing your wood. Cut it to the desired size and shape. Use a saw for straight cuts. Then, sand the edges to make them smooth.
Sanding helps remove splinters.
Next, assemble your desk top. Lay the pieces side by side.
Use wood glue to join them tightly. You can also add screws for extra strength.
For the finishing touches, choose a stain for color.
Apply it evenly, and let it dry. Finally, seal the wood to protect it from damage.
- Cut the wood carefully.
- Sand all edges thoroughly.
- Glue and screw pieces together.
- Stain and seal for durability.
Decorating and Personalizing Your DIY Wood Desk Top
Ideas for customization and decoration. Adding accessories: cable management solutions and organizers. Tips for integrating the desk into your home or office aesthetic.
Transform your DIY wood desk top into a personal statement. Here are some fun ideas:
- Add colorful coasters or a unique desk mat for style.
- Incorporate potted plants for a touch of nature.
- Use organizers to keep supplies tidy and accessible.
For a clean look, consider cable management solutions like clips or sleeves. This helps keep cords hidden and neat. Lastly, choose colors and patterns that match your home or office decor.
This will create a harmonious workspace you’ll enjoy!
Maintenance and Care for Your DIY Wood Desk Top
Best practices for cleaning and upkeep. How to deal with scratches and dents. Longterm care to ensure durability.
Your DIY wood desk top deserves some special TLC! For cleaning, use a soft cloth and mild soap. Avoid harsh chemicals; they can ruin your wood, just like spilling grape juice on a white shirt. For scratches and dents, rub a walnut over the area and watch it disappear—no magic wand needed!
Long-term care includes applying a wood conditioner every few months. This keeps the wood happy and healthy. Remember, a happy desk means a happy workspace!
| Task | Best Practice |
|---|---|
| Cleaning | Use a soft cloth and mild soap. |
| Scratches/Dents | Rub with a walnut or use wood filler. |
| Long-term Care | Apply wood conditioner every few months. |
Troubleshooting Common Issues with DIY Wood Desk Tops
Addressing warping and cracking. Solutions for uneven surfaces. Tips for fixing assembly mistakes.
Wood desk tops can face some common problems. Warping occurs when wood bends due to heat or moisture. To fix this, place heavy objects on the warped section for a few days.
Cracking can also happen. Use wood glue to seal cracks, keeping them smooth. Uneven surfaces can be resolved by sanding them down. If you make a mistake during assembly, don’t worry!
Simply unscrew and re-align the pieces correctly. Here are some quick tips:
- Monitor humidity levels.
- Use a flat surface for assembly.
- Check wood grain direction before gluing.
Inspiration: Creative DIY Wood Desk Top Designs
Showcase of unique desk designs from the DIY community. Case studies of successful projects. How to find and develop your own style.
There are many amazing designs created by the DIY community for wood desk tops. You can find styles that suit any taste! Here are some fun ideas:
- Rustic Charm: Weathered wood gives a cozy feel.
- Modern Minimalist: Sleek lines and simple shapes.
- Colorful Creativity: Bright paints or stains for a pop of color.
Look at successful projects for ideas. Check online galleries or local makers.
To develop your style, think about what inspires you. Gather images and sketches that you love!
Conclusion
In conclusion, creating a DIY wood desk top not only enhances your workspace but also allows for personal expression and creativity. With the right materials and tools, you can easily craft a functional and stylish desk that fits your needs. Embrace this rewarding project to elevate your home office, and enjoy the satisfaction of designing something truly your own.
FAQs
What Type Of Wood Is Best For Creating A Durable And Attractive DIY Desk Top?
Hardwoods such as oak, maple, and cherry are excellent choices for a durable and attractive DIY desk top due to their strength, resistance to wear, and appealing grain patterns. Oak, in particular, is known for its durability and rich color, while maple offers a smooth finish and a light hue. Cherry wood darkens beautifully over time, adding character to the desk. For a budget-friendly option, plywood with a hardwood veneer can also provide a sturdy and attractive surface.
What Tools And Materials Do I Need To Build A DIY Wood Desk Top?
To build a DIY wood desk top, you’ll need plywood or hardwood boards for the surface, appropriate lengths of wood for the edges, and wood glue for joining. Essential tools include a saw (circular or table saw), a drill with bits, sandpaper or a sander for smoothing edges, and clamps to hold pieces in place while the glue dries. Additionally, consider using wood finish or paint for protection and aesthetics. Safety gear, such as goggles and a mask, is also recommended.
How Can I Achieve A Smooth And Professional Finish On My DIY Wood Desk Top?
To achieve a smooth and professional finish on your DIY wood desk top, start by sanding the surface thoroughly with progressively finer grits of sandpaper, ending with at least 220 grit. After sanding, clean the surface to remove any dust, then apply a high-quality wood conditioner to ensure even stain absorption. Choose a finish, like polyurethane or lacquer, and apply it in thin, even coats, allowing adequate drying time between applications. Finally, lightly sand with fine sandpaper between coats for a glass-like smooth finish.
What Are Some Popular Designs Or Styles For DIY Wood Desk Tops?
Popular designs for DIY wood desk tops include rustic farmhouse styles featuring reclaimed wood, sleek modern designs using plywood or hardwood with a smooth finish, and industrial looks that combine wood with metal elements. Live edge wood tops are also trendy, highlighting the natural contours of the wood. Additionally, many DIY enthusiasts opt for a minimalist aesthetic using solid, stained woods for a clean and polished appearance. Customization through paint or unique grain patterns allows for personal expression in the design.
How Can I Customize The Size And Shape Of My DIY Wood Desk Top To Fit My Workspace?
To customize the size and shape of your DIY wood desk top, start by measuring your workspace to determine the ideal dimensions. Sketch out your desired shape and layout, considering functionalities like drawers or cable management. Choose the type of wood and thickness that best suits your design while ensuring stability. Finally, using woodworking tools, cut the wood according to your plan, and sand the edges for a smooth finish.