DIY Mason Jar Chandelier: Genius & Essential
Make a stunning DIY mason jar chandelier for a fraction of the cost of store-bought options. This guide provides easy, step-by-step instructions for beginners, ensuring a beautiful and functional centerpiece for any room. Gather your materials and get ready to illuminate your home with this genius project!
Hello there! I’m Md Meraj, your go-to guide for making your home projects not just doable, but truly enjoyable. Ever walked into a room and seen a beautiful chandelier, only to be shocked by the price tag? I know I have! That’s why I’m so excited to share this project with you today: a do-it-yourself mason jar chandelier. It’s a fantastic way to add charm and light to your home without breaking the bank. We’ll go through everything step-by-step, making it super simple, even if you’re new to DIY. Get ready to create something truly special!
Why a DIY Mason Jar Chandelier is a Genius Idea
Mason jars have this wonderful, timeless appeal. They evoke a sense of rustic charm, vintage style, and simple elegance. When you transform them into a chandelier, you’re not just creating a light fixture; you’re crafting a statement piece. This project is genius for several reasons:
- Affordability: Compared to traditional chandeliers, a DIY mason jar version is incredibly budget-friendly. You can often find mason jars at thrift stores or use ones you already have.
- Customization: You can tailor the look to perfectly match your decor. Want a more modern feel? Use clear jars and sleek metal accents. Prefer a farmhouse vibe? Opt for distressed jars and rustic wood.
- Simplicity: This project is surprisingly straightforward, making it ideal for beginners. With a few basic tools and clear instructions, you can achieve professional-looking results.
- Unique Charm: A handmade chandelier adds a personal touch that mass-produced items just can’t replicate. It’s a conversation starter and a source of pride.
- Versatility: Mason jar chandeliers work wonderfully in various spaces – dining rooms, kitchens, entryways, bedrooms, or even covered outdoor areas.
Let’s get started on creating your very own do-it-yourself mason jar chandelier. It’s a rewarding project that brings both light and character to your living space.

Essential Tools and Materials You’ll Need
Before we dive into the fun part, let’s gather everything we need. Having all your supplies ready makes the process so much smoother. Don’t worry if you don’t have all these tools; many are common household items, and some can be borrowed or are inexpensive to acquire. Safety first, always!
Tools:
- Drill and Drill Bits: For creating holes for wiring and hanging.
- Wire Strippers/Cutters: Essential for working with electrical cords.
- Screwdriver Set: For assembling any mounting hardware.
- Measuring Tape: For accurate measurements.
- Pliers: Useful for various small tasks.
- Safety Glasses: Protect your eyes!
- Work Gloves: To protect your hands.
- Ladder or Sturdy Step Stool: To safely reach your installation area.
- Pencil or Marker: For marking measurements.
- Optional: Hot Glue Gun and Glue Sticks: For securing some components if needed.
- Optional: Sandpaper (medium and fine grit): If you plan to distress the jars or wood.
Materials:
- Mason Jars: The number depends on the size of your chandelier. Ball jars are classic, but any mason jars will work. Consider different sizes for a unique look.
- Chandelier Kit or Pendant Light Cords: You can buy these online or at a hardware store. Look for kits specifically designed for multi-light fixtures, or individual cords with sockets.
- Light Sockets (Bulb Holders): Ensure they fit your chosen light bulbs and are rated for the wattage you plan to use.
- Light Bulbs: LED Edison bulbs are popular for their vintage look and energy efficiency.
- Ceiling Canopy or Mounting Plate: This is what attaches the chandelier to your ceiling box.
- Wire Nuts: For safely connecting electrical wires.
- Mounting Screws: To secure the canopy to the ceiling.
- Chain or Wire (if your kit doesn’t include enough length): For hanging the chandelier.
- Optional: Wooden Board or Metal Frame: To mount the jars onto, especially for larger chandeliers.
- Optional: Decorative Elements: Like wire, twine, beads, or spray paint to personalize your chandelier.
Once you have your tools and materials ready, you’re set to start building! It’s always a good idea to double-check that your electrical components are compatible and rated for safe use.
Step-by-Step Guide to Your DIY Mason Jar Chandelier
Let’s get crafting! We’ll break this down into manageable steps. Remember to work safely and take your time. If you’re unsure about any electrical steps, it’s always best to consult a qualified electrician.
Step 1: Plan Your Design and Layout
Before you start drilling or cutting, visualize your finished chandelier. How many jars will you use? How will they be arranged? Will they hang at the same level, or at staggered heights? This planning stage is crucial for determining the size of your base (if using one) and the length of your cords.
- Number of Jars: Decide on the number of jars. This will influence the size of your base and the number of light cords you need.
- Arrangement: Sketch out how you want the jars to hang. Will they be in a cluster, a line, or a more elaborate pattern?
- Jar Type: Will you use clear, painted, or decorated jars?
- Base Material: If you’re using a wooden board or metal frame, measure and plan its dimensions to accommodate your jars and wiring.
For a simple chandelier, you might hang multiple jars from a central canopy. For a larger statement piece, you might attach them to a wooden plank or a metal crossbar.
Step 2: Prepare the Mason Jars
Clean your mason jars thoroughly. If you plan to paint or distress them, now is the time. For painting, use spray paint designed for glass, applying thin, even coats. Allow them to dry completely between coats.
- Cleaning: Wash jars and lids with soap and water. Ensure they are completely dry.
- Painting/Distressing (Optional): If painting, use glass-specific spray paint. For a distressed look, you can lightly sand the edges after painting or use a crackle medium.
- Lid Preparation: You’ll need to make a hole in the center of each mason jar lid for the light socket to pass through. Use a drill with a hole saw bit or a step bit that’s the same diameter as your light socket base. Make sure the hole is smooth to avoid damaging the socket or wires.
Step 3: Wire the Light Sockets
This is where we connect the electrical components. If you bought a chandelier kit, it might come with pre-wired sockets. If not, you’ll need to wire them yourself.
- Disassemble Socket: Most light sockets come apart into a base, a socket body, and a retaining ring.
- Feed Wire: Thread the electrical cord through the hole in the mason jar lid from the inside out.
- Connect to Socket: Strip about half an inch of insulation from the end of each wire. Connect the wires to the terminals on the light socket according to the manufacturer’s instructions. Typically, one wire (often marked with a rib or stripe) connects to the “neutral” or “silver” screw, and the other wire (smooth) connects to the “hot” or “brass” screw.
- Secure Socket: Reassemble the socket, ensuring the wires are securely fastened and the socket body is properly seated. Use the retaining ring to hold it in place.
- Test (Optional but Recommended): Before assembling everything, you can briefly screw in a light bulb and plug in the cord (or connect it to a temporary power source) to ensure the light turns on. Always be extremely careful when testing electrical components.
Important Note on Electrical Safety: If you are not comfortable with electrical wiring, it is highly recommended to purchase a pre-wired pendant light kit or consult a qualified electrician. Improper wiring can be a fire hazard. You can find resources on safe wiring practices from organizations like the National Fire Protection Association (NFPA).
Step 4: Assemble the Jars and Cords
Now, attach the wired sockets to the prepared mason jar lids and screw the lids onto the jars.
- Attach Lids: Carefully screw the prepared lids onto the mason jars. Ensure they are secure.
- Adjust Cord Length: If you are using multiple cords, you’ll need to manage their lengths. Some chandelier kits allow you to adjust the length at the ceiling canopy. If not, you might need to shorten the cords by cutting them, re-stripping the ends, and re-attaching them to the socket terminals. Ensure all cords are the same length or at your desired staggered heights.
Step 5: Prepare the Mounting Base (If Applicable)
If you’re using a wooden board or metal frame, prepare it now. This might involve cutting it to size, sanding, staining, or painting.
- Cut to Size: Measure and cut your base material to the desired dimensions.
- Drill Holes: Drill holes in the base for the electrical cords to pass through. Also, drill holes for mounting the base to the ceiling or for attaching hanging hardware (like chains or eye screws).
- Finish: Sand, stain, or paint the base to match your decor. Let it dry completely.
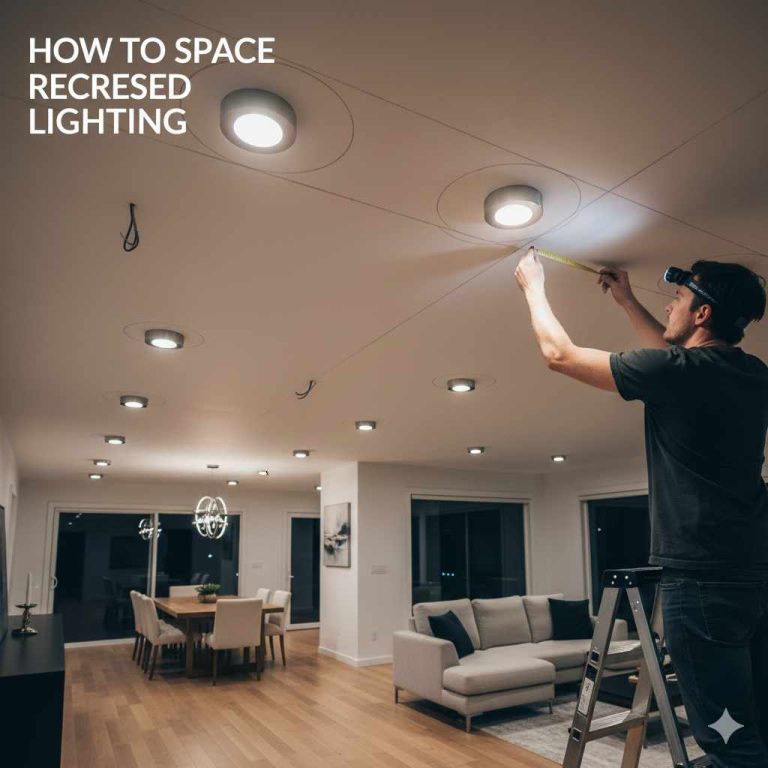
Step 6: Install the Ceiling Canopy and Wiring
This is the most critical part and requires careful attention to safety. Ensure the power to the ceiling outlet is turned OFF at the breaker box before you begin.
Safety First: Turn off power at the breaker box before proceeding!
- Remove Old Fixture: If there’s an existing light fixture, carefully remove it.
- Mount the Canopy: Secure the ceiling canopy to the electrical box in the ceiling using the provided screws.
- Connect Wires: This is where you’ll connect the wires from your chandelier to the house wiring. Typically, you’ll connect the ground wire (usually green or bare copper) to the ground wire in the ceiling box, the neutral wire (usually white) to the neutral wire in the ceiling box, and the hot wire (usually black) to the hot wire in the ceiling box. Use wire nuts to secure the connections. Gently tug on the wires to ensure they are secure.
- Tuck Wires: Carefully tuck the connected wires back into the electrical box.
- Attach Chandelier Base: Secure your chandelier’s base (or the canopy if it’s a direct mount) to the ceiling.
For detailed instructions on electrical wiring, consult a guide like those provided by This Old House.
Step 7: Hang the Jars and Attach Cords
Now for the exciting part – attaching your beautiful mason jars!
- Hang from Base: If using a wooden or metal base, you might have already run the cords through it. You can then secure the cords using clamps or by tying knots above the base to hold them at the desired height.
- Direct Hanging: If hanging directly from the canopy, you’ll typically use chains or adjustable cords that attach to the canopy. Feed the electrical cords through these hanging mechanisms.
- Secure Jars: Ensure the mason jar lids are securely screwed onto the jars, holding the sockets in place.
Step 8: Install Light Bulbs and Test
Almost there! Add your light bulbs and turn the power back on.
- Screw in Bulbs: Carefully screw in your chosen light bulbs into the sockets. Make sure they are the correct wattage for your sockets and fixtures.
- Restore Power: Go back to your breaker box and turn the power back ON.
- Test Your Chandelier: Flip the light switch to see your beautiful creation illuminate the room!
Take a moment to admire your work. You’ve just created a stunning, custom do-it-yourself mason jar chandelier!
Design Variations and Customization Ideas
The beauty of a DIY project is the endless potential for personalization. Here are some ideas to make your mason jar chandelier truly unique:
Jar Finishes:
- Frosted Jars: Use frosted glass spray paint for a softer, diffused light.
- Colored Jars: Tint the jars with translucent glass paints for a pop of color.
- Distressed Jars: Achieve a vintage farmhouse look by sanding painted jars or using crackle finishes.
- Wire-Wrapped Jars: Add intricate wire designs around the jars for an artisanal feel.
Base and Hanging Options:
- Rustic Wood Plank: A reclaimed wood plank adds significant farmhouse charm.
- Industrial Pipe Frame: For a more modern, industrial look, use plumbing pipes to create a frame.
- Metal Ring: Suspend jars from a large metal hoop for a circular arrangement.
- Single-Point Hanging: For a simpler look, hang multiple cords from a single ceiling canopy without a separate base.
Decorative Touches:
- Add Beads or Crystals: String beads or crystals along the cords or attach them to the jar rims.
- Twine or Rope Accents: Wrap twine or rope around the cords or the jar necks for a nautical or rustic touch.
- Different Lid Styles: Experiment with different styles of lids or even metal inserts for a unique look.
Consider the room where the chandelier will be installed. A kitchen might benefit from a brighter, more casual design, while a dining room might call for something more elegant. The options are limitless!
Safety Considerations for Your DIY Project
Safety should always be your top priority when undertaking any DIY project, especially one involving electricity. Here are some key points to keep in mind:
-
Electrical Safety:
- ALWAYS turn off power at the circuit breaker before working with any electrical wiring. Verify the power is off using a non-contact voltage tester.
- Use UL-listed electrical components (sockets, cords, wire nuts).
- Ensure your wiring connections are secure and properly insulated with wire nuts.
- Do not exceed the maximum wattage rating for your light sockets and bulbs.
- If you are unsure about any electrical step, hire a qualified electrician. It’s better to be safe than sorry.
-
Working at Heights:
- Use a sturdy ladder or step stool. Ensure it is placed on a stable, level surface.
- Have someone spot you on the ladder if possible.
- Avoid overreaching; move the ladder as needed.
-
Tool Safety:
- Always wear safety glasses when drilling, cutting, or working with tools that could produce debris.
- Wear work gloves to protect your hands from sharp edges or splinters.
- Read and understand the operating instructions for all power tools you use.
-
Material Safety:
- Ensure any paints or finishes you use are suitable for indoor use and have adequate ventilation during application and drying.
By following these safety guidelines, you can ensure your DIY mason jar chandelier is not only beautiful but also safe for your home.

Troubleshooting Common Issues
Even with careful planning, you might run into a few hiccups. Here’s how to address some common problems:
| Problem | Possible Cause | Solution |
|---|---|---|
| Light doesn’t turn on. | Power is off at the breaker. | Check your circuit breaker and turn it back on. |
| Loose wire connection. | Turn off power, re-check all wire nut connections at the ceiling and socket. Ensure wires are stripped correctly and securely in the nuts. | |
| Faulty light bulb. | Try a different light bulb. | |
| Faulty socket or cord. | If multiple bulbs don’t work, and power is confirmed, a component might be faulty. Test with a known working component or consider replacing it. | |
| Chandelier is crooked. | Uneven hanging points or unbalanced weight. | Adjust the chains or cords to level the chandelier. Ensure jars are securely attached and evenly distributed. If mounted on a base, ensure the base is level. |
| Jars are too heavy for the mounting hardware. | Overloaded hanging mechanism. | Ensure your ceiling electrical box is rated for the weight of the fixture. Use appropriate mounting hardware and chains strong enough to support the chandelier. If it’s too heavy, consider a lighter design or reinforcing the mounting. |
| Wiring is too short or too long. | Incorrect measurement during planning. | If too short, you may need to splice in additional wire (ensure correct gauge and insulation) or replace the cord. If too long, carefully shorten the cord, re-strip the ends, and re-connect to the socket. |
Remember, patience is key. Most issues can be resolved with careful inspection and a methodical approach.
Frequently Asked Questions (FAQ)
Q1: How many mason jars can I use in one chandelier?
The number of jars depends on the size and weight of your chandelier, as well as the capacity of your ceiling electrical box and mounting hardware. For a standard ceiling box, 3-6 jars is usually manageable. For larger, heavier chandeliers, you might need to reinforce the ceiling support.
Q2: What type of light bulbs should I use?
LED Edison bulbs are highly recommended for their vintage aesthetic and energy efficiency. Ensure the bulb’s wattage does not exceed the maximum rating of your light socket and fixture.
Q3: Do I need to be an electrician to do this?
Basic knowledge of electrical wiring is helpful, but it’s not strictly required if you use pre-wired kits. However, if you are connecting wires directly to your home’s wiring, and you are not confident, it is always best and safest to hire a qualified electrician.
Q4: Can I hang a mason jar chandelier outdoors?
Yes, but only if the area is covered and protected from direct moisture. Ensure all electrical components are rated for outdoor use if exposed to any elements, and consult local building codes.
Q5: How do I clean my mason jar chandelier?
Turn off the power at the breaker. Carefully unscrew the jars and wash them with soap and water. Wipe down the electrical components and cords with a dry or slightly damp cloth. Ensure everything is completely dry before reassembling and restoring power.
Q6: Where can I buy mason jars and electrical supplies?
Mason jars can be found at grocery stores, craft stores, home goods stores, and thrift shops. Electrical supplies like sockets, cords, and canopies are available at hardware stores and online retailers.
Conclusion
You’ve now got all the knowledge and steps needed to create your very own do-it-yourself mason jar chandelier. From planning your design to the final flick of the light switch, this project is a fantastic way to add personality, warmth, and beautiful light to your home. It’s proof that with a little creativity and some basic DIY skills, you can achieve stunning results that are both stylish and affordable.
Remember the satisfaction of building something with your own hands. This chandelier isn’t just a light fixture; it’s a reflection of your style and your ability to transform everyday items into something extraordinary. So, gather your jars, grab your tools, and get ready to shine!