DIY Monitor Stand Wood: Ideal Height & Easy Build Guide
A DIY wood monitor stand raises your screen so its top edge sits at or slightly below eye level — the exact standard OSHA recommends for computer workstations. Get the height wrong and you risk neck and shoulder strain from looking down or craning upward for hours each day. This guide covers material choice, pocket-hole assembly steps, and the OSHA-based height check for your own desk.
Insert your Affiliate Disclosure reusable block here.
Quick Answer
Build a monitor stand from 1×4 or 1×6 pine (or plywood/MDF) using pocket-hole joinery — a common published plan measures about 39″ long, 11″ deep, and 6¼″ tall and costs roughly $40 in materials. Set the exact height so your monitor’s top edge sits at or just below your seated eye level, then sand, glue, and screw the legs to the shelf before finishing.
Materials and Tools Needed for a DIY Wood Monitor Stand
Most builds use one board species for the whole stand: 1×4 or 1×6 pine is the cheapest and easiest to cut, birch plywood holds screws better and resists dents, and maple is stronger but costs more per board foot. A common published plan uses a 1x4x8 board for the shelf, three 1x6x8 boards for the legs and supports, and a 1/4″ plywood or MDF panel for any bottom shelf — all standard lumber-yard sizes.

Beyond the wood, gather these tools before you start cutting. Woodworkers new to woodworking projects can find each of these at any hardware store:
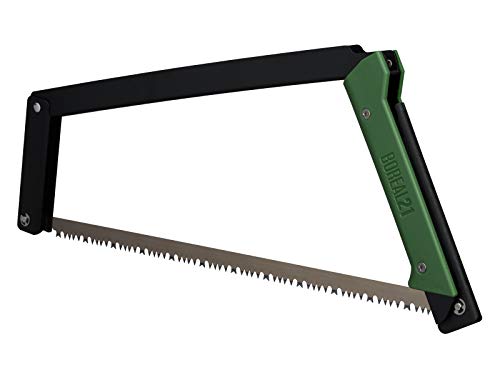
- Miter saw or hand saw, for square crosscuts
- Pocket-hole jig and drill, for hidden, strong joints
- 1 1/4″ pocket-hole screws and wood glue
- Orbital sander or sandpaper (120 then 220 grit)
- Tape measure and a combination square
- Wood finish: matte polycrylic, stain, or paint
Why Build Your Own Wood Monitor Stand
A wood monitor stand raises your screen to eye level, which reduces the neck strain that comes from looking down at a desk-height monitor for hours. It also opens up storage underneath for a keyboard, notebooks, or a small drawer, and because you build it yourself, you choose the wood, finish, and footprint to match your desk instead of settling for a generic store-bought riser.
Step-by-Step: Building the Monitor Stand
This sequence follows the same pocket-hole method used in published plans from sites like Saws on Skates and Shanty-2-Chic — cut, drill, glue, screw, sand, finish.
- Measure your monitor and eye level: Sit at your desk and note the gap between your seated eye level and where the top of your monitor currently sits — that gap is your target stand height.
- Cut the shelf and legs: Cut one board to the width of your monitor’s base (or wider, for two monitors) for the shelf, and two shorter boards for the legs, sized to your measured height.
- Drill pocket holes: Drill two pocket holes into each leg piece using a pocket-hole jig, angled to join into the underside of the shelf.
- Glue and screw the legs on: Apply wood glue to each joint and drive 1 1/4″ pocket-hole screws through the legs into the shelf ends, then let the glue cure per the label before handling.
- Sand all surfaces: Sand with 120-grit, then 220-grit paper, and round over sharp edges so the stand is safe to handle daily.
- Apply finish: Apply two coats of a matte polycrylic, stain, or paint, letting each coat dry fully before the next.
Best Pocket-Hole Jig Pick
Kreg KPHJ320-22 Pocket-Hole Jig 320 – $49.00
Drills the same angled, hidden joint this guide uses to attach the legs to the shelf — sized for the 1/2″ to 1 1/2″ thick pine or plywood most monitor stand plans call for.
- Best for: tight-space clamping on short leg pieces
- Why we picked it: compact size matches the small parts in a monitor stand build
- Main drawback: single clamp means slower repeat setups on longer runs
Compare more pocket-hole jig options
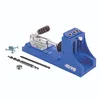
 Option 1 Kreg R3 Jr. Pocket-Hole Jig System – $34.00
|
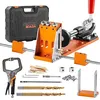 Option 2 VEVOR 34-Pc Pocket Hole Jig Kit – $56.90
|
 Option 3 Kreg K4 Pocket Hole Jig – $99.00
|
As an Amazon Associate we earn from qualifying purchases.
📊 OSHA recommends the top of your monitor sit at or slightly below eye level, with the screen center 15 to 20 degrees below horizontal eye level and a viewing distance of 20 to 40 inches. — Source: OSHA Computer Workstations eTool
How Big Should a DIY Monitor Stand Be?
Size depends on your desk and monitor, but one widely-published plan (Shanty-2-Chic) builds a stand roughly 39″ long, 11″ deep, and 6¼″ tall for about $40 in pine, pocket screws, and hardware — a useful reference point if you’d rather size to a known plan than measure from scratch. If you’re placing a laptop next to the monitor instead of building storage in, an adjustable wooden laptop stand solves that without widening the whole build.
Leave Room for Your Keyboard
Space the legs wider than your keyboard, not just wider than the monitor base. This is the single most common regret builders report after finishing a stand — legs placed directly under the shelf ends look tidy but block the keyboard from sliding fully underneath.
“I didn’t space the legs a bit farther apart, and I wish I had — leave enough clearance for your keyboard to slide fully underneath before you commit to a leg width.”
Which Wood Is Best for a Monitor Stand?
Pine, birch plywood, and MDF each work, but they trade off differently on cost, durability, and finishing. If you’re also sizing wood for the desk itself rather than just the stand, the same trade-offs apply — see this site’s guide on the best wood to use for a desk for a deeper comparison.
| Material | Approx. Cost | Durability | Best For |
|---|---|---|---|
| Pine (1×4/1×6) | Lowest | Soft, dents and scratches easily | First builds, painted finishes |
| Birch plywood | Moderate | Holds screws well, resists warping | Stands that carry heavier monitors |
| Maple | Highest | Very hard, holds a natural finish well | A stand meant to match hardwood furniture |
| MDF | Low | Stable but not moisture-resistant; needs paint or edge banding | Bottom shelves and hidden panels |
Common Mistakes to Avoid When Building a Monitor Stand
Three mistakes account for most rebuilds. Avoiding them the first time saves a second trip to the lumber yard.
- Underestimating weight capacity: a 27″–32″ monitor plus a soundbar or webcam can exceed 15–20 lbs — use at least 3/4″ thick stock for the shelf, not thin plywood scraps.
- Skipping glue on pocket-hole joints: screws alone can loosen over months of small vibrations from typing and desk bumps; glue plus screws holds permanently.
- Choosing a finish that can’t handle daily contact: a wipe-on oil looks good briefly but wears at the front edge where hands rest; a polyurethane or polycrylic topcoat holds up far longer.
Frequently Asked Questions
What materials are best suited for building a DIY wooden monitor stand?
Plywood, solid pine or birch boards, and MDF all work well because they provide enough strength and stability for a monitor’s weight. Hardwoods like oak or maple add durability and a nicer natural finish but cost more. Join the pieces with pocket-hole screws or wood glue, then finish with a wood stain or polycrylic sealant for protection and a polished look.
How can I design a monitor stand to fit multiple monitor sizes?
Build the shelf wider than your widest current monitor setup and use a modular leg design with pre-drilled holes at a few positions so you can reposition supports later. Choose stock at least 3/4″ thick so the shelf stays rigid across a wider span, and route cables through a rear notch so the stand still works cleanly if you add a second monitor.
What are some creative ways to incorporate storage into a wooden monitor stand?
A lift-top shelf hides a storage compartment underneath the monitor itself. Side-mounted drawers work well for pens, cables, or small gadgets, and an open cubby underneath fits a keyboard, notebooks, or a laptop when it’s not in use. Pegboard or hooks on the sides keep headphones or charging cables off the desktop entirely.
How do I finish and treat the wood for durability?
Sand with progressively finer sandpaper, finishing at 220 grit, and apply a wood conditioner first if you’re using a softwood like pine so stain absorbs evenly. Follow with two coats of a durable topcoat — polyurethane or polycrylic both hold up well to daily hand contact — sanding lightly between coats. Plan to refresh the topcoat every few years as it wears at the front edge.
What height should a DIY monitor stand be?
There’s no single universal number — it depends on your chair, desk, and monitor. Sit in your normal position and measure the gap between your seated eye level and the top of your monitor at its current height; that gap is the stand height you need. OSHA’s general guidance is that the top of the monitor should sit at or slightly below eye level, with the screen 20 to 40 inches from your eyes.
Conclusion
A DIY wood monitor stand is a weekend project that pays off every day you sit at your desk: pick pine, birch, or maple based on budget and durability, join the legs to the shelf with glue and pocket screws, and size the height to your own seated eye level rather than a generic number. With about $40 in materials and the tools above, you’ll end up with a stand built for your exact setup instead of a one-size-fits-all riser off a shelf.
Sponsored / affiliate links. As an Amazon Associate I earn from qualifying purchases. I may earn additional commission from eligible campaigns.