How To Make A Seat Cushion For A Wooden Chair At Home
Wooden chairs are lovely. They add a touch of class to any room. But let’s be honest, sitting on hard wood for long periods isn’t always fun.
Your bottom might get sore. You might fidget more than you’d like. Making your own seat cushion is a great idea.
It adds comfort. It also lets you pick exactly how it looks. You can match your decor perfectly.
This guide will walk you through making a comfy cushion. You can do this right in your own home.
Making a custom seat cushion for your wooden chair at home is a straightforward project. It involves measuring, cutting fabric and filling, and sewing. This allows you to create a perfectly fitting, comfortable, and stylish cushion that matches your home’s unique look and feel.
What Exactly Goes Into a DIY Seat Cushion?
A DIY seat cushion is a simple thing. It’s basically a soft layer you put on your chair. This layer makes sitting much nicer.
It stops your legs from getting tired. It also protects the wood of your chair. Over time, sitting can wear down the wood finish.
A cushion helps prevent that.
Think of it like a soft hug for your backside. It absorbs some of the pressure. It makes your hard chair feel more like a comfy spot.
This is especially true if you spend a lot of time at a table. Maybe you work from home. Maybe you love long family dinners.
A good cushion makes all the difference.
The main parts are the outer cover and the filling. The cover is the fabric you see. The filling is what makes it soft.
You can use different things for filling. Some are softer than others. Some are thicker.
We’ll talk about these later. For now, know that you are building a comfy sandwich.
My First Cushion Fiasco (And What I Learned)
I remember the first time I tried to make a chair cushion. It was for my kitchen table. The chairs were old, solid oak.
Beautiful, but they felt like sitting on a plank. I grabbed some pretty floral fabric from the craft store. I also bought a big piece of foam.
My plan seemed simple. Cut fabric. Stuff it in.
Sew it shut. Easy, right? Wrong.
My measurements were a bit off. The fabric was too tight. The foam bunched up weirdly.
When I finally sewed it, it looked lumpy and sad. Sitting on it was only slightly better than sitting on the wood.
I felt so frustrated. I thought I’d wasted my time and money. But that mistake taught me a lot.
It showed me how important precise measurements are. It also showed me that different fillings behave differently. The cheap foam I used didn’t hold its shape well.
It squished flat too fast. This time, though, I was determined to get it right. I researched more.
I learned about different materials. I practiced my sewing. It made a huge difference.
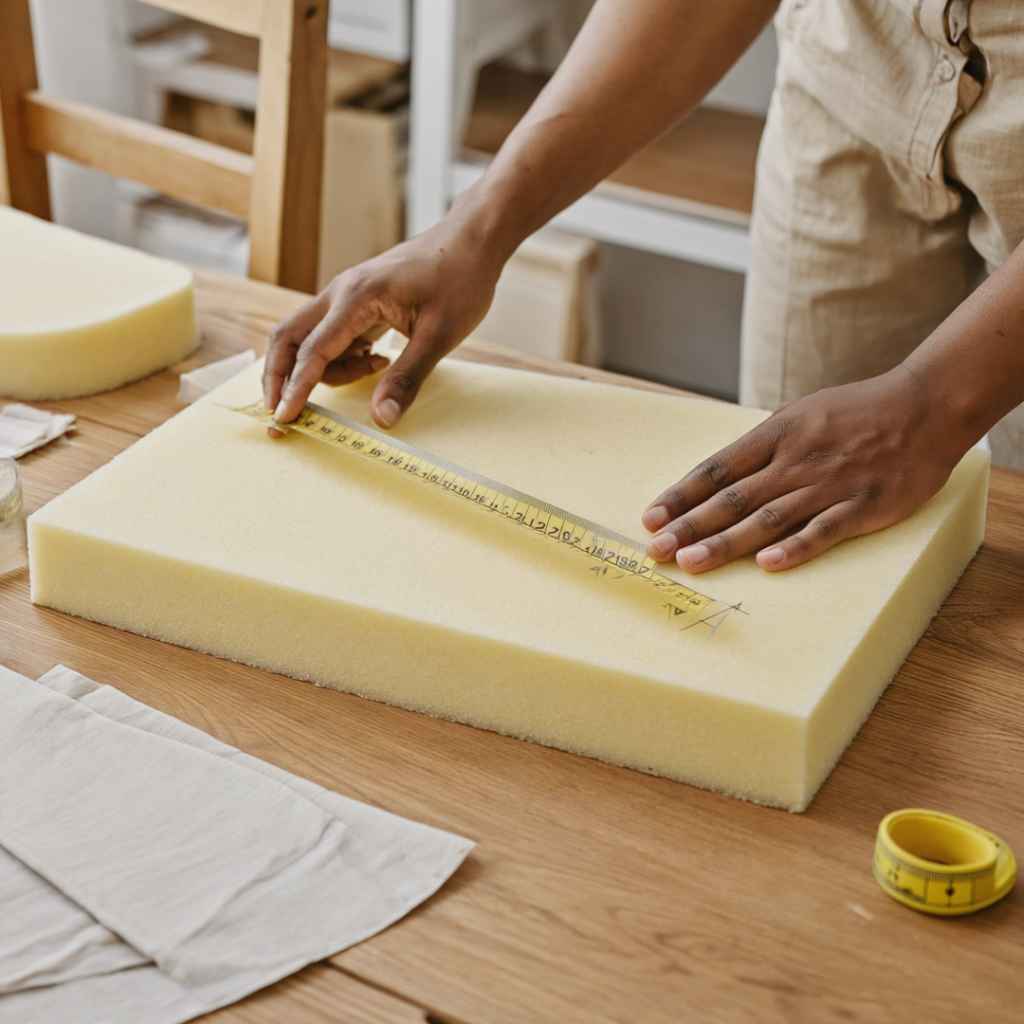
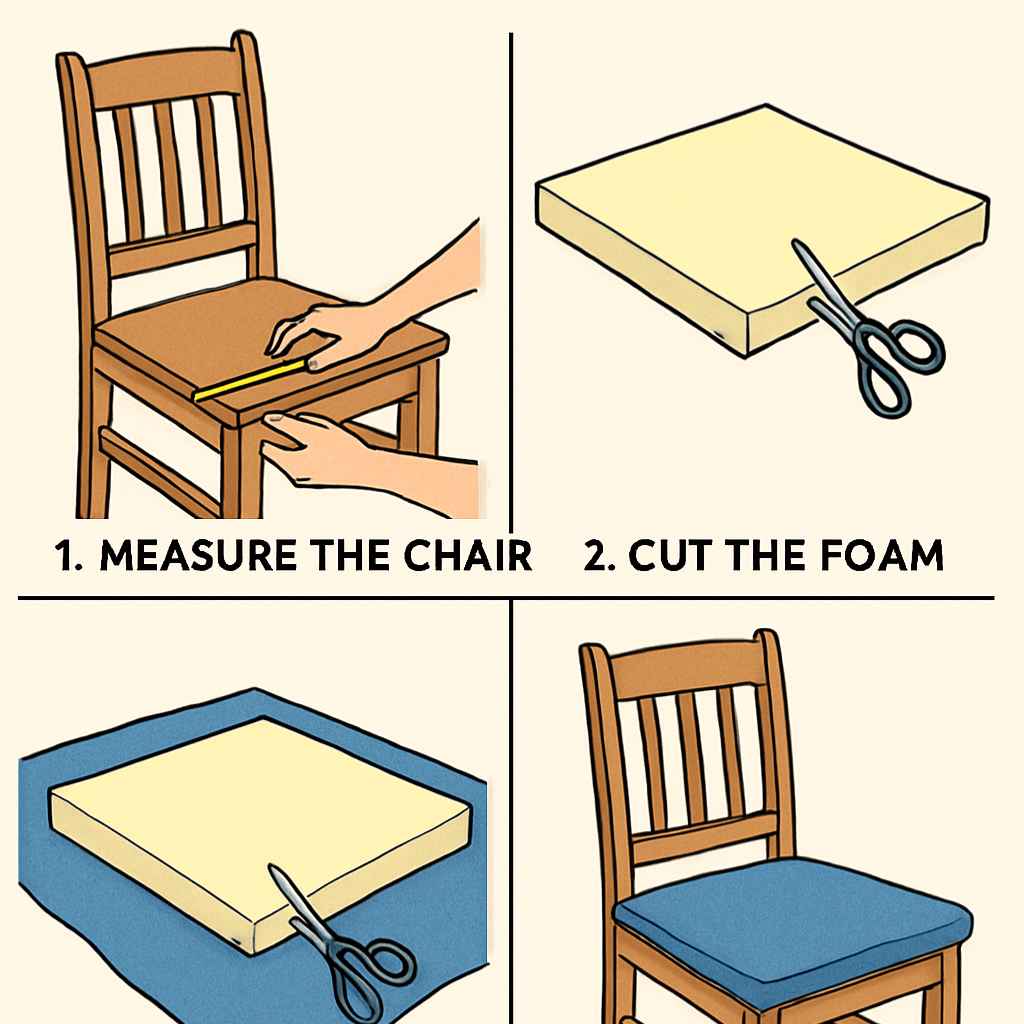
Measuring Your Chair Seat
Getting the size right is key. Use a flexible tape measure. Measure the width and depth of your chair’s seat.
Be exact. If your seat is rounded, try to measure the widest and deepest points. You’ll want the cushion to fit snugly.
It shouldn’t hang over the sides too much. This prevents it from slipping.
Choosing Your Materials: Fabric and Filling
The materials you pick are super important. They affect how your cushion looks and feels. They also affect how long it lasts.
Let’s break it down.
Fabric Choices for Your Cushion Cover
You have so many fabric options! For a kitchen chair, you want something durable. It should also be easy to clean.
Spills happen, especially in a kitchen. Here are some good choices:
- Cotton Duck or Canvas: These are strong and hold up well. They come in many colors and patterns.
- Upholstery Fabric: This is made to be tough. It’s designed for furniture. It often has a nice texture and is stain-resistant.
- Outdoor Fabric: Even if your chairs are inside, outdoor fabric is great. It’s very durable and often water-resistant.
- Linen Blends: For a softer feel, a linen blend can be nice. Just be aware that pure linen can wrinkle more.
Avoid flimsy fabrics like thin cottons or silks. They won’t stand up to regular use. Think about color too.
Darker colors hide stains better. Lighter colors can make a room feel brighter. You can also use a pattern.
This can add a pop of fun. Or choose a solid color to be more subtle.
Fabric Considerations
Durability: Will it wear out fast? Look for tight weaves.
Cleanability: Can you wipe up spills easily? Some fabrics are more stain-resistant.
Feel: Does it feel nice to touch? Some people prefer softer fabrics.
Style: Does it match your room? Color and pattern matter.
Filling Options for Cushion Comfort
This is what makes your cushion soft! The filling determines the cushion’s thickness and how it feels when you sit. Here are popular choices:
- Foam: High-density foam is best. It’s firm but still soft. It keeps its shape well. Look for upholstery foam. It’s made for this. Cheaper craft foam can go flat fast.
- Polyester Fiberfill: This is the fluffy stuff you find in pillows. You can buy it in bags. It’s soft and moldable. You might need a lot of it. It can compress over time.
- Batting: This is a thin layer of padding, often cotton or polyester. You can layer it to get thickness. It’s usually used with other fillings for extra softness.
- Old Clothes/Fabric Scraps: This is a very budget-friendly option! Cut up old t-shirts, towels, or fabric scraps. Pack them tightly into the cushion cover. It gives a firm but soft fill.
Many people like to mix fillings. You could use a layer of foam for support. Then, add a layer of fiberfill on top for extra plushness.
If you use fabric scraps, make sure they are clean and soft. You don’t want seams or buttons poking through.
Filling Quick Guide
For Firm Support: High-density foam, tightly packed fabric scraps.
For Softness: Polyester fiberfill, layered batting.
For a Mix: Foam base with fiberfill top layer.
For Budget: Clean fabric scraps or old clothes.
Step-by-Step: Creating Your Custom Seat Cushion
Okay, let’s get to it! This is where you make it happen. Follow these steps carefully.
You’ll have a cozy seat in no time.
Step 1: Measure and Cut Your Fabric
First, measure your chair seat. Let’s say it’s 16 inches wide and 16 inches deep. You need to add extra fabric for the sides.
This is called the seam allowance and the gusset (the side part). For a typical cushion, add about 4-6 inches to both the width and depth measurements. This allows for the thickness of your cushion and a place to sew.
So, for a 16×16 inch seat, you might cut two pieces of fabric that are 22 inches wide and 22 inches deep. These will be your top and bottom pieces. You’ll also need a long strip of fabric for the sides, called the boxing strip or gusset.
Its length should be the perimeter of your seat (16 + 16 + 16 + 16 = 64 inches). The width of this strip will be the height you want your cushion to be, plus about an inch for seam allowance. Let’s say you want a 3-inch high cushion.
You’d cut this strip about 4 inches wide and 64 inches long. You might need to sew a few strips together to get the full length.
Tip: If your chair seat is rounded, draw a pattern on paper first. Trace that onto your fabric.
Step 2: Prepare Your Filling
If you’re using foam, cut it to the exact size of your chair seat. Make sure it’s a snug fit. If it’s too big, you can trim it.
If it’s too small, you might need to add more filling later.
If you’re using fiberfill, you’ll want to fluff it up. You can also use polyester batting. If you’re using fabric scraps, cut them into smaller pieces or strips.
This helps them fill the space evenly. Try to get a good amount ready. You can always add more later if needed.
Fabric Cutting Cheat Sheet
Top & Bottom: Seat Width + 5 inches (example: 16″ + 5″ = 21″)
Top & Bottom: Seat Depth + 5 inches (example: 16″ + 5″ = 21″)
Side Strip (Boxing): Seat Perimeter + 2 inches (example: (16+16+16+16) + 2″ = 66″)
Side Strip Width: Desired Cushion Height + 1 inch (example: 3″ + 1″ = 4″)
Step 3: Sew the Boxing Strip
Take your long fabric strip for the sides (the boxing strip). Fold it in half lengthwise. The right sides of the fabric should be facing each other.
Sew along one long edge. This creates a long tube. This tube will be the side wall of your cushion.
This seam allowance should be about 1/2 inch.
Now, you need to attach this tube to one of your main fabric pieces (either the top or bottom). Pin the raw edge of the tube to the raw edge of the fabric piece. Make sure the right sides of both fabrics are together.
Start pinning at one corner. Go all the way around. You’ll have extra fabric at the end, which is fine.
Sew this seam with a 1/2 inch allowance. You are essentially sewing the side wall onto the base fabric.
Step 4: Attach the Top Fabric Piece
Now, take your other main fabric piece (the top if you attached the boxing to the bottom, or vice versa). Place it on top of the structure you just created. The right sides of this top piece should be facing the right sides of the boxing strip.
Pin it all around, just like you did with the first piece.
Here’s the tricky part: You need to leave an opening. Leave about a 6-8 inch gap unsewn somewhere along one of the sides. This opening is where you will turn the cushion right side out and add your filling.
Sew this top piece all the way around, except for that gap. Again, use a 1/2 inch seam allowance.
Step 5: Turn and Fill Your Cushion
Carefully reach through the opening you left. Start to pull the fabric through. Turn the whole thing right side out.
Push out the corners so they are nice and sharp. You should now have a fabric shell that looks like a cushion, but it’s empty inside.
Now, start adding your filling. If you’re using foam, slide it in. If you’re using fiberfill or fabric scraps, start stuffing.
Pack it in firmly but evenly. You want the cushion to be plump. It should fill out all the corners.
Don’t be afraid to use a lot of filling. A too-stuffed cushion is better than a flat one.
Make sure the filling goes all the way into the corners. Use your fingers or a ruler to push it in. Smooth out any lumps as you go.
You want an even surface. This will make the cushion comfortable and look professional.
Filling Tips
Evenness: Stuff filling into corners first.
Density: Pack it snugly for support.
Plumpness: Add a little extra; it will compress.
Smoothness: Use your hands to break up clumps.
Step 6: Close the Opening
Once your cushion is filled to your liking, it’s time to close the opening. This is done by hand. You’ll use a stitch called a “ladder stitch” or “invisible stitch.” Fold the raw edges of the opening inward, so they are hidden inside.
Then, use a needle and thread to carefully sew the edges together. Make small stitches. They should catch a bit of fabric from each folded edge.
This stitch is hard to see from the outside. It makes for a clean finish.
Take your time with this step. A neat closing makes a big difference in the final look. Once you’ve sewn the opening shut, give your cushion a final fluff and shape.
You’ve done it!
Closing the Gap
Fold: Tuck raw edges inward.
Stitch: Use a ladder stitch for invisibility.
Secure: Tie off your thread well.
Finish: Fluff and shape the cushion.
Adding Extra Touches: Zippers and Ties
While the basic method above works great, you can make your cushions even better. These extras add style and function.
Removable Covers with Zippers
Having a removable cover is a game-changer. It makes washing so much easier. You can simply unzip it and toss it in the wash.
To do this, you’ll need a zipper that’s about the length of one side of your cushion, or slightly longer than the opening you would have left.
When you’re sewing the main pieces together (Steps 3 & 4), you’ll actually sew the zipper into one of the seams. This requires a bit more precision. You’ll sew the boxing strip to the bottom piece, but leave one side open to are many great tutorials online that show exactly how to install a zipper into a cushion cover.
Expert Tip: Use a zipper that matches or complements your fabric. A contrasting zipper can also be a cool design element!
Attaching Ties for Stability
Ties are great for keeping your cushion from sliding around. This is especially helpful for dining chairs. You’ll want to make these ties from the same fabric as your cushion.
Cut four strips of fabric, each about 1.5 inches wide and 12-18 inches long. Fold them in half lengthwise, right sides together. Sew along the long edge and one short edge, creating a fabric loop or strap.
Turn them right side out and press them flat.
When you’re sewing the boxing strip to the main fabric pieces (Steps 3 & 4), you’ll insert these ties. Pin them to the side seam at the back corners of your cushion. Make sure the raw edges of the ties line up with the raw edges of the fabric you are sewing.
The loops of the ties should be pointing inward. Then, proceed with sewing the main seams. When the cushion is done, you’ll have ties ready to knot around the chair legs.
Tie Placement
Number: Four ties are typical.
Location: Usually at the back corners of the cushion.
Length: Long enough to tie securely around chair legs.
Material: Use strong fabric like your main cushion fabric.
Real-World Scenarios for Your DIY Cushions
Let’s think about where these cushions fit into your life. Every home is different.
The Busy Kitchen
In a kitchen, cushions see a lot of action. Kids might jump on them. Spills from dinner are common.
You need fabrics that are tough. They must be easy to wipe down. Think about washable covers.
Maybe a darker color or a busy pattern. This hides crumbs and small stains. Outdoor fabrics work really well here.
They are made to withstand weather, so they can handle daily life indoors too.
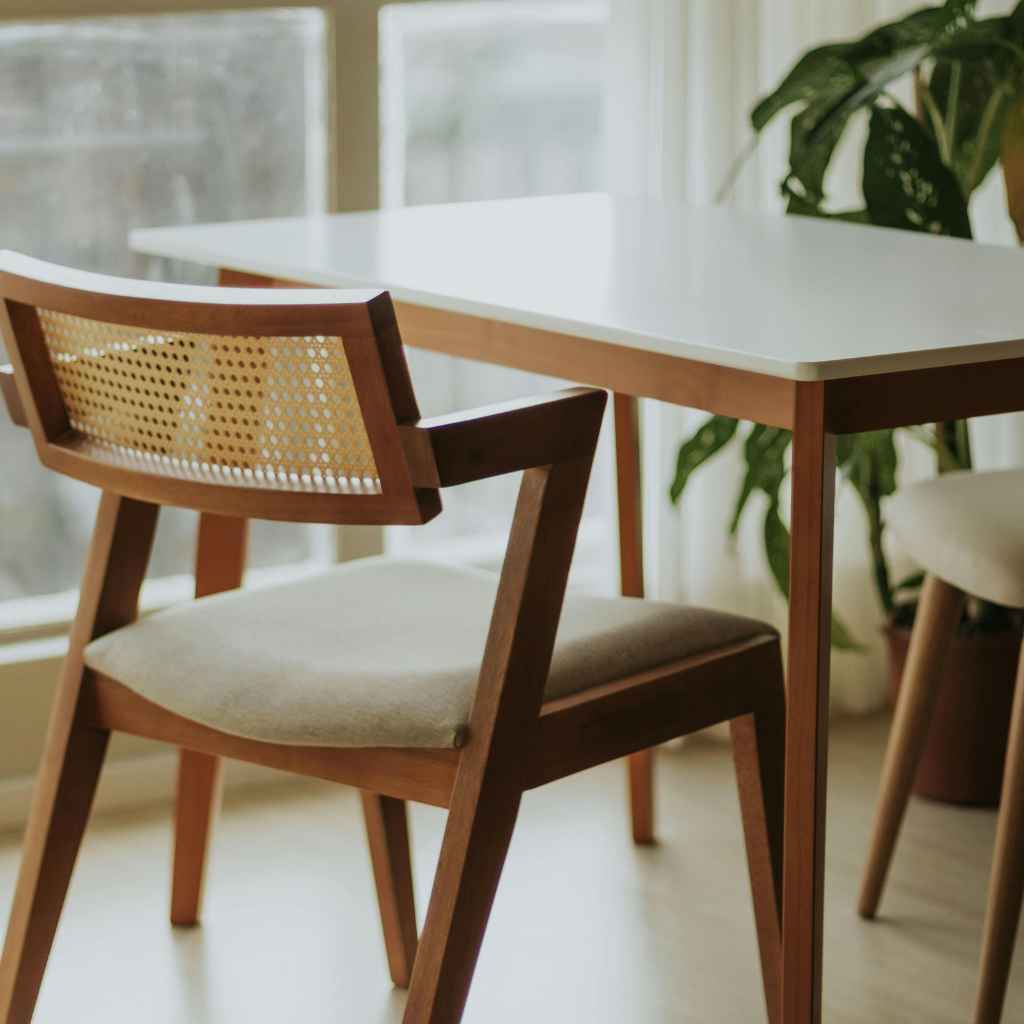
The Cozy Dining Room
For a dining room, comfort is key. You might sit here for a while. Plush filling is good.
Maybe a memory foam topper for extra softness. You want them to look nice too. They are part of your decor.
You could match your curtains or rugs. Ties are very useful here. They stop the cushions from sliding off when people get up and down.
The Craft Room or Office Nook
If your wooden chair is in a workspace, you need support. Long hours sitting require good cushioning. A firmer foam is a good choice.
You don’t want to sink too much. You can also make them in a style that inspires you. Maybe a bright color or a fun geometric print.
Consider ergonomics if you sit for many hours. A well-made cushion can prevent back strain.
Chair Cushion Use Cases
Kitchen: Durable, washable, stain-resistant fabric. Darker colors or patterns.
Dining Room: Comfort and style. Plump filling, ties for stability. Coordinate with decor.
Workspace: Firm support, ergonomic considerations. Inspiring colors or patterns.
When is Your DIY Cushion “Done”?
How do you know when your cushion is perfect? It’s a mix of how it looks and how it feels.
The Comfort Test
Sit on it! Does it feel good? Is it too hard?
Too soft? Does it feel supportive? If it’s too flat, you can always open it up and add more filling.
If it’s too firm, you might need to adjust your filling. A good cushion should give a little but still support you. You shouldn’t feel the hard chair underneath.
The Fit and Finish Check
Does it fit the chair well? Is it too big or too small? Does it look neat?
Are the stitches straight? Is the closing seam tidy? If you added ties, do they feel secure?
Check all the seams for any loose threads. A well-made cushion looks good and feels good.
Normal: A slight compression over time is normal, especially with fiberfill. Your cushion will settle a bit. This is okay.
It still provides comfort.
Concerning: If your cushion flattens completely in a week, the filling might not be dense enough. If seams are pulling apart, you may need to reinforce them. If fabric is tearing, it might be too thin for the use it’s getting.
DIY Cushion Checklist
Comfort: Is it pleasant to sit on?
Support: Does it hold your weight well?
Fit: Does it match the chair seat size?
Appearance: Are the seams neat? Is it plump?
Durability: Do the materials seem strong enough?
Quick Tips for a Better Cushion
Here are some final thoughts to make your project even smoother.
- Pre-wash your fabric: This prevents shrinking after you’ve sewn everything.
- Use a walking foot on your sewing machine: If you have one, it helps feed thick fabric evenly.
- Press your seams: Ironing the seams as you go makes a big difference in the finished look.
- Buy extra filling: It’s better to have too much than not enough.
- Consider a pattern: A subtle pattern can hide minor sewing imperfections.
- Test your stitches: Before sewing your actual cushion, test your stitch length on scraps.
Frequently Asked Questions about DIY Seat Cushions
How thick should a wooden chair seat cushion be?
The ideal thickness depends on your preference and the chair. For most dining or kitchen chairs, a cushion between 2 to 3 inches thick is common. If you want more plushness or support, you can go up to 4 inches.
It’s a balance between comfort and not making the chair too high to sit at comfortably.
Can I make a seat cushion without sewing?
Yes, you can! One popular no-sew method uses fabric glue or strong adhesive tape. You’d cut your fabric larger than your filling, place the filling inside, then wrap the fabric around it, folding and gluing the edges shut.
Another option is to use a ready-made cushion insert and cover it with a no-sew envelope-style pillowcase.
How do I clean my homemade seat cushions?
This depends on your fabric and how you made it. If you used a removable cover with a zipper, you can often machine wash the cover on a gentle cycle. Check the fabric care label.
If the cover is not removable or is made of delicate fabric, spot cleaning with a mild soap and water is best. For foam inserts, they are usually not washable and should be spot cleaned only.
What is the best filling for a firm seat cushion?
For a firm seat cushion, high-density foam is your best bet. Look for upholstery foam that is at least 2 inches thick. You can also achieve a firmer cushion by tightly packing the cover with clean fabric scraps or shredded foam.
Adding a layer of firm batting can also increase firmness.
How do I make sure my cushion stays in place on the chair?
Adding fabric ties to the back corners of your cushion is the most effective way. These ties can be looped around the chair legs and tied securely. You can also use non-slip rug pads or shelf liner cut to the size of your cushion and placed underneath it.
Some people even use Velcro strips attached to the bottom of the cushion and the chair seat.
Can I use old clothes to stuff my cushion?
Absolutely! This is a fantastic way to upcycle old textiles and save money. Clean old t-shirts, towels, or fabric scraps work well.
Cut them into smaller pieces or strips. Pack them tightly into the cushion cover to ensure a firm and even fill. Just make sure there are no hard buttons or zippers left that could poke through the fabric.
Conclusion: Your Comfort, Your Design
Making your own seat cushion for a wooden chair is a rewarding project. It’s about more than just adding comfort. It’s about bringing your own style into your home.
You learned about picking the right materials. You saw how to put it all together step-by-step. You can make something that looks great and feels amazing.
Enjoy your newly cozy seat!