How To Miter Corner Shelves With Uneven Edges (Step-By-Step)
This guide provides a step-by-step method for accurately cutting and fitting mitered corner shelves when the wood edges are not perfectly straight. It focuses on techniques to compensate for imperfections, ensuring a tight and professional joinery.
Understanding the Challenge of Uneven Edges
When we talk about miter joints, we usually picture sharp, clean lines. This works best with perfectly straight wood. Think of two pieces of wood meeting at a 45-degree angle.
This creates a smooth 90-degree corner. The magic happens when the edges meet perfectly flush. This is where the ‘miter’ looks its best.
But what if the wood isn’t like that? Real wood often has slight curves. It can have warps.
Or maybe the cut wasn’t perfectly straight from the start. These small imperfections can throw off your angles. Your 45-degree cuts might not meet cleanly.
You can end up with a gap. This gap might be small. Or it could be quite noticeable.
This makes the whole joint look messy. It can really spoil the look of your project.
Why Miter Joints Matter for Corner Shelves
Miter joints are popular for a reason. They look great. They offer a clean, professional finish.
This is especially true for shelves. Corner shelves can sometimes look bulky. A miter joint hides the end grain.
It creates a smooth, seamless look. It makes the shelf appear to be one solid piece. This is a big part of why people choose them for their homes.
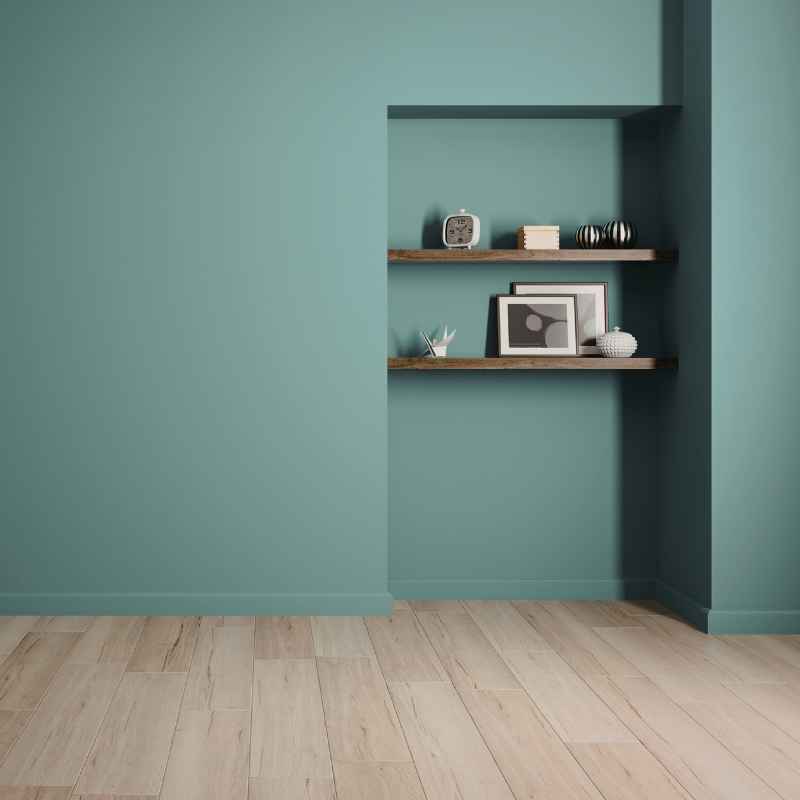
When done right, a mitered corner shelf blends into the wall. It looks like it belongs there. It adds elegance.
It’s a sign of good craftsmanship. But if there are gaps, it shows. It’s like a smudge on a nice painting.
It draws the eye. It makes the whole piece look less finished. This is why getting the miter right, even with tricky wood, is so important.
It’s the difference between a good job and a great one.
Choosing the Right Wood for Your Project
The type of wood you select plays a role. Some woods are more prone to warping. Others are more stable.
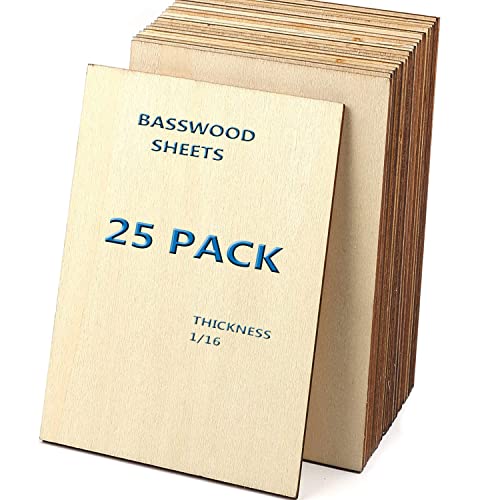
For shelves, hardwoods like oak or maple are often good choices. They are strong. They tend to stay straighter.
Plywood can also work. Especially good quality cabinet-grade plywood. It’s usually very stable.
However, even the best wood can have imperfections. Especially if it’s been stored for a while. Or if it’s natural wood with a unique grain.
The goal isn’t just to pick the ‘perfect’ wood. It’s to know how to handle the wood you have. Even when it’s not factory-perfect.
Understanding wood is part of the process. Knowing its nature helps you prepare.
Wood Selection Tips for Mitered Shelves
- Hardwoods: Oak, maple, or cherry offer strength and stability.
- Plywood: High-quality cabinet-grade plywood is very flat.
- Softwoods: Pine is cheaper but more prone to dents and warping.
- Moisture Content: Ensure wood is properly dried. Wet wood can warp later.
- Inspect Each Piece: Look for warps, twists, or cupping.
Measuring and Marking for the Miter
Accurate measurements are the first step. For a corner shelf, you’re usually dealing with two pieces that will meet at 90 degrees. This means each piece needs a 45-degree cut.
But here’s the catch with uneven edges. You can’t just measure from one end. You need to measure the actual contact line.
Imagine one shelf piece. You need to know where the other shelf piece will touch it. Measure that exact spot.
Then, mark your 45-degree line. This line should follow the intended join. It’s not just about the length of the shelf.
It’s about the angle meeting another angle. Use a good quality tape measure. Make your marks clear.
A sharp pencil or a fine-point marker is best.
For uneven edges, you might need to measure from both the front and back. Or from the top and bottom. This helps you see the overall shape of the edge.
You are trying to capture the ‘true’ line where the two pieces will butt up. Think of it as tracing the space you need to fill. This takes more time than a simple square cut.
But it’s worth it for a clean joint.
Tools You’ll Need
You don’t need a whole workshop. But a few key tools make this job much easier. And safer too.
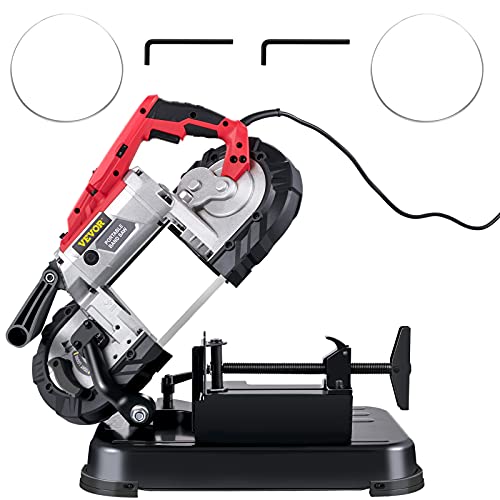
First, a way to make accurate cuts. A miter saw is ideal. It can be a manual miter box with a hand saw.
Or an electric miter saw. The electric ones are faster and often more precise.
Next, you need to measure and mark. A good tape measure is a must. A sharp pencil.
A combination square is also handy. It helps ensure your lines are square to the edge. You’ll also need a way to hold the wood securely.
Clamps are essential. They keep the wood from moving while you cut. Finally, sandpaper is needed for smoothing.
Safety gear is non-negotiable. Always wear safety glasses. Hearing protection is good for power tools.
Gloves can protect your hands. Make sure your work area is clear. Good lighting helps you see what you’re doing.
This makes the whole process safer and more successful.
Essential Tools for Mitered Shelves
- Miter Saw: Manual miter box with hand saw or electric miter saw.
- Tape Measure: For accurate length and angle measurements.
- Pencil: For clear marking of cut lines.
- Combination Square: To ensure lines are perpendicular to edges.
- Clamps: To secure wood during cutting and gluing.
- Sandpaper: Various grits for smoothing edges.
- Safety Glasses: Protect your eyes.
The Strategy for Uneven Edges
The core idea is to make the cuts work together. Even if the wood edges aren’t perfectly straight. You need to account for any bowing or cupping.
This means your marks might not be simple lines. You might need to create a ‘template’ line.
Think of it like this. You have two pieces of wood. Shelf A and Shelf B.
They need to meet at the corner. Take Shelf A. You need to cut it so its edge will meet Shelf B.
Now, hold Shelf B up to Shelf A. Where they would touch, trace that line onto Shelf A. Do this carefully.
This tracing line is your new cut line. It’s specific to how these two pieces fit.
This takes patience. You might need to dry-fit several times. This means holding the pieces together without glue.
Adjusting your marks. Then cutting again. It’s a bit like sculpting.
You’re removing wood to make two odd shapes fit perfectly. This is different from a standard miter cut. It requires more care.
Cutting Technique: Finding the True Angle
When using a miter saw, you set the angle to 45 degrees. This is for a perfect corner. But with uneven edges, the saw’s angle might be slightly off.
You need to adjust based on the actual wood.
Place your wood on the miter saw. Instead of just cutting blindly, check your mark. If the edge is wavy, you might need to set the saw to a slightly different angle.
This is where practice helps. You can test cuts on scrap wood. See how the wavy edge lines up.
A good trick is to use a thin shim. Or a piece of cardboard. Place it under the low spot of the wood.
This can help it sit flatter on the saw. It makes the cut more consistent. You are trying to get the saw blade to follow your traced line as closely as possible.
This requires a steady hand and careful alignment.
What if the unevenness is really bad? You might need to make two passes. A shallow pass first.
Then a deeper one. This helps prevent tear-out. Tear-out is when wood splinters along the cut.
It makes the edge even worse. Take your time. Go slow.
This is not a race.
Step-by-Step Guide for Uneven Edges
Let’s walk through it. Imagine you have your two shelf pieces. Let’s call them Shelf 1 and Shelf 2.
They will form the corner.
Step 1: Initial Fit and Measurement
Place Shelf 1 where it will go. Now, bring Shelf 2 to meet it. Hold them in position.
Look at the corner. See how they meet. Are there any big gaps?
You want the outer edges to be flush. And the inner edges to meet as closely as possible.
Step 2: Marking the First Cut
Take Shelf 1 off. On the edge that will meet Shelf 2, make your mark. This mark should represent the 45-degree line.
But it needs to follow the contour of Shelf 2’s edge. You might need to trace Shelf 2’s edge onto Shelf 1. This is delicate work.
Use a very sharp pencil.
Step 3: Setting Up Your Saw
Set your miter saw to 45 degrees. Position Shelf 1 on the saw. Line up your marked cutting line with the saw blade.
Make sure the blade will cut along your traced line. Double-check the angle. Sometimes, a slight adjustment from 45 degrees is needed to match the curve.
This is a judgment call. Test on scrap if unsure.
Step 4: Making the Cut
Secure Shelf 1 with clamps. Make the cut. Go slow.
Let the saw do the work. Do not force it. Once cut, check the edge.
Does it look better? Is it closer to meeting Shelf 2 cleanly?
Step 5: Marking and Cutting the Second Shelf
Now, repeat the process for Shelf 2. Place Shelf 2 against Shelf 1’s newly cut edge. Trace the edge of Shelf 1 onto Shelf 2.
This is your cut line for Shelf 2. Again, this line should be a 45-degree angle overall. But it follows the curve.
Set your saw for Shelf 2’s cut. Again, test the angle if needed.
Step 6: Test Fit and Refinement
Bring the two cut shelves together. How do they look? Are there small gaps?
Use sandpaper. Gently sand down any high spots. Or areas that are not meeting flush.
You might need to use a block plane for small adjustments. But be very careful not to remove too much.
You are essentially fine-tuning the fit. This stage is crucial. You want a tight joint.
You can use wood filler later for tiny imperfections. But the goal is a clean join with minimal gaps. The sanded edges should meet smoothly.
This process might take a few tries.
Miter Joint Checklist
- Accurate Markings: Did you trace the true contact line?
- Correct Saw Angle: Is it set precisely? Does it need slight adjustment?
- Secure Clamping: Did the wood move during the cut?
- Smooth Cut: Is there tear-out or splintering?
- Test Fit: Do the edges meet with minimal gaps?
- Sanding: Are the edges smooth and flush?
Using Jigs and Aids for Precision
Sometimes, a simple miter saw isn’t enough. Especially for tricky wood. You can make simple jigs.
Or use helpful accessories. For example, a zero-clearance insert on your saw can help. It supports the wood closer to the blade.
This reduces tear-out.
You can also create a custom fence for your saw. This fence can guide the wood more accurately. It can help you hold the wood at the exact angle needed.
Especially if the wood has a slight cup or bow. You might need to build a small support. This support ensures the wood stays flat against the saw base.
Another idea is using a stop block. This ensures your cuts are the same length. While this is more for repeating pieces, it can help with consistency.
If you are making multiple shelves, having them the same length matters. But for the miter joint itself, the focus is on the angle and the fit.
Think about your saw. Does it have a good fence? Can you make precise angle adjustments?
If not, consider how you can add to it. A small piece of plywood can be attached. This can act as a better guide.
These little improvements can make a big difference. They help you achieve that professional look.
The Role of Sanding and Smoothing
After you make your cuts, the edges won’t be perfect. They will likely be a bit rough. Sanding is your best friend here.
Start with a medium grit sandpaper. Something like 120 grit. Gently sand the cut edge.
You are smoothing out any saw marks.
Then, move to a finer grit. Like 180 or 220 grit. This makes the surface smooth to the touch.
It also helps the wood accept glue better. A smooth surface creates a stronger bond. It means the glue can spread evenly.
When sanding the mitered edge, be careful. You don’t want to round over the edge too much. You want to keep that sharp angle.
Sand with the grain as much as possible. If you sand across the grain, you’ll leave marks. These marks can be hard to remove later.
Take your time. Ensure both edges are equally smooth.
Sometimes, after sanding, you might notice a tiny gap. This is where a bit of wood filler can help. But the goal is to make the gap as small as possible before filling.
The less filler you need, the better the joint will look. Filler is for very minor imperfections, not for closing large holes.
Sanding Best Practices
- Start with Medium Grit: Use 100-120 grit to remove saw marks.
- Progress to Fine Grit: Use 180-220 grit for a smooth finish.
- Sand with the Grain: Avoid cross-grain scratches.
- Keep Edges Sharp: Don’t over-sand the mitered angle.
- Clean Dust: Remove all dust before gluing.
Applying Glue and Clamping
This is where your careful work pays off. Use a good quality wood glue. White PVA glue is common.
Apply a thin, even layer to both mitered surfaces. Don’t use too much glue. It will just squeeze out everywhere.
You want enough to create a strong bond. But not so much that it becomes a mess.
Spread the glue evenly. A small brush or a glue spreader works well. Then, bring the two pieces together.
Align them carefully. This is the moment of truth. They should fit snugly.
If they don’t, don’t force it. Go back and check your cuts or sand a bit more.
Now, apply clamps. Use corner clamps if you have them. These are designed for holding mitered corners together.
If not, use regular bar clamps or pipe clamps. Place them so they apply pressure to both pieces. You want to bring the joint together tightly.
But not so tight that you crush the wood fibers.
Put some scrap wood pieces under your clamp jaws. This protects the shelf surfaces. Tighten the clamps until you see a little bit of glue squeeze out along the joint.
This is a good sign. It means you have enough pressure. Wipe away any excess glue immediately with a damp cloth.
Dried glue is hard to remove. And it can prevent stain or finish from adhering properly.
Let the glue dry completely. Check the glue bottle for drying times. Usually, it’s at least a few hours.
But it’s best to leave them clamped overnight. This ensures a rock-solid bond. This is critical for shelf strength.
You don’t want shelves failing.
Dealing with Small Gaps After Gluing
Even with the best efforts, tiny gaps can sometimes appear. Especially with uneven edges. Don’t despair.
Most small gaps can be fixed. The first step is to assess the size of the gap.
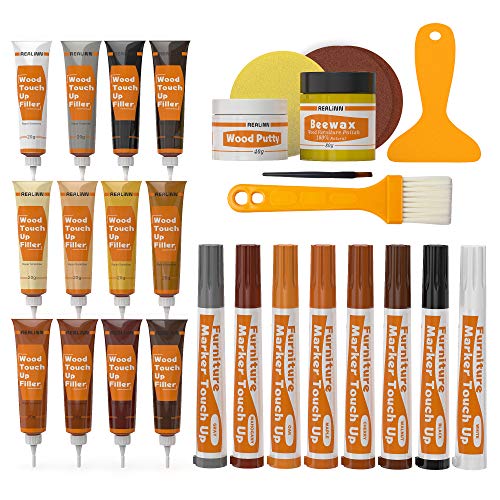
For very small gaps, wood filler is often the solution. Choose a wood filler that matches your wood color as closely as possible. Or a stainable wood filler.
Apply it carefully. Use a small putty knife. Press the filler into the gap.
Smooth it off so it’s flush with the surrounding wood. Let it dry completely.
Once dry, sand the area smooth. Be gentle. You don’t want to sand away the surrounding wood.
If you’re planning to paint, a little filler is usually invisible. If you’re staining, using a stainable filler is key. However, even stainable fillers can sometimes take stain differently.
For larger gaps, wood filler might not be enough. You might consider a wood epoxy. Or even a small piece of matching wood can be carefully fitted into the gap.
This is called a Dutchman repair. It’s more advanced. But it can make a seam almost disappear.
The goal is to make the fix as invisible as possible. For most DIY projects, a well-applied wood filler for tiny imperfections is perfectly fine. It shows you’re willing to refine your work.
It’s part of the process of making something beautiful.
Gap Filling Strategies
- Assess the Gap: Is it small, medium, or large?
- Wood Filler: Best for very small, hairline cracks. Match color or use stainable.
- Wood Epoxy: Stronger for slightly larger gaps. Can be sanded and finished.
- Dutchman Repair: For larger gaps, inlaying a piece of matching wood.
- Sanding: Always sand filler smooth after drying.
Finishing Your Mitered Corner Shelves
Once the glue is dry and any gaps are filled, it’s time for finishing. This protects the wood. And it makes your shelves look amazing.
The type of finish you choose depends on your preference.
You can paint them. A clean coat of primer and then your chosen paint color. You can stain them.
This brings out the natural beauty of the wood. You can use a clear coat like polyurethane or lacquer. This offers protection and a smooth feel.
If you’re staining, test your stain on a scrap piece of the same wood. This is important. Wood can take stain differently.
Especially if you used wood filler. Make sure you like the color before you apply it to your shelves.
Apply your finish evenly. Follow the product instructions. Usually, this involves multiple thin coats.
Sand lightly between coats with very fine sandpaper. This creates a smooth, durable finish. It makes your shelves look professionally done.
Take pride in this final step. It seals all your hard work.
When to Consider Alternatives to Miter Joints
While miter joints are beautiful, they aren’t always the best choice. Especially if you’re new to woodworking. Or if your wood is extremely warped.
There are other ways to join corner shelves.
One option is a butt joint. This is where one shelf piece butts directly into the other. You can reinforce this with screws or nails.
It’s simpler. But it doesn’t have the clean look of a miter. You’ll see the end grain of the wood.
Another method is a rabbet joint or dado joint. These involve cutting grooves into the wood. They create a stronger connection.
But they are more complex to make. They require different tools and techniques.
For uneven edges, sometimes a simple miter cut and then filling the gaps with a colored epoxy can look quite modern and intentional. It depends on your aesthetic. If perfection is hard to achieve, sometimes embracing the imperfections can lead to a unique look.
Don’t be afraid to choose a simpler joint. The goal is a functional and attractive shelf. If the miter proves too challenging, there are great alternatives.
The important thing is that the shelf is sturdy and looks good in your space. It’s your home, after all.
Personal Experience: The Day the Shelf Gap Mocked Me
I remember one late afternoon, I was finishing up a built-in bookshelf in my living room. The corner pieces were supposed to be mitered. I had picked out some nice oak.
It looked pretty straight. I was feeling pretty confident. I’d done a few miters before.
I figured this would be a breeze.
I measured carefully. I marked my lines. I set up my trusty miter saw.
The first cut seemed okay. Then came the second piece. As I brought them together, I saw it.
A small, but distinct, gap. Right in the middle of the join. It was maybe only a sixteenth of an inch wide.
But it was enough to make me groan. It looked like a tiny frown. It mocked my efforts.
I tried sanding. I tried a little shim. Nothing seemed to make it disappear.
I felt that familiar wave of frustration wash over me. I sat there, staring at the two pieces of wood. The sun was starting to set, casting long shadows.
It felt like the gap was getting bigger. I wanted to just glue it and fill it. But I knew that little gap would bug me forever.
It was a reminder of what wasn’t quite right. That day taught me that even with good wood, you have to be prepared for surprises. And sometimes, you need to be willing to go back and redo a cut, even if it means losing some daylight.
Real-World Context: Kitchen Corner Cabinets
Think about your kitchen. Those corner cabinets are tricky spaces. Often, they use a mitered joint for the cabinet doors or the countertop.
Imagine the countertop needing to meet at the corner. The wood there might not be perfectly straight. Especially if it’s a natural wood like granite or butcher block.
Or even laminate.
The installer has to deal with this. They can’t just cut a perfect 45-degree angle. They have to account for the slight curves.
They use specialized saws. And a lot of skill. They might use templates.
Or even make a cardboard mock-up first. This ensures the final pieces fit perfectly. The goal is always a seamless look.
Where the countertop appears to flow around the corner.
In a kitchen, these joints are crucial. They prevent water from seeping in. They make cleaning easier.
A tight joint means less gunk builds up. It looks professional. It adds value to the kitchen.
This is why the techniques for dealing with imperfect edges are so important in real-world applications. It’s not just about aesthetics. It’s about function too.
What This Means for Your Shelves
When you’re building your own shelves, this knowledge is empowering. You know that uneven edges are normal. You don’t have to give up on your mitered corner.
You have strategies.
When it’s Normal: It’s completely normal for wood to have slight imperfections. A little bit of cupping or a slightly wavy edge is very common. This is why learning to adapt your cuts is key.
When to Worry: If the wood is severely warped or twisted, it might be too difficult to get a good miter. If the pieces don’t come close to fitting even with adjustments, you might have a problem with the wood itself. Or the angle of your cut is way off.
Simple Checks: Before you cut, hold the two pieces together. See how they naturally want to meet. Look for the biggest gaps.
This tells you where you need to focus your adjustments. After cutting, dry-fit them often. This helps you see how your adjustments are working.
Before you even think about glue.
Quick Tips for Perfect Mitered Corners
Here are some quick takeaways to help you get that perfect miter:
- Measure Twice, Cut Once: Always. Especially with tricky edges.
- Trace the Contact Line: Don’t just measure from the end. Trace where the wood meets.
- Test Your Angle: A standard 45 degrees might need slight tweaking.
- Use a Sharp Blade: A dull blade causes tear-out.
- Clamp Securely: Wood must not move during the cut.
- Sand Smoothly: Both surfaces must be smooth for good glue adhesion.
- Dry Fit Often: Check your progress before committing to glue.
- Don’t Over-Sand: Keep the mitered edge sharp.
- Wipe Glue Fast: Clean up excess glue before it dries.
- Embrace Imperfection (Slightly): Small gaps can often be filled.
Frequently Asked Questions
Can I use a hand saw for mitered corner shelves?
Yes, you can. You’ll need a miter box, which is a guide that holds the wood and directs your hand saw at specific angles, usually 45 and 90 degrees. It takes more practice and effort than a power miter saw, but it is possible to get good results for straight edges.
For uneven edges, you’ll need to be even more careful with your marking and cutting, potentially needing to adjust the angle slightly.
What kind of wood is best for making shelves with mitered corners?
Hardwoods like oak, maple, or cherry are excellent choices. They are dense, strong, and less likely to warp. High-quality plywood can also work well as it’s very stable.
Softwoods like pine are cheaper but more prone to dents and can be more difficult to get a clean miter with due to their softer nature and tendency to splinter.
How do I prevent gaps in my mitered corner shelves?
Accurate measuring and cutting are key. For uneven edges, you must trace the actual contact line between the two pieces. Test fit frequently.
Ensure your saw blade is sharp. Use clamps to hold the wood steady. Sand the edges smooth.
For tiny remaining gaps, wood filler can be used after gluing.
My wood has a slight cup. How does that affect miter cuts?
A cup means the wood is bowed. When you place it on a miter saw, one edge might lift off the saw bed. You can try using shims to support the low side.
Or, you might need to adjust your saw’s angle slightly to compensate for the curve. Trace the exact contact line between the two pieces to ensure they align correctly.
What is the best way to join two mitered shelf pieces without a corner clamp?
You can use regular bar clamps or pipe clamps. Place scrap wood pieces between the clamp jaws and the shelf to prevent damage. Position the clamps to apply firm pressure directly across the mitered joint.
Ensure the edges are pulled together tightly without over-crushing the wood. You might need two clamps, one on each side of the corner.
Is it okay to have small gaps that I fill with wood filler?
Yes, for many DIY projects, it is perfectly acceptable to fill small gaps with wood filler. The goal is to make the joint as tight as possible before gluing. If you have very tiny, almost invisible gaps, a well-applied wood filler can make the joint look seamless, especially if you plan to paint the shelves.
For stained finishes, use a stainable filler and test its color match.
Final Thoughts on Achieving a Seamless Look
Creating mitered corner shelves with uneven edges is a rewarding challenge. It pushes your skills. It teaches you to adapt.
The key is patience and careful observation. Don’t aim for impossible perfection. Aim for a beautiful, functional shelf.
One that looks like you put thought into it. Even if the wood wasn’t perfect. Your home deserves your best effort.
And your shelves will show it.