Create Your Own Stunning Do It Yourself Chandelier
Hey there! Have you ever walked into a room and been completely captivated by a gorgeous chandelier? The way it sparkles, casting light in all directions, can transform any space into something magical. I’ve always loved chandeliers, but let’s be honest—those store-bought ones can cost a fortune! That’s why I dove into the world of do-it-yourself chandeliers. Trust me, making your own is not only budget-friendly but also a fun, creative way to add a personal touch to your home. In this guide, I’m sharing everything I’ve learned from my own DIY chandelier projects. Whether you’re a crafting newbie or a seasoned pro, I’ll walk you through the steps, ideas, and tips to create a chandelier that’s uniquely yours. Let’s get started!
Why Choose a DIY Chandelier?
When I first started exploring home improvement projects, I was shocked at how expensive chandeliers can be. Even simple ones at big-box stores can set you back hundreds of dollars. But here’s the thing: a DIY chandelier lets you control the cost, style, and vibe. You can customize it to match your home’s decor, whether you love modern minimalism, rustic charm, or boho chic. Plus, there’s something incredibly satisfying about saying, “I made that!” when guests admire your work.
Creating your own chandelier also means you can repurpose materials you already have, making it an eco-friendly choice. From mason jars to driftwood, the possibilities are endless. And don’t worry if you’re not super handy—I wasn’t either when I started. With a little patience and creativity, anyone can pull this off.
Materials You’ll Need for a DIY Chandelier
Before we dive into the how-to, let’s talk about materials. The beauty of a DIY chandelier is that you can use almost anything to create a stunning piece. Over the years, I’ve experimented with different supplies, and here’s a breakdown of what you’ll typically need:
| Material | Purpose | Where to Find It |
|---|---|---|
| Base or Frame | The structure that holds everything together (e.g., wire basket, old lamp) | Thrift stores, hardware stores |
| Light Bulbs | Provides the lighting (LEDs are energy-efficient and safe) | Hardware stores, online retailers |
| Wiring Kit | Connects the bulbs to a power source | Hardware stores, online DIY shops |
| Decorative Elements | Adds style (e.g., crystals, beads, mason jars, wood) | Craft stores, flea markets, your home |
| Tools (screwdriver, pliers) | For assembling and securing parts | Your toolbox or hardware stores |
| Paint or Spray Paint | Customizes the frame or accents | Craft stores, hardware stores |
You don’t need to buy everything new. I’ve found amazing frames at thrift stores and even used old lampshades as bases. Check your garage or attic—you might already have some treasures waiting to be transformed.

Planning Your Chandelier Design
When I made my first chandelier, I learned the hard way that planning is everything. You don’t want to start gluing beads or wiring lights without a clear vision. Here’s how I approach the design process:
First, think about the style you want. Are you going for something glamorous with crystals? Or maybe a rustic look with wood and twine? I once made a chandelier using mason jars for a cozy farmhouse vibe, and it’s still one of my favorite projects. Browse Pinterest or home decor magazines for inspiration, but don’t be afraid to add your own flair.
Next, consider the size. Measure the space where your chandelier will hang. A dining room might need a larger piece, while a small entryway calls for something more compact. I made the mistake of building a chandelier that was too big for my living room, and it overwhelmed the space. Lesson learned: always measure twice!
Finally, think about lighting. Do you want bright, functional light or a soft, ambient glow? I recommend LED bulbs because they’re energy-efficient and don’t get too hot, which is important if you’re using materials like fabric or wood.
Step-by-Step Guide to Building Your Chandelier
Now, let’s get to the fun part—actually making your chandelier! I’ll walk you through the process I used for a simple yet elegant chandelier made from a wire basket and string lights. Feel free to tweak this to match your vision.
Step 1: Prepare Your Base
I started with a wire basket I found at a thrift store for $5. You can also use an old lampshade frame, a hula hoop, or even a wooden embroidery hoop. Clean it thoroughly and remove any rust or dirt. If you want to paint it, now’s the time. I sprayed mine with gold paint for a touch of elegance. Let it dry completely before moving on.
Step 2: Add the Lighting
For my chandelier, I used a string of LED fairy lights because they’re easy to work with and don’t require complex wiring. If you’re comfortable with electrical work, you can use a chandelier wiring kit with sockets for standard bulbs. Thread the lights through the base, securing them with zip ties or floral wire. Make sure the plug or wiring is accessible so you can connect it to a power source later.
Safety tip: If you’re using a wiring kit, double-check that all connections are secure. I once had a loose wire that caused a bulb to flicker, and it was such a hassle to fix after everything was assembled.
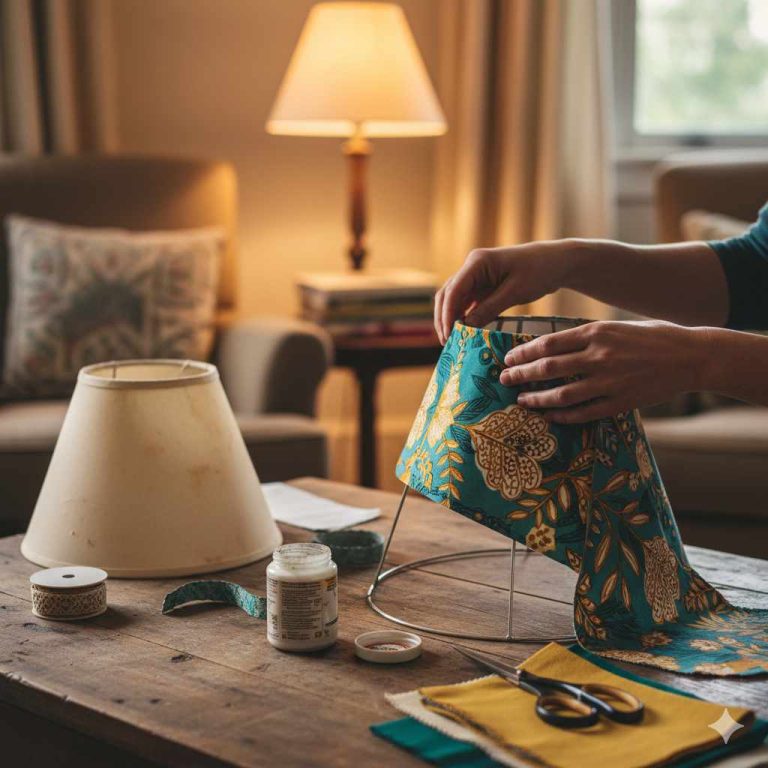
Step 3: Add Decorative Elements
This is where your creativity shines! For my chandelier, I draped strands of faux crystals from the basket to catch the light. You could also use glass beads, shells, or even small mason jars to hold tea lights. I’ve seen amazing chandeliers made with driftwood, wine bottles, or even old silverware. Attach your decorations with hot glue, wire, or string, depending on the material.
Step 4: Test the Lighting
Before you hang your chandelier, plug it in to make sure everything works. Adjust the lights or decorations if needed. I learned to do this step early after spending hours on a chandelier only to realize one of the light strands was faulty.
Step 5: Hang Your Chandelier
Choose a spot with a sturdy ceiling hook or existing light fixture. If you’re replacing an old fixture, turn off the power at the breaker to stay safe. I used a ceiling hook rated for 50 pounds to ensure my chandelier was secure. If you’re not hardwiring it, you can use an extension cord and hide it along the ceiling or wall with cord covers.
Creative DIY Chandelier Ideas
Over the years, I’ve tried all sorts of chandelier designs, and I want to share a few of my favorites to spark your imagination:
- Mason Jar Chandelier: Perfect for a farmhouse or rustic look. I used six small mason jars, each holding an LED tea light, and hung them from a wooden board. It’s simple but so charming.
- Crystal Bead Chandelier: I strung strands of clear beads from a wire frame to create a glamorous, sparkling effect. It looks high-end but cost less than $30 to make.
- Driftwood Chandelier: For a beachy vibe, I used pieces of driftwood tied together with twine and wrapped with fairy lights. It’s perfect for a coastal home.
- Upcycled Lampshade Chandelier: I took an old lampshade, removed the fabric, and wrapped the frame with burlap and fairy lights. It’s a great way to repurpose something you already have.
Each of these projects took less than a weekend, and none of them broke the bank. The key is to use materials that speak to you and fit your home’s style.
Tips for a Professional-Looking Chandelier
I’ve made my share of mistakes, so let me save you some trouble with these tips:
- Balance is Key: Make sure your decorations are evenly spaced to avoid a lopsided look. I use a ruler or measuring tape to keep things symmetrical.
- Test Weight Capacity: Before hanging, test your chandelier’s weight. My first one was heavier than I thought, and I had to reinforce the ceiling hook.
- Hide the Wires: Use cord covers or paint them to blend with your ceiling. It makes a huge difference in the final look.
- Keep Safety First: If you’re not sure about electrical work, stick to battery-powered or plug-in lights. I always double-check that my materials are heat-resistant.
Budgeting for Your DIY Chandelier
One of the best things about a DIY chandelier is how affordable it can be. Here’s a rough breakdown of costs based on my projects:
| Item | Estimated Cost |
|---|---|
| Base (e.g., wire basket) | $5–$20 |
| LED Lights or Wiring Kit | $10–$50 |
| Decorative Elements | $5–$30 |
| Tools (if needed) | $10–$30 |
| Total | $30–$130 |
You can keep costs down by shopping at thrift stores, using coupons at craft stores, or repurposing items from around your home. My most expensive chandelier cost about $100, but it still saved me hundreds compared to a store-bought one.
Maintaining Your DIY Chandelier
Once your chandelier is up, you’ll want to keep it looking great. Dust it regularly with a soft cloth or feather duster to prevent buildup. If you used delicate materials like crystals or beads, be gentle to avoid damage. I check the wiring every few months to make sure everything is secure, especially if I used plug-in lights. If you notice any flickering or dimming, replace the bulbs right away to keep the glow consistent.
Why DIY Chandeliers Are Worth the Effort
I’ll be honest—making a chandelier takes time and a bit of patience. But every time I look at the ones I’ve created, I feel a sense of pride. They’re not just light fixtures; they’re pieces of art that tell a story about my creativity and style. Plus, I’ve saved so much money compared to buying chandeliers from high-end stores. Whether you’re decorating a dining room, bedroom, or even a patio, a DIY chandelier adds a personal touch that you can’t get from anything mass-produced.
If you’re hesitant, start small. Try a simple design with fairy lights and a basic frame. Once you see how easy and fun it is, you’ll be hooked. I’m already planning my next chandelier, and I can’t wait to see what you create!
FAQs
How Long Does It Take to Make a DIY Chandelier?
It depends on the complexity, but most of my projects took one to two days. Simple designs, like a fairy light chandelier, can be done in a few hours. More intricate ones with wiring or lots of decorations might take a weekend.
Do I Need Electrical Skills to Make a Chandelier?
Not necessarily! I’ve made plenty of chandeliers using battery-powered or plug-in lights, which are super easy and safe. If you want to use a wiring kit, basic electrical knowledge helps, but you can learn from online tutorials. Always turn off the power if you’re working with ceiling wiring.
Can I Make a Chandelier on a Tight Budget?
Absolutely! My cheapest chandelier cost about $20 using a thrift store frame and fairy lights I already had. Shop secondhand, repurpose items, and look for sales at craft stores to keep costs low.
What’s the Easiest DIY Chandelier for Beginners?
I recommend starting with a wire basket and LED fairy lights. It’s simple, requires minimal tools, and looks amazing. You can add beads or other decorations to make it your own without much effort.
How Do I Make Sure My Chandelier Is Safe?
Use LED bulbs to avoid heat buildup, secure all wires tightly, and make sure your ceiling hook can handle the weight. If you’re unsure about electrical work, stick to battery-powered or plug-in lights. Always double-check your setup before hanging.