Do You Need Joist Tape on Treated Wood
Building something great, like a deck or a fence, often means working with pressure-treated wood. It’s tough and lasts a long time. But when you start putting things together, you might wonder about the little details.
One question that pops up is Do You Need Joist Tape on Pressure Treated Wood? It can seem confusing at first, especially if you’re new to building projects. Don’t worry, though!
We’ll make it super simple to figure out. Let’s get started and learn exactly what you need to do to protect your project.
Protecting Your Deck Joists
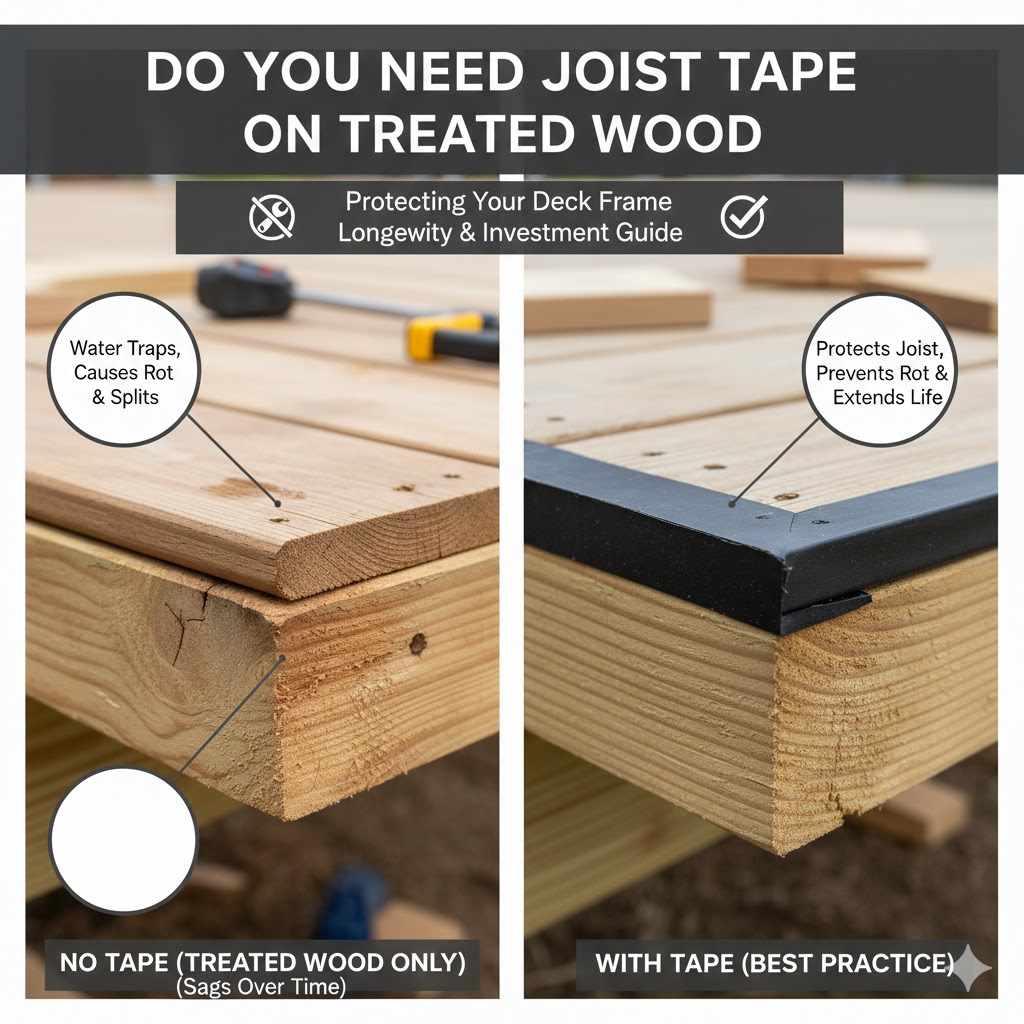
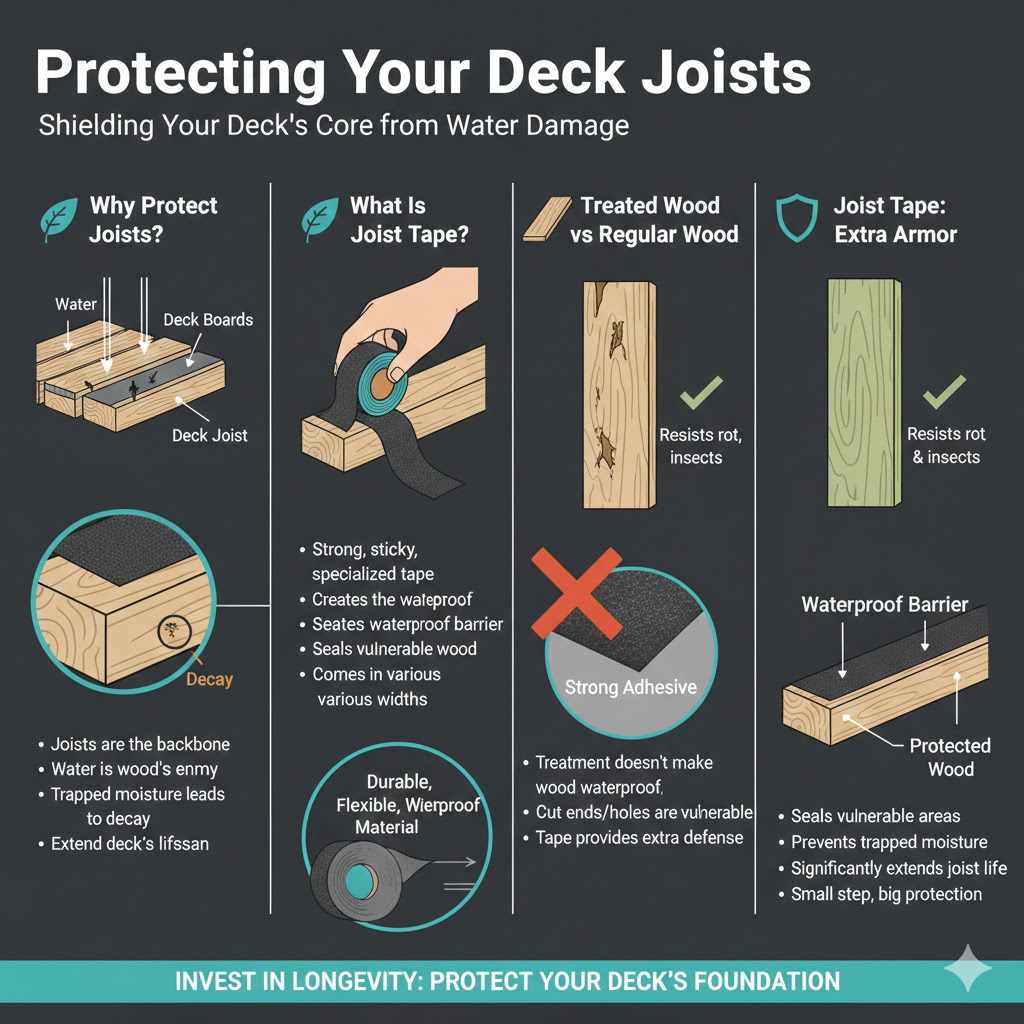
When you’re building a deck, the joists are the backbone. They hold up the deck boards you walk on. Pressure-treated lumber is great because it resists rot and bugs.
But even the best wood can get damaged over time, especially where water can sit. That’s where joist tape comes in. It acts like a shield for your joists.
Imagine your deck joists are like the sturdy beams of a house. They need to stay strong for many years. Water is the biggest enemy of wood.
Even pressure-treated wood isn’t completely immune to moisture, especially at the cut ends or drilled holes. When water gets trapped, it can lead to decay and weaken the structure. This is why taking steps to prevent water damage is so important for a long-lasting deck.
Joist tape is a special kind of adhesive strip designed to seal the tops of your joists. It creates a waterproof barrier. This barrier stops rain, snow, and even dew from soaking into the wood.
It’s a simple addition that makes a big difference in how long your deck will last.
What Is Joist Tape?
Joist tape is basically a strong, sticky tape made to stick to wood. It’s not like the tape you use for wrapping gifts or fixing things around the house. This tape is designed to be tough and stand up to the weather.
It’s typically made from a durable, flexible material that’s waterproof. The underside has a very strong adhesive that sticks firmly to the wood. When you apply it to the top of a joist, it creates a seamless, protective layer.
This layer prevents water from seeping into any small cracks or the grain of the wood.
The tape comes in rolls, kind of like duct tape, but it’s much more specialized. You can buy it in different widths to fit various sizes of joists. Some tapes are black, while others might be other colors, but the color doesn’t usually matter for its function.
What’s important is how well it sticks and how long it lasts outdoors.
Why Use Tape on Treated Wood?
You might think, “It’s pressure-treated wood, isn’t that enough?” Pressure-treated wood is treated with chemicals to resist rot and insects. This makes it last much longer than regular wood, especially in outdoor conditions. However, the treatment doesn’t make it totally waterproof.
When you cut pressure-treated wood, you expose the untreated interior. This is especially true for the top surface of the joists. When you place deck boards on top, any water that gets between the joist and the deck board can get trapped.
This trapped moisture is what can eventually lead to rot, even in pressure-treated wood.
Joist tape acts as an extra layer of defense. It seals off these vulnerable areas. It stops water from reaching the wood surface directly.
This significantly extends the life of your joists and your entire deck structure. It’s a small step that offers big protection against the elements.
Pressure Treated Wood vs. Regular Wood
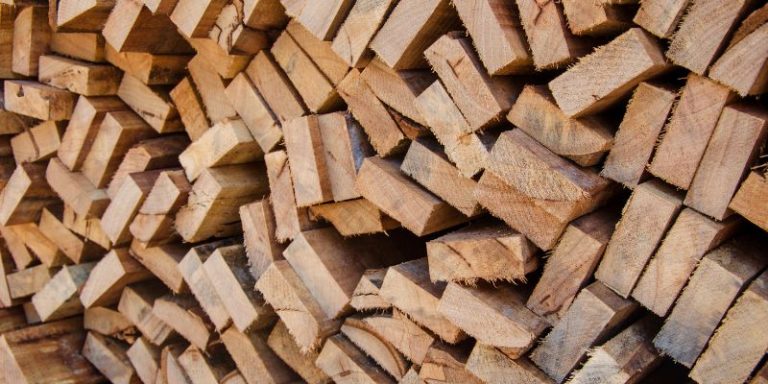
Pressure-treated wood is made by forcing chemicals deep into the wood fibers. This process makes it very resistant to rot, decay, and insect attack. Because of this, it’s a popular choice for outdoor projects like decks, fences, and pergolas.
It can last for decades when properly maintained.
Regular, untreated wood is much more susceptible to damage from moisture and pests. Without protection, it will rot and break down relatively quickly when exposed to the outdoors. This is why joist tape is generally considered more of a best practice for pressure-treated wood, as it’s already designed for longevity.
However, it would be even more critical for untreated wood if you were to use it in a damp environment.
The chemicals in pressure-treated wood are meant to prevent biological decay. But they don’t create an impenetrable barrier against water. Water can still find its way into the wood, especially in areas where it’s constantly exposed.
Joist tape seals these areas, preventing that moisture from causing damage over time. It’s like giving your already tough wood an extra suit of armor.
The Purpose of Joist Tape
The main goal of joist tape is to create a protective barrier on top of deck joists. This barrier stops water from getting into the wood. This is really important for the health and longevity of your deck.
When rain falls on your deck, water can run down between the deck boards and the joists. If there’s no protection, this water sits on the wood. Over time, this can lead to rot and decay.
Joist tape seals this gap, preventing water from pooling and damaging the joists.
This protection is especially vital for the structural integrity of your deck. The joists are what support the weight of people, furniture, and the deck boards themselves. Keeping them strong and rot-free ensures your deck is safe and sound for years to come.
It’s a simple way to get maximum life out of your investment.
Preventing Rot and Decay
Rot and decay are the natural enemies of any outdoor wood structure. They are caused by fungi that feed on the wood fibers. Moisture is the key ingredient that allows these fungi to grow and spread.
Pressure-treated wood is designed to resist these fungi. However, the treatment doesn’t make the wood completely impervious to moisture. When water gets trapped on the surface of a joist, especially in areas where deck boards are attached, it creates a perfect environment for rot to start.
This can happen even if the wood is only slightly damp for extended periods.
Joist tape acts as a sacrificial barrier. It takes the brunt of the moisture, keeping the wood dry underneath. This prevents the fungi from ever getting a foothold, significantly slowing down the process of rot and decay.
By sealing the top of the joist, you’re essentially creating a dry sanctuary for the wood that supports your deck.
Extending Deck Lifespan
A deck is a significant investment. You want it to last as long as possible. Joist tape plays a key role in making that happen.
By protecting the joists, you’re protecting the very foundation of your deck.
Joists that are protected from moisture will remain strong and stable for much longer. This means you won’t have to worry about replacing them prematurely. This saves you money and hassle in the long run.
A deck that lasts longer also means more years of enjoyment for you and your family.
Consider a deck built in a region with a lot of rain or snow. Without joist tape, the constant exposure to moisture can lead to premature failure of the joists. This might mean having to rebuild parts of the deck sooner than expected.
With joist tape, you’re adding years of life to the structure, ensuring it remains safe and attractive for a much greater period.
Protecting Against Water Damage
Water damage is the most common cause of premature failure in outdoor wooden structures. It can come from rain, snowmelt, sprinklers, or even condensation.
When water sits on the surface of wood, it can be absorbed. This absorption can cause the wood to swell. As it dries, it shrinks.
This constant cycle of swelling and shrinking can lead to cracks and warping. It also creates pathways for rot and mold to develop.
Joist tape creates a continuous waterproof seal. It prevents water from penetrating the wood in the first place. This protection is especially important on the horizontal surfaces of the joists where water tends to collect.
By diverting water away from the wood, joist tape significantly reduces the risk of water-related damage.
Is Joist Tape Necessary for Pressure Treated Wood?
This is the big question many DIY builders ask. While pressure-treated wood is designed to last, it’s not indestructible. Joist tape offers an extra layer of defense that can be very beneficial.
Think of it like wearing a raincoat. Even if you’re wearing a good jacket, a raincoat adds an extra layer of protection from heavy rain. Joist tape does something similar for your deck joists.
It’s a best practice that many professionals recommend for a truly long-lasting deck.
For most outdoor deck projects, especially those in wetter climates, using joist tape is highly recommended. It’s a small cost that can prevent major headaches and expenses down the line. It ensures your deck remains safe and looks good for many, many years.
Best Practices in Deck Construction
Experienced deck builders often swear by joist tape. It’s considered a standard part of high-quality deck construction. Skipping this step can sometimes lead to problems later on.
The reason it’s a best practice is simple: it addresses a known weakness in wood structures exposed to the elements. Even with pressure treatment, the top surface of joists is a prime spot for moisture to get trapped. This can compromise the integrity of the joists over time.
By applying joist tape, you are proactively preventing rot and decay. This ensures that the structural components of your deck remain sound. It’s an investment in the long-term safety and durability of your deck.
Many deck warranties may even require its use for coverage.
When Is It Most Important?
Joist tape is most important in situations where your deck will be exposed to significant moisture. This includes:
- Decks in rainy or humid climates.
- Decks built close to the ground, where moisture can rise from the soil.
- Decks with large overhangs that can trap water.
- Decks where water might collect due to the design or grading.
If you live in a very dry climate with little rainfall, the need for joist tape might be less critical, but it still offers a good protective measure. The added protection is always a good idea for any outdoor structure that needs to withstand the elements year after year. It’s better to have it and not need it than to need it and not have it.
The Cost Factor
When you look at the cost of building a deck, joist tape might seem like an extra expense. However, it’s a relatively small investment compared to the overall cost of the project and the potential cost of repairs later.
A roll of joist tape can cost anywhere from $15 to $30, depending on the brand and size. For a typical deck, you might need a few rolls. When you compare this to the cost of replacing rotted joists, which can run into hundreds or even thousands of dollars, it’s a very wise purchase.
Think of it as cheap insurance for your deck. It’s a way to ensure that your deck stays strong, safe, and beautiful for as long as possible without needing major repairs due to moisture damage. The peace of mind knowing your deck is protected is well worth the small upfront cost.
How to Apply Joist Tape Correctly
Applying joist tape is a straightforward process. If you follow these steps, you’ll get a good, lasting seal on your joists.
The key is to make sure the surface is clean and dry before you start. This allows the adhesive to stick properly. You’ll want to measure and cut the tape to fit each joist.
Then, peel off the backing and press it down firmly. Smoothing it out helps create a good seal.
Taking your time and doing it right will ensure the tape performs its job effectively. It’s a simple step that adds significant value to your deck’s lifespan. Let’s walk through it step by step.
Preparation is Key
Before you even think about applying the tape, you need to get the joists ready. This means making sure they are clean and dry. Any dirt, sawdust, or moisture will prevent the tape from sticking properly.
If your lumber is new, it might have some dust from the mill. You can brush this off. If the lumber has been sitting out in the rain, you’ll need to let it dry completely.
This might take a day or two, depending on the weather. You can also wipe down the tops of the joists with a clean, dry cloth.
A clean surface is essential for the adhesive on the joist tape to bond well. If the tape doesn’t stick properly, it won’t be able to create that waterproof seal, defeating its purpose. So, take a little extra time here; it’s worth it.
Applying the Tape
Once your joists are clean and dry, you can start applying the tape. It’s best to work on one joist at a time. You’ll want to start at one end of the joist.
Peel back a few inches of the backing paper from the tape roll. Align the edge of the tape with the edge of the joist. Then, press the exposed sticky side of the tape firmly onto the joist.
Slowly pull the backing paper away with one hand while pressing the tape down with the other hand.
Make sure to press down firmly as you go. You want to eliminate any air bubbles or wrinkles. These can create weak spots where water can eventually seep in.
Overlap the tape slightly at the ends of the joists if you need to, ensuring a continuous seal.
Cutting and Overlapping
When you reach the end of a joist, you’ll need to cut the tape. Use a utility knife or a strong pair of scissors for this. Cut the tape so it sits neatly on the joist, extending just slightly over the edge if needed to meet the next piece or to wrap around a corner.
If you need to join two pieces of tape end-to-end, or if you’re wrapping around a post, make sure to overlap the tape. A slight overlap of an inch or two will create a better seal. This ensures there are no gaps for water to penetrate.
Think of it like shingles on a roof; the overlap is what keeps the water out.
Carefully smooth down any overlaps to ensure they are pressed firmly. This makes the seam as waterproof as possible. A well-applied overlap is crucial for maintaining the integrity of the waterproof barrier.
Tools You Might Need
Applying joist tape is pretty simple and doesn’t require a lot of specialized tools. Here’s what you’ll likely need:
- Measuring tape: To measure the length of your joists and cut the tape accurately.
- Utility knife or sharp scissors: For cutting the tape cleanly. A sharp blade makes for a much neater cut and easier application.
- Clean, dry cloths: To wipe down the joists and ensure they are free of dust and moisture.
- Optional: A putty knife or roller: Some people like to use a putty knife or a small roller to press the tape down very firmly, especially over seams or in tight spots. This helps ensure maximum adhesion.
Having these simple tools ready will make the job go much smoother and faster. It ensures you can apply the tape correctly for the best results.
Alternatives and Considerations
While joist tape is the most common and effective solution, there are other things to think about. Sometimes, people use other methods or have specific concerns.
Understanding these alternatives can help you make the best choice for your project. It’s good to know all your options before you start building. Each method has its pros and cons.
Flashing Tape Options
There are various types of flashing tapes available for construction. Many of these are designed for window and door installations, but some can be used for joists too.
These tapes are often made from rubberized asphalt or butyl rubber. They are very sticky and highly waterproof. Some are designed to adhere even in cold temperatures.
When choosing a flashing tape for joists, ensure it’s rated for outdoor use and can withstand UV exposure over time.
The key difference is often in the specific adhesive formulation and the backing material. Standard joist tape is often optimized for wood. Other flashing tapes might be more aggressive in their adhesion, which can be a good thing for a permanent seal.
Just make sure it’s suitable for your specific climate and the type of wood you are using.
DIY Methods
Some people try to create their own solutions instead of buying specialized joist tape. While this might seem like a cost-saving measure, it often doesn’t work as well in the long run.
For instance, using standard construction adhesive can seal gaps, but it doesn’t offer the same consistent coverage or flexibility as tape. Other methods might involve cutting strips of protective membranes, but getting a good, tight seal can be difficult.
These DIY methods often fail to provide the same level of waterproof protection. They can crack, peel, or not adhere properly over time. This can lead to water getting in anyway.
It’s generally best to stick with products specifically designed for the job to ensure your deck is properly protected.
When Might You Skip It?
There are a few very specific scenarios where you might consider skipping joist tape, though it’s rarely recommended.
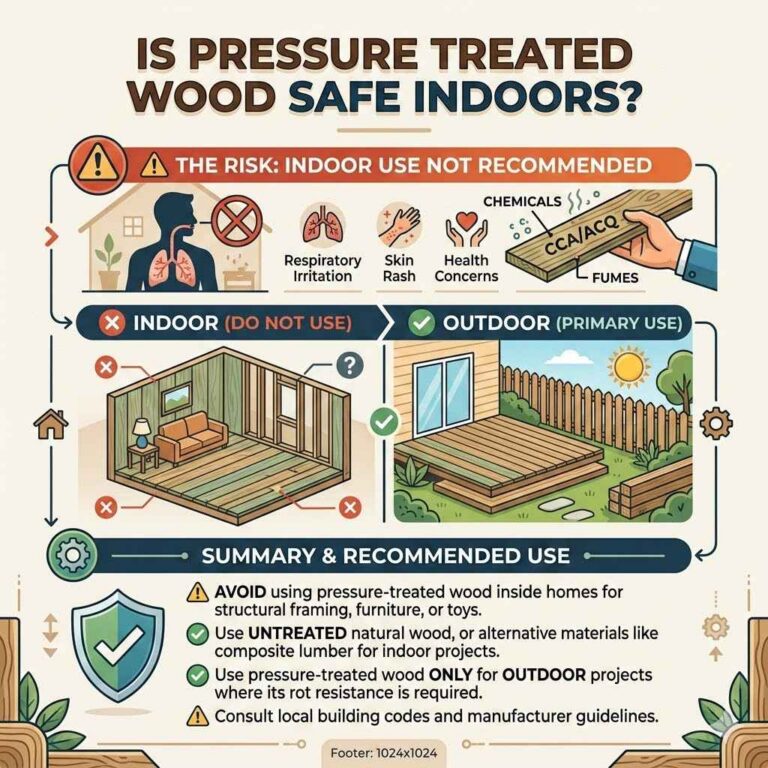
- Indoor Projects: If you are building something indoors that will never be exposed to moisture, like shelves inside a dry garage, then joist tape is likely unnecessary.
- Temporary Structures: For very temporary structures that you don’t expect to last more than a year or two, the risk might be lower. However, even temporary structures can degrade faster if not protected.
- Extremely Dry Climates: In desert regions with virtually no rainfall, the risk of water damage is significantly reduced. However, even dew or occasional irrigation could cause issues.
Even in these cases, the low cost and ease of application make joist tape a good practice for added assurance. It’s a small step that provides significant long-term benefits. For any outdoor deck or similar structure, it’s almost always a good idea to use it.

Frequently Asked Questions
Question: Can I use regular duct tape on my joists?
Answer: No, regular duct tape is not designed for outdoor use and will not provide a durable, waterproof seal. It will likely peel off quickly and not protect your joists from moisture.
Question: How long does joist tape last?
Answer: High-quality joist tape is designed to last for many years, often matching or exceeding the expected lifespan of the deck itself. Factors like climate and installation quality can affect its longevity.
Question: Do I need to tape the ends of the joists too?
Answer: While taping the top surface of the joist is the primary goal, some builders also tape cut ends or any holes drilled through the joist for extra protection against moisture intrusion.
Question: What if my pressure treated wood is still wet when I apply the tape?
Answer: It is crucial to ensure the wood is completely dry before applying joist tape. If the wood is wet, the adhesive will not bond properly, and the tape will not be effective. Allow the wood to dry thoroughly.
Question: Can I paint or stain over joist tape?
Answer: Generally, no. Most joist tapes are not designed to be painted or stained over. They are meant to be covered by deck boards.
Check the specific product instructions for any exceptions.
Final Thoughts
So, Do You Need Joist Tape on Pressure Treated Wood? Yes, it’s highly recommended for a lasting deck. It seals out water, preventing rot and decay.
This simple step protects your investment and keeps your deck safe. Applying it is easy and the cost is minimal. Make sure your deck joists stay strong for years.