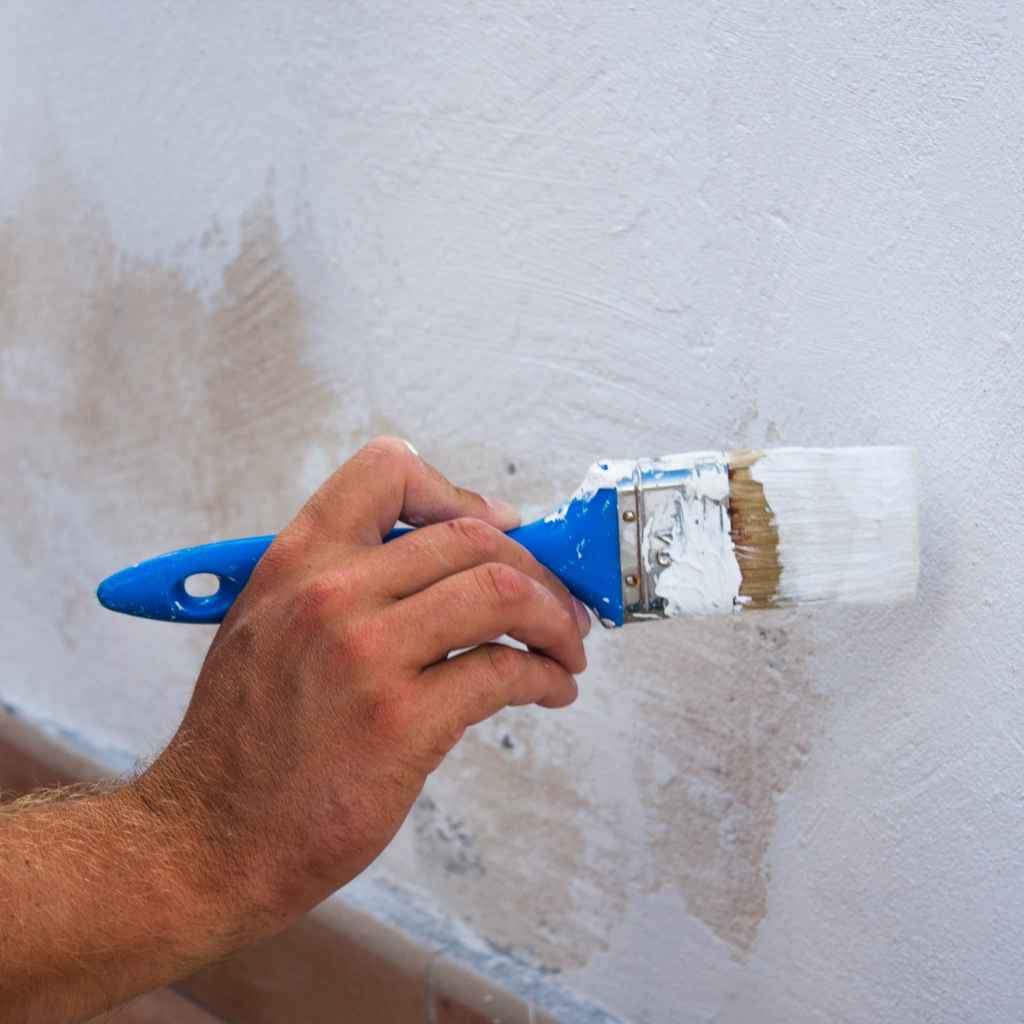
Do You Wet a Paint Brush Before Painting a Wall
Painting can be a fun project, but sometimes little questions pop up that can feel confusing, especially for folks just starting out. One common question is, “Do You Wet a Paint Brush Before Painting a Wall?” It might seem like a small detail, but getting it right can make a big difference in how smoothly your paint goes on and how good your walls look. Don’t worry if you’re unsure; this guide will break it down simply, step by step, so you can feel confident with your paintbrush.
Let’s figure out this simple painting trick together.
Wet Or Dry Paint Brush Is It Better
Deciding whether to wet your paint brush before starting a painting job is a frequent point of discussion for many DIY painters. This simple step can significantly impact how paint adheres to surfaces, how smoothly it applies, and the overall quality of the finish. For beginners, the logic behind this might not be immediately obvious, leading to hesitation or incorrect techniques.
Understanding the purpose behind wetting a brush, or knowing when not to, is key to achieving professional-looking results without unnecessary frustration.
The Purpose Of Wetting A Paint Brush
Wetting a paint brush before using it is primarily done to prepare the bristles for optimal paint pickup and release. When bristles are dry and stiff, they can absorb some of the paint, leading to less paint being applied to the wall. A slightly damp brush, on the other hand, allows paint to flow more freely from the brush to the surface.
This helps prevent paint from drying too quickly on the bristles, which can cause them to splay out and leave unwanted brush marks.
The idea is not to saturate the brush with water, but to lightly dampen it. Too much water can dilute the paint, affecting its color and coverage. The goal is to create a smooth transition of paint from the brush to the wall, ensuring an even coat.
This technique is especially helpful when working with latex or water-based paints, as water is the solvent used for cleaning and thinning them.
Real-life example: Sarah was painting her living room and noticed her new brush was leaving streaks. She remembered her grandfather telling her to dampen the brush. After a quick rinse under the tap and squeezing out the excess water, her brush glided much more smoothly, and the paint coverage improved dramatically.
She was able to finish the job faster and with a much better result.
When Not To Wet Your Paint Brush
While wetting a brush is often beneficial, there are specific situations where it’s not recommended. The most significant exception is when working with oil-based paints or stains. These types of finishes use different solvents, and introducing water can interfere with their chemical properties, leading to poor adhesion and a compromised finish.
Water and oil do not mix, so adding water to oil-based paint can cause it to separate or become clumpy.
Additionally, if you are using a high-quality synthetic brush that is designed to hold and release paint exceptionally well, you might find that wetting it is unnecessary. Some modern brushes have features that already promote smooth paint flow. Over-wetting any brush can lead to issues like the paint becoming too thin, running down the handle, or creating an uneven texture on the wall.
Always check the paint can for specific recommendations, as different paint formulations might have unique requirements.
The type of surface you are painting also plays a role. For very porous surfaces, a dry brush might initially absorb more paint, but wetting it could also lead to the paint soaking too deeply into the material, requiring more coats. It’s a balance of understanding the materials you’re working with.
Types Of Paint Brushes And Their Needs
Paint brushes come in various shapes, sizes, and materials, and their construction influences how they perform with or without water. Natural bristle brushes, typically made from animal hair like hog or badger, are excellent for oil-based paints and stains. They tend to absorb more liquid, so for these paints, wetting might be less critical or even detrimental if it dilutes the paint too much.
These bristles also tend to be stiffer.
Synthetic bristle brushes, usually made from nylon or polyester, are ideal for latex or water-based paints. They are more durable, easier to clean, and less likely to be damaged by water. For these brushes, a light dampening can significantly improve paint flow and prevent the bristles from drying out and splaying.
The finer tips of synthetic bristles can achieve smooth finishes.
Angled brushes are great for cutting in around trim, corners, and edges. The angle allows for more control. Whether you wet an angled brush depends on the paint type, just like with flat brushes.
A brush’s quality also matters; premium brushes are engineered to hold more paint and release it evenly, potentially reducing the need for wetting.
Preparing Your Paint Brush Correctly
The process of preparing your paint brush involves more than just a quick dip. For water-based paints, start by rinsing the brush under cool running water. Gently work the water into the bristles, making sure it reaches the ferrule (the metal part that holds the bristles together).
Once the bristles are wet, hold the brush firmly and squeeze out the excess water. You can do this by running your fingers or a comb down the bristles from the ferrule to the tip, as if you were combing hair.
The goal is to have the bristles feel slightly damp, not dripping wet. A good test is to flick the brush lightly; if water sprays out significantly, there’s too much. If the bristles feel springy and hold a bit of moisture without being saturated, it’s just right.
This preparation helps the paint glide on smoothly and evenly.
Avoid leaving a brush soaking in water for extended periods, as this can damage the bristles and weaken the glue holding them in the ferrule. A short, controlled rinse and squeeze is all that’s needed for proper preparation when using water-based paints.
The Benefits Of A Damp Paint Brush
Using a slightly damp paint brush when working with latex or water-based paints offers several key advantages that contribute to a better painting experience and a superior final look. These benefits stem from how the moisture interacts with both the paint and the bristles, creating a more efficient and effective application process.
Smoother Paint Application
One of the most immediate benefits of a damp brush is smoother paint application. When bristles are dry, they tend to absorb some of the paint, causing it to dry faster on the brush. This can lead to clumping and an uneven distribution of paint on the surface.
A damp brush acts like a lubricant for the paint. It allows the paint to flow more readily from the brush onto the wall, reducing drag and making it easier to create long, consistent strokes.
This smoother flow means less effort is required to spread the paint evenly. You’ll find that you don’t need to press as hard, which can also prevent overworking the paint and causing drips. The result is a more uniform coat with fewer high spots and low spots of paint, leading to a more professional finish.
Sample scenario: Imagine you’re painting a large, flat wall with latex paint. If you use a dry brush, you might find yourself having to reload it frequently and the paint might start to dry on the bristles as you work. This can lead to visible lap marks where one stroke meets another.
A slightly damp brush ensures that the paint stays workable for longer, allowing you to maintain a wet edge and blend your strokes seamlessly for a smooth, consistent finish.
Reduced Brush Marks
Brush marks, also known as “hairy” or “streaky” finishes, are a common frustration for painters. They occur when the bristles of the brush leave visible lines or textures on the paint surface. A dry brush is more prone to leaving these marks because its bristles are stiffer and more likely to push and drag the paint, especially as the paint begins to set.
A slightly damp brush softens the bristles, making them more flexible. This flexibility allows the bristles to bend and conform to the surface more gently. As you paint, the dampness helps the paint spread out evenly between the bristles, rather than being pushed into distinct lines.
The result is a cleaner, smoother finish with minimal visible brush marks, giving your walls a more polished appearance.
This reduction in brush marks is particularly important when painting areas that are highly visible or when using paints with a higher sheen, as these finishes tend to highlight imperfections more readily. Investing a few seconds to dampen your brush can save you significant time and effort in post-painting touch-ups.
Better Paint Pickup And Release
A paint brush’s primary function is to pick up paint and then release it onto the surface being painted. The efficiency of this process is greatly influenced by the condition of the bristles. Dry bristles can act like tiny sponges, absorbing paint into their core, which means less paint is available to transfer to the wall.
This can lead to having to dip the brush into the paint can more often.
When a brush is slightly damp, the water in the bristles creates a barrier that prevents the paint from being excessively absorbed. Instead, the paint sits on the surface of the bristles. This allows the brush to hold more paint effectively and, crucially, to release it more evenly and completely onto the surface.
You get more coverage from each dip, making your painting process more economical and faster.
This improved pickup and release means you can achieve a fuller, more consistent coat of paint with fewer passes, which is especially beneficial when working on larger areas or when trying to cover a darker color with a lighter one.
Extended Working Time On The Wall
One of the biggest challenges in painting is maintaining a “wet edge.” This means overlapping your strokes while the previous stroke is still wet, ensuring a seamless blend and preventing lap marks. Paint, especially water-based varieties, can dry quite quickly, particularly in warm or dry conditions. A dry brush can accelerate this drying process on the wall.
By using a slightly damp brush, you introduce a small amount of moisture that helps to keep the paint on the surface workable for a little longer. This extension of working time is invaluable for achieving smooth, unblemished finishes. It gives you more opportunity to blend your strokes effectively, ensuring that fresh paint always overlaps paint that is still wet.
This benefit is most pronounced when painting large surfaces like walls or ceilings. It allows for a more relaxed pace and better control, reducing the stress of having the paint dry too fast before you can properly finish your stroke. It’s a simple trick that significantly enhances the painting experience.
How To Properly Wet A Paint Brush
Achieving the perfect level of dampness for your paint brush is crucial. Too much water dilutes the paint, and too little offers no benefit. The process is straightforward but requires a little attention to detail.
It’s about preparing the brush so it works with the paint, not against it.
Rinsing The Brush
Begin by holding your paint brush under a stream of cool running water. For natural or synthetic bristle brushes, the water should flow over the bristles. Gently work the water into the bristles with your fingers, from the ferrule down to the tips.
The objective is to saturate the bristles without soaking the entire brush. You want the water to penetrate the bristle base but not become so abundant that it saturates the wooden handle or causes the ferrule to rust (if it’s metal).
This initial rinse helps to remove any dust or manufacturing residue that might be present on new brushes. For brushes that have been used, this step helps to prepare them for their next coat of paint by ensuring the bristles are clean and receptive. It also pre-moistens them, which is the first step in achieving the desired dampness.
Squeezing Out Excess Water
After rinsing, it is vital to remove excess water. Hold the brush firmly and use your thumb and forefinger to gently squeeze the bristles together, working from the ferrule outwards towards the tips. You can also use a clean rag or paper towel to wipe and squeeze the bristles.
The goal is to achieve a state where the bristles are damp but not dripping. They should feel pliable and slightly moist, but when you flick the brush, no significant amount of water should fly off.
This step is perhaps the most critical in the “wetting” process. If you leave too much water, it will dilute the paint, reduce its opacity, and potentially cause drips. If you squeeze too much water out, the brush will be too dry to offer the desired benefits.
It’s about finding that happy medium that allows the paint to flow smoothly.
Statistic: Studies show that using a properly dampened brush for latex paint can reduce the need for touch-ups by up to 25% due to improved coverage and fewer lap marks.
Testing The Dampness
Before dipping your brush into the paint, it’s a good idea to test its dampness. You can do this by lightly flicking the brush or by painting a small, inconspicuous area of your wall or a piece of scrap material. If you see a fine mist of water, you’ve likely squeezed out enough.
If the bristles feel cool and slightly springy to the touch without leaving a wet spot on your hand, they are likely at the right moisture level.
Another simple test is to look at the bristles. They should appear slightly darker due to the moisture, but they should not be glistening or look waterlogged. The goal is for the bristles to be pliant enough to hold and release paint smoothly.
This simple check ensures you are ready to paint without any surprises from improper brush preparation.
When To Avoid Wetting A Paint Brush
While wetting a brush is a common and often helpful technique, it’s not a universal rule. Certain situations and materials call for keeping your brush dry to ensure the best possible results.
Oil-Based Paints And Stains
The cardinal rule is to never wet a brush with water when using oil-based paints, varnishes, or stains. These products use mineral spirits or other petroleum-based solvents for thinning and cleanup. Water does not mix with oil; introducing it into an oil-based paint will disrupt the paint’s formulation.
This can lead to the paint separating, becoming clumpy, or not adhering properly to the surface.
For oil-based products, you typically use brushes made with natural bristles, which are better suited for these types of paints. These brushes are also more prone to damage from excessive water. If you need to prepare a natural bristle brush for an oil-based paint, it’s usually best to use it dry or slightly dampened with the recommended solvent if the manufacturer advises it for better flow, but never water.
Sample scenario: John was painting an old wooden cabinet with an oil-based varnish. He decided to try wetting his natural bristle brush with water, thinking it would help. The varnish immediately became gummy and started to peel away from the bristles in an unworkable mess.
He had to stop, clean the brush thoroughly with mineral spirits, and start over with a dry brush, learning a valuable lesson about paint types.
Shellac Based Primers Or Sealers
Shellac-based primers and sealers are another category of product where water is not your friend. Shellac is derived from the lac bug and is dissolved in alcohol. Like oil-based products, water can interfere with the integrity and application of shellac.
Using a wet brush can cause the shellac to become sticky, difficult to spread, and may even prevent it from forming a proper seal or bond.
Brushes used with shellac should be cleaned with denatured alcohol. If you’re preparing a brush for a shellac-based product, it should be clean and dry, or if you need extra flow, you might use a tiny amount of denatured alcohol to slightly dampen the bristles, but never water. This ensures the shellac applies smoothly and effectively seals the surface as intended.
Specialty Paints And Finishes
Some specialized paints or finishes might have very specific application requirements that deviate from standard practices. For example, certain epoxy paints or high-performance coatings might require brushes that are completely dry or prepared in a unique way as outlined by the manufacturer. Always consult the paint can or product label for the manufacturer’s recommendations regarding brush preparation and application techniques.
These specialty products are formulated with specific resins and additives, and introducing unintended moisture can compromise their unique properties, such as extreme durability, chemical resistance, or specific curing processes. Relying on the manufacturer’s instructions is the safest approach to ensure you get the best performance from these advanced materials.
High-Quality Synthetic Brushes For Certain Paints
While synthetic brushes are generally good with water-based paints, some very high-quality synthetic brushes are engineered to hold and release paint so effectively that wetting them might actually be counterproductive. These premium brushes are designed with advanced bristle technology to achieve optimal paint flow without the need for added moisture. Over-wetting such a brush could potentially dilute the paint or make it too runny.
If you’ve invested in a top-tier synthetic brush and are using a high-quality latex paint, you might want to try painting a small test area without wetting the brush first. Pay attention to how the paint flows. If it feels smooth and even, and you’re not experiencing any issues with drying or streaking, then wetting the brush might not be necessary for that specific combination of brush and paint.
When Painting Over Existing Dry Paint
When you are painting over an existing coat of dry paint and the goal is to simply apply a new, even layer, the primary concern is adhesion and coverage. While a damp brush helps with flow and reducing marks, it’s not always essential for simply recoating. The existing paint provides a surface for the new paint to adhere to.
However, if the existing paint is very smooth or glossy, a slightly damp brush might still help create a better bond by allowing the new paint to spread more thinly and evenly, minimizing the chance of peeling or cracking. But for most standard recoating scenarios with latex paint, a dry, clean brush that is well-loaded with paint can often suffice, provided you are careful with your strokes and maintain a wet edge.
Frequently Asked Questions
Question: Do I need to wet my brush for all types of paint
Answer: No you do not need to wet your brush for all types of paint. For oil-based paints stains and shellac based products you should never use water. Always use the recommended solvent for those products.
Question: How much water should I use to wet my brush
Answer: You only need to dampen your brush slightly. Rinse it under cool water and then squeeze out almost all the water until the bristles are just moist not dripping.
Question: Will wetting my brush make the paint color lighter
Answer: If you use too much water it can dilute the paint and make the color appear lighter or less vibrant. It’s important to squeeze out excess water to avoid this.
Question: Can I use a damp brush for primers
Answer: Yes you can generally use a damp brush for latex or water-based primers. However always check the primer’s label for specific instructions especially if it’s an oil-based or shellac-based primer.
Question: How do I clean a brush after using it with water
Answer: After painting with water-based paint rinse your brush thoroughly under cool running water until the water runs clear. Then squeeze out excess water and reshape the bristles before storing.
Summary
So, Do You Wet a Paint Brush Before Painting a Wall? For water-based paints, a lightly dampened brush helps paint flow smoothly, reduces brush marks, and improves coverage. Ensure it’s just moist, not dripping.
Avoid wetting brushes for oil-based products or shellac. Proper preparation is key for a great finish.