How to Fix a Dryer Door Latch Quickly
Sometimes your dryer door just won’t close right, and it can be frustrating when you need to dry clothes fast. For beginners, fixing a dryer door latch might seem tricky because there are a few small parts involved. You might worry about breaking something or making it worse.
But don’t worry, this guide makes it super simple. We’ll walk through everything step-by-step so you can get your dryer working perfectly again in no time. Let’s look at what might be going wrong and how to fix it easily.
Troubleshooting Dryer Door Latch Issues
When your dryer door won’t latch, it often means a small part isn’t lining up or has become loose. This can stop your dryer from starting because most models have a safety switch that needs the door to be fully closed and latched. Identifying the exact problem is the first step to fixing it quickly.
This section will help you pinpoint what’s causing the latch not to work properly so you can move on to the repair.
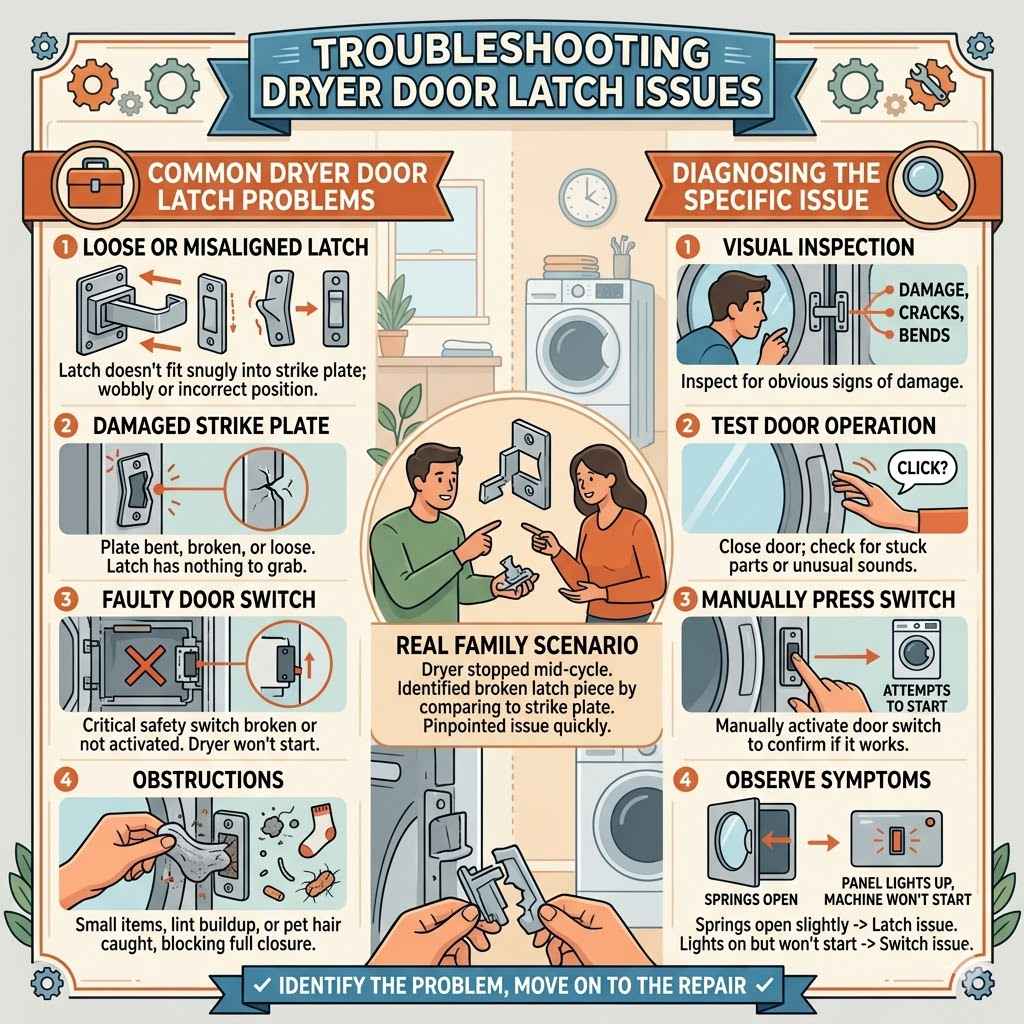
Common Dryer Door Latch Problems
Several things can cause a dryer door latch to malfunction. The most frequent issues involve the latch mechanism itself, the strike plate on the dryer body, or the door switch. Sometimes debris can get stuck in the mechanism, preventing it from engaging.
Other times, parts can simply wear out or become dislodged over time.
Loose or Misaligned Latch: The latch, which is usually part of the door assembly, might be loose. It needs to fit snugly into the strike plate on the dryer’s frame to engage the switch. If it’s wobbly or not positioned correctly, it won’t connect.
Damaged Strike Plate: The strike plate is the piece on the dryer cabinet that the latch hooks onto. If this plate is bent, broken, or loose, the latch has nothing to grab. This is often made of plastic or metal and can wear down or snap.
Faulty Door Switch: Inside the dryer frame, there’s a switch that tells the dryer when the door is closed. If this switch is broken or not being pressed by the latch mechanism, the dryer won’t start, even if the door seems shut. This switch is a critical safety feature.
Obstructions: Small items like socks, lint buildup, or even pet hair can get caught in the latch or strike plate. This physical blockage can prevent the latch from closing fully or engaging properly with the strike plate.
Diagnosing the Specific Issue
To figure out exactly what’s wrong, you need to do a little detective work. First, visually inspect the door latch itself and the area on the dryer where it hooks in. Look for any obvious signs of damage, like cracks, bends, or missing pieces.
Then, gently try to close the door and see if the latch moves freely or if it seems stuck. Listen for any unusual sounds. Sometimes, you can manually push the door switch with your finger to see if the dryer attempts to start, which helps confirm if the switch is the culprit.
A common scenario is when you close the door, and it springs open slightly. This often points to the latch not fully engaging with the strike plate. Another sign is if the dryer’s control panel lights up, but the machine won’t start its cycle when you press the start button.
This strongly suggests a problem with the door switch not being activated.
One family found their dryer stopped working mid-cycle. Upon inspection, they noticed a small plastic piece from the latch had broken off. Without that piece, the strike plate couldn’t be held securely.
They were able to identify this quickly by comparing the broken latch to where it should connect.
How to Fix a Dryer Door Latch Quickly
Once you know what’s causing the problem, fixing it can often be done with simple tools and a bit of patience. The goal is to restore the secure connection between the door and the dryer frame so the machine can operate safely. These steps are designed to be straightforward, even if you’ve never done appliance repair before.
We’ll guide you through securing or replacing parts to get your dryer back in action.
Step-by-Step Repair Process
The first step is always safety. Make sure the dryer is unplugged before you start working on it. This prevents any electrical shocks.
Then, you can proceed with examining the components more closely.
Securing a Loose Latch or Strike Plate
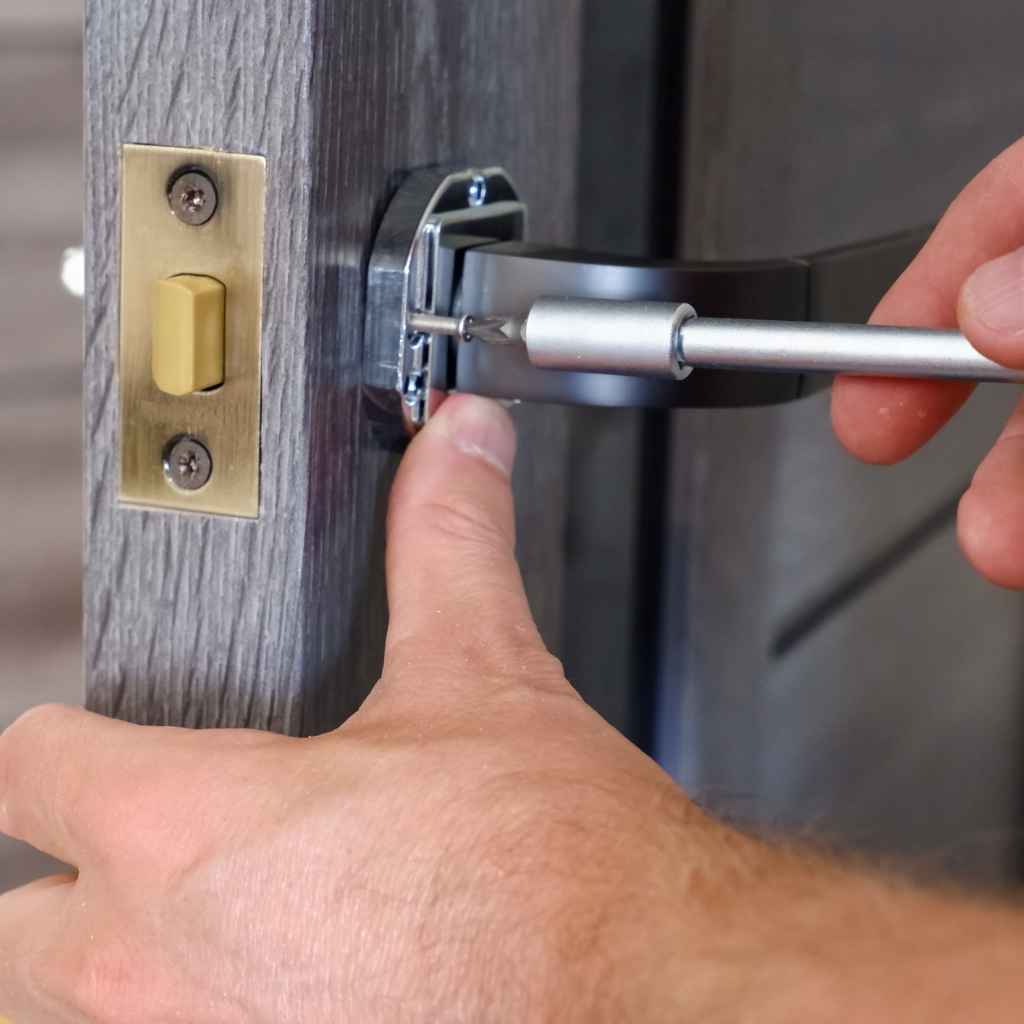
If you find that the latch or the strike plate is just loose, tightening it is usually the easiest fix. For the latch, which is often part of the door panel, you might find screws holding it in place from the inside of the door. You’ll likely need to remove the inner door panel to access these.
For the strike plate, it’s usually attached to the dryer cabinet with screws. Simply use a screwdriver to tighten these screws firmly.
You might need a Phillips head screwdriver for most dryer repairs. Sometimes, a nut driver is also necessary if there are nuts and bolts involved. The key is to ensure the component is snug and doesn’t wobble.
A loose connection means it won’t properly activate the door switch or hold the door closed.
Consider a scenario where the strike plate on the dryer cabinet feels a bit wobbly. A quick tightening of its mounting screws can often resolve the issue. This is a common and easily fixed problem.
Replacing a Broken Latch Assembly
If the latch itself or the strike plate is visibly broken, cracked, or missing pieces, it will need to be replaced. You can usually order replacement parts online or from appliance parts stores. You’ll need to know your dryer’s model number to ensure you get the correct part.
Replacing the latch often involves unscrewing the old one from the door panel and screwing in the new one. For a strike plate, you’ll unbolt or unscrew the old one from the cabinet and secure the new one. Always refer to your dryer’s manual if you have it, or look for online videos specific to your model.
A broken strike plate is not uncommon. If the plastic piece snaps, the latch has nothing to catch onto. Replacing this small part can be done in under 15 minutes with the right replacement and a screwdriver.
Testing and Reassembly
After tightening or replacing parts, it’s time to test. Plug the dryer back in. Close the door firmly.
It should now latch securely. If it latches, try starting a short cycle. If the dryer starts and runs normally, you’ve successfully fixed the problem.
If the door still doesn’t latch, double-check your work. Ensure all screws are tight and that the new part is installed correctly. Sometimes, the door panel itself might be slightly warped, which can affect alignment.
In rare cases, the entire door might need adjustment or replacement, but this is less common for simple latch issues.
If you replaced the door switch, you’ll want to ensure the new one is properly seated and wired. Many dryer door switches click when you press them and should offer a bit of resistance, indicating they are functional.
Tools You Might Need
Most dryer door latch repairs are quite simple and don’t require specialized tools. Typically, you’ll only need basic household tools. Having these on hand will make the process much smoother and faster.
Screwdrivers: A Phillips head screwdriver is essential for most common screws found in dryer assemblies. A flathead screwdriver can also be useful for prying or for specific types of fasteners.
Nut Drivers or Socket Set: Some dryers use nuts and bolts instead of screws. Having a small set of nut drivers or sockets can help you tackle these if encountered.
Pliers: Needle-nose pliers can be helpful for handling small wires or clips, especially if you’re dealing with the door switch.
Work Gloves: Protecting your hands from sharp edges or minor cuts is always a good idea when working on appliances.
Remember to unplug the dryer before starting any work. This is the most important safety step.
Finding Replacement Parts
When you need to replace a part, finding the right one is key. The most reliable way to get the correct part is by using your dryer’s model number. This number is usually found on a sticker inside the door frame, on the back of the dryer, or sometimes on the side.
Once you have the model number, you can search for replacement parts on appliance parts websites, manufacturer websites, or large online retailers. Many of these sites have diagrams that help you identify the specific latch or strike plate for your dryer model. If you’re unsure, contacting customer support for the parts supplier can help you confirm you’re ordering the correct item.
The cost of replacement parts for a dryer door latch is typically quite low, often ranging from $10 to $30. This makes DIY repair a very cost-effective solution compared to calling a professional technician. A technician might charge $100 or more for a service call and labor.
Example of a Part Replacement Scenario
Sarah’s dryer stopped working because the plastic piece on the door that engages the dryer’s safety switch had broken. She found her dryer’s model number on the back panel. She then searched online for “dryer door latch replacement ” and found a compatible part for $15.
The replacement involved unscrewing the old latch from the inside of the door panel and screwing the new one into place. The whole process took about 20 minutes, saving her the cost of a service call.
Statistics on DIY Appliance Repair
A survey by HomeAdvisor found that about 75% of homeowners have attempted a DIY home repair. Of those, appliance repair was one of the most common categories. This indicates that many people are comfortable tackling minor appliance issues themselves.
Another study suggested that consumers can save an average of $150 per repair by performing basic fixes like this on their own.
Advanced Dryer Door Latch Solutions
While most dryer door latch issues are simple fixes, sometimes more complex problems can arise. These might involve deeper mechanical issues or electrical components related to the latch. Understanding these can help you decide if you need professional help or if you can still manage the repair yourself.
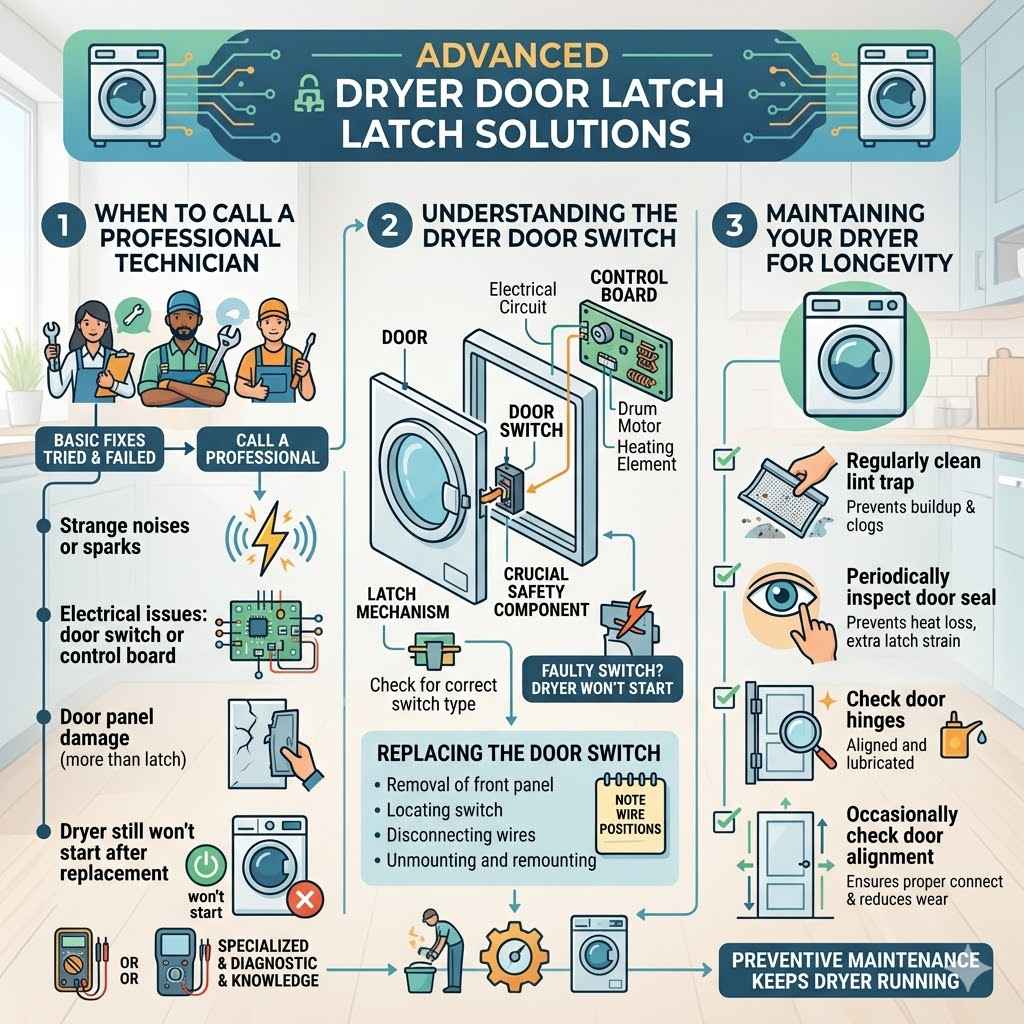
When to Call a Professional Technician
If you’ve tried the basic fixes and your dryer door still won’t latch properly, or if you encounter electrical issues, it might be time to call a professional. This is especially true if you are uncomfortable working with electrical components or if the repair seems beyond your skill level.
Signs that you should call a professional include:
- If the dryer makes strange noises or sparks when you try to operate it.
- If you suspect an electrical problem with the door switch or the dryer’s main control board.
- If the door panel itself is damaged and needs more than just a latch replacement.
- If you’ve replaced the latch and strike plate, and the dryer still won’t start.
Technicians have specialized tools and knowledge to diagnose and fix more complicated problems safely and efficiently. They can also identify underlying issues that you might miss.
Understanding the Dryer Door Switch
The dryer door switch is a crucial safety component. When the door is closed and latched, the latch mechanism presses on the switch. This action completes an electrical circuit, signaling the dryer’s control board that it’s safe to start the heating element and the drum motor.
If this switch is faulty, dirty, or not being activated correctly by the latch, the dryer simply won’t run.
Replacing the door switch usually involves removing the front dryer panel. You’ll need to locate the old switch, disconnect the wires (making a note of where each wire goes), and then unmount the old switch. The new switch is then mounted, and the wires are reconnected.
It’s important to ensure the new switch is the correct type for your dryer model.
A faulty door switch is a very common reason for a dryer not starting, even if the door appears to be closed. This is why it’s often one of the first things to check when troubleshooting.
Maintaining Your Dryer for Longevity
Preventive maintenance can help avoid common issues like a faulty door latch. Regularly cleaning the lint trap after every use is essential. This not only improves drying efficiency but also prevents lint buildup that could eventually clog other parts of the dryer or interfere with the door mechanism.
Periodically inspect the door seal for any tears or damage. A damaged seal can lead to heat loss and longer drying times, and in some cases, could put extra strain on the latch mechanism. You might also want to check the door hinges to ensure they are properly aligned and lubricated.
Keeping these simple things in check can extend the life of your dryer.
One good practice is to occasionally check the alignment of the door itself. If the door hangs unevenly, it can cause the latch and strike plate to wear out faster or not connect properly.
Frequently Asked Questions
Question: How do I know if my dryer door latch is broken or just needs tightening
Answer: If the latch or the part it connects to on the dryer frame (the strike plate) looks cracked, bent, or is missing pieces, it’s likely broken. If it just feels loose or the door springs open easily but the parts look intact, it probably just needs tightening.
Question: Can I use tape to temporarily fix my dryer door latch
Answer: While you might be able to tape the door shut temporarily, it’s not a reliable or safe solution for a dryer. The heat and tumbling action can easily dislodge tape, and it won’t properly activate the safety switch required for the dryer to run.
Question: How long does it usually take to fix a dryer door latch
Answer: For most common issues like tightening a loose part or replacing a simple latch or strike plate, the repair can often be completed in 15 to 30 minutes, assuming you have the replacement part readily available.
Question: What if my dryer still doesn’t start after fixing the latch
Answer: If the dryer still won’t start after you’ve addressed the latch, the problem might be with the door switch itself, the motor, or the control board. At this point, it’s best to consult your dryer’s manual or call a professional appliance repair technician.
Question: Where can I find the model number for my dryer
Answer: The model number is usually located on a sticker or plate attached to the dryer. Common places to find it include the inside of the door opening, the back of the appliance, or along one of the sides.
Wrap Up
Fixing a dryer door latch quickly is often a simple DIY task. By inspecting the latch, strike plate, and door switch, you can usually identify the issue. Tightening loose parts or replacing broken ones with basic tools can get your dryer working again.
Don’t let a faulty latch stop your laundry routine; a few steps can save you time and money.