Restore a Weathered Wooden Front Door: Sand, Fill, Varnish
Restoring a weathered wooden front door means stripping the old finish, filling cracks or rot with exterior-grade filler, sanding through 120 to 220 grit, and sealing with 2 to 3 coats of spar varnish. Skipping UV-rated protection lets a refinished door look sun-bleached again within about a year. This guide covers assessing damage, repairing wood, sanding, and choosing between paint and stain.
Understanding Door Weathering
Best Finish Pick
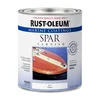
Rust-Oleum Marine Spar Varnish – $18.52
Matches the 2 to 3 coat spar varnish finish this guide recommends for shielding a restored door from UV and rain.
- Best for: the final sealing step after sanding to 220 grit
- Why we picked it: UV-resistant marine formula built for constant sun and rain exposure
- Main drawback: needs recoating every 1-2 years in harsh climates
Compare more door restoration supplies
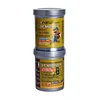 Option 1 PC-Woody Wood Repair Epoxy – $18.89
|
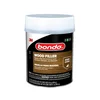 Option 2 3M Bondo Wood Filler – $22.10
|
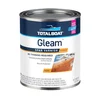 Option 3 TotalBoat Gleam Spar Varnish (Quart) – $42.50
|
As an Amazon Associate we earn from qualifying purchases.
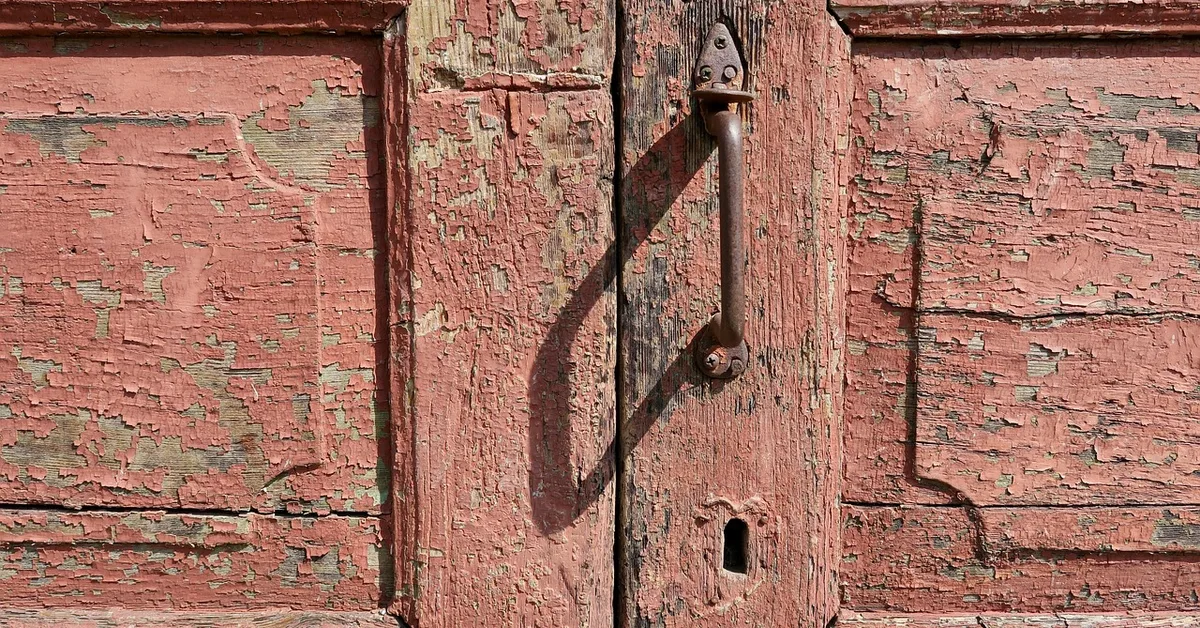
Wooden front doors face a tough battle. They stand guard against the elements every single day. The sun’s UV rays are strong.
They can break down the wood’s natural oils. This causes fading and drying out. Rain and snow can soak into the wood.
This leads to swelling and shrinking. This constant movement can cause cracks. It also makes paint or stain peel.
Mold and mildew love damp wood. They can grow and stain the surface. Wind can carry tiny particles.
These sandblast the door over time. All these things combine to make a door look old and tired.
Think of it like your skin. If you spend too much time in the sun without protection, it gets dry and damaged. Wood is similar.
It needs care to stay healthy and looking good. The type of wood also matters. Some woods are more resistant to rot and insects.
Others need more frequent attention. Knowing what your door is made of helps. It also helps to know what kind of finish it currently has.
Is it painted? Stained? Varnished?
Each type of finish reacts differently to weather and requires specific ways to restore it.

Gathering Your Supplies
Before you start, get everything ready. This makes the job easier. You’ll need cleaning supplies first.
This includes a good wood cleaner. Sometimes, a mild soap and water work. But a dedicated wood cleaner is often better.
You might also need a stiff brush. This helps scrub away dirt. For repairs, you’ll need wood filler or epoxy.
Make sure it’s for exterior use. You’ll also need sandpaper. Get a few different grits.
Start with a coarser grit for old finishes. Then use finer grits for smoothing. You’ll need safety gear too.
Wear gloves to protect your hands. Eye protection is a must. A dust mask keeps you from breathing in wood dust.
For the finishing part, you’ll need your new finish. This could be exterior paint or a good quality exterior stain. You’ll also need brushes or rollers.
Use good quality ones. They make a big difference. For stained doors, you might need a wood conditioner.
This helps the stain go on evenly. If you’re painting, you’ll need a good primer. This helps the paint stick.
It also covers imperfections. Finally, have some rags ready. They are useful for wiping up excess.
They are also for cleaning tools.
Essential Tools at a Glance
- Cleaning: Wood cleaner, scrub brush, bucket, water, mild soap.
- Repairing: Wood filler/epoxy, putty knife, sandpaper (various grits).
- Finishing: Exterior paint or stain, primer (if painting), wood conditioner (if staining), quality brushes/rollers, painter’s tape.
- Safety: Gloves, eye protection, dust mask.
- Miscellaneous: Rags, drop cloths, screwdriver (for hardware removal).
Step 1: Remove Hardware and Prepare the Area
This might seem like a small step. But it’s important. Take off all the hardware.
This means the doorknob, lockset, hinges, and any decorative pieces. Keep them safe. Put them in a plastic bag.
Label the bag. This way, you won’t lose small screws. Removing hardware lets you work on the entire door surface.
You won’t miss spots. It also stops you from getting paint or stain on them. This makes the final look much cleaner.
Next, protect the surrounding area. Lay down drop cloths. Cover the porch floor and any nearby plants.
This stops them from getting dirty or damaged. If your door is very old or has lead paint, take extra care. You might need special masks.
Check local regulations for safe disposal of old paint. Make sure the area is well-ventilated. This is important for your health and safety.
Good preparation makes the rest of the job go smoothly.
Step 2: Thorough Cleaning
Now, it’s time to get rid of the dirt. Start with a good wash. Use your wood cleaner.
Follow the product instructions. Usually, you apply it and let it sit for a bit. Then, scrub gently with your brush.
Work in the direction of the wood grain. This lifts out embedded dirt and grime. Rinse the door well with clean water.
Make sure no cleaner residue is left behind. Residue can affect how new finishes stick.
For tough stains or mildew, you might need a stronger cleaner. Some products are specifically for mildew. Or you can try a solution of one part bleach to ten parts water.
Use this carefully. Test it on an inconspicuous spot first. Always wear gloves and eye protection.
Rinse thoroughly after using bleach. Let the door dry completely. This can take a full day or two.
Don’t rush this step. Moisture trapped under new finishes causes problems. A truly clean surface is key for a lasting restoration.
Quick Cleaning Tips
For Painted Doors: A mild detergent and water often works best. Scrub gently. Rinse well.
For Stained Doors: Use a cleaner made for exterior wood. Avoid harsh chemicals that can bleach the wood unevenly.
Mold/Mildew: A bleach solution (1:10) can be effective. Always test first.
Drying: Allow at least 24 hours of dry weather for the door to dry completely.
Step 3: Stripping Old Finishes (If Needed)
If your door has peeling paint or old, flaking varnish, you need to strip it. This gives your new finish a good base to adhere to. You have a few options here.
Chemical strippers work well. They dissolve old finishes. Apply the stripper with an old brush.
Follow the product’s safety warnings. Let it work for the time recommended. Then, scrape off the softened finish with a putty knife.
Work carefully. Try not to gouge the wood.
For large areas or very tough finishes, a heat gun can be used. Heat the paint. It will soften.
Then scrape it off. Be careful not to scorch the wood. Always use a respirator mask when using heat guns.
Sanding is another option. Use a coarse-grit sandpaper (around 60-80 grit). A power sander can speed this up.
But be careful not to over-sand. You want to remove the old finish, not the wood itself. After stripping, clean the door again.
This removes any stripper residue. Let it dry completely.
Step 4: Repairing Damage
Now, look closely at the wood. Do you see any cracks, gouges, or rot? Small cracks can be filled.
Use a good quality exterior wood filler. It comes in many colors. Choose one that matches your wood or is paintable.
For larger holes or areas of rot, you’ll need exterior wood epoxy. Epoxy is stronger. It can also be shaped.
Apply the filler or epoxy with a putty knife. Press it firmly into the damaged area. Make it level with the surrounding wood.
Let it dry completely. This can take several hours.
Once dry, sand the filled areas smooth. Start with a medium grit sandpaper (100-120 grit). Then move to a finer grit (180-220 grit).
You want these repaired spots to blend in seamlessly. Check for any rough spots or unevenness. If you find any rot, you need to remove it first.
Dig out all the soft, rotten wood. Then fill the void. For severe rot, you might need to replace a section of the door.
This is a more advanced repair. If you’re unsure, consult a professional. Getting these repairs right is vital for the door’s look and longevity.
Repairing Wood: Quick Guide
Small Cracks/Gouges: Use exterior wood filler. Apply, let dry, sand smooth.
Larger Holes/Rot: Use exterior wood epoxy. Remove all rot first. Fill, let dry, sand.
Sanding After Repair: Start with 120 grit, finish with 220 grit for smoothness.
Step 5: Sanding for a Smooth Finish
Sanding is crucial for a good finish. It creates a smooth surface for paint or stain to adhere to. It also removes minor imperfections.
Start with a medium-grit sandpaper, like 100 or 120 grit. This will remove any leftover residue from stripping or filling. Always sand in the direction of the wood grain.
If you sand across the grain, you’ll create visible scratches. Use a sanding block or an orbital sander for larger flat areas. For detailed areas, use sandpaper by hand.
After using the medium grit, move to a finer grit. Use 180 grit. This refines the surface further.
Finally, use a very fine grit, like 220 grit. This creates a silky-smooth surface. This is especially important if you are staining.
A smooth surface takes stain more evenly. After each sanding stage, wipe the door down. Use a tack cloth or a damp rag.
This removes all the dust. Dust left behind will ruin your new finish. Take your time with this step.
A well-sanded door makes all the difference.
Step 6: Applying Primer (If Painting)
If you’re painting your door, primer is a must. It’s like a base coat. It helps the paint stick better.
It also covers up any remaining stains or imperfections. It ensures the final paint color is true. Use a high-quality exterior primer.
Look for one that seals wood well. Apply it evenly. Use a brush or roller.
Make sure to get into all the nooks and crannies. Apply a thin, even coat. Don’t try to cover everything in one go.
Let the primer dry completely. Check the product instructions for drying times. Some primers need a second coat.
If your door was stained or very dark, a second coat might be needed. After the primer is dry, lightly sand it. Use a very fine grit sandpaper (220 grit).
This smooths out the primer coat. Wipe away the dust with a tack cloth. A smooth primer coat means a smooth final paint job.
This step is skipped if you are staining. But it’s vital for painting.
Step 7: Applying Paint or Stain
This is the exciting part! You get to see your door transform. If you are painting, apply your first coat of exterior paint.
Use a good quality paint. Work in the direction of the wood grain. Apply thin, even coats.
Avoid drips. If you see a drip, fix it immediately with your brush. Let the first coat dry completely.
Drying times vary by product and weather. Check the can.
Once the first coat is dry, lightly sand the surface again with fine-grit sandpaper (220 grit). Wipe away dust. Then apply the second coat of paint.
For most doors, two coats are enough. Some very light colors might need a third coat. If you are staining, apply the stain with a brush or rag.
Work in the direction of the grain. Apply a thin coat. Let it penetrate for the time recommended on the can.
Then, wipe off the excess stain with a clean rag. This controls the depth of color. Let the stain dry completely.
Painting vs. Staining: What’s Best?
Painting: Offers more color choices. Hides wood grain. Good for less attractive wood.
Requires primer and multiple coats.
Staining: Enhances natural wood beauty. Shows wood grain. Requires a good wood type.
Needs a sealant or varnish on top for protection.
Step 8: Applying Top Coat (For Stained Doors)
If you stained your door, it needs protection. A stained door without a top coat will fade quickly. You need an exterior varnish or polyurethane.
This seals the wood. It also adds a layer of protection against weather. Choose a product that is UV resistant.
This helps prevent fading. Apply it in thin, even coats. Use a good quality brush.
Work in the direction of the wood grain.
Let each coat dry completely. Then, lightly sand the surface with very fine sandpaper (220 or 320 grit). Wipe away dust with a tack cloth.
This helps the next coat adhere better. It also creates a smoother finish. For most stained doors, two or three coats of top coat are recommended.
This provides robust protection. Make sure to let the final coat cure fully. This can take several days.
Avoid heavy use of the door during this time.
Step 9: Reinstall Hardware
Once the paint or stain and top coat are fully dry and cured, it’s time to put the hardware back. Carefully reattach the doorknob, lockset, hinges, and any other pieces you removed. Use the original screws.
If any screws are stripped or damaged, consider replacing them. A fresh set of screws can make hardware look new. Make sure everything is tightened properly.
The door should operate smoothly.
Take a step back and admire your work. The hardware against the freshly finished door will look great. This is the final touch that completes the transformation.
It’s rewarding to see all the pieces come together. You’ve taken a weathered door and made it look amazing again. This step is simple but essential for the door’s function and appearance.
Ensure all parts are secure and work as they should.
Maintaining Your Restored Door
Your hard work has paid off. Now you want to keep your door looking its best. Regular cleaning is key.
Wipe down the door periodically. Use a soft cloth and mild soap. This removes surface dirt before it builds up.
Check the finish every year or so. Look for any signs of wear. Small scratches or dull spots can be touched up.
This is much easier than a full restoration.
For painted doors, touch up chips or peeling spots right away. For stained doors, reapply a coat of sealant if the finish looks dull. Avoid harsh chemical cleaners.
They can damage the finish. Keep the area around the door clean. Remove leaves and debris that can trap moisture.
Parking your car too close to the door can also cause damage. Consider a storm door if your area has extreme weather. This adds another layer of protection.
Consistent care will make your door look beautiful for many years to come.
Maintenance Checklist
Monthly: Wipe down door with a soft cloth and mild soap.
Annually: Inspect finish for wear, chips, or fading. Touch up as needed.
As Needed: Clean any mold or mildew promptly with a gentle cleaner.
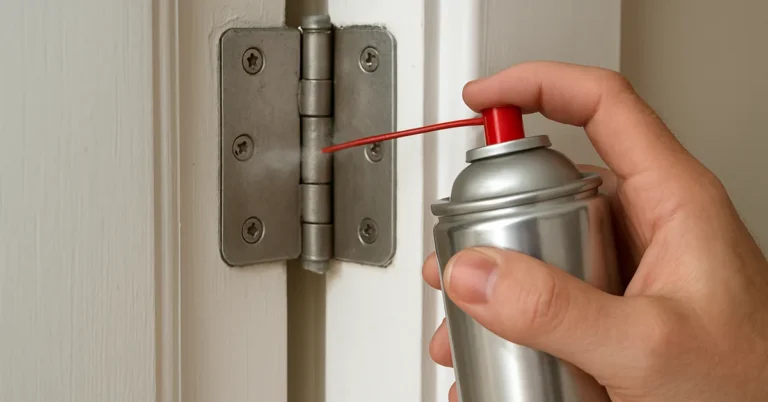
Seasonal: Check hardware for tightness and smooth operation. Lubricate hinges if needed.
When to Call a Professional
While many door restoration projects are DIY-friendly, there are times when you should seek expert help. If your door has significant structural damage, like deep rot or warping, a professional carpenter might be needed. They can assess if the door is salvageable or needs
Also, if you’re dealing with old, potentially lead-based paint, safety is paramount. Professionals are equipped to handle hazardous materials safely and according to regulations. If you’re simply overwhelmed by the process or don’t have the time, hiring a refinishing service is a great option.
They can often complete the job faster and with a factory-like finish. Don’t hesitate to get a quote. Sometimes, the peace of mind and guaranteed result are worth the cost.
Real-World Scenarios
I remember working on my Aunt Carol’s house. Her front door was this beautiful, old oak. But the sun beat down on it all afternoon.
The stain had faded to a sad grey. Paint was peeling in big flakes. She thought it was ruined.
We spent a weekend on it. The stripping was the hardest part. Her porch had so many intricate details.
Getting into them was tough. But when we finally got to applying that new, deep walnut stain, her face lit up. Then, the satin-finish exterior varnish sealed it all.
It looked like a new door. She said it made her whole house feel brighter. That’s the power of a well-restored door.
Another time, a friend had a solid pine door. It had been painted white for years. Every spring, the corners would get wet from rain.
The paint would bubble. We decided to strip it all back. Underneath, the pine was lovely.
We decided to go with a clear sealant instead of stain. It highlighted the natural grain of the pine. It was much less work than painting.
The key was making sure every bit of old paint was gone. And that the wood was completely dry. Now, it only needs a quick wipe down each year.
It’s a simpler approach for simpler wood.
Door Material Matters
Oak: Durable, shows grain well. Responds well to staining. Can be heavy.
Pine: Softer wood, prone to dents. Takes paint well. Can be stained but needs conditioner for even color.
Mahogany: Rich color, very durable. Expensive. Looks great with a clear or dark stain.
Fiberglass/Steel Doors: These are not wood. They don’t require the same restoration process. They are painted or refinished differently.
What This Means for Your Home
A restored wooden front door does more than just look good. It boosts your home’s curb appeal significantly. It makes a great first impression.
This can even add value to your home. A well-maintained door signals that the entire property is cared for. It also provides better protection.
A fresh finish seals out moisture. This prevents rot and extends the life of the door. It can also improve insulation.
A tight, well-sealed door keeps drafts out. This saves on energy bills.
Think about the feeling you get when you pull up to your house. Seeing a beautiful, welcoming front door makes a difference. It’s a small detail that has a big impact.
It shows pride in your home. It’s an investment that pays off in aesthetics and function. The effort you put in is visible every day.
It’s one of the most rewarding home improvement projects you can do yourself.
Frequently Asked Questions
How long does it take to restore a wooden front door?
The time can vary a lot. A simple cleaning and refinishing might take a weekend. If you need to strip old paint and do repairs, it could take 2-3 full days.
You also need to factor in drying times between coats, which can add several more days. Patience is key.
Can I restore a door with a lot of peeling paint?
Yes, absolutely. Peeling paint is a common issue. You’ll need to strip all the loose paint.
Chemical strippers or sanding can work. Then, you’ll repair any damage. After that, you can prime and repaint.
It’s a lot of work, but the result is worth it.
What is the best finish for an exterior wooden door?
For painted doors, use high-quality exterior acrylic latex paint. For stained doors, use an exterior wood stain followed by a UV-resistant exterior varnish or polyurethane. The best finish depends on the wood type and your desired look.
How often should I re-stain or repaint my front door?
This depends on your climate and sun exposure. In harsh conditions, you might need to touch up or reapply finish every 2-3 years. In milder climates, it could last 5 years or more.
Regular inspection is the best guide.
Can I use an interior wood filler on an exterior door?
No, never. Interior wood fillers are not designed to withstand moisture, temperature changes, or UV exposure. Always use exterior-grade wood fillers or epoxies for outdoor projects to ensure durability and longevity.
What kind of wood is best for a front door?
Hardwoods like oak, mahogany, or walnut are very durable. They resist rot and insects well. Fir and cedar are also good choices.
They are more affordable and still offer decent durability. Softwoods like pine can be used but require more maintenance.
Conclusion
Restoring a weathered wooden front door is a rewarding project. It takes time and effort. But the result is a beautiful, welcoming entryway.
You’ve learned how to clean, repair, and protect your door. With the right approach, your door can look new again. Enjoy the boost in curb appeal.
And the pride in a job well done.
Sponsored / affiliate links. As an Amazon Associate I earn from qualifying purchases. I may earn additional commission from eligible campaigns.