What is the Finished Opening for a Bifold Door?
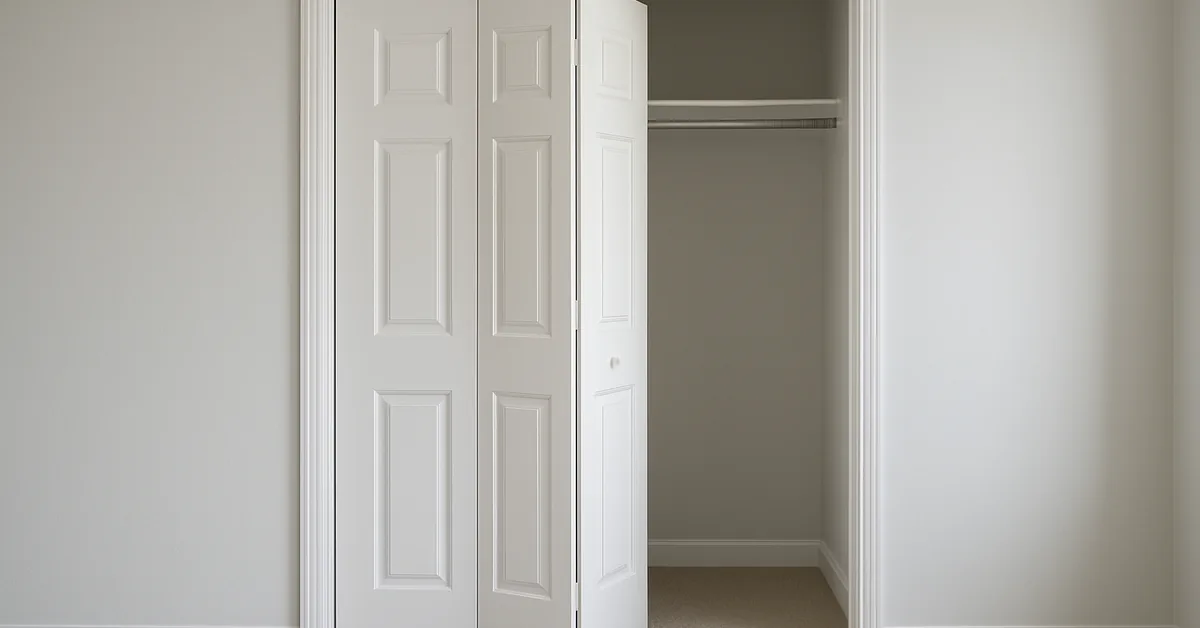
The finished opening for a bifold door is the fully framed, drywalled wall opening the door slides into — typically 3/4 inch taller than the door’s nominal size, per Masonite’s official installation chart, with a 1/8-inch gap at the top and 1/4 inch on each side. Get this wrong and the door binds, scrapes the floor, or won’t fold flush. This guide covers standard finished-opening dimensions by door size, how to measure one accurately, and what changes it.
Understanding the Finished Opening
Definition
Finished opening is the exact, fully-trimmed wall opening — framing, drywall, and trim complete — that a bifold door’s hardware is sized to fit into. It is not the same as the rough opening (the larger framed hole before drywall goes up) or the door’s nominal size (the labeled size, which is smaller than the actual finished opening it needs).
Let’s start with the basics. The finished opening for a bifold door is the final, fully prepared space where your door will be installed. Think of it as the hole in your wall, complete with all the framing, drywall, and trim, ready for the door to slide right in. It’s not just the rough opening you’d see during construction—it’s the polished, ready-to-go space.
When I installed a bifold door in my guest room closet, I learned that the finished opening is critical because it determines the size of the door you’ll buy. If the opening is too big or too small, your door won’t fit properly, and you’ll end up with gaps, sticking, or a door that just doesn’t work. The finished opening includes the width, height, and depth of the space, and it needs to be precise.
For example, a standard bifold door for a closet might require a finished opening of 32 inches wide by 80 inches tall. But here’s the catch: not all bifold doors are the same, and your opening might need to be slightly different depending on the door’s design or the manufacturer’s specs. Let’s explore why this measurement is so important.
Why the Finished Opening Matters
You might be wondering why we’re making such a big deal about the finished opening. Trust me, I wondered the same thing when I started my project. But here’s the deal: bifold doors are unique because they fold in half as they open, which means they need just the right amount of space to operate smoothly. If your finished opening is off by even half an inch, you could run into problems.
A properly sized finished opening ensures your door opens and closes without scraping the floor or jamming against the frame. It also affects how the door looks in your space. When I installed my bifold door, I wanted it to blend seamlessly with the room, and getting the finished opening right was the key to that polished look.
Another reason the finished opening matters is installation ease. If your measurements are accurate, the door will fit like a glove, and you won’t need to make last-minute adjustments or return the door to the store. Plus, it saves you time and money—nobody wants to deal with extra trips to the hardware store or hiring a pro to fix a mistake — the same door hardware that came with your bifold kit will need to be swapped or adjusted if the fit is off.
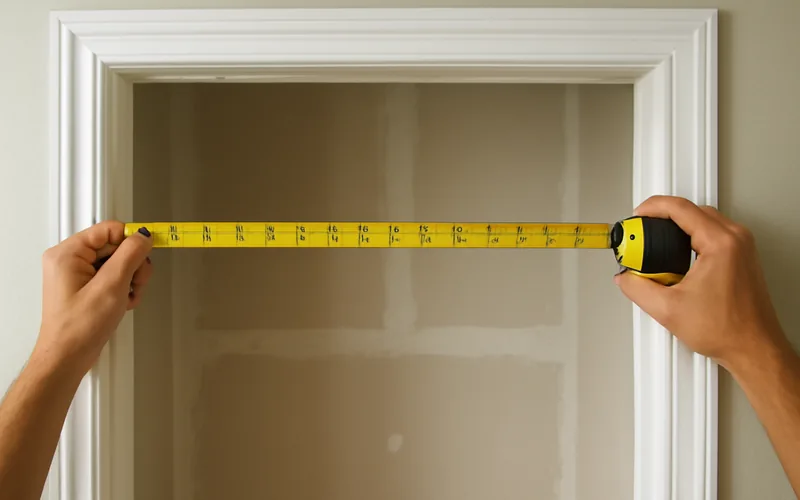
How to Measure the Finished Opening
Now, let’s get practical. Measuring the finished opening for a bifold door isn’t rocket science, but it does take some care. I learned this the hard way when I measured my closet opening too quickly and ended up with a door that was slightly too wide. Here’s how to do it right.
Grab a tape measure, a pencil, and a notepad. You’ll need to measure three things: the width, the height, and the depth of the opening. Start with the width. Measure across the top, middle, and bottom of the opening to make sure it’s consistent. Walls aren’t always perfectly straight, so take the smallest measurement to be safe.
Next, measure the height from the floor to the top of the opening. Again, check both sides and the middle to account for any unevenness. Finally, measure the depth of the opening, which is the thickness of the wall where the door will sit. Most bifold doors need a depth of at least 6 inches to accommodate the track and hardware.
Here’s a quick tip: always measure twice. I can’t stress this enough. When I rushed my measurements, I had to spend an extra weekend sanding down the door frame. Write down your numbers and compare them to the door’s requirements before you buy.
Standard Sizes for Bifold Door Finished Openings
One thing that helped me a lot was learning about standard bifold door sizes. Most bifold doors come in common widths like 24, 30, 32, or 36 inches for a single opening. The height is usually 80 inches, which matches standard interior door heights in the U.S. But here’s where it gets tricky: the finished opening is slightly different from the door’s nominal size.
To make it clearer, I’ve put together a simple table with some common bifold door sizes and their corresponding finished opening dimensions. These are based on my research and what I found at major home improvement stores like Home Depot and Lowe’s.
| Nominal Door Size (Width x Height) | Finished Opening (Width x Height) | Notes |
|---|---|---|
| 24″ x 80″ | 24″ x 80.5″ | Common for small closets |
| 30″ x 80″ | 30″ x 80.5″ | Popular for medium closets |
| 32″ x 80″ | 32″ x 80.5″ | Standard for most closets |
| 36″ x 80″ | 36″ x 80.5″ | Great for larger spaces |
| 48″ x 80″ (double bifold) | 48″ x 80.5″ | Used for wide openings |
The extra half-inch in height accounts for the track that sits at the top of the door. Some manufacturers might also recommend a slightly wider opening (about 1/8 to 1/4 inch) to give the door room to slide smoothly. Always check the specific requirements for the door you’re buying, as they can vary.
Official Manufacturer Finished Opening Chart
For a more precise reference, here is Masonite’s own published finished-opening chart for standard 1-3/8″ bifold doors, covering both common panel heights:
| Door Width | Finished Opening (79″ Panel) | Finished Opening (77″ Panel) |
|---|---|---|
| 18″ | 18″ x 80-3/4″ | 18″ x 78-3/4″ |
| 24″ | 24″ x 80-3/4″ | 24″ x 78-3/4″ |
| 28″ | 28″ x 80-3/4″ | 28″ x 78-3/4″ |
| 30″ | 30″ x 80-3/4″ | 30″ x 78-3/4″ |
| 32″ | 32″ x 80-3/4″ | 32″ x 78-3/4″ |
| 34″ | 34″ x 80-3/4″ | 34″ x 78-3/4″ |
| 36″ | 36″ x 80-3/4″ | 36″ x 78-3/4″ |
Double-bifold units (two sets of panels sharing one track) mount together for openings up to 72″ wide using the same per-panel dimensions above. Not every size is stocked in every market — wider or non-standard openings are often special-order.
📊 Manufacturer specs call for a 1/8-inch gap at the top of the bifold and 1/4 inch of clearance on each side after installation — not the reverse. Source: Masonite official bifold door installation instructions
Best 24″x80″ Bifold Door Pick
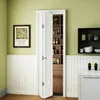
JUBEST 24 in. x 80 in. Bifold Closet Door, 2-Panel White Primed – $149.00
Matches the 24″ x 80-3/4″ finished opening in the chart above — the single most common bifold closet size, ready to hang on a standard track kit.
- Best for: standard single-closet openings measuring close to 24″ x 80″
- Why we picked it: primed and ready to paint, sized to the nominal chart above with no custom order needed
- Main drawback: hollow-core panels — not as solid-feeling as a real wood door
Compare more finished-opening essentials
 Option 1 Prime-Line Bi-Fold Door Hardware Repair Kit – $8.75
|
 Option 2 STANLEY FATMAX 25-Foot Tape Measure – $20.99
|
 Option 3 WD-40 Specialist Silicone Lubricant Spray – $22.79
|
As an Amazon Associate we earn from qualifying purchases.
Factors That Affect the Finished Opening
Not every bifold door installation is straightforward. I learned this when I tried to install a bifold door in an older home with uneven floors. Several factors can affect the size of your finished opening, and it’s worth keeping them in mind.
First, consider the type of bifold door. Some doors are solid wood, while others are hollow-core or even glass-paneled. Heavier doors might need a sturdier frame, which could slightly change the opening size. For example, my solid wood bifold door needed a bit more clearance than a lightweight hollow-core one.
The floor material is another factor. If you have thick carpet or tile, you might need to adjust the height of the opening to prevent the door from dragging. I had to add a small shim under my door track to account for my plush carpet, and it made a big difference.
Finally, the wall’s condition matters. If you’re working with an older home, the walls might not be perfectly plumb, which can throw off your measurements. In my case, I had to use a level to check the frame and make small adjustments to get everything square.
Preparing the Finished Opening
Once you’ve got your measurements, it’s time to prepare the finished opening. This step is all about making sure the space is ready for your door. When I did this, I found it helpful to think of it like setting the stage for a performance—the door is the star, and the opening needs to be perfect.
Start by checking that the frame is square and level. Use a carpenter’s square and a level to confirm. If it’s not square, you might need to add shims or adjust the framing. Next, make sure the drywall or trim is finished and smooth. Any rough edges or protruding nails can interfere with the door’s movement.
You’ll also need to install the track that comes with your bifold door kit. Most tracks are mounted at the top of the opening, so make sure there’s enough space for it. I made the mistake of not leaving enough room for the track at first, and I had to redo part of the frame. Follow the manufacturer’s instructions for track installation, as some might require specific screws or brackets.
“I made the mistake of not leaving enough room for the track at first, and I had to redo part of the frame — measure the full 3/4-inch-over-nominal height before you cut anything, not after.”
If you’re replacing an old door, remove any leftover hardware or trim from the previous setup. A clean, smooth opening makes installation so much easier.
Choosing the Right Bifold Door
Now that your finished opening is ready, it’s time to pick the perfect bifold door. This part is fun because you get to choose the style and material that matches your home. I spent hours browsing options, and I learned a few things along the way.
Bifold doors come in a variety of materials, like wood, MDF, or even mirrored panels. Think about the room’s vibe. For my modern living space, I went with a sleek white MDF door, but a rustic wooden door might be perfect for a cozy bedroom.
You’ll also need to decide between a single bifold (one set of folding panels) or a double bifold (two sets for a wider opening). Check your finished opening measurements against the door’s specs to make sure it’s a match. Most manufacturers provide a sizing guide, so don’t skip reading it.
Another tip: consider the hardware. Some bifold doors come with basic knobs, while others have fancier handles or even no hardware at all for a minimalist look. I chose a door with a small, discreet handle to keep things clean and simple.
Installing Your Bifold Door
With your finished opening prepared and your door picked out, it’s time to install. I’ll be honest—installation can feel daunting, but it’s totally doable with some patience. Here’s how I did it.
First, install the top track. Most bifold door kits come with a track that screws into the top of the opening. Make sure it’s level, or your door will slide unevenly. Next, attach the bottom pivot bracket to the floor, following the manufacturer’s guide.
Then, hang the door. Bifold doors usually come in two panels connected by hinges. You’ll slide the top rollers into the track and set the bottom pivot into the bracket. It took me a couple of tries to get this right, but once the door was in place, it felt so rewarding.
Adjust the door as needed. You might need to tweak the track or pivot to make sure the door folds smoothly and sits flush when closed. I had to adjust the height slightly to avoid scraping my carpet, but the kit came with clear instructions.
Common Mistakes to Avoid
I made a few mistakes during my bifold door project, and I want to save you the hassle. One big one is not double-checking your measurements. Even a small error can cause big problems, so measure carefully.
Another mistake is ignoring the floor. If your floor isn’t level, your door might not close properly. Use a level and shims to fix this before you install.
Finally, don’t skip the instructions. Every bifold door is a little different, and the manufacturer’s guide will have specific tips for your model. I thought I could wing it, but reading the manual saved me a lot of time in the end.
Maintenance Tips for Bifold Doors
Once your bifold door is installed, you’ll want to keep it in great shape. I’ve found that a little maintenance goes a long way. Regularly check the track for dust or debris, as this can make the door stick. A quick wipe with a damp cloth usually does the trick.
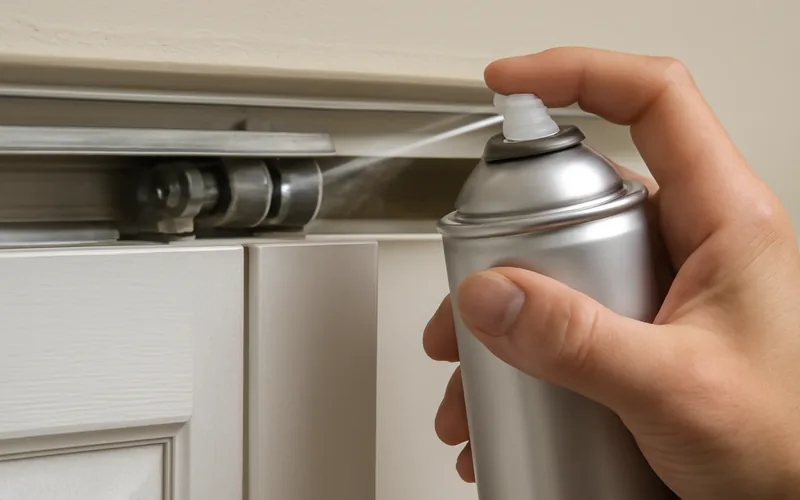
Lubricate the rollers and pivots every few months with a silicone-based spray. This keeps the door sliding smoothly. Also, tighten any loose screws in the track or hinges to prevent wobbling.
If your door is wooden, consider sealing or painting it to protect against moisture, especially in humid areas like bathrooms. My closet door has held up beautifully with just a little care.
Frequently Asked Questions
What’s the difference between a rough opening and a finished opening?
The rough opening is the initial framed space in your wall before drywall or trim is added. It’s usually a bit larger to allow for adjustments. The finished opening is the final, ready-to-go space with all the framing, drywall, and trim in place, sized exactly for your bifold door.
Can I install a bifold door in a non-standard opening?
Yes, but you might need a custom door or some extra work. If your opening is an unusual size, you can order a custom bifold door or adjust the opening with framing or shims. It’s best to consult a professional if you’re unsure.
How much clearance do bifold doors need?
Most bifold doors need about 1/8 inch of clearance at the top and 1/4 inch on each side, per manufacturer installation charts like Masonite’s. Check your door’s instructions for exact measurements, as they can vary.
Do bifold doors work with carpeted floors?
Yes, but you may need to adjust the height of the bottom pivot to prevent dragging. I used a shim under my track to account for my carpet, and it worked perfectly.
Can I install a bifold door myself?
Absolutely! With the right tools and careful measurements, installing a bifold door is a manageable DIY project. Just follow the manufacturer’s instructions and take your time to get it right.
Conclusion
Installing a bifold door can transform your space, and getting the finished opening right is the first step to success. I’ve loved how my bifold door added both function and style to my home, and I hope this guide helps you feel ready to tackle your own project. From measuring carefully to choosing the perfect door, every step counts. Take your time, double-check your work, and soon you’ll have a bifold door that fits perfectly and looks amazing. Happy home improving!
Sponsored / affiliate links. As an Amazon Associate I earn from qualifying purchases. I may earn additional commission from eligible campaigns.