How to Install Bifold Doors Without a Bottom Track
Bifold doors can be hung without a bottom track using a top-hung system or pivot hinges — but only for wood, plastic, or hollow-core panels light enough for the top hardware to carry alone. Skipping the track on a heavy metal or glass door lets the panels wobble and shortens hinge life. This guide covers measuring the opening, choosing top-hung vs. pivot-hinge hardware, and when a floor guide pin (not a full track) is worth adding back.
Quick Answer
Yes — bifold doors can hang without a bottom track using a top-hung roller system or pivot hinges anchored to the head and side jambs. Wood or hollow-core panels rated around 40 lbs per panel work well trackless; heavier or glass doors still need at least a discreet floor guide pin to stop the bottom edge from wobbling.
Why Choose Bifold Doors Without a Bottom Track?
When I first started researching bifold doors, I was drawn to the idea of skipping the bottom track. A bottom track can collect dust, create a tripping hazard, and sometimes make your space feel less open. By going trackless, you get a cleaner look and easier maintenance. These doors pivot on hinges or slide on a top track, keeping the floor clear. They’re perfect for small spaces like closets or for creating flexible room dividers. Plus, they’re easier to install than you might think, especially if you’re handy with tools. The key is understanding how the door’s weight is supported by the top track or hinges, which I’ll explain as we go.
Tools and Materials You’ll Need
Before we get started, let’s gather everything you need. I learned the hard way that having all your tools and materials ready saves a ton of time. Here’s what I used for my project. If you’re replacing worn hardware rather than starting fresh, see the trackless-friendly hardware kits below — they cover both the pivot-only route and a top track option.
| Item | Purpose |
|---|---|
| Bifold door kit (trackless) | Includes doors, top track (if needed), and hardware like hinges or pivots. |
| Measuring tape | For precise measurements of the door opening. |
| Level | To ensure the door frame and track are perfectly aligned. |
| Drill and drill bits | For making pilot holes and securing hardware. |
| Screwdriver | To tighten screws and adjust fittings. |
| Stud finder | To locate studs for secure mounting. |
| Shims | To level the frame or adjust door alignment. |
| Pencil | For marking measurements and drilling points. |
| Saw (if trimming doors) | To cut doors to size if the opening isn’t standard. |
| Sandpaper | To smooth any cut edges. |
| Safety gear (gloves, goggles) | To protect yourself while cutting or drilling. |
Best Trackless Bifold Hardware Pick
Bifold Door Hardware Repair Kit, 2-Pack – $6.79
This top-and-bottom pivot kit is surface-mounted with no mortises to cut — the same trackless, pivot-hinge approach this guide walks through above, and it skips the bottom track entirely.
- Best for: closet and pantry doors under about 40 lbs per panel
- Why we picked it: surface-mount install matches this guide’s no-mortise, trackless method
- Main drawback: pivots only — add a separate floor guide pin if panels wobble
Compare more bifold hardware options
 Option 1 Bifold Door Hardware Repair Kit – $6.87
|
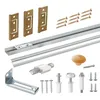 Option 2 Bifold Door Hardware Kit with Track – $19.98
|
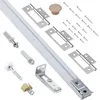 Option 3 36-Inch One-Piece Top Track Kit – $29.99
|
As an Amazon Associate we earn from qualifying purchases.
Measuring Your Space
The first step I took was measuring the door opening. Accuracy here is crucial because bifold doors need to fit snugly. I grabbed my measuring tape and measured the width and height of the opening at multiple points. Door frames aren’t always perfectly square, so I checked the top, middle, and bottom for width, and both sides for height. Write down the smallest measurements to ensure the doors fit.
For trackless bifold doors, you’ll either be using a top-hung system (where the doors slide on a track mounted above) or a pivot-hinge system (where doors fold on hinges without a floor track). My closet used a top-hung system, so I made sure the header above the door was sturdy enough to support the weight. If you’re using a pivot-hinge system, check that the side jambs are strong. If your measurements are off, the doors might not close properly, so take your time.
Do You Actually Need a Bottom Track?
A bottom track is a floor-mounted channel that guides the lower edge of a bifold door and is not strictly required for interior wood, plastic, or hollow-core panels — but it does add stability that a top-hung or pivot-hinge system alone doesn’t provide. Whether you need one comes down to weight and material, not preference alone.
Manufacturer weight ratings are the clearest way to decide. Johnson Hardware’s residential-grade 1700 Series top-mount track — the same style hardware referenced in the tools table above — is rated for panels up to 40 lbs each. A typical hollow-core closet door panel falls well under that, which is why trackless top-hung systems work fine for standard closets. Solid wood, glass, or exterior aluminum bifold panels routinely exceed that weight, and forcing them onto pivots alone accelerates hinge wear and makes the doors wobble at the bottom edge.
📊 Johnson Hardware’s residential 1700 Series bifold track rates each door panel up to 40 lbs — Source: Johnson Hardware, 2026
If your panels are near that limit, or you notice the bottom edge tapping the baseboard when the doors swing, the fix isn’t necessarily a full track. Most trackless kits pair with a small L-shaped floor guide bracket and a knurled pivot pin — the pin never touches the floor directly, but the bracket stops side-to-side sway without adding a visible channel. It’s the middle ground between a fully trackless install and a full bottom track.
Choosing the Right Bifold Doors
Picking the right doors was one of the most fun parts for me. Bifold doors come in all sorts of styles—wood, glass, mirrored, or even lightweight MDF. I went with solid wood for a classic look, but you might prefer glass panels for a modern vibe. The key is to choose doors that match your space and are compatible with a trackless system.
For a top-hung setup, ensure the doors are designed for a top track or have pre-installed rollers. For a pivot-hinge system, check that the doors come with the right hinges or pivots. I also made sure my doors weren’t too heavy for the top track to handle. Most manufacturers list weight limits, so double-check that against the 40 lb per-panel benchmark above. If your opening isn’t a standard size, you might need to trim the doors or order custom ones. I had to trim mine slightly, which I’ll explain later.
Preparing the Door Opening
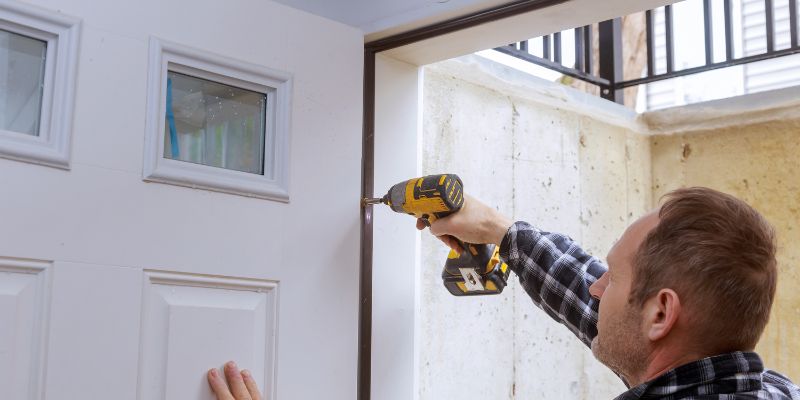
Before installing anything, I prepped the door opening. This step is all about making sure the space is ready for your new doors. I used a level to check that the header and side jambs were plumb. If they’re not, you might need shims to even things out. I also used a stud finder to locate studs in the header for securing the top track or pivot brackets.
Next, I cleaned out any debris from the opening and removed any old hardware if I was replacing existing doors. If you’re working with a new frame, make sure it’s square. I had to sand down a small lip on my frame to ensure a smooth fit. If your doors need painting or staining, do it now before installation. I stained mine beforehand to avoid messing up the floor.
Installing a Top-Hung Bifold Door System
Since I used a top-hung system, I’ll walk you through that first. The top track is the backbone of this setup, so it needs to be installed securely. Here’s how I did it:
- Mark the Track Placement: I held the top track against the header and marked where the screws would go. Using a stud finder, I located the studs to ensure the track would be anchored solidly.
- Drill Pilot Holes: I drilled pilot holes for the screws to prevent the wood from splitting. Make sure the holes are slightly smaller than your screws.
- Attach the Track: I secured the track to the header with screws, using a level to keep it straight. If the header isn’t level, add shims under the track.
- Install the Rollers: My doors came with rollers that fit into the track. I attached them to the top of each door panel, following the manufacturer’s instructions.
- Hang the Doors: With a friend’s help, I lifted the doors and slid the rollers into the track. It took a bit of wiggling to get them in place.
- Adjust the Alignment: Most top-hung systems have adjustable rollers. I tweaked them until the doors moved smoothly and lined up evenly when closed.
It took me about an hour to get this part right, but once the track was secure, the doors glided like a dream.
“Once the top track was secured level and the rollers were adjusted, the doors glided like a dream — no bottom track needed. I still lubricate the rollers with a silicone spray every few months to keep that smooth.”

Installing a Pivot-Hinge Bifold Door System
If you’re going for a pivot-hinge system, the process is a bit different. This setup uses hinges or pivots on the side jambs and top of the frame, so no track is needed at all. Here’s how I tackled it for a friend’s project:
- Install the Top Pivot Bracket: I attached the top pivot bracket to the header, aligning it with the side jamb. Again, I used a stud finder to secure it to a stud.
- Attach the Bottom Pivot (Optional): Some pivot systems don’t need a bottom pivot, which keeps the floor clear. If yours does, install it on the jamb side, not the floor.
- Mount the Hinges: I attached hinges between the door panels, usually two or three per pair, depending on the door height. Make sure they’re evenly spaced.
- Hang the Doors: I inserted the top pivot into the bracket, then aligned the bottom pivot (if used). The doors should fold smoothly when opened.
- Check Alignment: I adjusted the pivots to ensure the doors sat flush with the frame when closed. Shims helped if the jamb wasn’t plumb.
This system feels more like installing a regular door, but the folding mechanism makes it unique. It’s great for a seamless look.
Trimming Doors (If Needed)
My closet opening was slightly shorter than standard, so I had to trim the doors. If you’re in the same boat, don’t worry—it’s manageable. I measured the height of the opening and subtracted about 1/4 inch for clearance. Using a saw, I carefully trimmed the bottom of the doors, keeping the cut straight. Sandpaper smoothed out the edges, and I applied a coat of stain to match the rest of the door. Always wear safety gear when cutting, and double-check your measurements to avoid cutting too much.
Adjusting and Testing the Doors
Once the doors were hung, I spent time testing and adjusting them. For the top-hung system, I tweaked the rollers to ensure smooth sliding and no gaps when closed. For the pivot-hinge system, I adjusted the pivots to make sure the doors folded neatly. I opened and closed the doors multiple times to check for sticking or misalignment. If the doors don’t close flush, you might need to adjust the track or hinges or add shims to the frame. Patience is key here—it took me a few tries to get everything perfect.
Adding Finishing Touches
With the doors installed, I added some finishing touches to make them look polished. I attached handles or knobs, which usually come with the door kit. If your doors are pre-finished, you’re good to go. If not, now’s the time to paint or stain. I also checked for any gaps around the frame and used caulk to seal them for a clean look. If you’re using the doors as a room divider, consider adding a latch or stop to keep them in place when open.
Maintenance Tips for Trackless Bifold Doors
To keep your doors working smoothly, a little maintenance goes a long way. I clean the top track or pivots every few months to remove dust. For top-hung systems, I occasionally lubricate the rollers with a silicone-based spray to keep them gliding. Check the screws and hinges periodically to ensure they’re tight. If you notice any wobbling, it might be a sign that the track or pivots need adjusting — or that it’s time to add the floor guide pin discussed above. With minimal care, these doors can last for years.
Common Mistakes to Avoid
I made a couple of mistakes during my installation, so let me save you some trouble. First, don’t skip measuring multiple times—small errors can throw off the whole project. Second, don’t overtighten screws, as this can strip the wood or damage the hardware. Third, don’t ignore the panel weight limit — hanging a solid wood or glass door on pivots rated for hollow-core panels is the single biggest cause of early hinge failure. Finally, make sure the header is strong enough to support the doors, especially for top-hung systems. If you’re unsure, consult a professional before starting.
Conclusion
Installing bifold doors without a bottom track was one of the most rewarding home projects I’ve tackled. The clean, trackless look transformed my closet and made the space feel bigger and more modern. By following these steps—measuring carefully, choosing the right doors, and taking your time with installation—you can achieve the same results. Whether you go with a top-hung or pivot-hinge system, the process is straightforward with the right tools and a bit of patience. For a wider look at bifold hardware options, see our door hardware and locks guides, and if you’re still deciding on doors, check what size bifold door you need before you buy.
Frequently Asked Questions
Can I install bifold doors without a bottom track in any room?
Yes, you can! I’ve seen trackless bifold doors work beautifully in closets, bedrooms, and even as room dividers. Just make sure the header or jambs are sturdy enough to support the doors’ weight.
How much weight can a bifold door track hold without a bottom track?
Residential top-hung tracks like Johnson Hardware’s 1700 Series are rated for about 40 lbs per panel. Standard hollow-core closet doors fall well under that. Solid wood, glass, or metal panels often exceed it and need a floor guide or full bottom track for support.
Do I need a floor guide if I skip the bottom track?
Not always, but it helps. A small L-shaped floor guide bracket with a pivot pin stops the bottom edge from swinging side to side without adding a visible track channel. It’s worth adding if your doors wobble or tap the baseboard when closing.
How do I know if my door opening is suitable for trackless bifold doors?
Measure the opening carefully and check that the header and jambs are level and strong. If the frame isn’t square, you can use shims. For top-hung systems, ensure the header can handle the weight.
Do trackless bifold doors require more maintenance?
Not really! I clean the top track or pivots every few months and lubricate the rollers occasionally. Regular checks to tighten screws keep everything in great shape.
Can I install trackless bifold doors by myself?
You can, but having a friend helps, especially when hanging the doors. I found it tricky to hold and align the doors alone, so an extra pair of hands makes it easier.
What if my bifold doors don’t close properly?
Check the alignment of the track or pivots. You might need to adjust the rollers or hinges. Shims can help if the frame isn’t level. I had to tweak mine a few times to get a perfect fit.
Sponsored / affiliate links. As an Amazon Associate I earn from qualifying purchases. I may earn additional commission from eligible campaigns.