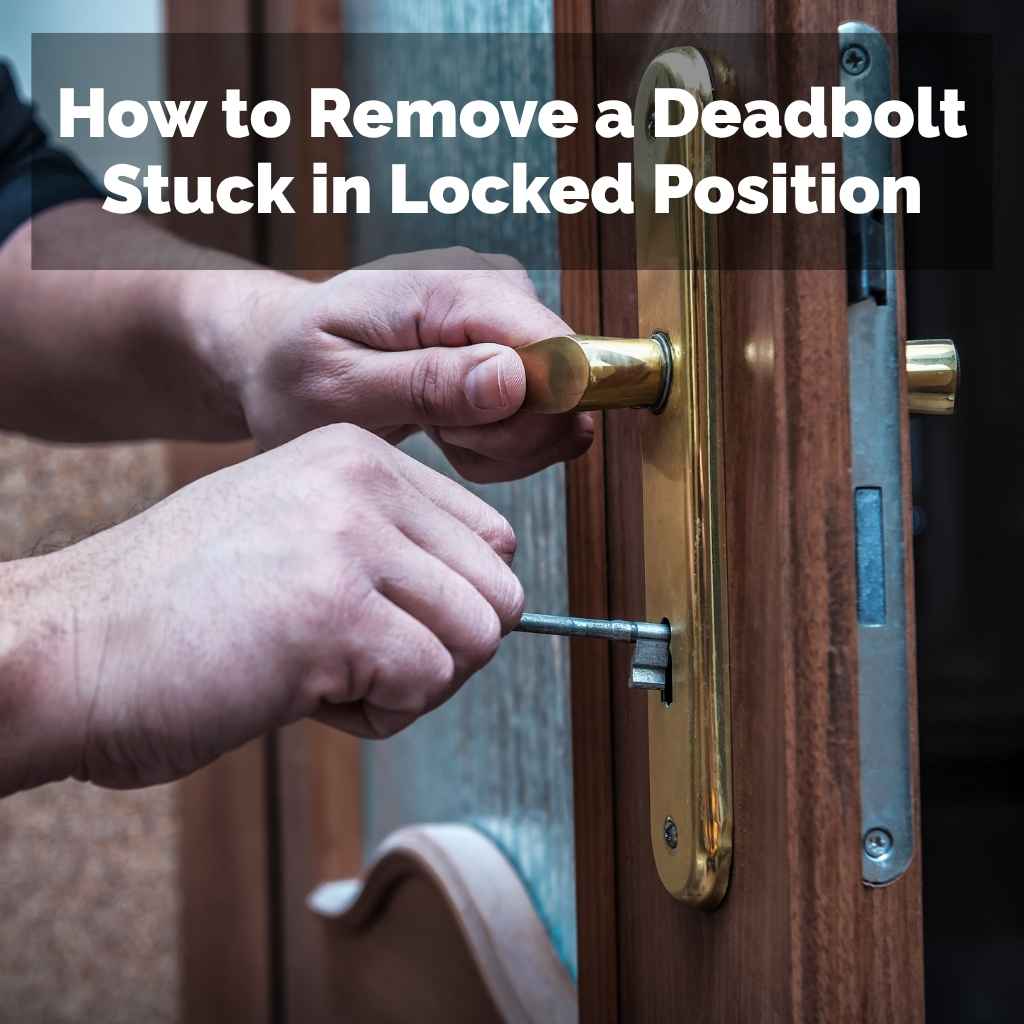
How to Remove a Deadbolt Stuck in Locked Position
Sometimes, your door lock can get stuck. It might be a deadbolt that won’t budge, leaving you wondering what to do. This can be a common problem, especially for those new to home maintenance or dealing with older locks.
Don’t worry, it’s usually not a big emergency, and there are simple steps you can follow to fix it. We’ll show you exactly how to remove a deadbolt stuck in the locked position without causing more trouble.
Fixing a Stuck Deadbolt Lock
When a deadbolt gets stuck, it can feel frustrating. This often happens because of small issues like debris inside the lock, worn-out parts, or the bolt itself not aligning perfectly with the strike plate on the door frame. For beginners, the idea of taking apart a lock might seem tricky, but it’s often much simpler than you think.
The main goal is to gently coax the bolt back into its housing or remove the entire lock mechanism safely. This section will cover the initial checks and basic maneuvers that can often solve the problem without needing special tools.
Identifying the Cause of a Stuck Deadbolt
Before you try to force anything, it’s good to figure out why the deadbolt is stuck. Is it the key not turning at all, or is the bolt itself refusing to retract or extend? Sometimes, dirt and dust get inside the lock cylinder, making it stiff.
Other times, the connecting pin between the inside knob and the outside cylinder might have shifted. Even extreme weather can sometimes affect metal parts and cause them to bind.
-
Check the Key and Cylinder
Make sure you’re using the correct key. Try gently wiggling the key while turning it. If the key won’t go in all the way or turns with a lot of resistance, there might be something blocking the pins inside the lock.
You can try blowing compressed air into the keyhole to clear out any dust or small debris. Sometimes, a little graphite lubricant (never oil) can help smooth things out, but use it sparingly.
-
Examine the Bolt Movement
If the key turns but the bolt doesn’t move, look at the bolt itself. Is it slightly misaligned with the hole in the door frame (the strike plate)? If the door has shifted slightly, the bolt might be hitting the edge of the strike plate.
This is common if the house settles or if the door has warped. You might be able to gently push or pull the door to relieve the pressure on the bolt, allowing it to retract.
-
Listen for Unusual Sounds
When you try to operate the lock, pay attention to any strange noises. Grinding or scraping sounds often mean that internal parts are damaged or not lining up correctly. A simple click might indicate that the mechanism is engaging, but the bolt itself is stuck.
Understanding these sounds can give you clues about what needs to be done next.
A 2022 survey by HomeAdvisor found that about 25% of homeowners have experienced a lock malfunction in the past year, with sticky or stuck deadbolts being a frequent complaint.
Simple Fixes Before Disassembly
Many times, a stuck deadbolt can be fixed with simple, non-invasive methods. These steps focus on relieving pressure, lubrication, and gentle manipulation of the door and lock. They are designed to be tried before resorting to taking the lock apart, which is generally a last resort if the problem is minor.
-
Relieve Door Pressure
This is one of the easiest and most effective first steps. If the deadbolt is stuck because it’s binding against the strike plate, try to relieve the pressure. Close the door firmly, or even push against the door frame near the lock.
Then, try turning the key or the thumbturn again. Sometimes, pulling the door slightly away from the frame can also release the tension. This simple trick works surprisingly often.
-
Lubricate the Lock Mechanism
Dry locks can become stiff and hard to operate. For deadbolts, it’s best to use a dry lubricant like graphite powder or a silicone-based spray. Avoid WD-40 or oil-based lubricants, as they can attract dust and make the problem worse over time.
Insert the nozzle of the spray or the tip of the graphite applicator into the keyhole and give it a few short bursts. Work the key in and out a few times to spread the lubricant.
-
Tap Gently
Sometimes, a gentle tap can help dislodge a slightly jammed internal component. Use the handle of a screwdriver or a small rubber mallet. Gently tap around the deadbolt mechanism on the door, and also on the strike plate area on the door frame.
Be careful not to hit too hard, as you don’t want to damage the door or the lock further. This is meant to be a light vibration to help things move.
How to Remove a Deadbolt Stuck in Locked Position Safely
If the simpler methods don’t work, it’s time to consider removing the deadbolt. This process involves carefully taking the lock apart, piece by piece. The goal is to gain access to the internal mechanism that is causing the bolt to stay extended.
Safety is key here, meaning you should proceed with caution to avoid injury or further damage to the door or lock. We will guide you through the steps needed to dismantle the lock correctly when it’s stuck in the locked state.
Gathering Necessary Tools
Before you begin the process of removing the stuck deadbolt, having the right tools will make the job much smoother and prevent you from needing to improvise, which could lead to damage. Most deadbolt removal tasks require common household tools that most people already have.
-
Screwdriver Set
You will likely need both Phillips head and flathead screwdrivers. The size of the screws can vary between deadbolt brands, so a set with multiple sizes is ideal. Make sure the screwdriver tip fits snugly into the screw head to avoid stripping the screw.
Stripped screws are a common problem that can turn a simple fix into a frustrating ordeal.
-
Pliers
Needle-nose pliers can be very helpful for gripping and pulling small parts, or for holding components steady while you unscrew something else. They are also useful for removing retaining clips or springs that might be part of the deadbolt assembly.
-
Hammer and Wood Block
A small hammer and a block of wood are useful for gently tapping parts if they are stuck. The wood block can be placed against a part to distribute the force evenly and prevent damage. This is a more controlled way to apply percussive force compared to hitting directly with the hammer.
-
Safety Glasses
Always wear safety glasses when working with tools, especially when taking apart mechanisms. Small parts can spring out unexpectedly, and you want to protect your eyes from any potential hazards.
-
Pen and Paper or Phone Camera
It’s a good idea to take pictures or sketch out the order of the parts as you remove them. This will be invaluable if you plan to reassemble the lock later, or if you need to identify which part is causing the problem.
Disassembling the Deadbolt from the Exterior
The first part of removing the stuck deadbolt involves working from the outside of the door. This is where the keyhole and often the thumbturn are located. The goal here is to detach the exterior cylinder and its mounting hardware without damaging the door itself.
-
Locate and Remove Set Screws
Look carefully around the exterior of the deadbolt. You might find small set screws that hold the cylinder in place. These are often on the edge of the deadbolt assembly or hidden on the side.
Use the appropriate screwdriver to loosen and remove these screws. Keep them in a safe place, like a small bowl or magnetic tray.
-
Access the Mounting Screws
Once any set screws are removed, you will likely find two larger screws that go all the way through the door, from the interior side, to hold the deadbolt assembly together. These screws are typically located on the interior side of the door, under the thumbturn mechanism. You will need to access the interior side of the door to remove these.
-
Remove the Exterior Cylinder
With the mounting screws removed, the exterior cylinder assembly should be loose. You might need to gently wiggle it or use your needle-nose pliers to carefully pull it out from the door. Be patient, as it might be slightly stuck due to internal binding.
If it’s stuck, try to identify what’s holding it from the inside.
A typical deadbolt assembly has an exterior cylinder, an interior thumbturn mechanism, a bolt mechanism, and connecting spindles or shafts. Understanding these components helps in troubleshooting.
Detaching the Interior Mechanism
After the exterior components are loosened or removed, the next step is to detach the interior side of the deadbolt. This often reveals the main bolt mechanism and any internal issues that might be preventing it from retracting.
-
Remove Interior Thumbturn Screws
On the inside of the door, locate the screws that hold the interior thumbturn and housing in place. These are usually visible on the face of the interior plate. Use your screwdriver to remove these screws.
Again, keep them safe, as they will be needed if you plan to reassemble the lock.
-
Separate the Interior Plate and Bolt Mechanism
Once the screws are out, the interior plate should come away from the door. Behind this plate, you will find the main bolt mechanism. This is the part that extends into the door frame.
It might be held in place by a spindle or a connecting rod. Carefully detach this spindle or rod from the interior mechanism.
-
Isolate the Bolt Assembly
With the interior and exterior parts separated, you should now be able to get a clear view of the bolt mechanism itself. If the bolt is stuck in the extended position, you might be able to see what is obstructing its movement. The goal is to remove this entire bolt assembly from the door.
It’s important to note that not all deadbolts are removed in the exact same order. Some brands have different internal designs. Always refer to your lock’s manual if you have it, or search for your specific model online.
Addressing the Stuck Bolt
Once you have the deadbolt mechanism out of the door, you can focus on the part that’s actually stuck. This is where you can really see what’s going on and figure out how to free the bolt.
-
Inspect the Bolt and Latch
Carefully examine the bolt itself. Is there any visible damage, rust, or bent metal? Sometimes, the internal spring that retracts the bolt can break or get jammed.
If you see debris or something bent, try to carefully remove it with pliers or tweezers. If the bolt is simply jammed, you might be able to gently pry it back with a flathead screwdriver or pliers.
-
Check the Spindle or Rod Connection
Ensure the spindle or rod that connects the inside and outside handles is moving freely. If this part is bent or jammed, it won’t allow the bolt to retract. Try to straighten it if it’s slightly bent, or replace it if it’s severely damaged.
This connection is critical for the lock’s operation.
-
Apply Lubricant and Gentle Force
Once you’ve identified any obstruction or potential cause, apply a small amount of graphite lubricant directly to the moving parts of the bolt mechanism. Then, use pliers to gently try and pull or push the bolt back into its retracted position. If it’s very stiff, a gentle tap with a small hammer on a wooden block might help dislodge it.
A common reason for a stuck bolt is the retraction spring failing or becoming misaligned. This spring is crucial for pulling the bolt back into the lock body.
Replacing or Reinstalling the Deadbolt
After you’ve successfully freed the stuck bolt and removed the deadbolt mechanism, you have a choice: either reinstall the same lock if it’s now working perfectly, or
Reinstalling the Repaired Deadbolt
If you managed to fix the issue with the original deadbolt and it’s now operating smoothly, you can reassemble it. This process is essentially the reverse of disassembly, but requires attention to detail to ensure everything aligns correctly.
-
Align the Bolt Mechanism
Place the bolt mechanism back into the hole in the edge of the door. Make sure the spindle holes are facing outward. If there’s a retaining clip or screw holding the bolt mechanism in place, secure it now.
-
Reconnect the Interior and Exterior Parts
Carefully guide the exterior cylinder and the interior thumbturn mechanism back into their respective positions on the door. Ensure the connecting spindle or rod passes through the holes in both the exterior cylinder and the interior mechanism. This step can be tricky, as everything needs to align perfectly.
-
Secure with Mounting Screws
Once the parts are in place and aligned, insert and tighten the mounting screws from the interior side that pass through the door. Make sure they are snug but do not overtighten them, as this can strip the threads or warp the lock housing. Test the lock thoroughly with the key and thumbturn to ensure smooth operation.
A survey from the National Association of Home Builders indicated that about 80% of new home buyers prioritize security features, including deadbolts, when choosing a property.
When to Replace the Deadbolt
There are several signs that indicate it’s time to replace your deadbolt rather than try to repair it. If the lock is old and corroded, if parts are broken beyond simple repair, or if you’ve had recurring issues, a new lock is a better investment for your security.
-
Visible Damage or Rust
If the metal parts of the deadbolt are significantly corroded, bent, or cracked, they are likely compromised. Trying to repair heavily damaged parts may not restore full security and could lead to future failures. Replacing it ensures reliable operation.
-
Worn-Out Internal Components
Sometimes, internal springs, pins, or tumblers wear down over time. This can lead to stiff operation or failure to lock/unlock properly. If you notice excessive wear or if the lock feels loose and wobbly, it’s a good candidate for replacement.
-
Frequent Sticking or Malfunctions
If this isn’t the first time your deadbolt has gotten stuck, or if it frequently operates with difficulty, it’s probably best to replace it. This indicates an underlying issue that might not be easily fixed and could fail again, leaving you vulnerable.
Replacing a deadbolt is a relatively simple DIY project that can enhance your home’s security significantly. Basic deadbolts can be purchased for as little as $20 to $50.
Installing a New Deadbolt
Installing a new deadbolt is a straightforward process, especially if you are replacing an existing one. Most new deadbolts come with detailed instructions and all the necessary hardware.
-
Prepare the Doorway
Ensure the holes in your door are the correct size for the new deadbolt. Most new deadbolts will fit standard pre-drilled doors. If not, you might need to enlarge the holes slightly or use a template provided with the new lock.
-
Install the Bolt Mechanism
Insert the new bolt mechanism into the hole on the edge of the door. Make sure it’s oriented correctly with the “UP” arrow pointing upwards. Secure it in place with the provided screws.
Ensure the bolt can extend and retract freely.
-
Mount the Exterior and Interior Components
Attach the exterior cylinder and interior thumbturn assembly. Feed the connecting spindle through the appropriate holes. Secure the two halves of the lock together using the mounting screws from the interior side.
Double-check alignment before tightening.
-
Test the New Lock
Before closing the door completely, test the new deadbolt thoroughly. Operate it with the key from both sides and use the thumbturn. Make sure it locks and unlocks smoothly and that the bolt fully extends and retracts into the strike plate on the door frame.
Adjust the strike plate if necessary.
Here’s a comparison of common deadbolt features:
| Feature | Basic Deadbolt | Smart Deadbolt |
|---|---|---|
| Locking Mechanism | Key and Thumbturn | Key, Keypad, Smartphone App, Voice Assistant |
| Security Rating | ANSI Grade 2 or 3 | ANSI Grade 1 or 2 |
| Connectivity | None | Wi-Fi or Bluetooth |
| Installation Complexity | Easy | Moderate (requires power/batteries) |
Troubleshooting Common Deadbolt Issues
Even after removal and reinstallation or replacement, deadbolts can sometimes present new or recurring problems. Knowing how to troubleshoot these common issues can save you time and frustration, ensuring your lock remains functional and secure.
Key Won’t Turn Fully
This is a frequent complaint, and often has simple solutions. If the key inserts fully but won’t turn, or only turns partway, it suggests an internal pin issue or alignment problem.
-
Debris in the Cylinder
Tiny particles of dirt, dust, or even lubricant can get lodged in the lock cylinder, preventing the pins from moving freely. Try using compressed air to blow out any obstructions. A graphite lubricant can also help clear minor blockages and smooth pin movement.
-
Misaligned Pins
Over time, the pins inside the lock cylinder can become slightly worn or misaligned. If you have the lock disassembled, you can try to gently nudge the pins with a small tool to ensure they are seated correctly. This is easier to do with the cylinder removed from the door.
-
Bent Key or Cylinder
A bent key will not operate the lock properly. Inspect your key for any signs of bending or damage. If the key appears straight but the lock still doesn’t turn, the cylinder itself might be slightly warped, especially if it’s old or has been exposed to extreme temperatures.
Statistics show that approximately 15% of lock malfunctions are due to key-related issues, including bent or worn keys.
Bolt Not Engaging Strike Plate
When the deadbolt extends but doesn’t fully enter the strike plate on the door frame, it means the door isn’t properly aligned with the frame, or the strike plate itself needs adjustment.
-
Adjust the Strike Plate
The strike plate is the metal piece on the door frame that the bolt goes into. If it’s slightly out of alignment, you can often adjust it. Loosen the screws holding the strike plate, gently shift its position, and then retighten the screws.
You might need to slightly enlarge the hole with a file if the bolt is hitting the metal.
-
Check Door Alignment
Doors can sag or warp over time, causing misalignment. If the deadbolt is consistently hitting the edge of the strike plate, the door itself might need to be adjusted. This could involve tightening hinges or shimming them to reposition the door within the frame.
Sometimes, simply closing the door with a bit more force can help it engage.
-
Ensure Full Bolt Extension
Make sure the deadbolt mechanism is fully extending. If the internal mechanism is weak or not engaging properly, the bolt might not be reaching far enough to enter the strike plate. This would point to an issue with the lock mechanism itself, potentially requiring replacement.
Interior Thumbturn is Loose
A loose thumbturn can make it difficult to operate the deadbolt from the inside and may indicate a problem with the internal spindle or housing.
-
Tighten Interior Screws
The most common reason for a loose thumbturn is that the mounting screws on the interior side have become loose. Try tightening these screws firmly. If they keep loosening, the threads in the lock housing might be stripped, or the screws themselves might need replacing.
-
Check Spindle Connection
The thumbturn connects to a spindle that operates the bolt. If this spindle is damaged, worn, or not properly seated within the thumbturn mechanism, it can cause looseness. Examine the connection point and ensure it’s secure.
If the spindle is worn, the entire lock mechanism might need replacement.
-
Worn Thumbturn Mechanism
In some older locks, the thumbturn mechanism itself can wear out, leading to a loose feel and difficulty in operating the bolt. If tightening screws and checking the spindle doesn’t help, the internal parts of the thumbturn might be the issue.
Frequently Asked Questions
Question: What is the easiest way to free a stuck deadbolt?
Answer: Often, the easiest way is to relieve pressure on the door by pushing or pulling it while trying to turn the key or thumbturn. Gentle lubrication with graphite powder can also help significantly.
Question: Can I use WD-40 to lubricate a stuck deadbolt?
Answer: It’s generally not recommended to use WD-40 or oil-based lubricants in deadbolts, as they can attract dust and gunk, making the problem worse over time. Graphite powder or silicone-based sprays are better choices.
Question: How do I know if I need to replace my deadbolt?
Answer: You should consider replacing your deadbolt if it has visible rust or damage, if internal parts are broken, or if it frequently gets stuck or malfunctions. A new lock ensures better security and reliability.
Question: Do I need special tools to remove a deadbolt?
Answer: For most standard deadbolt removals, you’ll need basic tools like a Phillips head screwdriver and a flathead screwdriver. Pliers and a small hammer can also be helpful.
Question: How long does it take to install a new deadbolt?
Answer: Installing a new deadbolt is usually a quick process. If your door is already pre-drilled for a deadbolt, it can often be done in 30 minutes to an hour.
Summary
Learning how to remove a deadbolt stuck in a locked position is a useful skill. By following simple steps to identify the problem, lubricate the mechanism, and carefully disassemble the lock, you can often resolve the issue. If repairs aren’t possible, replacing the deadbolt is a straightforward solution for improved security.