How To Install Cable Railing With Wood Posts Step-By-Step
Installing cable railing with wood posts involves careful planning, precise measurement, and proper tool usage to ensure a secure, safe, and visually appealing result. This guide provides a detailed, step-by-step approach for homeowners to achieve professional-looking results.
Understanding Your Cable Railing Project
Cable railing systems are a popular choice. They offer clean lines and unobstructed views. They are often chosen for decks, balconies, and stairways. The main parts are the cables, the posts, and the hardware that holds them all together. Wood posts are a classic material. They blend well with many outdoor designs. They can be made of cedar, redwood, or pressure-treated pine.
Choosing the right wood is important. It needs to be strong enough. It must also stand up to the weather. Cedar and redwood are naturally resistant to rot and insects. Pressure-treated wood offers good protection. But it’s always a good idea to seal it well. Your posts will be the main support for the cables. This means they need to be very secure.
You will also need cable railing kits. These usually include stainless steel cable. They also have tensioners, thimbles, and other fittings. These small parts are crucial for making the system work. They keep the cables taut and safe. Planning this project involves looking at your space. Measure everything carefully. Think about where each post will go. Consider the spacing between cables too. Building codes often have rules about this. Always check your local building codes first.
Gathering Your Tools and Materials
Before you start, gather everything you need. This saves time. It also prevents frustration later. You’ll need your cable railing kit. Make sure it has enough cable for your project. It should also have all the necessary hardware.
For the wood posts, choose sturdy lumber. A 4×4 post is often too small. A 6×6 post is usually better. You will need lag bolts or carriage bolts. These secure the posts to your deck frame or structure. You’ll also need washers and nuts.
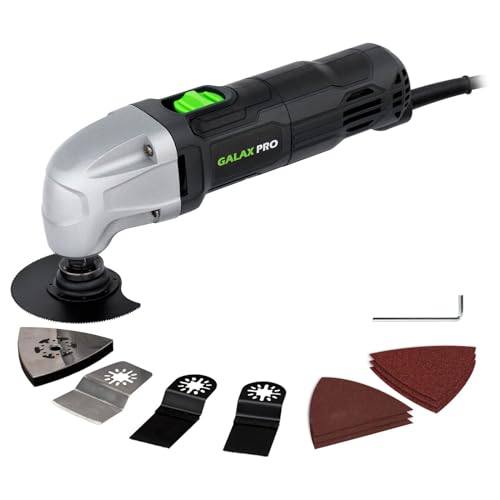
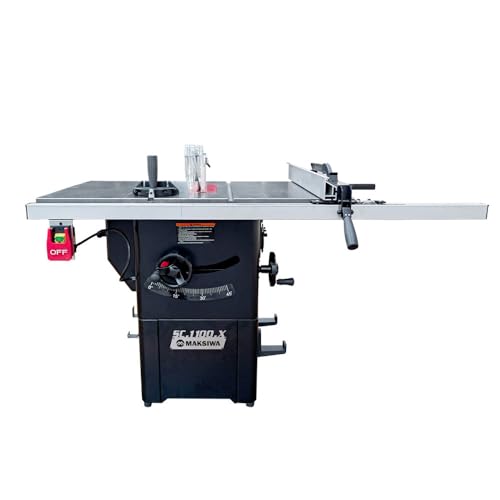
Here’s a list of common tools:
- Measuring tape
- Pencil
- Level (long and short ones are helpful)
- Drill with various drill bits (including long ones for cables)
- Socket wrench set
- Cable cutter (specifically for stainless steel cable)
- Wire stripper
- Crimping tool (if your kit doesn’t have swage fittings)
- Sander or sandpaper (for smoothing wood posts)
- Safety glasses
- Work gloves
- Ladder (if working at heights)
You might also need a stud finder. This helps locate the joists in your deck. This is where you will attach your posts for maximum strength. If you are installing new posts, you will need concrete and post hole diggers.
Post Preparation Essentials
Wood posts need to be ready for the elements and the cables. Ensure they are cut to the correct height. Sand down any rough edges. If you are using pressure-treated wood, let it dry for a few weeks. Then, apply a good quality exterior sealant or stain. This protects the wood and makes your railing look finished.
Step 1: Planning Your Layout and Post Placement
This is perhaps the most critical step. Good planning prevents many problems. You need to decide where each post will stand. Posts are usually placed at corners. They are also placed at regular intervals along straight runs. The distance between posts depends on the cable length and tension. Most manufacturers recommend a maximum span. Check your cable railing kit’s instructions.
For deck installations, posts must attach to the frame. This means finding the deck joists. These are the horizontal beams underneath your deck boards. You can often find them by looking at the edge of your deck. Or, use a stud finder. Mark the location of each joist. Your posts will attach directly to these joists.
For existing structures like porches, you might attach posts to the framing behind the fascia board. This requires knowing your building’s construction. If you’re unsure, it’s best to consult a professional. Safety is paramount. Incorrect post placement leads to sagging cables. It can also create a safety hazard.
Spacing is Key
Typical post spacing: 4 to 6 feet apart. This is a general rule. Always refer to your specific cable system’s guidelines. Longer spans require thicker cables or special tensioning systems. Consider the overall look. Even spacing makes the railing appear neat and professional.
Draw out your plan. Mark the post locations on paper first. Then, transfer these marks to your deck or porch. Use a measuring tape and a pencil. Double-check all your measurements. Make sure your lines are straight.
Step 2: Installing the Wood Posts
This is where the real building begins. For decks, you’ll likely be attaching posts to the existing frame. If you’re building a new deck, you might install new posts first.
Attaching to Existing Decks:
- Mark Post Location: Based on your plan, mark where the post will sit.
- Drill Pilot Holes: From the underside of the deck, locate the joist. Drill pilot holes up through the joist and into the base of your post. These holes should be slightly smaller than your bolts.
- Secure the Post: Use a strong lag bolt or carriage bolt. Insert it through the joist and the post. Use washers. Tighten securely with a socket wrench. For maximum strength, use two bolts per post.
Installing New Posts (e.g., for ground level patios or stairs):
- Dig Holes: Dig holes for your posts. The depth should be below the frost line in your area. Check local building codes for this.
- Add Gravel: Put a few inches of gravel at the bottom of the hole. This helps with drainage.
- Set Posts: Place the wooden posts in the holes. Use a level to make sure they are perfectly plumb.
- Pour Concrete: Mix and pour concrete around the posts. Fill the hole. Slope the top of the concrete away from the post. This keeps water from pooling.
- Cure: Let the concrete cure completely. This usually takes a few days. Do not proceed until the posts are solid.
When attaching posts to an existing deck, make sure you’re not compromising the deck’s integrity. If you’re removing deck boards to attach posts, do so carefully. Reinstall them securely afterward.
Post Height Matters
Your posts need to be the right height. This determines the height of your cable railing. Building codes often specify a minimum height. This is usually 36 inches for decks. For stairs, it can be 34 inches. Always check local regulations. Make sure your posts are all the same height before you drill for cable holes.
Step 3: Drilling for the Cables
This step requires precision. The holes need to be straight. They also need to be the correct size for your cables and fittings.
Measure and Mark: Decide where you want your cables to run. Mark the desired height for each cable on every post. Use your level to ensure these marks are perfectly horizontal. Consistency is key here.
Choose Your Drill Bit: You will need a drill bit that matches the diameter of your cable. Some systems use fittings that require a slightly larger hole. Check your kit’s instructions carefully. If your posts are very thick, you might need a long drill bit. This ensures you drill all the way through.
Drill Straight: This is challenging. When drilling through a 6×6 post, it’s easy to drill at an angle. Clamp a guide to your drill. Or, use a drill press if you have one. If drilling by hand, go slowly. Keep the drill as straight as possible. A slight angle might not be a huge issue for a few cables. But for many cables, it can add up. It might cause the cables to look uneven.
Drill from Both Sides (Optional but Recommended): For extra accuracy, drill partway through from one side. Then, drill from the other side to meet the first hole. This helps prevent the bit from wandering.
Cable Hole Considerations
Drill Bit Size: Use the bit size recommended by your cable railing manufacturer. Too small, and you won’t fit the cable. Too large, and the fittings might not be secure.
Angle: Aim for perfectly straight holes. Use a jig or guide if possible.
Depth: Ensure you drill through the entire post if the cable runs straight. Some systems have end posts with special fittings that go into the post.
Smooth out the inside of the holes. A small round file can work well. This prevents the cable from getting snagged or damaged.
Step 4: Attaching the Cable Fittings
Now, you’ll start connecting the pieces. Your cable railing kit will come with specific hardware. This usually includes things like threaded terminals, tensioners, and thimbles.
Thimbles: These small metal loops protect the cable. They go inside the loop of the cable. They prevent the cable from rubbing directly on the hardware. Thread the cable through the thimble. Then, loop the cable back onto itself.
Swaging or Crimp Fittings: The doubled-back cable needs to be secured. This is done using a swage fitting or a crimp. If you have a swage tool, follow its instructions. For most DIYers, you’ll use a special crimping tool. Crimp the fitting firmly onto the cable. This creates a strong loop. You might need to make several crimps. Ensure the fitting is tight. You don’t want any slack.
Threaded Terminals: These screw into the tensioners. One end of the cable will have a fixed terminal. This often screws directly into a tensioning device. The other end might have a fitting that screws into the tensioner on the opposite post.
Tensioners: These are the devices that allow you to tighten the cable. They usually have a threaded rod. One end attaches to a fitting on one post. The other end attaches to a fitting on the opposite post. You will screw these together. Then, you use a wrench to tighten them. This pulls the cable taut.
Common Cable Fitting Types
Swaged Fittings: These are permanent. They are attached using a special crimping tool. They offer a very clean look.
Threaded Terminals: These screw into place. They allow for easy adjustment.
Eye Bolts: Used to create a loop that attaches to another fitting.
Turnbuckles: Act as the primary tensioning mechanism.
Install the fittings on one end of each cable run. Leave the tensioners loose for now. You will need enough slack to get the cable to the other side.
Step 5: Running and Tensioning the Cables
This is the part where your railing starts to take shape. You will feed the cables through the holes in your posts.
Feed the Cable: Take one end of the cable. Gently feed it through the pre-drilled holes in your posts. Work your way along the run. Make sure the cable doesn’t get twisted. Keep it smooth.
Attach to the Opposite Post: On the final post, you will attach the other end of the cable. This usually involves a tensioning device. Screw the appropriate fitting into the tensioner. Then, attach the tensioner to the post. You might need to loop the cable back through itself. Then, crimp it securely, as you did on the first end. Or, the tensioner might directly attach to a fitting on the post.
Initial Tensioning: Once all cables are in place, begin tightening. Start with one cable. Use your wrench on the tensioner. Tighten it slowly. You will see the cable become taut. Don’t overtighten. You can damage the posts or the cable. Also, if you overtighten, it’s hard to adjust later.
Check for Sag: As you tension, check the cable. It should be taut. It should not sag when you push on it. There should be a slight give. But not enough to easily push it far. Most manufacturers suggest a deflection of about 1/2 inch when a moderate force is applied.
Tensioning Tips
Work Gradually: Tighten each cable a little at a time. This helps keep everything even.
Check Codes: Ensure your spacing and tension meet local building codes.
Even Tension: Try to achieve similar tension on all cables. This creates a uniform look.
Listen: Sometimes, you can hear cables creaking if they are too tight. Stop and back off a little.
It’s often best to tension cables in stages. Go around and tighten them a bit. Then, go back and tighten them a bit more. This helps the system settle. It prevents one cable from taking all the strain.
Step 6: Final Checks and Touches
You are almost done! Now, it’s time for the important final checks.
Wiggle Test: Gently push and pull on each post. They should be rock solid. There should be no movement at all. If a post wiggles, reinforce it. Make sure it’s securely attached.
Cable Check: Inspect every cable. Make sure all fittings are secure. The crimps should be tight. The tensioners should be snug. Look for any frayed ends of the cable. Trim them if necessary and consider adding end caps for a clean look.
Level Check: Use your level to check the cables. They should be straight and parallel. If one cable is significantly higher or lower, you may need to adjust the post hole or the fitting.
Clean Up: Remove any dust or debris from the installation. Wipe down the cables and posts. If you used sealant on the wood, touch it up where needed.
Post-Installation Care
Wood posts need ongoing care. Reapply sealant every year or two. Check for any signs of rot or insect damage. Keep an eye on the cable tension. It might loosen slightly over time, especially with temperature changes. Adjust as needed.
Consider adding a top rail. This is often a wooden or metal handrail. It provides a finished look. It also offers a comfortable grip. It can help distribute weight more evenly if someone leans on the railing. Not all cable railing systems require a top rail, but many homeowners prefer it.
Real-World Scenarios and Common Issues
I remember one project I helped a friend with. We were installing cable railing on a large deck. It had a beautiful view of the mountains. We got all our posts in perfectly. We drilled our holes with care. But then, when we started running the cables, one post seemed to lean just a tiny bit. It was hard to see, but it was there.
We had to take that post out. We reinforced the attachment to the joist with extra bracing. Then, we reinstalled it, making sure it was perfectly plumb. It added about two hours to our day. But it saved us from a sagging cable and a crooked railing. That’s why double-checking is so important. Even small errors can become big problems.
Another common issue is cable stretch. New stainless steel cables can stretch a bit. This is normal. That’s why you need tensioners. You’ll need to go back and re-tighten them after a week or two. This is especially true if you used a swage system. The metal can slightly deform under tension.
Myth vs. Reality
Myth: Cable railing is too complicated for DIY.
Reality: With careful planning and the right tools, it’s achievable for many homeowners.
Myth: Any wood post will work.
Reality: Sturdy, weather-resistant posts are essential for safety and longevity.
Myth: You can just eyeball the holes.
Reality: Precise drilling is crucial for a clean and functional look.
People often underestimate the force involved in tensioning cables. Stainless steel is strong, but wood posts are not infinitely strong. Always ensure your posts are adequately sized and securely fastened. A 4×4 post might look fine, but it could twist or break under tension. Always opt for 6×6 posts for better stability.
What This Means for Your Project
When is a cable railing installation normal? It’s normal when posts are secure. Cables are taut and parallel. The railing feels solid when you lean on it. It looks neat and uniform.
When should you worry? Worry if posts are loose or wobbly. Worry if cables sag significantly. Worry if you see any signs of wood rot or damage near the post attachments. Worry if the railing doesn’t meet local building codes. These are signs that something needs to be fixed.
A simple check is to run your hand along the cables. Feel for any sharp edges or loose wires. Also, push down on the middle of the longest cable span. It should only give a little bit.
Quick Safety Checks
Post Stability: Push hard on each post. It shouldn’t move.
Cable Tension: Cables should be firm. Not banjo-string tight, but taut.
Sharp Edges: Inspect cables and fittings for any snags.
Building Codes: Ensure your railing height and cable spacing are compliant.
If you have a large run of railing, consider intermediate posts. These are posts placed along a straight section. They help maintain the correct tension and prevent excessive sag. They also add structural support.
Quick Tips for a Smoother Installation
Read the Instructions: Every cable railing kit is different. Follow the manufacturer’s guide closely.
Measure Twice, Cut Once: This old adage is especially true for post heights and hole placement.
Use a Jig: For drilling, a simple drilling jig can make a huge difference in accuracy.
Don’t Rush: Take your time. This project requires patience and attention to detail.
Get Help: If you’re working on a large deck, having an extra pair of hands is invaluable.
Weather Watch: Try to complete the installation on a clear, dry day. Working in rain or extreme heat can be difficult.
Material Quality Matters
Use high-quality stainless steel for your cables and fittings. Cheaper options can rust or corrode. This looks bad and compromises safety. Invest in good quality wood for your posts too. Cedar and redwood are great choices for outdoor use.
Consider your cable diameter. Thicker cables are stronger and stretch less. But they also require larger holes. Ensure your chosen cable diameter works with your post material and chosen fittings.
Frequently Asked Questions
How far apart should wood posts be for cable railing?
Generally, wood posts for cable railing are spaced between 4 and 6 feet apart. However, this can vary depending on the cable system’s specifications and the type of cable used. Always check your cable railing kit’s manual for recommended spacing.
Can I use 4×4 posts for cable railing?
While a 4×4 post might look sufficient, 6×6 posts are highly recommended for cable railing. The tension on the cables can put a significant strain on the posts. Larger posts offer better stability and prevent potential issues like twisting or breaking over time.
How do I tension cable railing on wood posts?
Cable railing is tensioned using specific hardware, typically turnbuckles or threaded tensioners. One end of the cable is fixed, and the other end is attached to a tensioner. You then use a wrench to tighten the tensioner, pulling the cable taut. It’s best to tension cables gradually and evenly.
Do I need a top rail with cable railing?
A top rail is not always required for structural integrity but is often recommended for aesthetic appeal and comfort. It provides a finished look and a smooth surface to grip. Building codes may also have requirements regarding handrails.
How do I drill straight holes for cables in wood posts?
Achieving straight holes is crucial. You can use a drill press for perfect accuracy. If using a handheld drill, consider using a drilling jig or a guide block clamped to the post. Drilling partway from one side and then meeting it from the other can also help prevent the bit from wandering.
How tight should cable railing be?
Cable railing should be taut but not overly tight. There should be a slight give, typically about 1/2 inch deflection when moderate pressure is applied. Over-tightening can damage posts, cables, and fittings. Under-tightening will result in sagging cables. Check your kit’s specific tensioning guidelines.
Conclusion: Your Beautiful Cable Railing Awaits
Installing cable railing with wood posts is a rewarding project. It requires careful planning and execution. By following these steps, you can achieve a stunning and safe result. Remember to always prioritize safety. Check your local building codes. And don’t hesitate to ask for help if you need it. Enjoy your beautiful new railing!
Sponsored / affiliate links. As an Amazon Associate I earn from qualifying purchases. I may earn additional commission from eligible campaigns.