Easy DIY Dog Bowl Stand: Step-By-Step Guide
In the ever-evolving landscape of pet care, a DIY dog bowl stand represents an intersection of functionality and design. This innovative solution not only addresses the ergonomic needs of your canine companion but also enhances the aesthetic appeal of your living space. Elevating food and water bowls can significantly improve your dog’s posture during meal times, reducing strain on their neck and joints while promoting healthier eating habits. Moreover, a customized DIY dog bowl stand allows owners to incorporate personal flair into their creation, catering to various sizes and breeds.
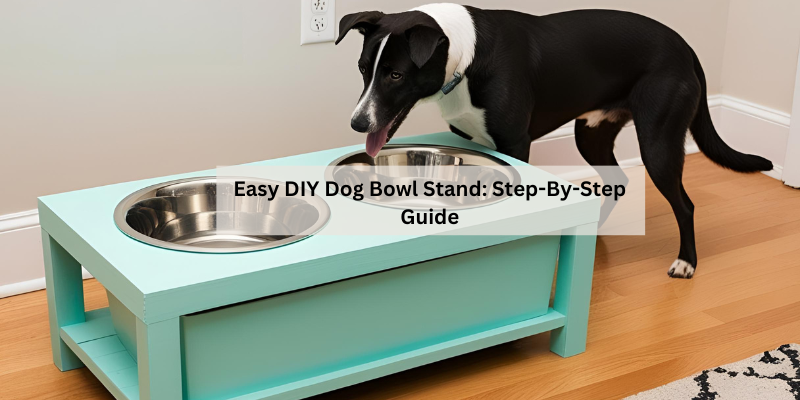
Discover how to craft the perfect stand that harmonizes with your home and benefits your furry friend.
How To Create A DIY Dog Bowl Stand For Your Pet
Creating a DIY dog bowl stand is an excellent way to enhance your pet’s mealtime experience while adding a personalized touch to your home. This brief overview covers the essential benefits of making your own stand, including improved posture for your dog, a cleaner feeding area, and the opportunity to customize it to match your decor. With a few basic materials and straightforward instructions, crafting a functional and stylish dog bowl stand can be a rewarding project for any pet owner.
Why a DIY Dog Bowl Stand is Worth Considering
Benefits of elevating dog bowls. Customization options for different dog sizes and needs.
A DIY dog bowl stand can improve your pet’s eating experience. Elevating dog bowls offers many benefits, such as:
- Better posture: Dogs can eat comfortably without straining their necks.
- Cleaner space: Less mess on the floor from spilled food and water.
- Hygiene: Elevated bowls reduce dirt and bacteria contact.
Customization is key! You can create different heights for various dog sizes, ensuring your furry friend has the perfect setup. Individual needs, such as age or health conditions, can also be met.
This approach enhances your pet’s dining experience while adding a personal touch to your home.
Materials Needed for a DIY Dog Bowl Stand
List of essential materials (wood, screws, paint, etc.). Recommended tools for construction.
Creating a dog bowl stand is fun and simple. To get started, you will need a few essential materials:
- Wood – Choose strong wood like pine or plywood.
- Screws – These will hold everything together.
- Paint or Stain – For a nice finish and protection.
- Sandpaper – To smooth the edges.
- Dog Bowls – Make sure to have bowls that fit the stand.
Recommended tools include:
- Drill
- Screwdriver
- Saw
- Measuring Tape
- Paintbrush
With these materials and tools, you’re ready to start your project!
Step-by-Step Instructions for Building Your Dog Bowl Stand
Detailed measurements for different dog sizes. Stepbystep construction process with diagrams.
Building a dog bowl stand is easy if you follow these steps. First, measure your dog to ensure the right height and size. Here are suggested heights for different dog sizes:
- Small Dogs: 2-4 inches
- Medium Dogs: 4-8 inches
- Large Dogs: 8-12 inches
Next, gather your materials. You’ll need wood, screws, and sandpaper.
Cut the pieces according to your measurements. Assemble them using screws for a secure fit. Use sandpaper to smooth sharp edges.
Finally, paint or stain the stand to your liking. Your dog will love eating from their new stand!
Design Inspiration for Your Dog Bowl Stand
Various designs (modern, rustic, etc.). Customization ideas (color, engraving, etc.).
Creating a dog bowl stand can be fun and creative. You can choose from different styles like:
- Modern: Sleek lines and bold colors.
- Rustic: Use wood and natural finishes for a warm feel.
Customization makes it special.
Consider these ideas:
- Color: Pick shades that match your home decor.
- Engraving: Personalize with your dog’s name or a fun design.
Let your imagination lead the way!
Tips for Maintaining Your DIY Dog Bowl Stand
Cleaning and upkeep advice. Recommendations for longlasting durability.
Keeping your dog bowl stand tidy is important. A quick wipe with warm, soapy water can work wonders. Don’t forget to rinse well!
For durability, use a wood sealant if your stand is wooden. This protects against spills and drool—yes, dogs are their own little waterworks!
Make sure to check for any loose screws or parts regularly; a wobbly stand is not a happy stand. Also, consider replacing bowls if they get too scratched—your pup deserves the best!
| Task | Frequency |
|---|---|
| Wipe down stand | Weekly |
| Inspect for loose parts | Monthly |
| Replace bowls | As needed |
Follow these tips, and your dog bowl stand will survive the test of time! Who knows, it might even outlast your dog’s endless energy!
Common Mistakes to Avoid When Making a Dog Bowl Stand
Pitfalls in choosing materials. Design flaws that could affect functionality.
Creating a dog bowl stand can be fun, but there are pitfalls to watch out for. First, choosing the wrong materials can lead to a weak structure. Avoid these common mistakes:
- Using untreated wood that can warp or splinter.
- Choosing plastic that might not hold up over time.
Additionally, design flaws can affect how well the stand works. Make sure to:
- Keep bowls at a comfortable height for your dog.
- Ensure stability to prevent spills and messes.
By avoiding these mistakes, you can create a practical and sturdy stand for your furry friend.
FAQs About DIY Dog Bowl Stands
Addressing common questions from pet owners. Clarifying misconceptions about dog bowl height and size.
Many dog owners have questions about making a DIY dog bowl stand. Here are some common inquiries:
- What height is best? Choose a height that matches your dog’s shoulder level for comfort.
- What size bowls should I use? The bowls should fit snugly in the stand but still be easy to remove.
- Can I use materials from home? Yes!Repurposing items like wooden crates can be a fun way to create your stand.
These tips help ensure your dog eats in style and comfort.
Alternative Ideas for Dog Bowl Stations
Other pet feeding solutions beyond a bowl stand. Incorporating storage into your design.
Looking for something different for your furry friend? Consider a feeding station that doubles as storage! Why not turn a cute bookshelf into a pet pantry?
You can store food, toys, and maybe even those mystery socks that seem to disappear. Or how about a coffee table with built-in bowls? It’s stylish and practical—two birds, one stone!
| Idea | Description |
|---|---|
| Bookcase Feeding Station | Use shelves to hold food and toys. |
| Coffee Table with Bowls | Fancy and functional feeding area. |
I mean, who wouldn’t want to eat in style? With these clever options, your dog’s mealtime can be both fun and organized!
Conclusion
In summary, creating a DIY dog bowl stand not only enhances your pet’s dining experience but also adds a personal touch to your home decor. With a variety of designs and materials to choose from, this project is both fun and practical. Embrace your creativity and ensure your furry friend eats comfortably with a custom stand that suits their needs perfectly.
FAQs
Sure! Here Are Five Related Questions About Diy Dog Bowl Stands:
1. What materials do I need to make a DIY dog bowl stand? 2. How can I customize the height of the dog bowl stand for my pet? 3. Are there any designs or plans available for building a sturdy dog bowl stand? 4. What finishing techniques can I use to protect the wood from water damage? 5. How can I ensure the stand is stable and won’t tip over while my dog is eating?
Sure! Please provide the question you’d like me to answer.
What Materials Are Best Suited For Building A Sturdy And Stylish Diy Dog Bowl Stand?
The best materials for a sturdy and stylish DIY dog bowl stand include hardwoods like oak or maple for durability and aesthetics. Plywood is an economical choice, while still providing strength and stability. Metal accents can enhance the design and provide additional support. Consider using water-resistant finishes to ensure longevity and easy cleaning.
How Do I Determine The Right Height For A Dog Bowl Stand Based On My Dog’S Size?
To determine the right height for a dog bowl stand, measure your dog’s height from the floor to their shoulders (with a standing position). The ideal bowl height is generally about the same as the dog’s shoulder height, or a few inches lower for smaller breeds. For larger dogs, the bowls should be positioned at or just slightly below shoulder level to reduce neck strain. Always ensure your dog can comfortably reach their food and water without bending too low.
What Are Some Creative Designs For A Diy Dog Bowl Stand That Complements Home Decor?
Creative designs for a DIY dog bowl stand could include a rustic wooden frame that matches farmhouse decor, featuring a distressed finish and built-in storage for pet supplies. Alternatively, a modern, minimalist stand made ofMetal or acrylic could complement contemporary interiors and include custom colors that match the home palette. Upcycling materials like repurposed furniture or old crates can add a unique touch while ensuring functionality. Lastly, incorporating bowls with artistic patterns or personalized engravings can enhance aesthetics while keeping practicality in mind.
Can I Add Features Like Storage For Dog Food Or Accessories To A Dog Bowl Stand Design?
Yes, you can definitely add features like storage for dog food or accessories to a dog bowl stand design. Incorporating drawers or shelves into the stand can provide convenient storage while optimizing space. Just ensure that the design maintains stability and accessibility for both the bowls and the stored items. Thoughtful integration of these features can enhance functionality without compromising the stand’s aesthetics.
What Tools And Skills Are Required To Successfully Create A Diy Dog Bowl Stand?
To successfully create a DIY dog bowl stand, you will need basic woodworking tools such as a saw, drill, and screwdriver, along with measuring tape and sandpaper for finishing touches. Essential skills include measurement and cutting accuracy, basic assembly techniques, and familiarity with using hand tools. Additionally, a creative mindset will help in designing a stand that suits your dog’s height and feeding habits. Finally, a sealant or paint may be required for a durable and attractive finish.