Faucet Leaking Fix: Causes, Checks, and Practical Fixes
A faucet leaking at the base usually means water is escaping below the spout, around the handle, or where the faucet meets the sink. The right repair depends on the leak location: a loose connection may need tightening, while a worn cartridge, O-ring, or gasket may need replacement. Start by drying the area and tracing the water to its highest wet point.
A small leak can waste water and damage the cabinet, countertop, or vanity floor. This guide shows how to identify the source, shut the water off safely, check the common failure points, and decide whether a simple repair is reasonable or a plumber should handle it.
What a leak at the faucet base can mean
“Base” can describe several different places. Water may collect where the faucet body sits on the sink, travel down from the handle, escape from the spout swivel, or drip from a supply connection hidden below the counter. These faults look similar because gravity carries water toward the lowest point. Wiping the entire area first is more useful than tightening every visible nut.
A leak that appears only when the faucet is running often points to a spout seal, handle cartridge, or loose connection under pressure. A leak that continues while the faucet is off may indicate a supply line, shutoff valve, or pressurized connection. That distinction narrows the repair before any part is removed.
How to locate the exact leak source
Clear the cabinet below the sink and place a dry towel underneath the faucet, valves, and supply lines. Dry the faucet body, the sink deck, and each connection with a clean cloth. Fold a strip of dry toilet paper or paper towel around one connection at a time. Turn the faucet on slowly, then check which strip becomes wet first. This is a simple diagnostic test, but it prevents a leak from the handle being mistaken for a bad supply hose.
- Check around the handle and cap while the water is running.
- Check the seam where the spout swivels or enters the faucet body.
- Check the faucet mounting nuts and gasket underneath the sink.
- Check both supply-line nuts and the shutoff-valve stems.
- Check the drain and backsplash area so sink splash is not confused with a faucet leak.
Turn off the water before taking anything apart
Close the hot and cold shutoff valves under the sink by turning each handle clockwise until it stops gently. For lever-style valves, turn the lever so it is perpendicular to the pipe. Open the faucet briefly to release residual pressure, then close it. Keep a small bowl and towel nearby because a small amount of water will remain in the hose or faucet body.
If a shutoff valve will not close, leaks around its stem, or the valve is badly corroded, do not force it with pliers. A damaged valve can break and release water inside the cabinet. Use the home’s main shutoff only if you know where it is and can operate it safely, then arrange the valve repair.
Fixing a loose faucet mounting nut or base gasket
When water appears between the faucet body and the sink deck, the mounting nut may be loose or the gasket may be flattened. From underneath, identify the mounting hardware and support the faucet above while loosening or tightening the nut. Use the correct basin wrench or hand tool and make small adjustments. Over-tightening can distort a rubber gasket, crack a plastic mounting piece, or damage the sink surface.
If tightening does not stop the leak, remove the hardware after the water is off and inspect the gasket. Clean the sink surface and the underside of the faucet base before installing a replacement gasket. The mating surfaces must be free of grit and old sealant. Reassemble evenly, then test with a dry paper towel around the base.
Repairing a leak around the handle
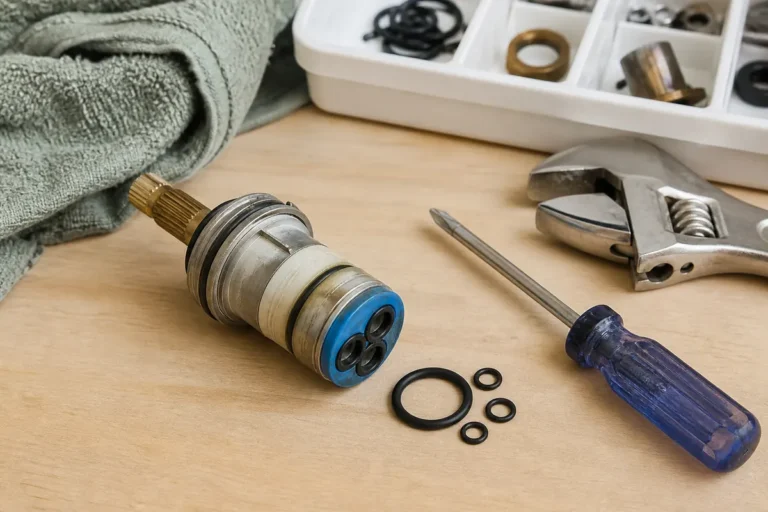
Water that rises around a faucet handle commonly points to a worn cartridge, stem seal, O-ring, or retaining nut. Remove the handle cap carefully, loosen the handle screw, and photograph the arrangement before taking out the retaining clip or nut. Faucet designs differ, so the brand and model number matter when choosing a cartridge.
Clean mineral deposits from the exposed area and replace the failed seal with a part that matches the original size and shape. Do not use excessive force to pull a stuck cartridge; a cartridge extractor may be safer than twisting the faucet body. Reassemble with the cartridge aligned in the same orientation, restore water slowly, and check both the handle and spout.
Fixing a leak at the spout base
A swiveling spout often seals with one or more O-rings inside the spout base. If water drips where the spout meets the body while the faucet runs, the O-rings may be worn, dry, or coated with mineral scale. With the water off, remove the retaining clip or collar according to the faucet design, then lift the spout without forcing it.
Clean the groove and install the correct replacement O-rings. A thin coat of plumber-approved silicone faucet grease can help the seal slide into place, but ordinary petroleum grease may damage some rubber materials. Reinstall the spout and test it through its full range of motion. A new O-ring will not help if the faucet body is cracked or deeply scored.
Checking supply lines and connections under the sink
If the paper towel becomes wet at a supply-line nut, inspect whether the line is cross-threaded, kinked, corroded, or damaged. Shut the valve fully and tighten the connection only slightly with the correct wrench while holding the valve or faucet fitting steady. Many compression connections seal at a washer or ferrule; thread tape is not a substitute for a missing or damaged washer.
Replace a supply hose when its braided jacket is rusty, the hose is bulging, or the connector has visible damage. Match the length and connection type. Do not reuse a crushed gasket. After replacement, open the shutoff valve slowly and hold a dry tissue around the connection for several minutes. A connection that stays dry while the faucet is both on and off is a better test than a quick visual inspection.
When the faucet itself should be replaced
Repair is usually sensible when the faucet body is sound and replacement parts are available. Replacement becomes more practical when the body is cracked, the mounting hardware is seized, the finish is badly corroded, or the correct cartridge is discontinued. Compare the cost of a reliable replacement faucet with the labor and repeated parts required to keep an old unit watertight.
Before buying a replacement, measure the number and spacing of sink holes, note whether the faucet has a pull-out spray, and confirm the supply connection size. A faucet that physically fits may still need different hoses or an adapter. Keep the installation instructions and check the new faucet for a separate gasket, mounting plate, and supply lines.
Common mistakes that make a faucet leak worse
- Tightening every nut before tracing the first wet point.
- Using thread tape on a connection that seals with a rubber washer.
- Over-tightening a plastic retaining nut or faucet mounting nut.
- Mixing hot and cold cartridge parts or losing a small retaining clip.
- Reusing a flattened gasket or installing the wrong O-ring size.
- Testing by opening the valve fully and walking away before checking underneath.
- Ignoring cabinet swelling, mold, or a persistent leak after a repair.
How to test the repair without creating a second leak
Keep the cabinet empty while testing so every connection is visible. Open the shutoff valve a small amount, pause, and inspect the valve stem, supply-line nut, faucet mounting area, and the repaired handle or spout. Run the faucet on cold and hot separately, then move the handle through its normal range. A repair can appear dry with the water off but leak only when the cartridge is under pressure.
Use a dry tissue rather than your hand because a tissue shows a very small bead of water. Leave it around the connection for several minutes, then check again after the faucet has been closed. Look at the cabinet floor and the underside of the sink as well. Water can travel along a hose or countertop before it drips, so the lowest puddle is not always the source.
Faucet leak repair cost factors
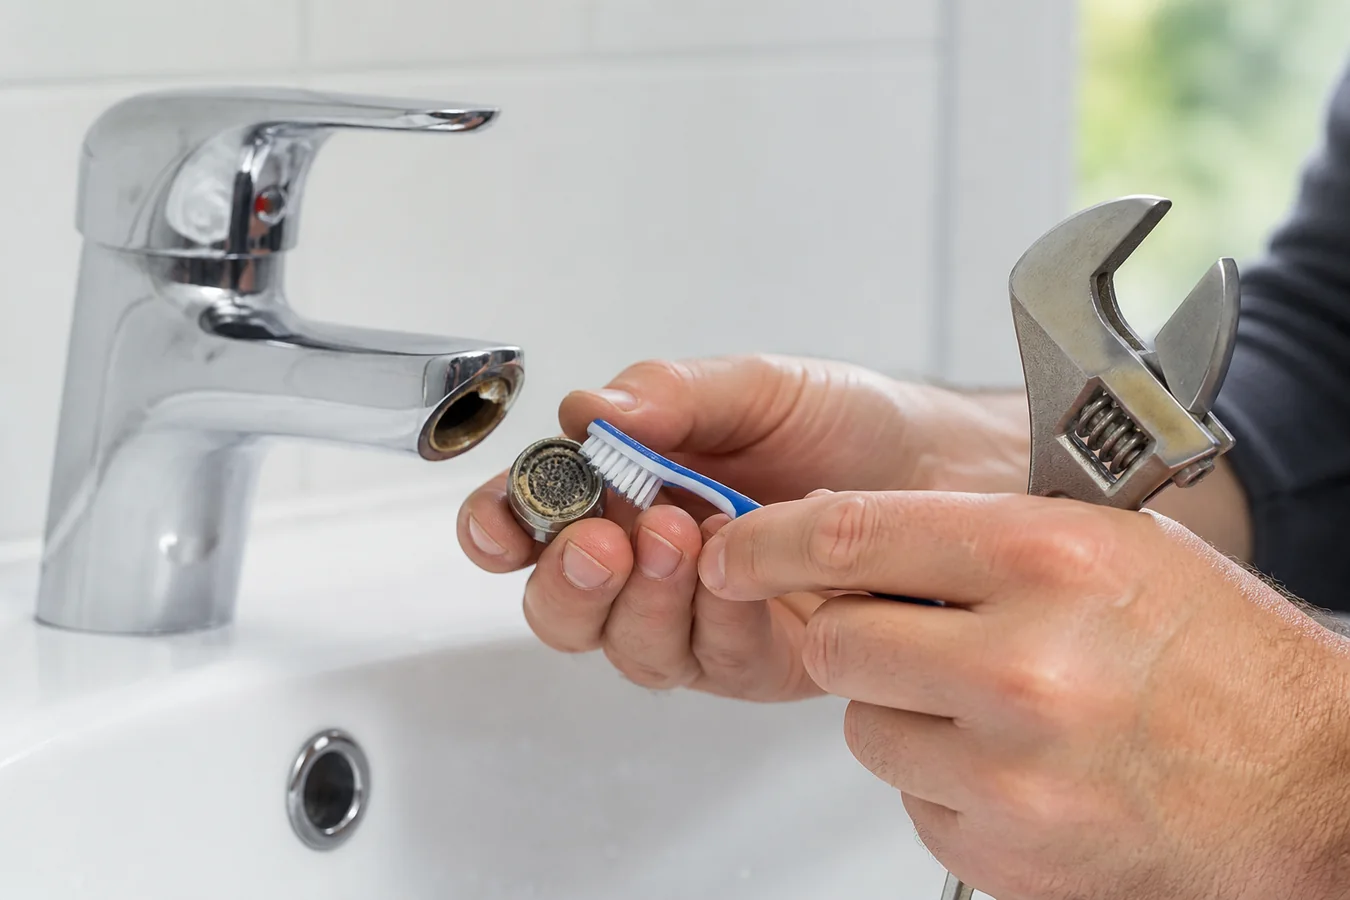
The cost of a faucet leaking fix depends on the failed part, access, faucet design, and whether the repair is a simple DIY job or a service call. Cleaning an aerator or replacing an accessible O-ring may require only a small part. A cartridge repair can cost more when the exact model is difficult to identify or the cartridge is seized. A supply-line or shutoff-valve replacement may also include the time needed to protect the cabinet and check the surrounding plumbing.
A useful decision is not simply the price of one replacement part. Consider the age and condition of the faucet, the availability of seals, the finish, and whether the faucet has leaked long enough to damage the vanity. A low-cost repair is sensible when the body is sound. Replacing an unreliable faucet may be more economical when several components are worn or the same leak returns after a correct repair.
What to do if the leak has damaged the cabinet
Dry the cabinet floor and remove any stored items immediately. Check for swelling, soft particleboard, peeling laminate, discoloration, or a musty smell. Keep the doors open so the area can dry, but do not cover a damp surface with a liner because trapped moisture slows drying. If the wall, floor, or adjacent cabinet is wet, document the damage and consider professional inspection before cosmetic repairs.
A repaired faucet does not automatically resolve hidden moisture. Check the area again later the same day and the next day with a dry tissue. Persistent dampness may come from a drain, dishwasher hose, wall supply, or another plumbing connection. Finding that second source early is less expensive than replacing a cabinet that stayed wet.
Choosing replacement seals and cartridges
Take the old part, faucet brand, model number, and clear photos when looking for a replacement. Cartridge shapes are not universal, even when two faucets look nearly identical. Measure the stem and compare the retaining tabs, inlet holes, and overall length. For O-rings, match the diameter and thickness rather than choosing the closest-looking hardware-store ring.
Avoid mixing parts from different repair kits unless the manufacturer confirms compatibility. A seal that is slightly too thick can make a handle stiff or prevent the cartridge from seating. A seal that is too thin may allow water to bypass it. Lightly lubricate compatible rubber seals with faucet-safe silicone grease and keep grit away from the sealing surface.
- Photograph the original assembly before removing clips, washers, or spacers.
- Keep hot and cold components separated if the faucet uses different parts.
- Save the model number and purchase date for the next repair.
- Flush loose sediment only when the water is controlled and the outlet is directed into a bucket.
- Test the faucet before reinstalling cabinet contents.
Frequently asked questions
Why does my faucet leak from the base when I turn it on?
The most common causes are a worn cartridge, a damaged spout O-ring, a loose mounting gasket, or water running down from the handle. Dry the faucet and use a paper-towel test to identify where the water first appears.
Can I fix a faucet leak without replacing the whole faucet?
Often, yes. A cartridge, O-ring, gasket, supply hose, or mounting nut can usually be serviced separately when the faucet body and threads are in good condition.
Should I use plumber’s tape on a leaking faucet base?
Usually not. Faucet bases and many under-sink connections seal with gaskets, washers, O-rings, or compression surfaces. Tape cannot correct a damaged seal and can interfere with proper threading.
When should I call a plumber for a faucet leak?
Call a plumber when the shutoff valve will not close, a pipe or valve is corroded, water is entering the cabinet or wall, the leak continues after the correct seal replacement, or you cannot safely identify the connection.
Conclusion
A faucet leaking at the base is a location problem before it is a parts problem. Dry the area, trace the first wet point, shut off the water, and inspect the matching seal or connection. Start with the least invasive repair and test slowly. If the leak involves a seized valve, damaged plumbing, or a cracked faucet body, professional help is safer than repeated tightening.
Sponsored / affiliate links. As an Amazon Associate I earn from qualifying purchases. I may earn additional commission from eligible campaigns.