How Do You Remove Stains From a Fiberglass Bathtub Genius Tip
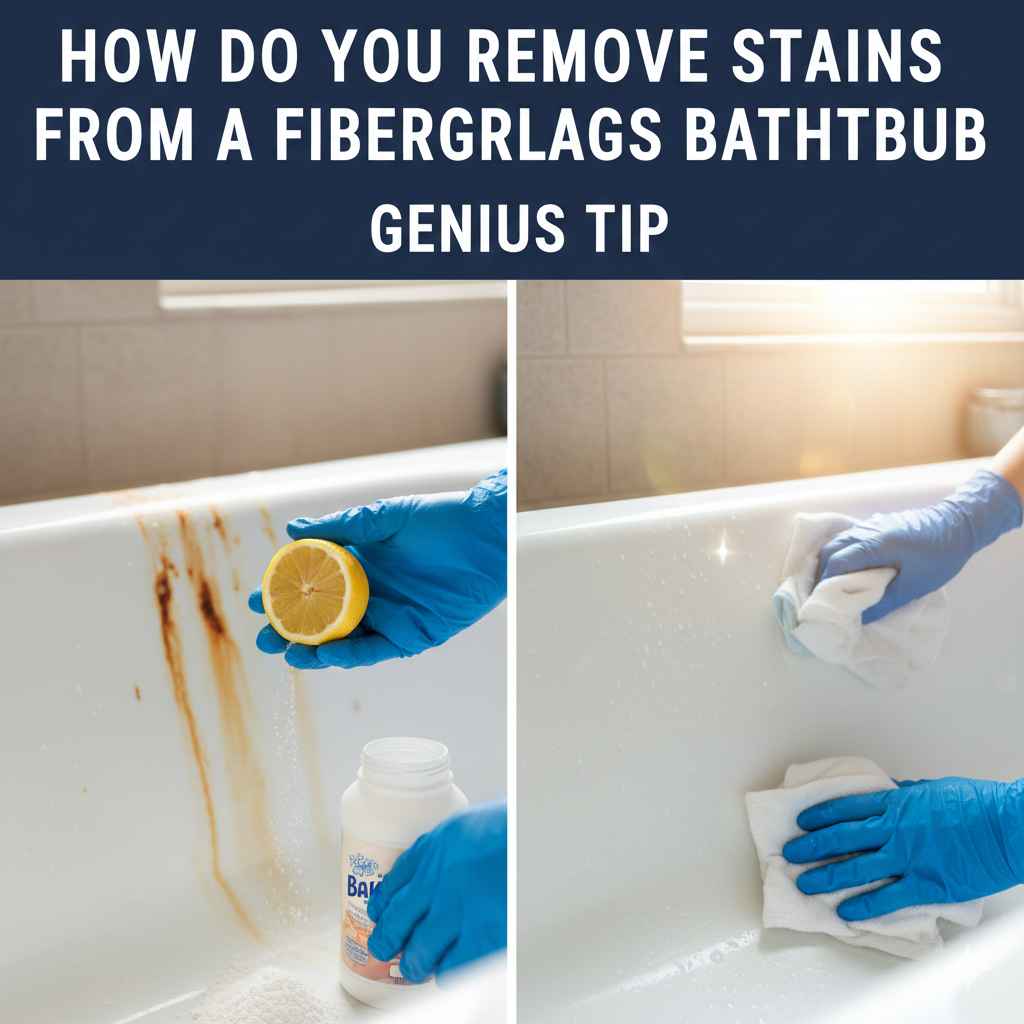
To remove stains from a fiberglass bathtub, create a paste using baking soda and a little water. Apply the paste directly to the stain, let it sit for a few hours, then spray it with white vinegar to create a fizzing action. Gently scrub the area with a non-abrasive sponge and rinse thoroughly with warm water.
Hello there! It’s Md Meraj, your friendly guide for all things home improvement. Is a stained fiberglass bathtub making your bathroom look less than its best? I know how frustrating that can be. It’s a super common issue, but the good news is you don’t need harsh chemicals or a lot of elbow grease to fix it. You just need a little know-how and a couple of simple ingredients you probably already have in your kitchen pantry.
I’m here to walk you through a simple, safe, and incredibly effective method to get those stubborn stains out and make your tub shine like new again. Forget spending money on specialty cleaners that might damage your tub’s surface. We’re going to use a genius trick that’s gentle on your bathtub but tough on stains. Let’s get that sparkle back in your bathroom!
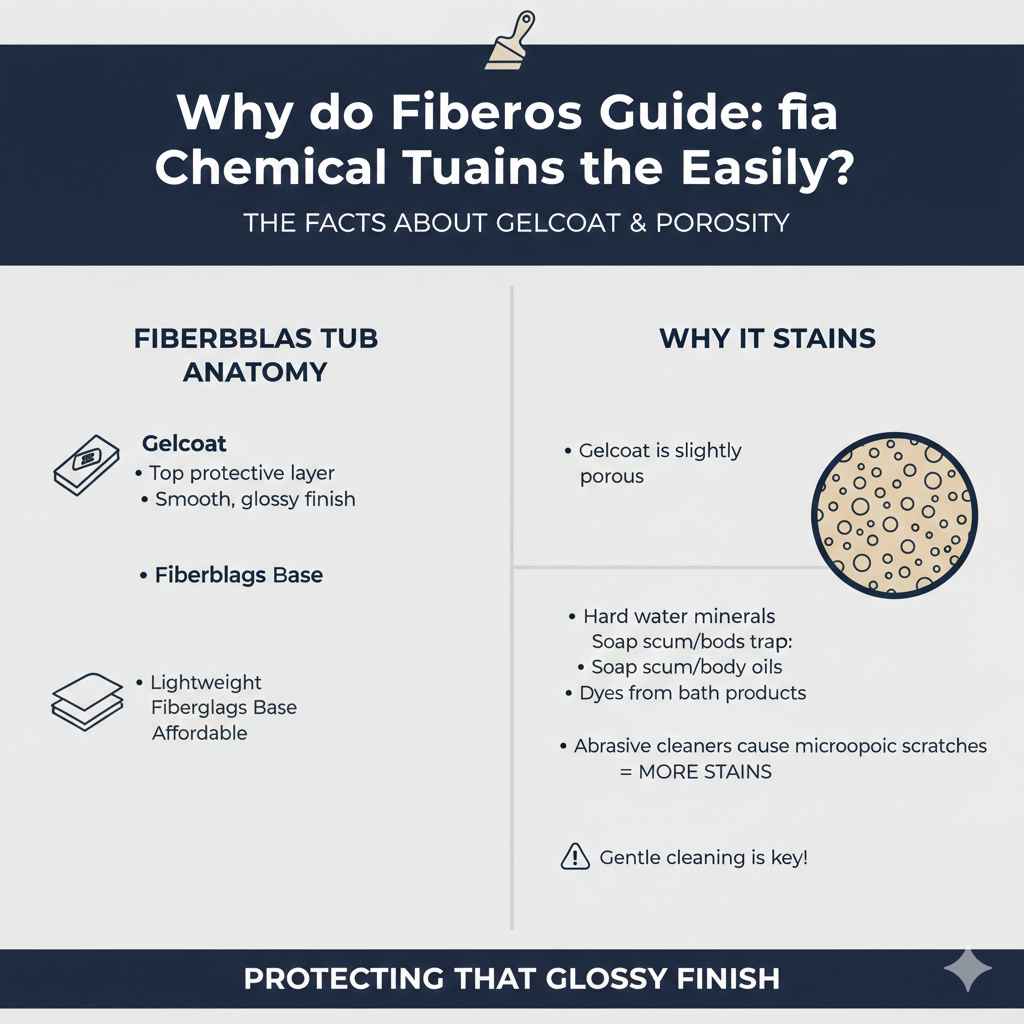
Why Do Fiberglass Tubs Stain So Easily?
Before we jump into cleaning, it helps to understand what we’re working with. Fiberglass tubs are popular because they are lightweight and affordable. They have a top layer called a gelcoat, which gives them their smooth, glossy finish. Think of this gelcoat like the clear coat on a car—it’s there for protection and shine.
However, this gelcoat is slightly porous. Over time, things like hard water minerals, soap scum, body oils, and dyes from bath products can seep into these tiny pores. Abrasive cleaners and scrubbing pads can also create microscopic scratches in the finish, giving stains even more places to hide. That’s why a gentle approach is always the best approach for fiberglass.
Gather Your Simple and Safe Cleaning Supplies
The best part about this method is its simplicity. You won’t need to buy any expensive or specialized products. Everything you need is likely already in your home.
- Baking Soda: This is our gentle scrubbing agent. It cleans without scratching.
- Distilled White Vinegar: A mild acid that breaks down mineral deposits and soap scum.
- A Spray Bottle: To apply the vinegar easily and evenly.
- A Soft Sponge or Microfiber Cloth: It’s crucial to use something non-abrasive.
- A Small Bowl: For mixing your cleaning paste.
- Rubber Gloves: To protect your hands.
- Warm Water: For rinsing.
Safety First: A Quick and Important Step
Even though we’re using gentle, household ingredients, it’s always a good idea to take a couple of quick safety precautions. Home projects, big or small, should always start with safety in mind.
- Ventilation is Key: Open a window or turn on your bathroom’s exhaust fan. While the fumes from vinegar aren’t harmful, good airflow is always a smart practice when cleaning.
- Protect Your Hands: Pop on a pair of rubber gloves. This will keep your skin from getting dry from the vinegar and baking soda.
The Genius Step-by-Step Guide to a Stain-Free Tub
Ready to see the magic happen? Just follow these simple steps, and your tub will be gleaming in no time. This is my go-to method because it’s effective, safe for your tub, and incredibly easy.
Step 1: Mix Your Powerful Paste
In your small bowl, mix about half a cup of baking soda with just enough warm water to form a thick paste. You’re looking for a consistency similar to toothpaste. If it’s too runny, add a bit more baking soda. If it’s too thick, add a few drops of water. This paste will stick to the sides of the tub and directly onto the stains.
Step 2: Apply the Paste to the Stains
Using your gloved fingers or a soft sponge, apply a generous layer of the baking soda paste directly onto the stained areas. Don’t be shy—make sure the entire stain is covered well. For general cleaning, you can apply a thinner layer all over the tub.
Step 3: Let the Paste Work Its Magic
Now, it’s time for a little patience. Let the paste sit and dry on the stains for at least one to two hours. For really tough, set-in stains, you can even leave it on overnight. The baking soda will gently work to lift the stain from the porous gelcoat surface.
Step 4: Add the Vinegar Fizz
This is the fun part! Fill your spray bottle with undiluted white vinegar. Spray the vinegar directly onto the dried baking soda paste. You’ll see and hear it start to fizz and bubble. This chemical reaction is what gives this method its genius power boost. The fizzing action helps to actively break down and dislodge the stain particles that the baking soda has started to lift.
Step 5: Gently Scrub the Area
While the mixture is still fizzing, take your soft sponge or microfiber cloth and gently scrub the stained areas in a circular motion. You don’t need to apply a lot of pressure. The paste and fizz are doing most of the work for you. The baking soda provides just enough grit to clean effectively without scratching.
Step 6: Rinse and Admire
Once you’ve scrubbed all the stained areas, rinse the entire tub thoroughly with warm water. Use your sponge to help wash away all the residue. Finally, dry the tub with a clean microfiber cloth to prevent water spots and reveal a brilliant shine. Step back and admire your sparkling clean, stain-free bathtub!
Tackling Different Types of Bathtub Stains
Sometimes, you might be dealing with a specific type of stain. While the baking soda and vinegar method is a fantastic all-rounder, here are a few other targeted solutions for common culprits.
For Stubborn Rust Stains
Rust stains from dripping faucets or shaving cream cans can be tricky. For these, a simple acid can work wonders.
- Create a paste using either lemon juice or white vinegar and salt.
- Apply the paste to the rust stain and let it sit for about an hour.
- Gently scrub with your soft sponge and rinse away. The mild acid breaks down the iron oxide (rust).
For Hard Water and Mineral Stains
If you have hard water, you’ll be familiar with the cloudy, chalky buildup it leaves behind. Vinegar is your best friend here.
- Soak a few paper towels in white vinegar and lay them directly over the hard water stains.
- Let them sit for one to two hours. This allows the acetic acid in the vinegar to dissolve the calcium and magnesium deposits.
- Remove the towels, give the area a light scrub with your sponge and some baking soda, and rinse well.
For Soap Scum and Grime
That sticky, filmy layer of soap scum can make your tub feel dirty even when it’s not. The solution is surprisingly simple.
- Warm up a little bit of white vinegar in the microwave (don’t boil it).
- Mix the warm vinegar in a spray bottle with an equal amount of a gentle dish soap, like Dawn.
- Spray the mixture all over the soap scum, let it sit for 20-30 minutes, then scrub gently and rinse. The soap helps cut through the grease and oils in the scum.
For Hair Dye or Bath Bomb Color Stains
Accidents happen! If a colorful bath bomb or a bit of hair dye has left its mark, don’t panic.
- Make a paste of baking soda and a small amount of hydrogen peroxide.
- Apply it to the dye stain and let it sit for about 30 minutes. Hydrogen peroxide is a mild bleaching agent that can lift color without harming the gelcoat.
- Scrub gently and rinse completely. You may need to repeat this for very vibrant stains.
Cleaners and Tools to AVOID on Your Fiberglass Tub
This is just as important as knowing what to use. Using the wrong products can cause permanent damage to your tub’s finish, leading to more stains down the road. According to the U.S. Environmental Protection Agency (EPA), choosing safer cleaning products is better for both your home and the environment. Our DIY solutions fit this perfectly, but it’s important to know what commercial products to steer clear of.
| Item to Avoid | Why It’s Harmful to Fiberglass |
|---|---|
| Abrasive Powder Cleansers (e.g., Comet, Ajax) | These contain harsh grit that will scratch and dull the gelcoat finish, making it a magnet for future dirt and stains. |
| Steel Wool or Scouring Pads | These will severely scratch the surface, creating deep gouges that are impossible to remove and will trap grime. |
| Chlorine Bleach | While it may whiten stains initially, bleach is a harsh chemical that can weaken and yellow the gelcoat over time, making it brittle. |
| Ammonia-Based Cleaners | Ammonia can be too harsh for the gelcoat, causing it to lose its shine and potentially leading to discoloration. |
| Drain Cleaners | These are highly corrosive chemicals. If they splash onto the fiberglass surface, they can cause immediate and permanent damage. |
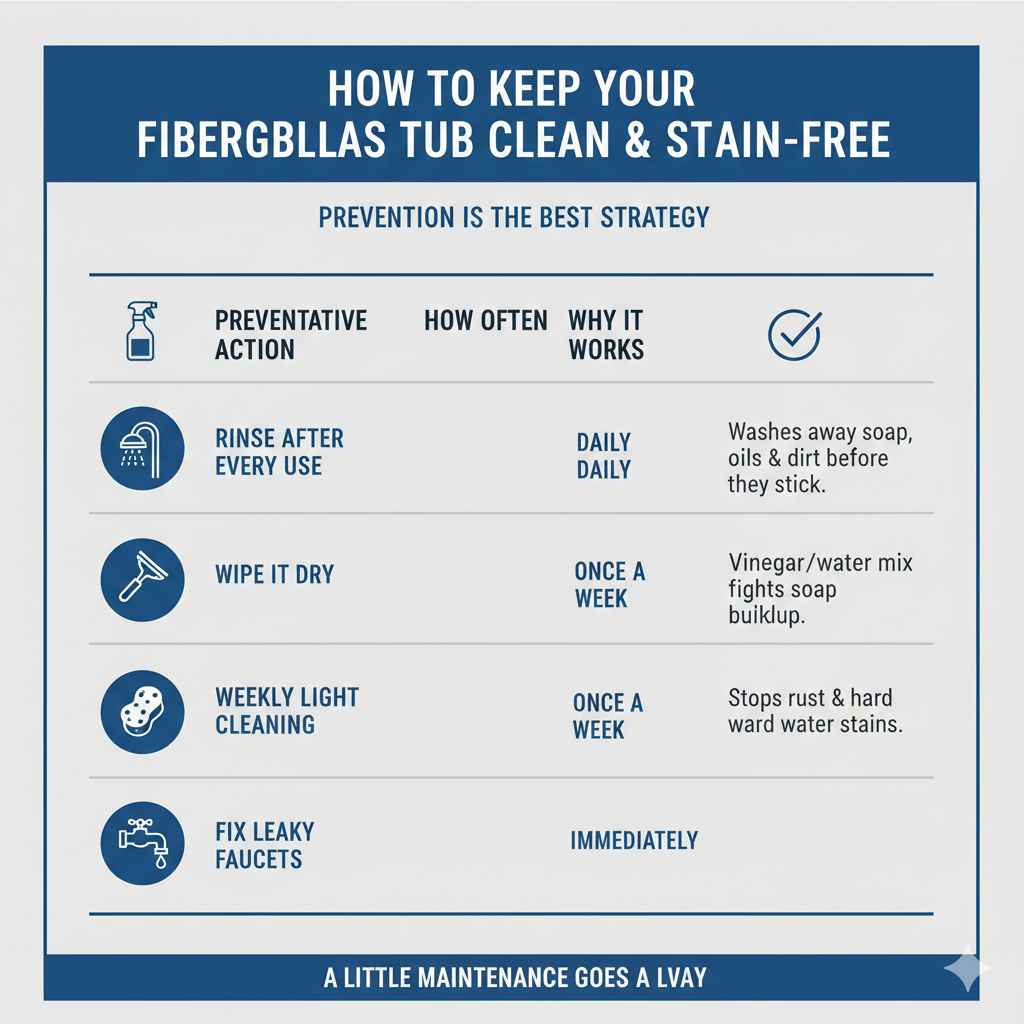
How to Keep Your Fiberglass Tub Clean and Stain-Free for Good
Now that your tub is sparkling clean, let’s keep it that way! A little bit of regular maintenance goes a long way and will save you from heavy-duty scrubbing in the future. Prevention is always the best strategy in home care.
| Preventative Action | How Often | Why It Works |
|---|---|---|
| Rinse After Every Use | Daily | Washes away soap residue, body oils, and dirt before they have a chance to dry and stick to the surface. |
| Wipe It Dry | Daily | Using a squeegee or microfiber towel to dry the tub prevents hard water spots and mineral buildup from forming. |
| Weekly Light Cleaning | Once a Week | Spray the tub with a 50/50 mix of white vinegar and water. Let it sit for 15 minutes, then wipe and rinse. This keeps soap scum at bay. |
| Fix Leaky Faucets | Immediately | A constant drip is the primary cause of rust and hard water stains. Fixing leaks protects your tub and saves water. |
FAQs: Your Fiberglass Tub Questions Answered
Can I use a Magic Eraser on a fiberglass tub?
You can, but with caution. A Magic Eraser is a type of micro-abrasive foam. While it can be effective on tough spots, using it too often or scrubbing too hard can slowly wear away the tub’s glossy gelcoat. Use it gently and only for very stubborn, isolated stains.
How can I tell if my tub is fiberglass or acrylic?
Here’s an easy way to tell. Gently tap on the side of the tub. Fiberglass often feels thinner and will produce a hollow sound. Acrylic feels more solid and substantial, producing a duller thud. Fiberglass is also more flexible, while acrylic is very rigid.
Why did my fiberglass tub turn yellow?
Yellowing is common in older fiberglass tubs and can be caused by a few things. It can be a reaction of the gelcoat aging over time, buildup from hard water minerals, or damage from using harsh chemical cleaners like bleach. Our baking soda and vinegar method can often help brighten a yellowed surface.
How often should I deep clean my fiberglass tub?
If you follow the weekly light cleaning routine, you should only need to do a deep clean (like the baking soda paste method) once every month or two, or whenever you notice a stain starting to form. Regular, gentle maintenance is the key to avoiding big cleaning jobs.
Is it okay to use bleach on just one really stubborn stain?
I strongly advise against it. Bleach is very harsh and can cause permanent yellowing and damage to the gelcoat, even if used in a small area. It might seem like a quick fix, but it can create a bigger problem in the long run. Stick to safer alternatives like hydrogen peroxide for color stains.
Can you wax a fiberglass tub to keep it shiny?
Yes, you can! After a deep cleaning, applying a coat of marine or automotive wax (make sure it’s a pure wax without any “cleaning” abrasives) can help restore the shine and create a protective barrier. This barrier helps water and grime slide right off. Just be sure to avoid waxing the floor of the tub, as it will become extremely slippery and dangerous.
Conclusion: Enjoy Your Sparkling Clean Tub!
And there you have it! Restoring the shine to your fiberglass bathtub is truly that simple. You don’t need to be an expert or buy a shelf full of harsh chemicals. With just a little baking soda, vinegar, and some gentle care, you can tackle even the most stubborn stains and bring that beautiful gloss back to your bathroom.
Remember, the key to maintaining fiberglass is consistency and a gentle touch. By avoiding abrasive cleaners and adopting a simple weekly cleaning routine, you can keep your tub looking brand new for years to come. I hope this guide has given you the confidence to tackle this project yourself. Happy cleaning!