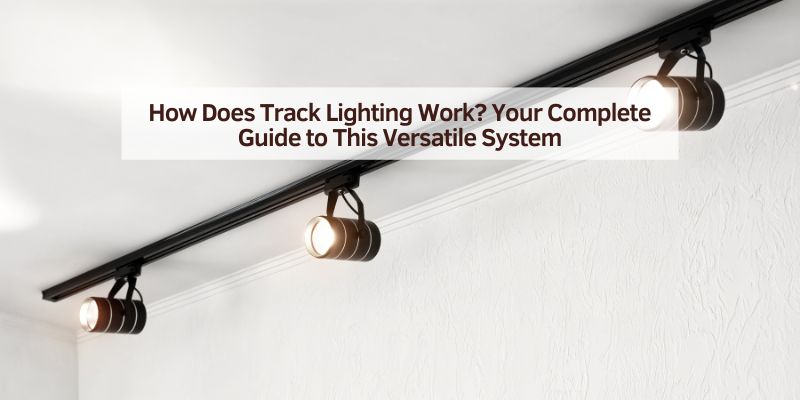
How Does Track Lighting Work? Your Complete Guide to This Versatile System
Hey there, friend! Have you ever walked into a room and been wowed by how perfectly the lights highlight a piece of art or make the space feel just right? That’s the magic of track lighting! I remember the first time I saw it in a friend’s sleek kitchen, with lights aimed exactly where they were needed. I was hooked and had to learn how it worked. After installing track lighting in my own home and helping a few buddies with theirs, I’ve gotten the hang of this cool system.
So, how does track lighting work? It’s simpler than you might think, and it’s super flexible for any space. In this guide, I’ll break it all down for you, like we’re chatting over a cup of coffee. Let’s shine a light on this topic and make your home glow!
What Is Track Lighting?
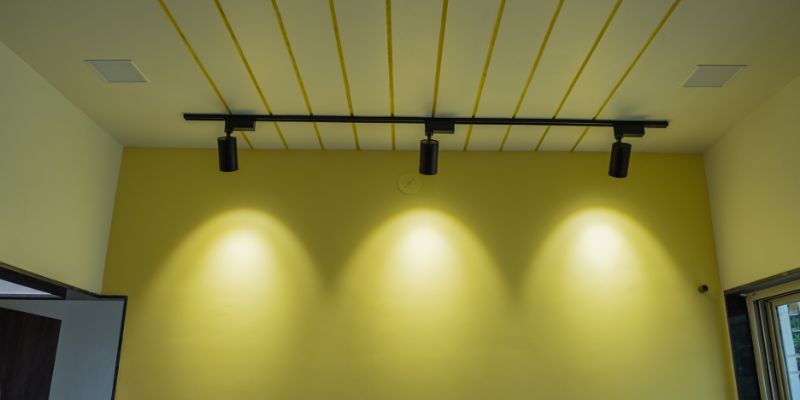
Track lighting is a system where lights are mounted on a continuous track, which is a metal strip attached to your ceiling or wall. The track carries electricity, so you can snap lights anywhere along it and point them where you want. I love how it lets me focus light on specific spots, like my dining table or a bookshelf.
The beauty of track lighting is its versatility. You can move, add, or adjust the lights without rewiring anything. When I installed it in my living room, I could aim one light at my favorite painting and another at the couch for reading. It’s used in homes, offices, and even galleries across the USA, giving a modern, customizable vibe.
How Does Track Lighting Work?
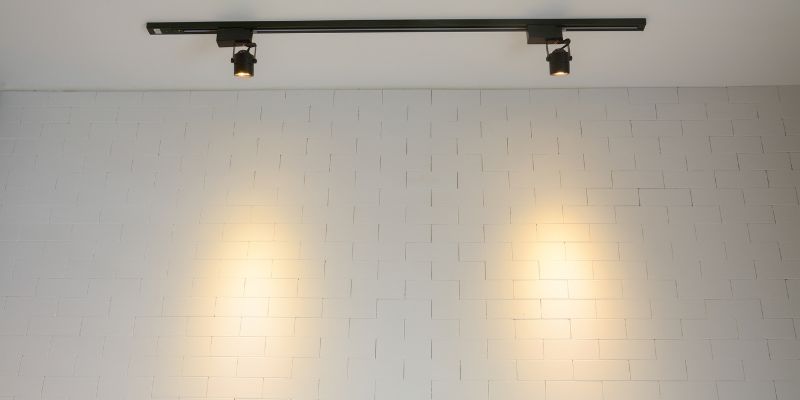
At its core, track lighting is all about a powered track and flexible light heads. The track is wired to your home’s electrical system, carrying a low-voltage current along its length. Each light head clips into the track, connecting to the current to power the bulb. You can slide the heads along the track and tilt them to direct the light.
I think of it like a train track: the track is the path, and the lights are the trains that can stop anywhere along it. The system is simple but genius, letting you change the lighting without touching a single wire. Whether you’re highlighting a workspace or creating ambiance, track lighting makes it easy.
Components of a Track Lighting System
To understand how track lighting works, you need to know its parts. I’ve taken apart a few systems, and here’s what makes them tick. I’ve put it in a table for clarity.
| Component | Description | Purpose | Common Types |
|---|---|---|---|
| Track | Light source in the head | Powers and holds light heads | Linear, L-shaped, flexible |
| Light Heads | Adjustable fixtures that clip onto the track | Direct light where needed | Spotlights, pendants, floodlights |
| Connector | Joins multiple tracks | Extends or shapes the track layout | Straight, T-shape, X-shape |
| Transformer | Converts household voltage to low voltage | Ensures safe operation | Built-in or separate |
| Bulbs | Light source in the heads | Provide illumination | LED, halogen, incandescent |
Track
The track is the backbone of the system. It’s usually a metal strip, about an inch wide, that you screw to the ceiling. I installed a 4-foot linear track in my kitchen, but you can get curved or flexible tracks for unique layouts. The track has conductive strips inside that carry electricity to the light heads.
Light Heads
Light heads are the fixtures that snap onto the track. They come in styles like spotlights, pendants, or floodlights. I used spotlights in my office to focus on my desk and pendants in my dining room for a softer look. You can move or rotate them to aim the light exactly where you want.
Connector
Connectors let you extend or shape the track. I used a T-shaped connector in my living room to create a branched layout, lighting up two corners of the room. You can get straight, L-shaped, or X-shaped connectors to fit your space.
Transformer
Some track systems, especially low-voltage ones, use a transformer to step down your home’s 120-volt current to 12 or 24 volts. My system has a built-in transformer, which keeps things safe and efficient. If your track uses standard voltage, you might not need one.
Bulbs
The bulbs in the light heads determine the brightness and mood. I switched to LED bulbs because they’re bright, energy-efficient, and last up to 50,000 hours. Halogen bulbs are brighter but run hotter, while incandescent are cheaper but less efficient.
Types of Track Lighting Systems
There are a few types of track lighting, and knowing them helps you pick the right one. Here’s what I’ve seen in homes and stores.
Standard Line-Voltage Track
This is the most common type, running on your home’s standard 120-volt power. I used this in my kitchen because it’s simple and works with most bulbs. It’s easy to install and great for general lighting.
Low-Voltage Track
Low-voltage tracks use a transformer to reduce power to 12 or 24 volts, making them safer and more efficient. I installed a low-voltage system in my basement for a sleek look. They’re ideal for smaller lights or precise spotlighting.
Monorail Track
Monorail tracks are flexible and can bend into curves or shapes. I helped a friend install one in her art studio, and it looked like a piece of modern art itself. They’re perfect for creative layouts but can be pricier.
Two-Circuit Track
These tracks have two separate circuits, so you can control different lights independently. I haven’t used one yet, but I’m eyeing it for my next project to light my living room and dining area separately on one track.
How Track Lighting Powers Up
The magic of track lighting lies in how it delivers power. The track has two metal strips (or conductors) inside, one for the hot wire and one for the neutral. When you snap a light head onto the track, its connectors touch these strips, completing the circuit and powering the bulb.
I was amazed the first time I slid a light head along the track and it lit up instantly—no extra wiring needed! Some systems also have a ground wire for safety. The track connects to your home’s electrical box, usually through a ceiling junction box, just like a regular light fixture.
Benefits of Track Lighting
Why did I fall in love with track lighting? Here are the reasons it’s so awesome:
- Flexibility: I can move or adjust lights anytime without rewiring. It’s perfect for changing decor or highlighting new furniture.
- Style: Track lighting looks modern and sleek. My kitchen went from boring to chic with a black track and spotlights.
- Focused Lighting: I can aim lights at specific spots, like my coffee table or artwork, for dramatic effect.
- Easy to Install: Compared to recessed lights, track lighting is simpler to set up, especially in existing ceilings.
- Energy Efficiency: With LED bulbs, my track lights use way less power than my old fixtures, saving me money.
It’s not just practical—it makes any room feel like it’s straight out of a design magazine.
Planning Your Track Lighting Layout
Before you install, you need a plan. A bad layout can leave dark spots or feel too bright. Here’s how I map it out:
- Measure the Room: I grab a tape measure and note the length and width. My 12×15-foot living room is 180 square feet.
- Decide the Purpose: Is it general lighting, task lighting (like for a kitchen counter), or accent lighting (like for art)? I used task lighting in my kitchen and accent in my office.
- Choose Track Length: A 4-foot track works for small areas; an 8-foot or longer for bigger rooms. I used two 4-foot tracks in my living room for full coverage.
- Space Light Heads: I place heads 2-3 feet apart for even light. In my kitchen, I spaced four heads on an 8-foot track.
- Consider Angles: I aim spotlights at key areas, like my dining table, and floodlights for broader coverage.
I sketch the ceiling on paper, marking where the track and heads will go. You can also tape string on the ceiling to visualize the layout.
Tools You’ll Need
You don’t need a huge toolbox, but a few essentials make the job smooth. Here’s what I use:
- Step Ladder: For safe ceiling access. My 6-foot ladder works for 8-10-foot ceilings.
- Screwdriver: Phillips or flathead for mounting screws.
- Drill: For securing the track to the ceiling, especially in tough drywall.
- Voltage Tester: To confirm that the power is off. My non-contact tester is a must-have.
- Wire Strippers: For preparing wires, if needed.
- Track Lighting Kit: Includes track, light heads, and connectors.
- Bulbs: I prefer LEDs for efficiency and brightness.
I keep a small bowl for screws and a flashlight for dark corners. Nothing’s worse than losing a screw on the carpet!
Safety Tips Before You Start
Working with electricity and heights means safety first. I’ve had a few close calls, and I want you to avoid them. Here’s what I do:
- Turn Off the Power: I flip the breaker at the electrical panel and use a voltage tester to confirm the wires are dead.
- Use a Stable Ladder: I set it on flat ground and lock it in place. A helper holding it is even better.
- Check Ceiling Strength: I ensure the junction box is secure and can hold the track’s weight (usually 5-20 pounds).
- Wear Safety Glasses: Dust or debris can fall when drilling. I learned this the hard way!
- Work Slowly: If something’s stuck, I stop and figure it out to avoid breaking parts.
Safety keeps this project fun, not stressful.
Step-by-Step Guide to Installing Track Lighting
Let’s install that track lighting! I’ll walk you through it like we’re doing it together. It usually takes me 1-2 hours.
Step 1: Turn Off the Power
I head to the breaker box and switch off the circuit for the room. I flip the light switch a few times to confirm it’s off, then test the ceiling wires with my voltage tester. No shocks for us!
Step 2: Remove the Old Fixture
If you’re replacing an old light, I climb the ladder and unscrew the fixture’s cover or canopy. I disconnect the wires (black, white, and ground) and lower the fixture carefully. I take a quick photo of the wiring for reference.
Step 3: Mount the Track
I hold the track against the ceiling, aligning it with the junction box. I mark screw holes with a pencil, then drill pilot holes if needed. I screw the track to the ceiling, making sure it’s level and secure. For longer tracks, I add extra screws for stability.
Step 4: Connect the Wires
The track has a wiring compartment that connects to the ceiling’s electrical box. I match the wires:
- Black track wire to black ceiling wire (hot).
- White track wire to white ceiling wire (neutral).
- Green or copper track wire to green or copper ceiling wire (ground).
I twist each pair together, secure with wire nuts, and wrap with electrical tape. I tuck the wires into the junction box neatly.
Step 5: Attach the Track Cover
Most tracks have a cover that hides the wiring. I snap or screw it on, making sure it’s flush. My kitchen track’s cover clicked into place easily, giving a clean look.
Step 6: Install Light Heads
I snap the light heads onto the track, sliding them to my desired spots. I adjust their angles, pointing some at my counter, others at the sink in my kitchen. Each head clicks into the track’s conductors, so no extra wiring is needed.
Step 7: Add Bulbs
I insert bulbs into each light head. I use 800-1000 lumen LEDs for bright, efficient light. I make sure they’re secure but don’t overtighten.
Step 8: Test the System
I turn the breaker back on and flip the switch. If the lights shine, I’m golden! If not, I turn off the power and check wire connections or bulbs. I had a loose wire once that took two minutes to fix.
Step 9: Adjust and Finalize
I tweak the light heads’ positions and angles for perfect coverage. In my living room, I aimed one at a plant and another at the couch—it’s like a spotlight for my space. I wipe the track with a soft cloth for a polished look.
Step 10: Clean Up
I sweep up any dust, put away my tools, and admire the new glow. A clean room makes the lighting pop!
Common Problems and How to Fix Them
Sometimes, things don’t go perfectly. Here’s how I handle issues:
- Light Doesn’t Work: I check the bulb, wire connections, and breaker. A loose wire nut was the culprit in my kitchen once.
- Track Won’t Stay Up: I ensure screws are tight and in a stud or toggle bolt. I added extra screws for my 8-foot track.
- Light Heads Flicker: This can mean a loose connection or an incompatible dimmer. I swapped my old dimmer for an LED-compatible one.
- Track Misaligned: If it’s not level, I loosen the screws, adjust, and retighten. A level tool helps here.
If I’m stuck, I check the manual or watch a quick YouTube video for clarity.
Choosing the Right Track Lighting
Picking the right system is key. Here’s what I consider:
- Room Size: Small rooms (100 sq ft) need 4-foot tracks; larger rooms (200+ sq ft) need 8-foot or multiple tracks. My 180-sq-ft living room has two 4-foot tracks.
- Style: I match the track to my decor—black for modern, white for classic. My kitchen’s black track looks sleek.
- Light Head Type: Spotlights for tasks, pendants for ambiance. I mix both in my dining room.
- Brightness: 800-1000 lumens per head for general lighting; 1200+ for tasks. I use 1000 lumens in my kitchen.
- Dimmable: I love dimmable lights for flexibility. My living room dims for cozy nights.
I shop at Home Depot, Lowe’s, or Amazon for brands like Lithonia or Hampton Bay. Kits cost $50-$200, depending on size and features.
Maintaining Your Track Lighting
A little care keeps your lights shining. Here’s my routine:
- Clean Tracks and Heads: I dust monthly with a damp cloth. It keeps the light bright and the track sleek.
- Check Bulbs: I test bulbs yearly and keep spare LEDs handy. Most last year, but it’s good to check.
- Tighten Connections: I check screws and wire nuts annually to prevent flickering.
- Adjust Angles: I tweak light positions if I rearrange furniture. It keeps the room looking fresh.
Regular maintenance means your lights stay beautiful and functional.
When to Call a Professional
Most track lighting installs are DIY-friendly, but sometimes a pro is needed. I’ve called electricians for tricky jobs, and here’s when I suggest it:
- Old Wiring: If your home has outdated wiring, a pro can upgrade it. I saw frayed wires in an old house and left it to an expert.
- Complex Layouts: If you’re wiring multiple tracks or circuits, an electrician ensures it’s up to code. They charge $50-$150 per hour.
- High Ceilings: For ceilings over 12 feet, pros have the right ladders. I’m not risking a fall!
Find a licensed electrician through friends or sites like HomeAdvisor for peace of mind.
Conclusion: Light Up Your Space with Style
Track lighting is one of those upgrades that makes you wonder why you didn’t do it sooner. After installing it in my home and helping friends with theirs, I’ve seen how it transforms any room into something special. It’s flexible, stylish, and easier to install than you might think. With this guide, you’ve got everything you need to plan, install, and enjoy your track lighting system. Grab your tools, pick the perfect track, and create a space that’s bright, beautiful, and uniquely you. Here’s to a home that shines with personality and light!
FAQs
How does track lighting differ from recessed lighting?
Track lighting sits on a surface-mounted track, so you can move and aim lights. Recessed lights are built into the ceiling and fixed. I love track lighting for its flexibility.
Can I install track lighting myself?
Yes, if you’re comfortable with basic wiring. I always turn off the power and use a voltage tester for safety. If you’re unsure, hire a pro.
How many light heads do I need for my room?
Aim for one head every 2-3 feet of track for general lighting. My 180-square-foot living room has four heads on two 4-foot tracks.
Are LED bulbs best for track lighting?
Definitely! LEDs are bright, energy-efficient, and last up to 50,000 hours. I use them in all my track lights to save money.
Can I add more lights to my track later?
Yes, that’s the beauty of track lighting! I added an extra head to my kitchen track when I got a new island, no rewiring needed.