How Far Apart Should 6-Inch Recessed Lights Be: Essential Guide
For 6-inch recessed lights, aim for spacing between 4 to 8 feet apart, depending on ceiling height and desired light intensity. Lower ceilings and brighter light needs mean closer spacing, while higher ceilings and ambient light can allow for wider spacing. This guide will help you find the perfect distance for your room.
Lighting a room with recessed lights can make a big difference, creating a clean, modern look. But figuring out where to put them, and how far apart they should be, can feel a bit tricky. It’s a common question for many DIYers, and getting it just right means your room will feel comfortable and look its best. Don’t worry, we’ll walk through this step-by-step, making it simple and clear so you can achieve beautiful, even lighting in your home.
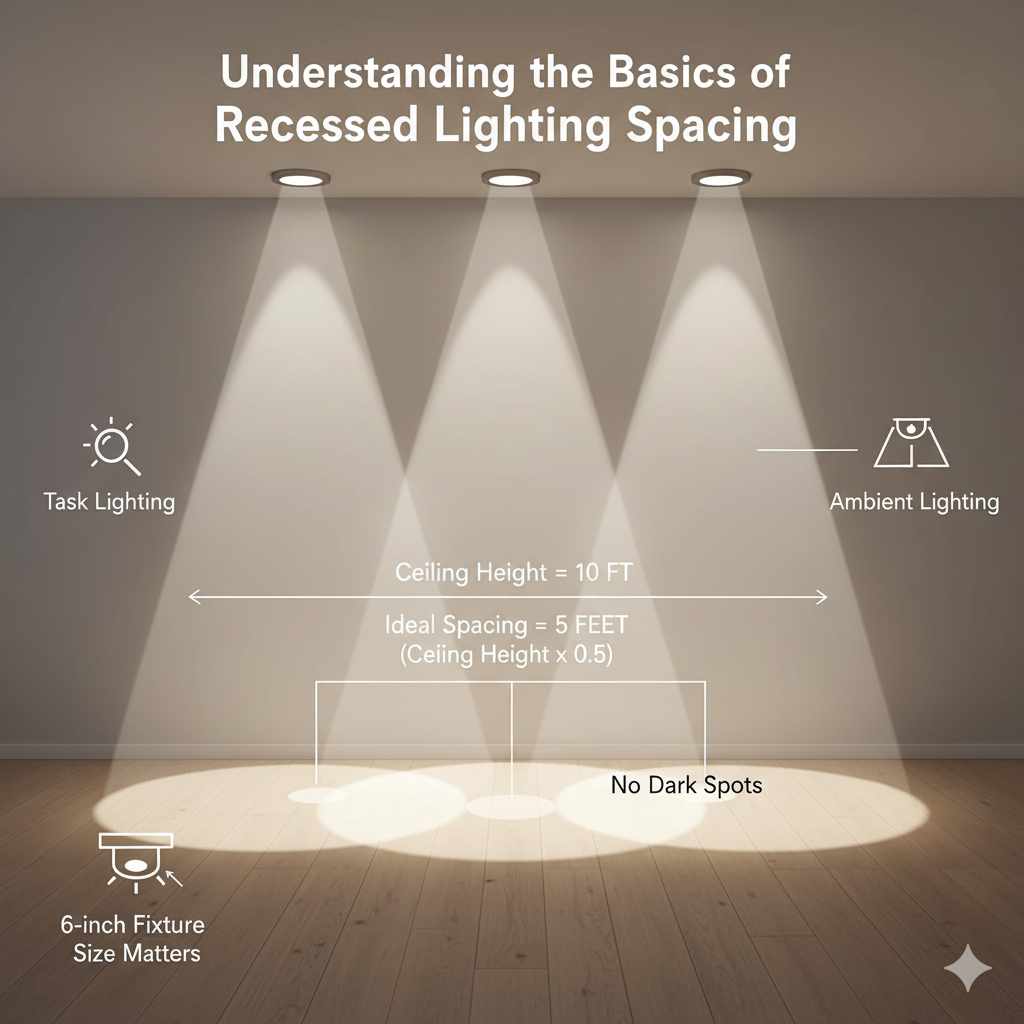
Understanding the Basics of Recessed Lighting Spacing
When we talk about recessed lights, we’re referring to those sleek, in-ceiling fixtures that blend seamlessly with your room. They’re great for providing general illumination, task lighting, or accent lighting. The key to making them work well is spacing them correctly. If they’re too far apart, you’ll end up with dark spots. If they’re too close, the light might feel overwhelming or simply be a waste of fixtures.
The size of the recessed light housing (like your 6-inch cans) is a primary factor, but it’s not the only one. Ceiling height, the type of bulbs you use, and the overall purpose of the lighting in the room all play a crucial role. Think of it like arranging furniture; you want a balanced and functional layout.
Factors Influencing 6-Inch Recessed Light Spacing
Let’s break down the elements that will guide your decision on how far apart your 6-inch recessed lights should be.
Ceiling Height: The Most Important Factor
This is probably the biggest influencer. Higher ceilings mean light needs to travel further, so you’ll generally need to space your lights a bit closer together to ensure adequate coverage. Conversely, lower ceilings mean the light doesn’t have as far to go, so you can often space them a bit wider.
Low Ceilings (8 feet or less): You might find yourself spacing lights closer, perhaps around 4-6 feet apart.
Standard Ceilings (9-10 feet): A spacing of 5-7 feet is often a good starting point.
High Ceilings (11 feet or more): You might be looking at 6-8 feet or even a bit more, depending on other factors.
Light Output and Bulb Type (Lumens)
The brightness of your bulbs, measured in lumens, is critical. A brighter bulb (higher lumens) can illuminate a larger area, meaning you might be able to space your lights further apart. If you’re using dimmer, more decorative bulbs, you’ll need them closer together for sufficient general lighting.
General Illumination: Aim for a lumen output that provides comfortable, even light across the entire room. For a living room or kitchen, you might aim for around 1500-2000 lumens per fixture for standard 8-foot ceilings, adjusting based on the bulb’s beam angle and spacing.
Task Lighting: If the recessed lights are primarily for a workspace like a kitchen counter or a desk, you’ll want them closer together and potentially use brighter bulbs to create a focused pool of light.
Accent Lighting: For highlighting artwork or architectural features, spacing is less about general coverage and more about placement and beam angle.
Beam Angle of the Bulb
Recessed light bulbs, especially LED ones, come with different beam angles. This angle determines how wide the light spreads.
Narrow Beam Angle (e.g., 25-30 degrees): These are good for accent lighting or when you need to direct light to a specific spot. They won’t spread light as widely, so you might need more fixtures spaced closer.
Wide Beam Angle (e.g., 60 degrees or more): These are excellent for general illumination as they spread light over a larger area. You can often space fixtures further apart with wider beam angles.
Room Purpose and Layout
The function of the room dictates how you should approach lighting. A bedroom might need softer, more ambient light, while a kitchen requires bright, functional light for cooking.
Living Rooms & Bedrooms: Often benefit from softer, more diffused light. Spacing can be more flexible, focusing on creating a comfortable atmosphere.
Kitchens & Bathrooms: These areas typically need brighter, more uniform light for tasks. Closer spacing is usually preferred.
Hallways: Need consistent light to prevent dark patches. Spacing is often determined by the length of the hallway, ensuring no gaps.
Obstructions and Room Features
Consider where you’re placing the lights. You’ll want to avoid placing them directly over furniture where they might create glare or shadows. Also, factor in architectural elements like beams, vents, or ceiling fans.
Common Spacing Formulas and Rules of Thumb
While there’s no single “right” answer, several helpful formulas and rules of thumb can guide you.
The “Diameter Rule”
A popular method is the “diameter rule.” This suggests spacing your lights apart by a distance roughly equal to the diameter of the light fixture. For 6-inch lights, this would mean spacing them about 6 feet apart. However, this is a very general guideline and doesn’t account for ceiling height or lumen output.
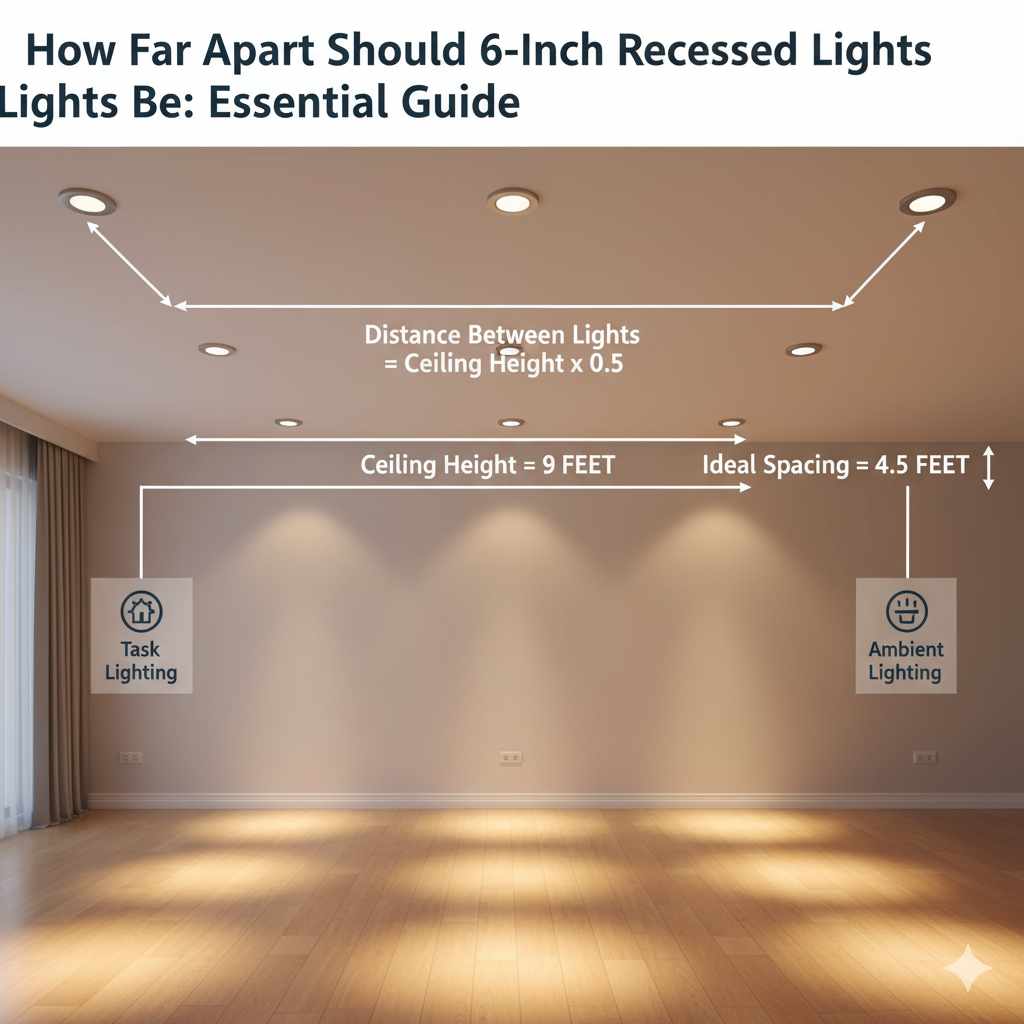
The “Ceiling Height Rule”
A more refined rule of thumb is to divide your ceiling height by two. This gives you a starting point for the spacing distance.
For an 8-foot ceiling: 8 feet / 2 = 4 feet spacing.
For a 10-foot ceiling: 10 feet / 2 = 5 feet spacing.
For a 12-foot ceiling: 12 feet / 2 = 6 feet spacing.
This rule is often a good starting point for general illumination.
The “Coverage Area” Method
Another approach is to think about the area each light needs to cover. This depends heavily on the beam angle of your bulb. A wider beam angle will cover a larger circular area. You want these circles of light to overlap slightly so there are no dark spots.
Calculating Spacing for 6-Inch Recessed Lights: A Practical Approach
Let’s get practical. Here’s a step-by-step way to figure out the best spacing for your 6-inch recessed lights.
Step 1: Measure Your Room and Ceiling Height
First, measure the length and width of your room in feet. Note your ceiling height. This information is essential for all calculations.
Step 2: Determine the Purpose of the Lighting
General Illumination: This is for overall brightness.
Task Lighting: Focused light for specific activities (e.g., kitchen counters, reading nooks).
Accent Lighting: To highlight features.
For this guide, we’ll focus on general illumination, as it’s the most common need and where spacing is most critical for even coverage.
Step 3: Choose Your Bulb Type and Lumens
Select the LED bulbs you plan to use. Note their lumen output and beam angle. For general lighting, a beam angle of 60 degrees or wider is usually best. Aim for bulbs that provide adequate lumens for your room size and ceiling height. A good starting point for general illumination is often around 800-1000 lumens per bulb for an 8-foot ceiling, but this can vary greatly.
Step 4: Calculate the Number of Lights Needed
A simple way to estimate the number of lights is by room square footage. A common recommendation for general lighting is one 6-inch recessed light for every 40-60 square feet of floor space.
Example: For a 12ft x 15ft room (180 sq ft):
180 sq ft / 40 sq ft/light = 4.5 lights (round up to 5)
180 sq ft / 60 sq ft/light = 3 lights (round down to 3)
This suggests you might need between 3 to 5 lights.
Step 5: Apply Spacing Rules and Adjust
Now, let’s combine the rules of thumb with your measurements.
Using the Ceiling Height Rule:
For an 8-foot ceiling, start with roughly 4 feet spacing.
For a 10-foot ceiling, start with roughly 5 feet spacing.
For a 12-foot ceiling, start with roughly 6 feet spacing.
Adjusting for Room Dimensions:
Lengthwise: Divide the room’s length by the desired spacing. If you have a 15-foot room and want 5-foot spacing, you’d place lights at approximately 2.5ft, 7.5ft, and 12.5ft from one wall. This gives you three lights.
Widthwise: Do the same for the room’s width. If your room is 12 feet wide and you want 5-foot spacing, you might place lights 3ft and 9ft from one wall, or center them for a more balanced look.
Crucial Adjustment: The goal is to have the light from one fixture spread out and overlap with the light from the next. A common recommendation is to space lights so the edges of their illuminated circles meet or overlap slightly. For a typical 60-degree beam angle LED, this often translates to spacing them about 5-7 feet apart for standard ceilings.
Positioning the First and Last Lights: Don’t place the first and last light too close to the wall. A good rule is to place the center of the first and last light fixture half the desired spacing distance from the wall.
If your desired spacing is 5 feet, place the first and last lights 2.5 feet from the wall.
This ensures even light distribution from wall to wall.
Table: General Spacing Guidelines for 6-Inch Recessed Lights (General Illumination)
| Ceiling Height | Recommended Spacing (Approximate) | Notes |
| :————- | :——————————– | :——————————————————————– |
| 8 feet | 4 – 6 feet | Closer spacing for brighter light, wider for ambient. |
| 9 feet | 4.5 – 6.5 feet | Standard spacing, good balance for general lighting. |
| 10 feet | 5 – 7 feet | Can space slightly wider, especially with wider beam angle bulbs. |
| 11 feet | 5.5 – 7.5 feet | Wider spacing possible, ensure bulbs have sufficient lumen output. |
| 12 feet | 6 – 8 feet | Requires bulbs with good lumen output and potentially wider beam angles. |
These are starting points. Always consider lumen output and beam angle of your chosen bulbs.
Laying Out Your Recessed Lights: A Visual Guide
Before you cut any holes, it’s essential to visualize your layout.
Step 1: Use Painter’s Tape to Mark Potential Locations
On your ceiling, use painter’s tape to mark where you think each light will go. This allows you to step back, look at the pattern from different angles, and make adjustments before making any permanent changes.
Step 2: Consider Room Layout and Furniture Placement
Imagine where your furniture will be. You don’t want lights directly above a couch where they might cause glare. Try to center lights in open areas and avoid placing them too close to walls where they might create harsh shadows.
Step 3: Ensure Even Spacing
Step back and look at the pattern. Are the distances between lights consistent? Is the distance from the walls to the first lights consistent? Even spacing creates a professional and pleasing look.
Step 4: Check for Obstructions
Use a stud finder to ensure you aren’t drilling into joists or running wires directly where you plan to install a light. You can find excellent guides on safe electrical practices from resources like the U.S. Consumer Product Safety Commission (CPSC), which emphasizes proper installation and avoiding hazards.
Special Considerations for Different Rooms
While general rules apply, some rooms have unique lighting needs.
Kitchens
Kitchens require bright, functional lighting. You’ll want to ensure ample light over countertops for food preparation.
Spacing: Often closer, around 4-6 feet apart, depending on ceiling height.
Placement: Position lights to avoid shadows on work surfaces. Consider placing them about 2-3 feet away from the edge of your cabinets.
Living Rooms and Family Rooms
These spaces often prioritize ambiance and comfort.
Spacing: Can be more flexible, perhaps 6-8 feet apart for standard ceilings, especially if you plan to use dimmers.
Placement: Avoid direct overhead glare on seating areas. Consider placing them slightly off-center or in zones to create different lighting moods.
Bedrooms
Bedrooms need a relaxing atmosphere.
Spacing: Similar to living rooms, 6-8 feet apart.
Placement: Ensure good light for dressing and reading, but avoid harsh light directly over the bed.
Hallways and Entryways
These areas need consistent, welcoming light.
Spacing: Often placed about 4-6 feet apart, ensuring continuous illumination.
Placement: Center them in the hallway to avoid dark corners.
Tools You Might Need
To get this project done safely and effectively, here are some tools that will make your life easier:
Tape Measure: Essential for all your measurements.
Pencil: For marking.
Painter’s Tape: For laying out your design.
Stud Finder: To locate ceiling joists and avoid them.
Drill with Hole Saw Attachment: For cutting the precise holes for your recessed lights.
Wire Strippers and Cutters: For electrical connections.
Voltage Tester (Non-Contact): Absolutely crucial for safety to ensure the power is off before you start working with wires.
Safety Glasses: Protect your eyes from dust and debris.
Ladder: Make sure it’s a stable one!
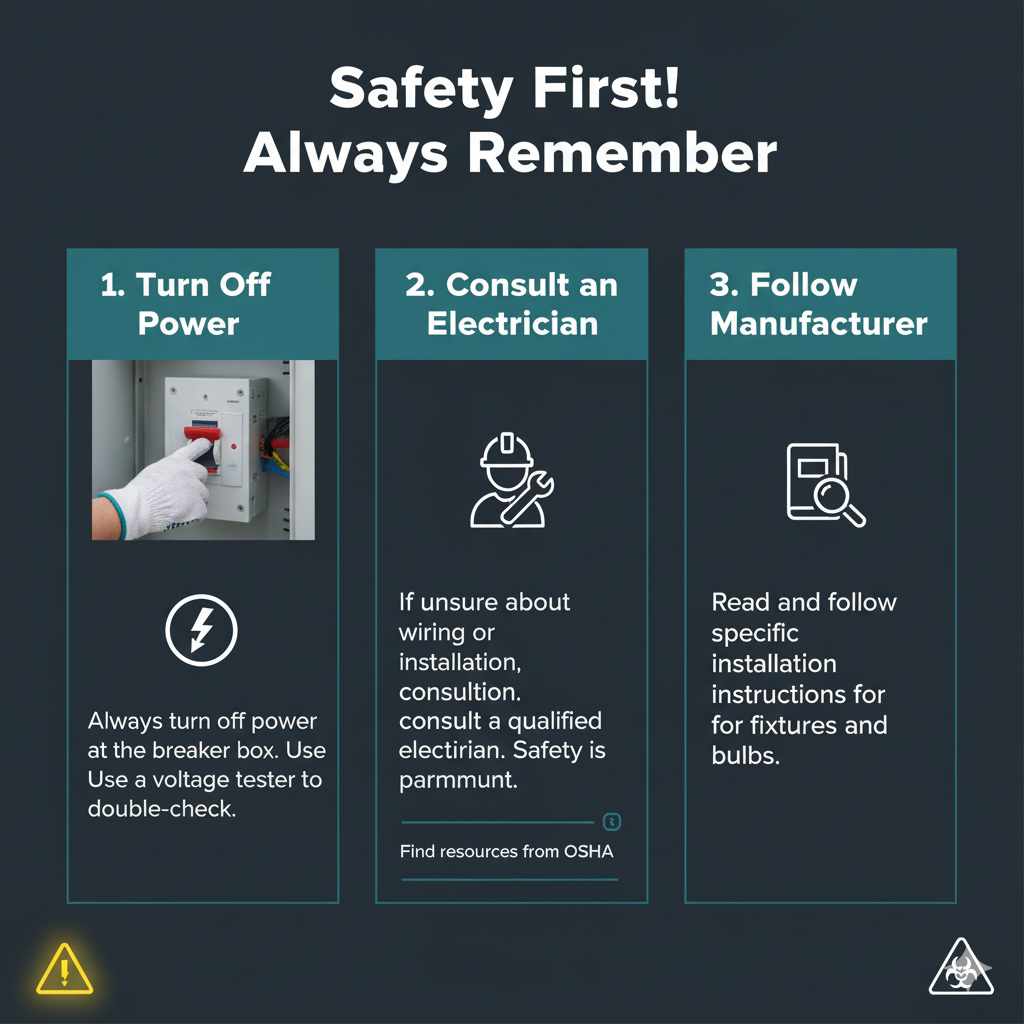
Safety First! Always Remember
Working with electricity can be dangerous if not done properly.
1. Turn Off Power: Always, always, always turn off the power to the circuit you’ll be working on at the breaker box before you start. Double-check with a voltage tester.
2. Consult an Electrician: If you are unsure about any part of the electrical wiring or installation, it’s always best to consult a qualified electrician. Safety is paramount. You can find resources on electrical safety from the Occupational Safety and Health Administration (OSHA).
3. Follow Manufacturer Instructions: Always read and follow the specific installation instructions for your chosen recessed light fixtures and bulbs.
Frequently Asked Questions (FAQ)
Q1: Can I use the same spacing for all rooms?
A1: No, spacing depends on ceiling height, bulb brightness (lumens), beam angle, and the room’s purpose. Always adjust your spacing based on these factors.
Q2: How do I avoid dark spots between lights?
A2: Ensure your lights are spaced so their illuminated circles overlap slightly. Also, position the first and last lights about half the desired spacing distance from the walls.
Q3: What if my room has an irregular shape?
A3: For irregular rooms, you might need to adjust spacing in different sections or use fewer lights and focus on key areas. It’s often best to sketch out the room and plan your layout section by section.
Q4: Do I need to consider the size of the recessed can itself?
A4: While the 6-inch size gives us a starting point, the actual beam angle and lumen output of the bulb inside the can are more critical for determining how far the light spreads and thus, how far apart they should be.
Q5: How far should 6-inch recessed lights be from walls?
A5: A good rule of thumb is to place the center of the first and last light fixture about half the desired spacing distance from the wall. For example, if you’re spacing lights 6 feet apart, place the first and last lights 3 feet from the wall.
Q6: Can I put recessed lights closer together if I want them brighter?
A6: Yes, placing lights closer together will increase the overall brightness of the room by overlapping more light. However, it’s often more energy-efficient and aesthetically pleasing to use bulbs with higher lumen output and maintain a slightly wider, more balanced spacing.
Q7: What’s the difference between general illumination and task lighting spacing?
A7: General illumination aims for even light across the entire room, so spacing is calculated for coverage. Task lighting requires focused, brighter light in specific areas (like over a kitchen counter), meaning lights will be placed closer together in those zones.
Conclusion
Figuring out how far apart your 6-inch recessed lights should be is all about balancing a few key factors: your ceiling height, the brightness and spread of your bulbs, and the purpose of the room. By using simple rules of thumb, like dividing ceiling height by two, and by visualizing your layout with painter’s tape, you can confidently plan a lighting scheme that perfectly illuminates your space. Remember to always prioritize safety by turning off power and consulting professionals if needed. With a little planning and careful execution, you’ll achieve beautiful, functional lighting that enhances your home and makes you feel proud of your DIY skills. Happy lighting!