How Long Does Semi-Gloss Paint Take to Dry? A Simple Guide
Painting is a common home project, but figuring out the drying time of paint can be tricky! Many people wonder How Long Does Semi-Gloss Paint Take to Dry? because it impacts their timeline and the final look. Don’t worry, it’s not as hard as it seems. This guide breaks down everything you need to know, making the process easy to manage. Let’s get started!
Factors Influencing Dry Time for Semi-Gloss Paint
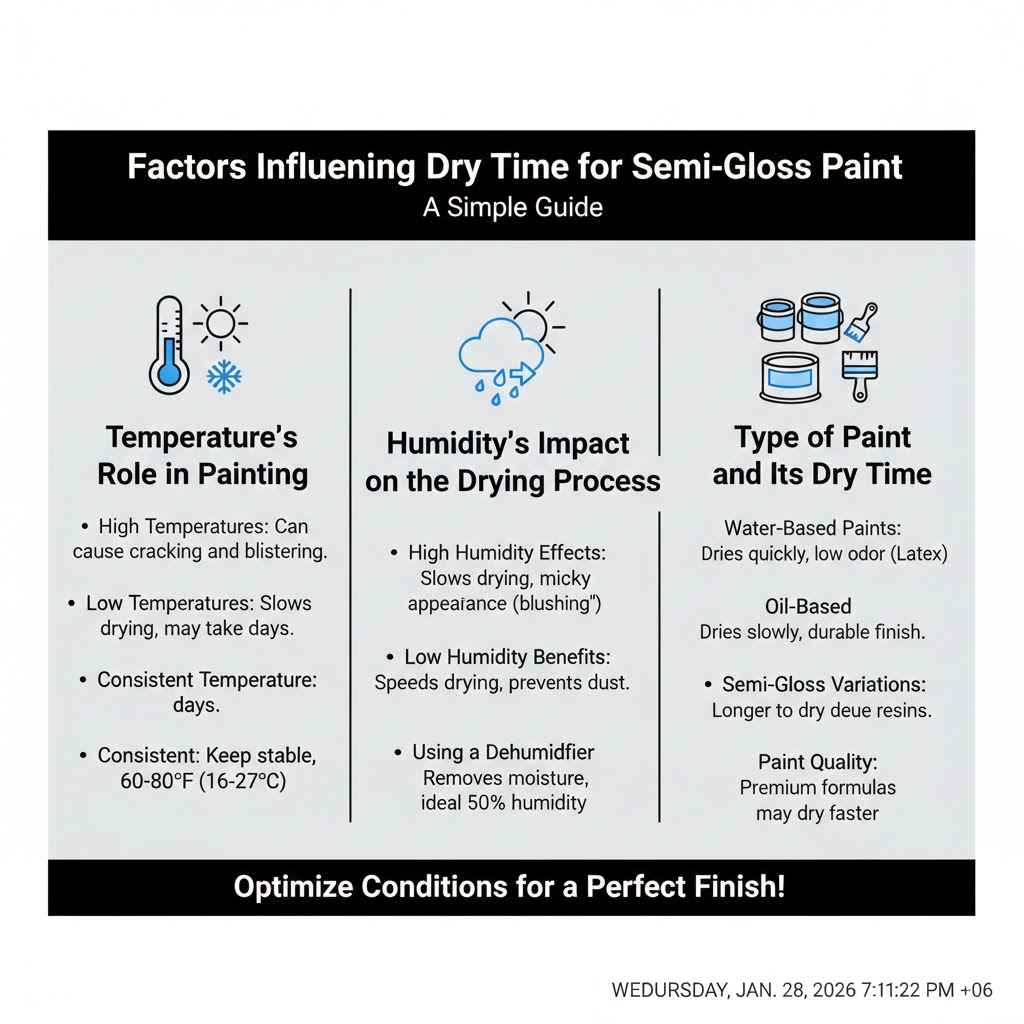
Several things affect how quickly semi-gloss paint dries. Temperature, humidity, and the paint itself all play important roles. Knowing these factors helps you plan your project and avoid problems like streaks or uneven coats. Let’s look at each factor to make sure your paint job looks great.
Temperature’s Role in Painting
Temperature is one of the most important things when painting. Warm temperatures usually make paint dry faster. Think of it like a warm oven drying a cake. However, too much heat can cause the paint to dry too quickly, leading to an uneven look. This can cause issues like “blistering” where the paint bubbles up. The ideal temperature range is usually between 60-80 degrees Fahrenheit (16-27 degrees Celsius). Check the paint can, as each paint brand might vary slightly. When the temperature is perfect, the paint goes on smoother, and you get a better finish.
- High Temperatures: Excessive heat can cause paint to dry too fast. This can cause problems like cracking, especially if the paint is applied in direct sunlight.
- Low Temperatures: Cooler conditions slow down the drying process. In cold weather, it may take days for paint to fully cure. Make sure to paint indoors or wait for a warmer day.
- Consistent Temperature: Keep the temperature stable. Large fluctuations, like turning the heat off and on, can affect drying and the final appearance of the paint.
Humidity’s Impact on the Drying Process
Humidity, or the amount of water in the air, also affects drying. High humidity makes paint dry slower because the air is already saturated with water. This can also lead to issues like “blushing,” where the paint has a milky appearance. Low humidity helps paint dry faster because the air can absorb the paint’s moisture. For best results, aim for a humidity level of around 50%. You can use a dehumidifier to reduce humidity if needed. This is key for achieving a smooth, professional-looking finish.
- High Humidity Effects: High levels of humidity slow down drying times. This also increases the chances of paint imperfections, making it crucial to manage indoor environments.
- Low Humidity Benefits: Low humidity speeds up the drying process. This ensures the paint sets faster and reduces the risk of dust or debris settling on wet surfaces.
- Using a Dehumidifier: A dehumidifier removes moisture from the air, creating the ideal atmosphere for paint to dry. Using a dehumidifier helps maintain the ideal humidity.
Type of Paint and Its Dry Time
Different types of paint have different drying times. Water-based paints, like latex paints, usually dry faster than oil-based paints. Also, the paint’s finish (like flat, semi-gloss, or gloss) matters. Semi-gloss paint often takes longer to dry than flat paint because it has a higher concentration of resins and additives. It’s also common to see that the quality of the paint effects drying time. Using higher-quality paints often means they contain more advanced formulations that may dry quicker and offer better protection.
- Water-Based Paints: These paints usually dry quickly. Latex paints are popular for their fast drying, low odor, and easy cleanup.
- Oil-Based Paints: Oil-based paints dry more slowly. They offer a durable, hard finish but can take longer to cure.
- Semi-Gloss Variations: Even within semi-gloss paints, formulas vary. Some are designed to dry faster for convenience, while others prioritize durability.
- Paint Quality: The quality of the paint can impact drying time. Premium paints often have formulations that reduce dry time and improve the final appearance.
Understanding Dry Times for Semi-Gloss Paint
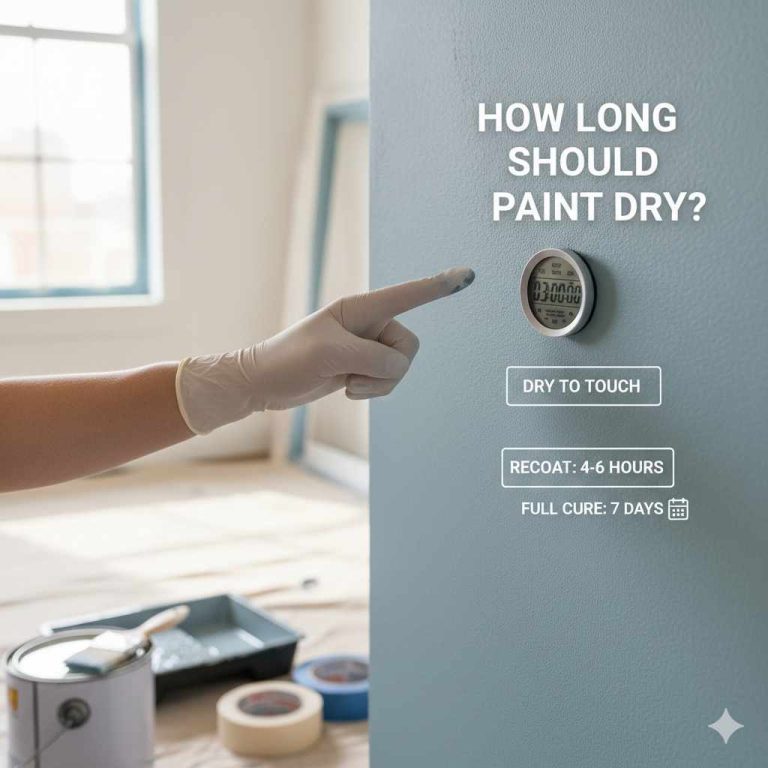
So, How Long Does Semi-Gloss Paint Take to Dry? The answer isn’t always simple, but knowing the basics can help. Typically, semi-gloss paint takes longer to dry than flat paint, but how long depends on the conditions and paint type. We will look at “dry to the touch” versus “cure time,” as well as how to check if your paint is ready for a new coat.
“Dry to the Touch” vs. “Cure Time”
There’s a difference between “dry to the touch” and “cure time.” “Dry to the touch” means the surface feels dry when you touch it. You can usually touch a semi-gloss painted surface within a few hours, but it’s not fully cured yet. “Cure time” is how long it takes for the paint to completely harden and reach its final strength. This takes much longer. Complete curing is essential for the paint to resist scratches, stains, and wear. Understanding this difference is key to a good paint job.
- Dry to the Touch: This is the time it takes for the surface to feel dry to the touch. It’s usually a few hours, depending on conditions. You can usually apply a second coat if the paint is dry to the touch.
- Cure Time: This is the time it takes for the paint to completely harden and reach its full durability. It could take days or even weeks. During this time, the paint becomes resistant to marks and can withstand regular use.
- Importance of Patience: Waiting for full cure time ensures the paint is durable and looks its best. Rushing the process can result in issues such as fingerprints and marks.
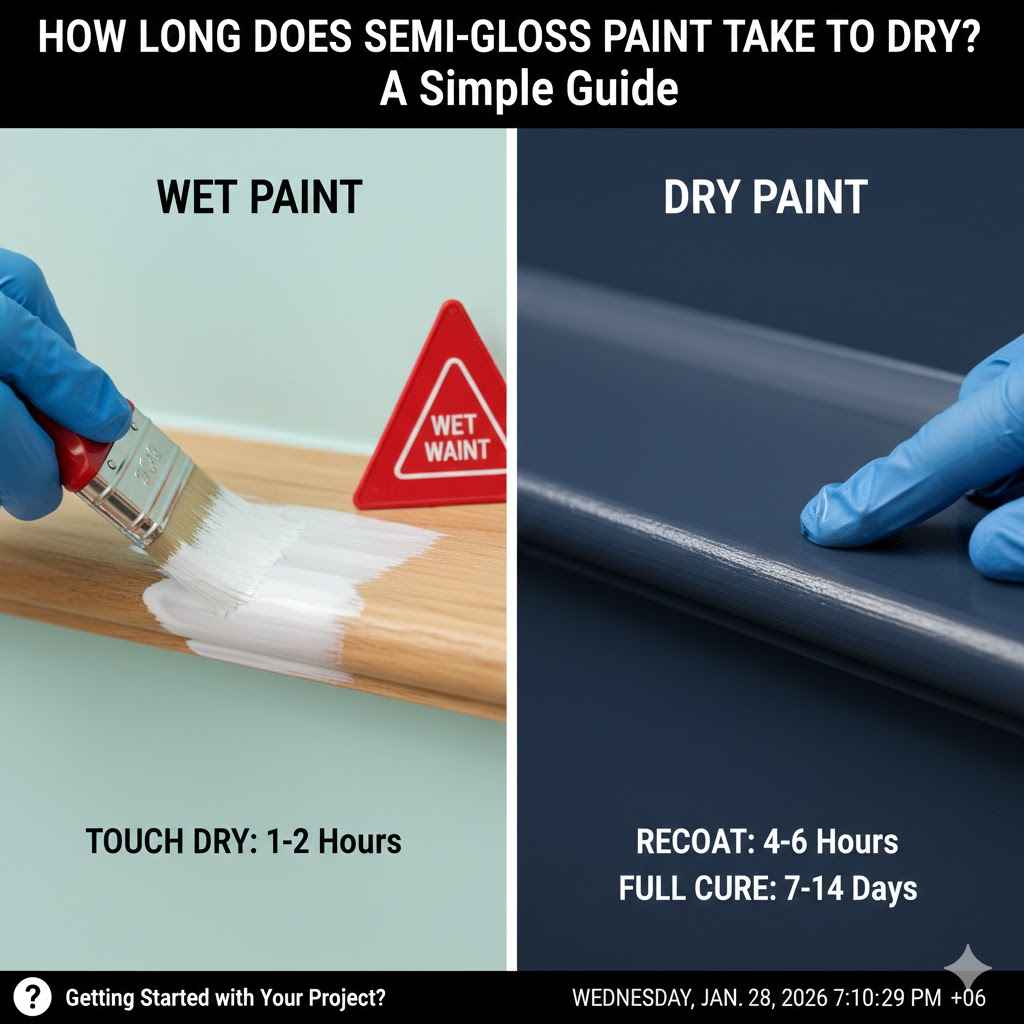
Typical Dry Times for Semi-Gloss Paint
Generally, semi-gloss paint will be dry to the touch in 2-4 hours under ideal conditions. But the recoat time—when you can apply another layer—is often 4-8 hours. However, for the paint to fully cure, you should wait up to a week. Remember that these times are estimates, and the actual drying time can change based on the factors we’ve discussed. Carefully reading the paint can instructions for your specific brand is the best practice.
- Dry to the Touch Timeline: It usually takes about 2-4 hours for semi-gloss paint to dry to the touch. This means you can lightly touch the surface without it feeling wet.
- Recoat Time: The typical recoat time is 4-8 hours. It is very important to wait for this period before applying a second coat.
- Full Cure Time: The paint may take up to a week to fully cure. This is when the paint reaches its maximum hardness and durability.
- Paint Brand Differences: Paint brands use different formulas, so drying times vary. Always check the manufacturer’s instructions on the paint can for guidance.
Testing If Paint is Dry
How do you know when the paint is ready? You can gently touch a small, inconspicuous area. If it feels dry and doesn’t leave a mark, it’s usually ready for another coat, but you should still give it some extra time. Another good test is to gently press your fingernail against the painted surface. If it doesn’t leave an indentation, the paint has likely dried sufficiently. However, remember the importance of allowing for full cure time, especially before heavy use.
- The Touch Test: Gently touch a hidden area of the painted surface. If it feels dry without leaving a mark, it is ready.
- The Fingernail Test: Press your fingernail lightly against the paint. If it doesn’t leave a mark, the paint is likely ready for a second coat.
- Check Recoat Instructions: Check your paint can for specific recoat instructions. Following the manufacturer’s recommendations ensures the best results.
Preparing for Painting and Maximizing Drying Efficiency
Getting your space ready and using the right techniques can speed up drying and improve your finish. This involves prepping the surface, using the proper tools, and creating an optimal environment. Proper preparation ensures that the paint goes on smoothly and dries properly. Following these steps can make a big difference in the outcome.
Surface Preparation: A Key Step
Proper surface prep is critical for a great paint job. First, clean the surface to remove dirt, grease, and dust. This ensures the paint sticks well. Then, patch any holes or imperfections with spackle, let it dry, and sand it smooth. Priming the surface is a good idea, particularly on bare wood or if you’re changing colors. Primers help the paint stick better and create a uniform surface. Proper preparation leads to better adhesion and a smoother, more attractive finish.
- Cleaning the Surface: Clean surfaces free of dust and debris with a damp cloth or a degreaser. Proper cleaning prevents the paint from peeling or bubbling.
- Repairing Imperfections: Fill holes and cracks with spackle or wood filler. Sand any imperfections to create a smooth surface before priming.
- Priming for Better Adhesion: Using a primer enhances paint adhesion, particularly on new or previously painted surfaces. Priming also provides a better surface.
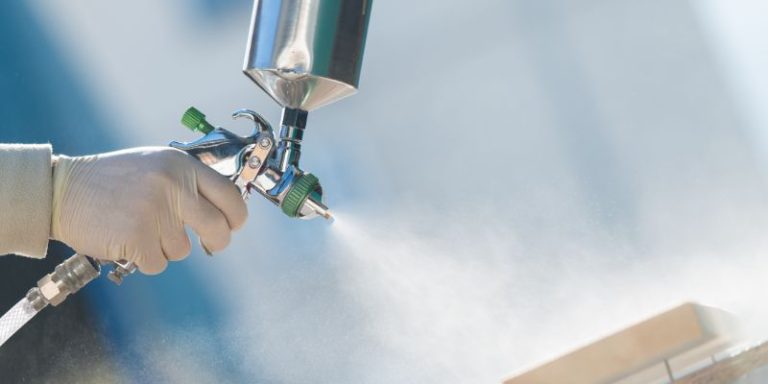
Tools and Techniques
The right tools and techniques also help. Using high-quality brushes or rollers gives a smoother finish. Apply paint in thin, even coats to avoid drips and runs. Overloading the brush leads to thick, uneven paint and longer drying times. For optimal results, use a roller for large areas and a brush for edges and corners. Consistent application and careful use of your tools makes a big difference in the outcome.
- Use Good-Quality Tools: Invest in quality brushes and rollers. They provide a smoother finish and can help you apply paint evenly.
- Apply Thin, Even Coats: Apply paint in thin layers to prevent drips and speed up the drying process. Thin coats dry faster and produce a more uniform look.
- Correct Rolling Technique: Use a roller with a consistent pressure and follow the grain of the surface. This helps eliminate streaks and achieves a flawless result.
Creating the Right Environment
Controlling the environment is critical for optimal drying. As mentioned earlier, keeping the temperature between 60-80 degrees Fahrenheit and the humidity around 50% helps. Improve air circulation by opening windows or using fans. Good ventilation helps the paint dry more quickly and evenly, reducing the risk of imperfections. During periods of high humidity, using a dehumidifier can be especially helpful to control conditions and ensure a great result.
- Air Circulation Benefits: Open windows or use fans to improve air circulation. This helps reduce drying time.
- Controlling Humidity: Use a dehumidifier to keep humidity levels around 50%. This creates ideal conditions for paint to cure properly.
- Ideal Temperature Ranges: Maintaining a consistent temperature between 60-80 degrees Fahrenheit provides the optimal conditions. The right temperature helps paint cure correctly.
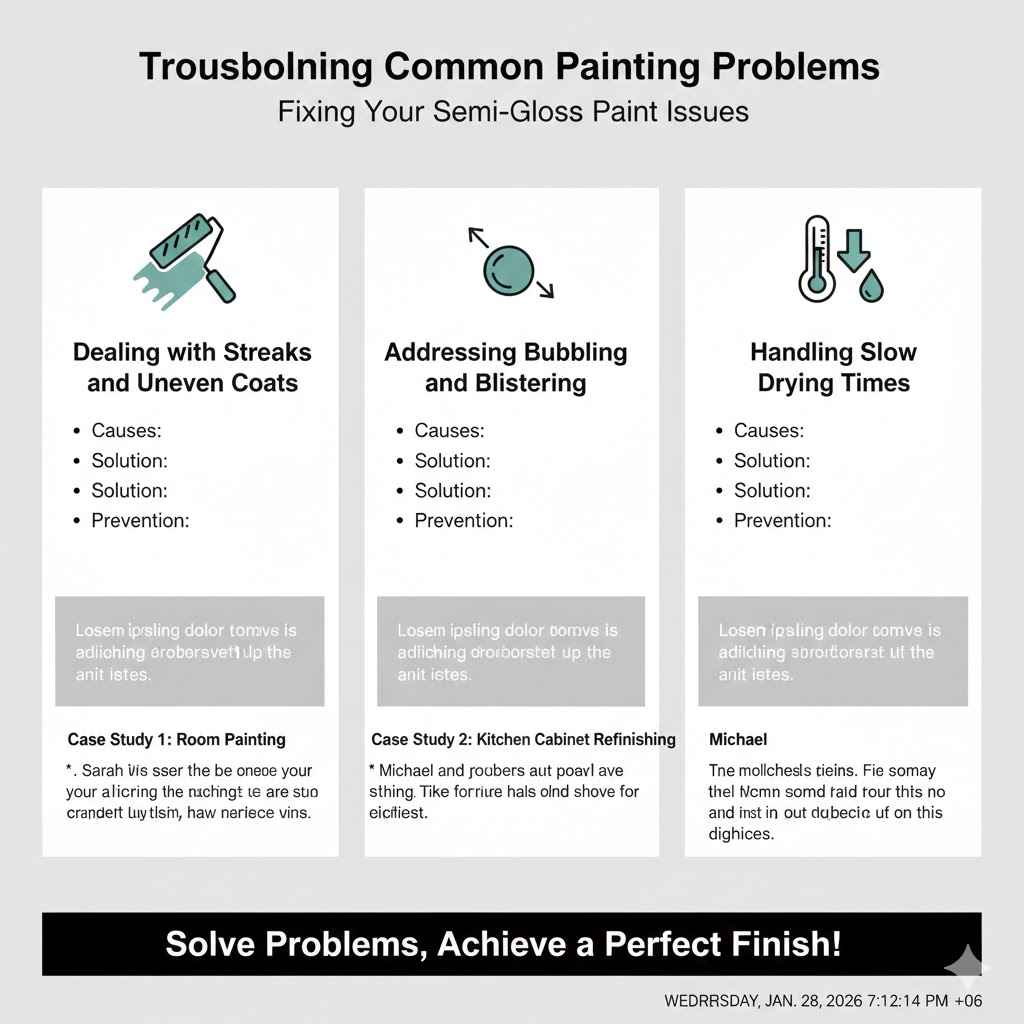
Troubleshooting Common Painting Problems
Sometimes, things go wrong. Learning about common paint problems helps you fix them. Streaks, bubbles, and slow drying are common issues that can happen. Here’s a look at what can cause these problems and how to solve them.
Dealing with Streaks and Uneven Coats
Streaks often happen when paint is applied too thick or when there’s uneven pressure on the brush or roller. To fix this, apply paint in thin, even coats. Be sure to use quality tools. If you already have streaks, lightly sand the surface after it’s dry and then repaint. Proper technique and surface preparation are important to ensure a smooth, flawless finish.
- Causes: Applying too much paint, using poor-quality tools, or uneven pressure causes streaks.
- Solution: Apply thin, even coats, using a brush or roller, and make sure that you do not apply too much pressure.
- Prevention: Preparing the surface will create a better result. Apply even coats with good tools to help avoid streaks.
Addressing Bubbling and Blistering
Bubbling and blistering happen when the paint dries too fast, trapping air underneath. This can happen in direct sunlight or with excessive heat. To solve this, let the paint dry completely, then sand the area lightly. Then, re-prime and repaint, making sure to apply paint in a cooler environment. Controlling temperature and humidity are key to preventing these issues.
- Causes: Fast drying times can cause paint to blister and trap air underneath.
- Solution: Let the paint dry completely. Lightly sand the affected area.
- Prevention: Avoid painting in direct sunlight or very high temperatures, and apply the paint correctly.
Handling Slow Drying Times
If your paint is drying too slowly, check the temperature and humidity. Cooler temperatures and high humidity slow drying. Improve air circulation and use a dehumidifier if needed. Ensure you’ve applied the proper number of coats and that the paint hasn’t expired. If the problem continues, consider using a paint additive designed to speed drying. Addressing these factors ensures your paint dries efficiently.
- Causes: High humidity, low temperatures, and thick paint applications can cause slow drying.
- Solution: Improve air circulation and use a dehumidifier to help.
- Prevention: Ensure the application area is in a controlled environment. The correct environment will ensure the paint dries faster.
Case Study 1: Room Painting
Sarah was repainting a room. She selected semi-gloss paint for the trim. After the first coat, the trim didn’t look quite right. She followed the recommended recoat time, applied a second coat, and the results were much better. This is why following all the steps is important. The second coat provided a smooth, durable finish that perfectly complemented the walls.
Case Study 2: Kitchen Cabinet Refinishing
Michael chose semi-gloss paint for his kitchen cabinets. He carefully prepared the surfaces and used thin coats. Because he worked in a well-ventilated area with a dehumidifier, his cabinets dried quickly and evenly. They had a beautiful, glossy finish. This project showed the importance of surface preparation and the ideal environment for the best results.
Frequently Asked Questions
Question: Can I speed up the drying time of semi-gloss paint?
Answer: Yes, you can. Ensure good air circulation, keep the temperature within the recommended range (usually 60-80°F), and reduce humidity using a dehumidifier.
Question: What happens if I apply a second coat too soon?
Answer: Applying a second coat too soon can cause the paint to wrinkle, bubble, or not dry properly. This will lead to an uneven and unsightly finish.
Question: Can I use a fan to help the paint dry faster?
Answer: Yes, fans can help. They improve air circulation, which can speed up the drying process. Make sure the fan isn’t blowing directly on the paint.
Question: Does the color of the paint affect drying time?
Answer: No, the color doesn’t directly affect drying time. However, darker colors might absorb more heat, which could slightly affect the drying rate in warm conditions.
Question: Is it okay to paint when it’s raining outside?
Answer: It’s generally not a good idea. Humidity is often high when it’s raining, slowing drying and potentially affecting the finish. The best time to paint is on a clear, dry day.
Final Thoughts
Understanding How Long Does Semi-Gloss Paint Take to Dry? is important for any painting project. Now you know the main things that affect drying time, from temperature and humidity to the type of paint. Remember, patience is key. Allowing the paint to fully cure will give you the best, most durable finish. By prepping your surface, using the right tools, and maintaining a good environment, you can enjoy a smooth and professional result. Follow the paint can’s instructions and be patient. You’ll have a beautiful, long-lasting finish.