How Much Does It Cost To Restain Cabinets
Thinking about giving your kitchen cabinets a fresh new look without a full replacement? Many homeowners wonder, How Much Does It Cost to Restain Kitchen Cabinets? This is a common question, especially for those new to DIY home projects. It can seem a bit tricky to pin down an exact price because so many things affect the cost.
Don’t worry, though. We’re here to break it all down in a simple way. You’ll get a clear picture of what to expect and how to plan your project.
Let’s find out what you need to know before you start.
Understanding Kitchen Cabinet Restaining Costs
Restaining kitchen cabinets is a popular way to update your kitchen’s appearance without the high expense of full cabinet replacement. This process involves applying a new stain over the existing finish of your cabinets, altering their color and enhancing their natural wood grain. It’s a project that can dramatically change the look and feel of your kitchen, often for a fraction of the cost of refacing or replacing cabinets entirely.
The decision to restain is often driven by a desire for a cosmetic upgrade, to match new decor, or to fix minor wear and tear on the existing finish. The cost is influenced by several key factors, each playing a role in the final price tag.
Factors Influencing Restaining Costs
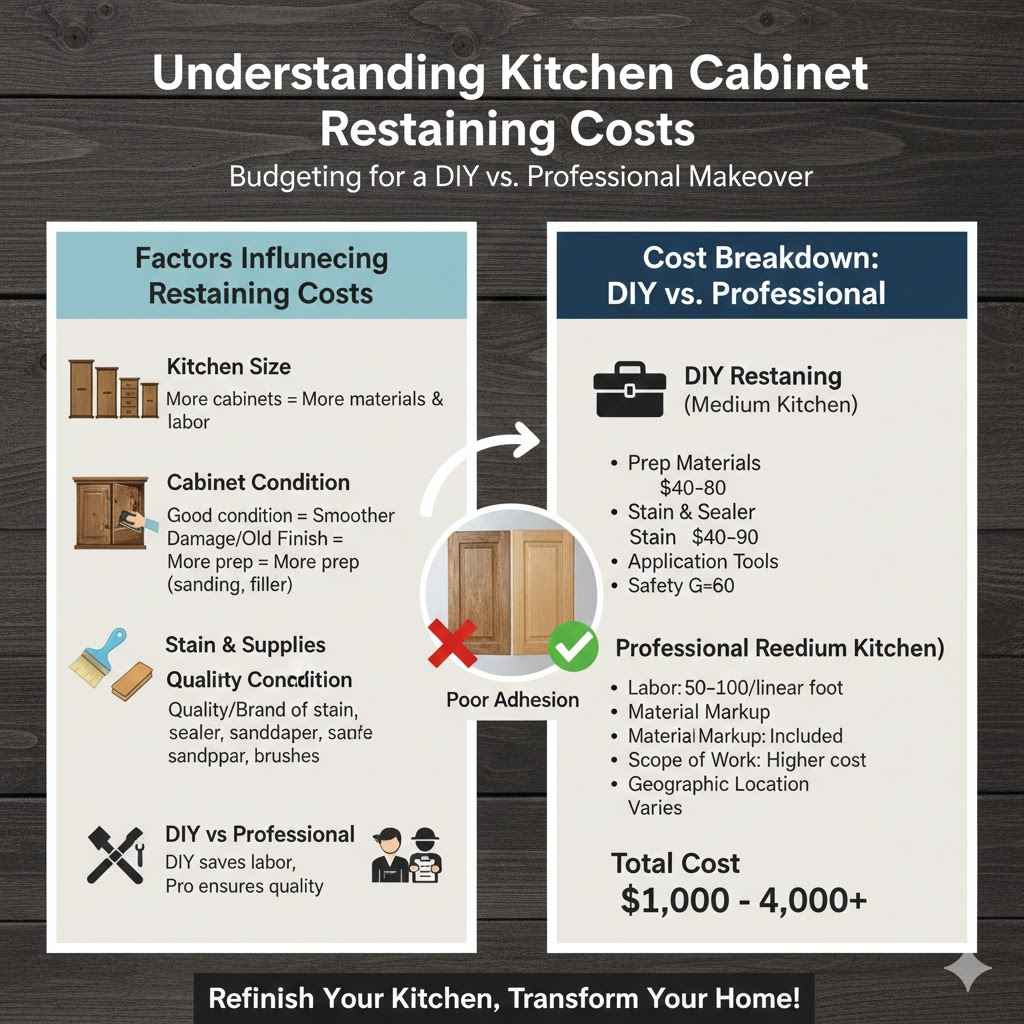
Several elements contribute to the overall cost of restaining kitchen cabinets. These include the size of your kitchen, the type and condition of the existing cabinets, the brand and quality of the stain and supplies you choose, and whether you hire a professional or decide to tackle it as a DIY project. Each of these variables can significantly impact the final amount you spend.
Kitchen Size and Cabinet Quantity
The number of cabinets you have is a primary driver of cost. A larger kitchen with more cabinets will naturally require more stain, more prep time, and more labor, whether yours or a hired professional’s. This means more materials like sandpaper, cleaning solutions, and applicators.
For instance, a small kitchen with 10 cabinet doors and a few drawers might cost significantly less than a large gourmet kitchen with 30 doors and numerous large drawers.
Cabinet Condition and Material
The current state of your cabinets plays a huge part. If your cabinets are already in good shape with minimal damage, the restaining process will be smoother and less labor-intensive. However, if they have deep scratches, peeling veneer, water damage, or a thick, old finish that needs removal, the prep work will increase.
This might involve more sanding, wood filler, or even stripping the old finish entirely. The type of wood also matters; some woods absorb stain differently and might require special preparation or multiple coats.
Choice of Stain and Supplies
The quality and brand of the stain and other finishing products you select will affect the price. Premium, high-quality stains and sealers can be more expensive but often offer better durability and a richer finish. You’ll also need to factor in the cost of sandpaper in various grits, wood filler, degreasers, tack cloths, brushes, rollers, and protective gear like gloves and masks.
Buying a complete, high-quality kit can sometimes be more economical than purchasing individual items.
DIY vs. Professional Services
Hiring a professional painter or cabinet restaining specialist will be more expensive than doing it yourself. Professionals charge for their expertise, time, and often carry insurance. However, they can deliver consistent, high-quality results, especially for complex jobs or when aiming for a factory-like finish.
A DIY approach saves on labor costs but requires your time, effort, and potentially the cost of learning from mistakes.
DIY Restaining Cost Breakdown
For homeowners considering a DIY restaining project, understanding the typical costs involved is essential for budgeting. This section breaks down the expenses for materials and tools you’ll likely need to purchase.
Prep Materials
Before you can even think about staining, thorough preparation is key. This includes a good degreaser to clean off years of grease and grime, likely costing around $10-$20 for a decent-sized bottle. You’ll also need various grits of sandpaper, from coarse for initial smoothing to fine for a perfect finish.
A pack of assorted sandpaper sheets might run $15-$30. Wood filler for any dings or scratches is typically $5-$15 per container. Tack cloths, essential for removing fine dust after sanding, are usually a few dollars each.
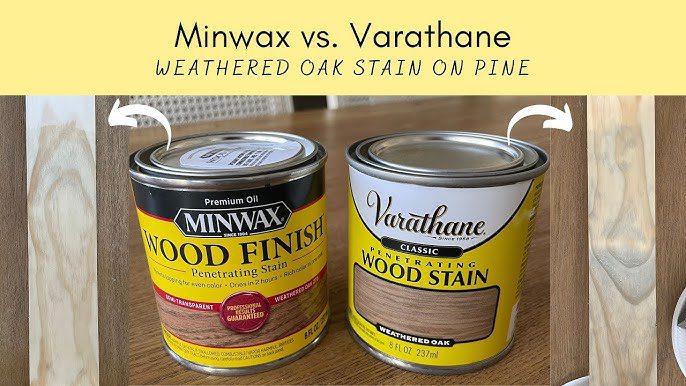
Stain and Sealer
The stain is where much of the aesthetic change happens. The cost of stain varies greatly by brand and type, but you can expect to spend $20-$50 per quart for a quality oil-based or water-based wood stain. For a standard-sized kitchen, you might need one to two quarts.
After staining, a protective topcoat is crucial. Polyurethane or a similar sealer can cost between $20-$40 per quart. Again, you might need more than one coat for durability, especially in a high-traffic kitchen.
Application Tools
You’ll need brushes for cutting in edges and detailed areas, along with foam rollers or high-quality synthetic brushes for larger surfaces to ensure a smooth, even application. A set of good quality brushes might cost $20-$50, and foam rollers or specialized cabinet rollers can be $10-$30. You’ll also need paint trays and possibly painter’s tape to protect surrounding areas, adding another $10-$20 to your budget.
Safety Gear
Protecting your health is paramount. This includes disposable gloves ($5-$10 for a box), safety glasses ($5-$15), and a good respirator mask with appropriate filters for fumes ($20-$40). Ventilation is also key, so while not a direct purchase, ensuring good airflow by opening windows is free.
A typical DIY restaining project for a medium-sized kitchen, including all necessary supplies, can range from $200 to $600. This estimate can increase if you need to purchase new tools or if your cabinets require extensive repairs.
Professional Restaining Cost Breakdown
When you opt for professional services, the cost reflects not only the materials but also the expertise, labor, and convenience. Understanding these costs helps in making an informed decision.
Labor Costs
This is the most significant portion of professional restaining. Professionals typically charge by the linear foot or by the job, and their rates vary based on location and experience. A common range for professional cabinet restaining labor is between $50 to $100 per linear foot of cabinetry.
This covers the entire process from initial cleaning and sanding to applying multiple coats of stain and sealer, and reassembling hardware. For a typical kitchen, this could add up to several thousand dollars.
Material Markup
While professionals buy materials in bulk, they may also add a small markup to cover their procurement time and ensure they are using high-quality products. The cost of the stain, sealer, and other consumables will be factored into the overall quote, often in a less itemized way than a DIY budget.
Scope of Work
The complexity of the job heavily influences the price. If your cabinets require significant repairs, such as extensive wood filling, veneer repair, or a full chemical stripping of old finishes, the labor time will increase, pushing the cost higher. Projects that involve intricate cabinet designs or custom stain matching also command higher prices.
Geographic Location
Labor rates and the cost of living vary significantly by region. You will generally find higher prices for professional services in major metropolitan areas compared to rural locations. This is a common factor across all home improvement services.
On average, hiring a professional to restain kitchen cabinets can cost anywhere from $1,000 to $4,000 or more for a standard-sized kitchen. The price can go higher for very large kitchens or those with significant damage requiring extensive repair work.
Average Costs To Restain Kitchen Cabinets
Determining the precise average cost to restain kitchen cabinets requires looking at typical project scopes and pricing models. This section aims to provide a clearer picture of what most homeowners can expect to pay, distinguishing between DIY and professional approaches.
DIY vs. Professional Cost Comparison
The difference in cost between a DIY project and hiring a professional is substantial. For a DIY approach, the primary investment is in materials and tools, which, as previously detailed, might range from $200 to $600 for a standard kitchen. This saves a significant amount on labor, which is often the largest expense in professional services.
Conversely, professional services account for expertise, time, and convenience. The average cost for professional restaining, including labor and materials, can be anywhere from $1,000 to $4,000 or more. This considerable difference highlights the trade-off between saving money with DIY and saving time and effort with professional help.
Consider these figures:
| Project Type | Estimated Cost Range | Primary Cost Factor |
|---|---|---|
| DIY Restaining | $200 – $600 | Materials and Tools |
| Professional Restaining | $1,000 – $4,000+ | Labor and Expertise |
This comparison underscores that while DIY is budget-friendly, professional services offer a guaranteed finish and save you the effort, often with quicker turnaround times.
Factors Affecting the Average Price
Several variables can push the average cost higher or lower. The condition of the cabinets is a major player. Cabinets that are heavily damaged, require extensive sanding to remove old finishes, or have gouges that need filling will naturally increase the time and therefore the cost for professionals, and the effort for DIYers.
The type of wood and its current finish also play a role. Some woods are porous and require more stain, or special primers, to achieve a desired color. Oak, for example, has a strong grain that can be more challenging to cover or even out than maple or birch.
If your cabinets are currently painted, removing the paint to expose the wood for staining is a much more labor-intensive and costly process than simply applying a new stain over an existing wood finish.
The complexity of the cabinet design matters too. Flat-panel doors are simpler to sand and stain than raised-panel or custom-molded doors, which have more nooks and crannies that require careful attention. Hardware removal and reinstallation are usually included in professional quotes, but if you plan on replacing hardware, that’s an additional expense to consider.
Real-World Cost Examples
Let’s look at a couple of scenarios to make these costs more tangible.
Scenario 1: The Budget-Conscious DIYer
Sarah has a small kitchen with about 15 cabinet doors and 6 drawers. Her cabinets are in decent condition, with only minor wear. She decides to restain them herself.
She spends $40 on a good degreaser and sandpaper, $30 on two quarts of high-quality wood stain in a deep walnut color, $35 on polyurethane sealer, and $30 on brushes and rollers. She also buys a $25 respirator mask. In total, Sarah spends approximately $160 on materials.
The project takes her three weekends to complete.
Scenario 2: The Busy Professional Opts for a Pro
Mark and Lisa have a medium-sized kitchen with 25 doors and 10 drawers. They are busy professionals and don’t have the time or inclination for a lengthy DIY project. They get quotes from three local cabinet painters.
The average quote comes in at $2,800. This price includes full prep work (cleaning, sanding, minor wood filler), applying their chosen stain color, and applying two coats of a durable satin-topcoat. They also get quotes for new hardware separately, adding another $400.
Scenario 3: The Extensive Renovation Project
The Miller family is renovating their older home and wants to restain their large kitchen cabinets, which are showing signs of age and have a very dark, dated varnish. Their kitchen has 35 cabinet doors and 15 drawers. The cabinets are made of a hardwood that requires careful stripping.
They hire a professional company that specializes in cabinet refinishing. The quote is $4,500. This price includes stripping the old finish, sanding, extensive repairs to some damaged panels, a new custom stain color application, and three coats of a high-performance protective finish.
They also opt for a professional hardware installation at an additional $300.
These examples illustrate the wide range of costs based on kitchen size, cabinet condition, and the choice between DIY and professional services. They highlight how How Much Does It Cost to Restain Kitchen Cabinets? is a question with many variables.
Steps Involved in Restaining Kitchen Cabinets
Whether you are a seasoned DIYer or embarking on your first major home project, understanding the steps involved in restaining kitchen cabinets is key to a successful outcome. This process requires patience and attention to detail, but the results can be incredibly rewarding. Let’s break down the essential stages that lead to beautifully restained cabinets.
Preparation is Paramount
This is arguably the most critical phase. Skipping or rushing preparation will lead to a subpar finish and potential problems down the line. The goal here is to create a perfectly clean, smooth, and uniform surface for the new stain to adhere to.
Empty and Remove Cabinets
Begin by emptying all the contents from your cabinets and drawers. This is also the perfect time to give the interiors a good clean. Then, carefully remove all cabinet doors and drawer fronts.
Label each piece meticulously with a number or letter corresponding to its original location. This step is crucial for proper reinstallation. Store the doors and drawer fronts in a safe, dust-free area, perhaps leaning them against a wall with protective padding.
Clean Thoroughly
Kitchen cabinets accumulate grease, grime, and dust over years of use. You’ll need a strong degreaser to cut through this buildup. Use a solution of warm water and a dedicated kitchen degreaser or a mild detergent.
Apply with a sponge or cloth, working in sections. Rinse thoroughly with clean water to remove any residue from the degreaser. Letting the cabinets air dry completely is important before proceeding.
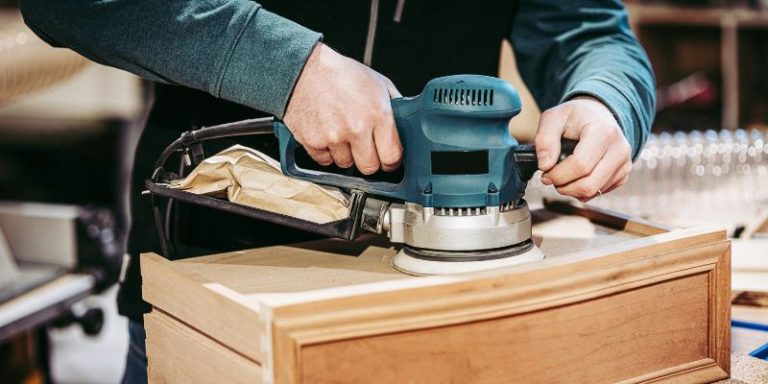
Sand for Smoothness
Sanding is essential for creating a smooth surface and ensuring the stain adheres properly. Start with a medium-grit sandpaper (around 120-150 grit) to scuff up the existing finish and remove any imperfections. If the old finish is thick or damaged, you might need to start with a coarser grit (like 80-100) or even consider using a chemical stripper, though this adds complexity and cost.
After the initial sanding, move to a finer grit (180-220) to achieve a silky-smooth surface. Always sand in the direction of the wood grain. After sanding, use a vacuum cleaner with a brush attachment and then a tack cloth to remove all dust.
Repair Imperfections
Inspect each cabinet surface for dents, scratches, or holes. Use a quality wood filler or putty to fill these imperfections. Apply the filler slightly above the surface, as it tends to shrink when drying.
Once dry, sand the filled areas flush with the surrounding surface using fine-grit sandpaper. Again, ensure all dust is removed with a vacuum and tack cloth.
Applying the Stain
With your cabinets prepped and ready, it’s time for the transformation. Applying stain evenly requires patience and the right technique.
Test the Stain
Before you stain your cabinet doors, always test the stain on an inconspicuous area or a scrap piece of wood from the same cabinets if you have any. This allows you to see how the color will look on your specific wood and how the stain applies. Some woods take stain darker than others, and you may discover you need a different shade or even a pre-stain wood conditioner.
Apply the Stain
Stain can be applied using a foam brush, a high-quality bristle brush, or a lint-free cloth. Work in small sections, applying the stain liberally and brushing or wiping it in the direction of the wood grain. Avoid applying too much at once, as it can lead to blotchiness.
If using a brush, ensure even strokes.
Wipe Off Excess Stain
Allow the stain to penetrate the wood for the time recommended by the manufacturer, usually between 5 to 15 minutes. Then, using a clean, lint-free cloth, wipe off the excess stain, again moving in the direction of the wood grain. The longer you leave the stain on before wiping, the darker the final color will be.
Consistency is key here for an even color across all surfaces.
Apply Additional Coats (if needed)
For a darker or richer color, you may need to apply a second coat of stain. Ensure the first coat is completely dry according to the product instructions before applying the second. Repeat the staining and wiping process.
It’s important not to over-stain, as this can lead to a muddy or uneven appearance.
Applying the Protective Topcoat
The final step is to protect your newly stained cabinets with a durable topcoat. This safeguards the finish from moisture, scratches, and daily wear and tear.
Choose Your Topcoat
Polyurethane (oil-based or water-based) is a popular choice for cabinet topcoats due to its durability and resistance to wear. Oil-based polyurethanes generally offer a warmer tone and are more durable, but they have stronger fumes and longer drying times. Water-based polyurethanes dry faster, have less odor, and tend to dry clearer, which can be preferable if you want to maintain the true color of your stain.
For kitchens, a high-solids or durable finish is recommended.
Apply Thin Coats
Apply the topcoat in thin, even coats using a high-quality synthetic brush or a foam applicator. Avoid applying it too thickly, as this can lead to drips, runs, and an uneven finish. Work in the direction of the wood grain.
Proper ventilation is essential during this stage.
Light Sanding Between Coats
After each coat of topcoat has dried completely (follow manufacturer’s instructions), lightly sand the surface with very fine-grit sandpaper (320-400 grit). This step is crucial for creating a perfectly smooth surface and ensuring good adhesion for the next coat. After sanding, always use a tack cloth to remove all dust before applying the next layer.
Multiple Coats for Durability
For kitchen cabinets, which experience heavy use, it is highly recommended to apply at least three to four coats of topcoat. Each coat adds a layer of protection and contributes to the overall longevity and beauty of your restained cabinets. Allow the final coat to cure fully before reattaching doors and drawers.
Curing can take several days to a couple of weeks, depending on the product and environmental conditions.
Reassembly and Final Touches
Once the topcoat is fully cured, it’s time to put everything back together. Reinstall the cabinet doors and drawer fronts carefully, referring to your labels for correct placement. Reattach any hardware, such as hinges and drawer pulls.
If you are installing new hardware, ensure you have pre-drilled the correct holes or are using template guides to ensure accuracy. Step back and admire your newly transformed kitchen!
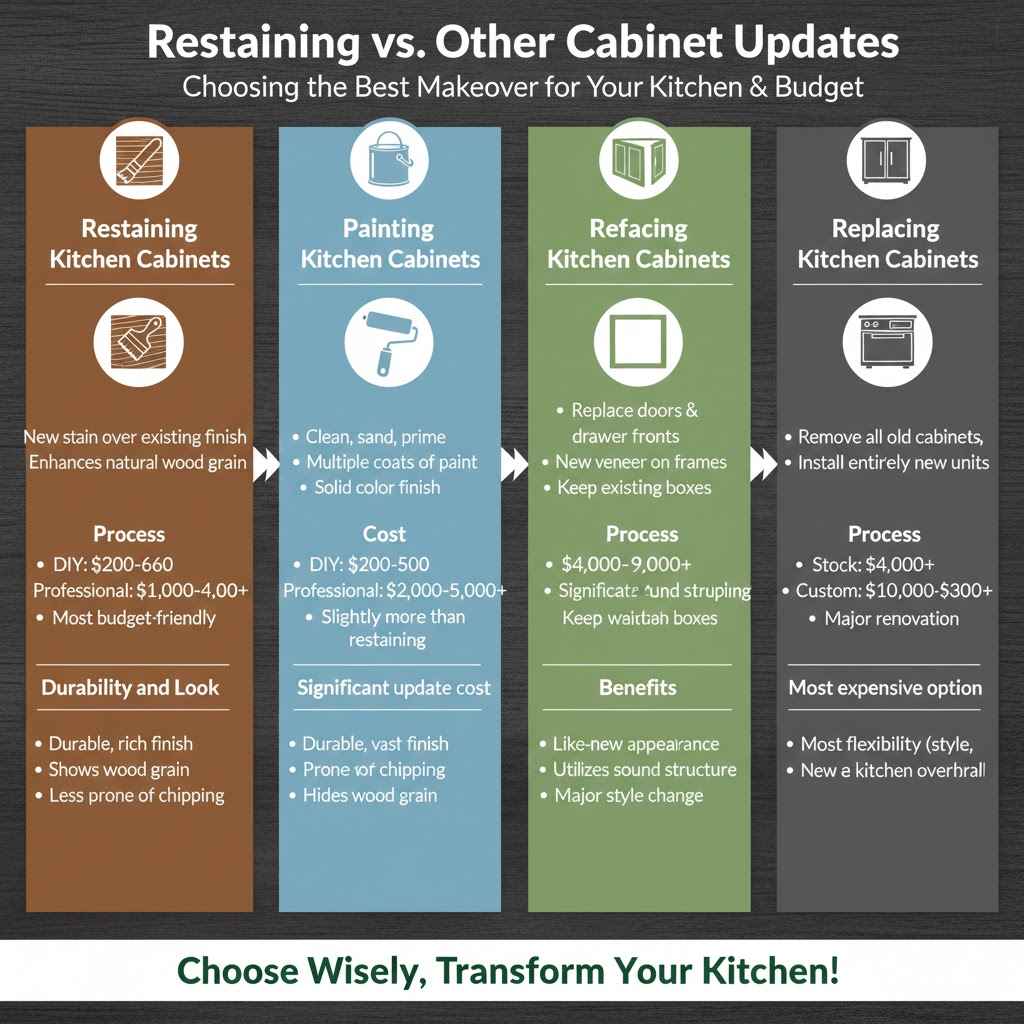
Restaining vs. Other Cabinet Updates
When considering updating kitchen cabinets, restaining is just one option. Other popular methods include painting, refacing, and replacing. Each has its own benefits, drawbacks, and cost implications.
Understanding these differences is crucial for choosing the best approach for your kitchen and budget.
Painting Kitchen Cabinets
Painting cabinets is another popular way to refresh their look. It offers a vast array of color choices and can completely change the style of your kitchen. Like restaining, it can be a DIY project or professionally done.
Process
Painting involves a similar preparation process to restaining: cleaning, sanding, and filling imperfections. However, instead of stain, you apply primer and then multiple coats of cabinet-grade paint. The finish can range from a matte, modern look to a high-gloss, sleek appearance.
Cost
DIY painting costs are comparable to DIY restaining, typically ranging from $200 to $500 for materials. Professional painting often falls between $2,000 to $5,000 for a standard kitchen, depending on the complexity and quality of the paint used. This can be slightly more expensive than professional restaining due to the number of coats and the labor involved in achieving a smooth finish.
Durability and Look
Modern cabinet paints are very durable and can last for many years. However, painted cabinets can be more prone to chipping or showing wear over time compared to a stained finish, especially in high-traffic areas. The look is a solid color, which hides the wood grain entirely, offering a completely different aesthetic than restaining.
Refacing Kitchen Cabinets
Cabinet refacing involves replacing the exterior parts of your cabinets – the doors, drawer fronts, and the visible side panels – with new materials, while keeping the existing cabinet boxes (the internal structure). This offers a significant update without the cost of a full replacement.
Process
Professionals will measure your existing cabinet boxes and then custom-make new doors and drawer fronts, often in materials like solid wood, wood veneer, or laminate. They then apply a matching veneer or laminate to the exposed cabinet box sides and front frames. Hinges and hardware are typically replaced as well.
Cost
Cabinet refacing is generally more expensive than restaining or painting. For a standard kitchen, costs can range from $4,000 to $9,000 or more. This price reflects the cost of custom-made doors and the labor involved in professionally applying new veneers.
Benefits
Refacing offers a like-new appearance while utilizing the existing cabinet structure, which is usually still sound. It’s a good option if your cabinet boxes are in good condition but the doors and drawer fronts are outdated or damaged. It allows for significant style changes, like updating from laminate to solid wood doors.
Replacing Kitchen Cabinets
Replacing kitchen cabinets is the most comprehensive and expensive option. It involves removing all existing cabinets and installing entirely new ones. This is usually considered when the existing cabinet boxes are damaged, the layout needs to be changed, or a complete kitchen overhaul is desired.
Process
This involves design, ordering, demolition of old cabinets, installation of new cabinets, and often plumbing and electrical work if the layout is changing. It is a major renovation project.
Cost
The cost of replacing kitchen cabinets can vary wildly based on the quality of the new cabinets, materials, and the size of the kitchen. Stock cabinets might start around $4,000 for a small kitchen, while semi-custom or custom cabinets can easily cost $10,000 to $30,000 or more. This price does not include installation labor, countertops, or other kitchen renovation expenses.
Benefits
Full replacement offers the most flexibility in terms of style, layout, and functionality. You can choose from an endless array of designs, materials, and organizational features. It’s the ultimate way to get a completely new kitchen.
In summary, restaining is typically the most budget-friendly option for updating cabinet appearance, offering a middle ground between DIY painting and more expensive refacing or full replacement.
Frequently Asked Questions
Question: How long does it take to restain kitchen cabinets?
Answer: For a DIY project, it typically takes anywhere from 3 to 7 days, depending on the size of your kitchen, the number of cabinets, and your pace. Professionals can often complete the job in 3 to 5 days due to their efficiency and experience.
Question: Can I restain over a painted finish?
Answer: It’s generally not recommended to restain directly over a painted finish. Paint seals the wood, preventing stain from penetrating and showing the wood grain. You would typically need to strip the paint down to the bare wood before you can apply a stain.
Question: How often do kitchen cabinets need to be restained?
Answer: Restaining is usually a one-time project to change the color or appearance. The protective topcoat, however, may need refreshing or recoating every 5-10 years, depending on the quality of the finish and how heavily the cabinets are used.
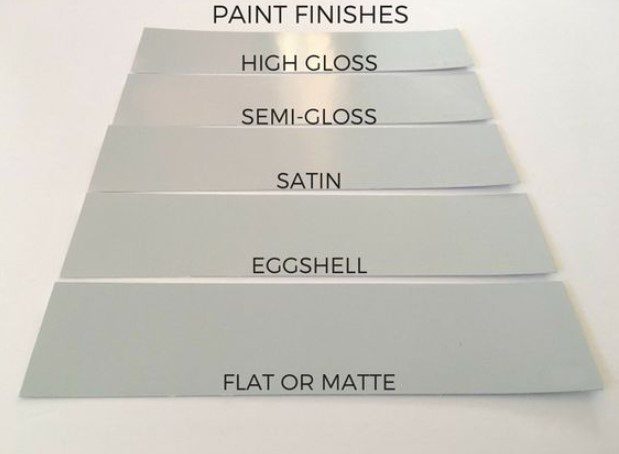
Question: What is the difference between staining and varnishing cabinets?
Answer: Stain adds color to the wood, enhancing its natural grain. Varnish (or polyurethane) is a clear protective coating that seals and protects the wood, adding durability. Restaining involves applying a new stain, followed by a protective topcoat like varnish.
Question: Do I need to remove cabinet hardware before restaining?
Answer: Yes, it is highly recommended to remove all cabinet hardware, including hinges, knobs, and drawer pulls. This allows for a cleaner, more thorough application of stain and topcoat, preventing uneven coverage and drip marks around the hardware.
Conclusion
So, How Much Does It Cost to Restain Kitchen Cabinets? You can expect to spend between $200-$600 for a DIY project, focusing on materials. Hiring professionals typically ranges from $1,000-$4,000+, covering labor and expertise. Restaining offers a budget-friendly transformation, a great middle-ground for updating your kitchen’s look.